What's new
What's new

16" Sidney Cone Drive, a few questions

3v0

Plastic
Joined
Oct 18, 2017
Location
Oklahoma Panhandle USA
IMG_7084_S.jpgIMG_7086_S.jpg

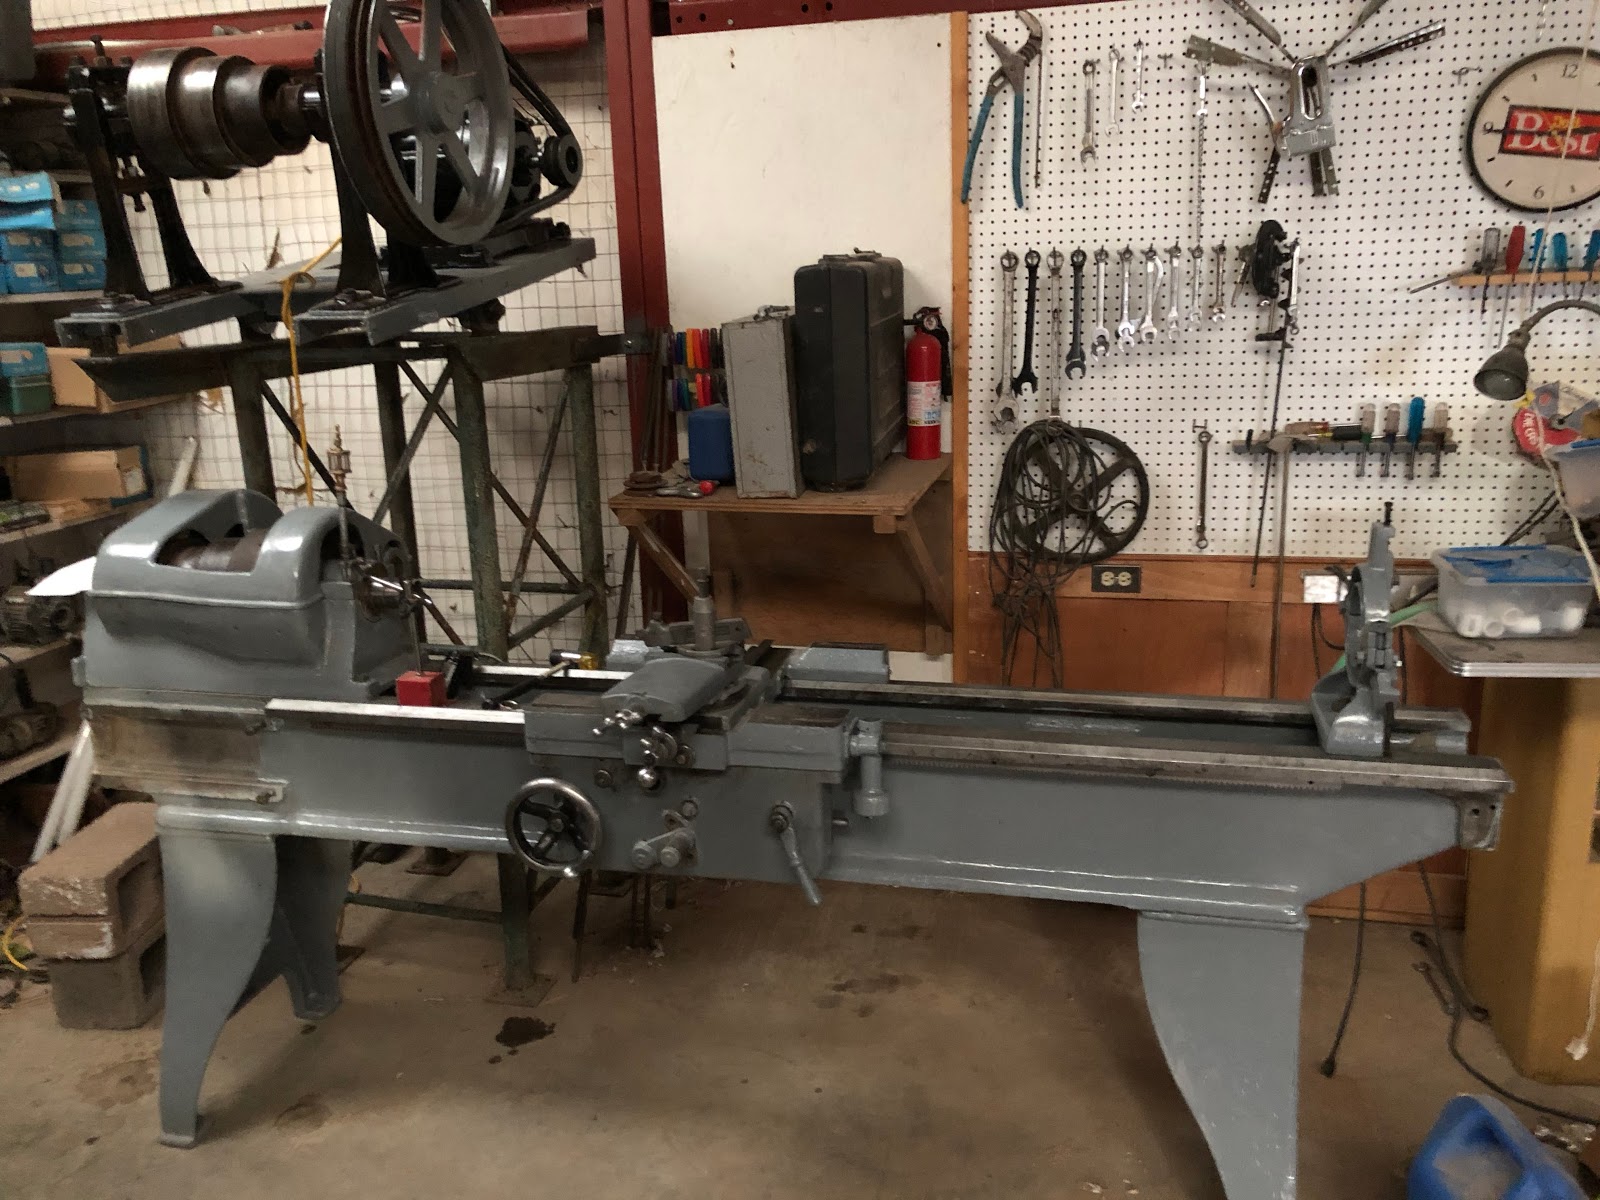
First post & first metal lathe. According to the previous owner it has a 16 inch swing and is about 10 feet long. There is a large 220V motor on the upper drive which sits atop a tower. It has a faceplate, steady rest, and 3 & 4 jaw chucks. The exposed gears and chuck jaws look good. There are shims, maybe 4, in the headstock. The bed is very sturdy so I'm hoping its still true.

The lathe has been sitting outside for 10 years. The wind blows sand into everything so I need to tear it down to clean and lube. If the original paint is halfway decent I may try to save it. I've about given up on finding manuals for this lathe but by the time I have it cleaned up I should know what the controls do.

The questions:

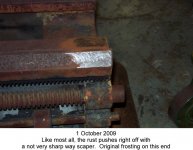
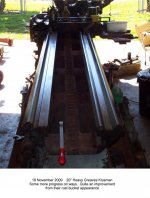
What is the best approach to cleaning up the bed ways?

What is thing with the crank in the center of this image?

IMG_7081_S.jpg

I am watching lathe rebuilds on YouTube.
Any advice is welcome.

Howard
 
It's hard to say from that picture. At first sight, it looks like the keyway cutter attachment of a Master Mill (the father of the Versa Mill).
On the left you have the broach, on the top I see (well rusted, of course) the proprietary taper ending with a screw (somehow similar to Moore jig borer taper) and, in the middle, the eccentric and the connecting rod.
(I'm sorry, but it's too late nad am too lazy to search pictures from the Web)

Paolo
 

Attachments

  • DCP_1289.jpg
    DCP_1289.jpg
    82.3 KB · Views: 69
  • DCP_1317.jpg
    DCP_1317.jpg
    89.1 KB · Views: 72
I have a 15" Sidney with the same 10' bed that I use every day and, prior to my refurbishing it, had been outside in New England for at least 10 years. Without seeing yours it's difficult to say where to start but I would systematically dismantle it, perhaps starting with the saddle, clean the bed, clean everything else and reassemble it. I think you've got a bigger problem with sand which you have to get rid of, than I had but I had a lot more rust to deal with.

If I can help with any technical details, I'll be glad to. There were photos of my lathe on this site but they disappeared with the Photobucket debacle. I'll try to repost a few tonight.

I used John O's "dull carbide scraper" technique on the ways of my machine and it worked a charm. With some further improvements I made, I can now regularly hold a .001 tolerance.
 
First Chips

Although none of the drive parts are attached I have first chips. Both for the lathe and me I should add. I used the tool that was in the lathe as it came to me. Not sharp.

IMG_5489.JPG

Just prior to installation of the serpentine belt and chuck.

I have a question about one of the lathe tools but I put that in the next post.
 
Armstrong 82R tool holder

I initially identified this as a parting tool but I'm not sure anymore. The holder angles the blade off the vertical. That would not cut very deep. I can't find any blade orientation that would make it vertical. If its not a parting tool what is it ?

IMG_5533._S.JPG
IMG_5534_S.JPG
IMG_5531_S.jpgIMG_5530_S.jpg

I found an image on ebay of a similar tool.

s-l1600_C.jpg
 
The blade in the second picture is inserted upside-down: the widest part should be on the top and the narrowest part on the bottom, so that you create a side clearance.

Paolo
 
The toolholder you have shown is a "cutoff" or "parting" tool holder. It is used for what it's name says: cutting off work. It is also used for making a groove or "undercut" at the root of a shoulder so a threading tool had a place to "run off" into.

Take the clamping portion (the stud will have a machined step or wedge) out of the tool holder and see if the cutoff tool fits. A cutoff tool is ground so it is flat or nearly so on the top, and the front angles back to create a sharp cutting edge on the "nose" of the tool.

Try inserting the cutoff tool from the front of the holder. The holder may have a slight angle on the slot's bottom and top surfaces to get the tool drawn in and wedged. It seems unlikely that someone would have the wrong sized cutoff tool (known as a "blank" until it is ground to the proper front clearance and top rake to cut a given material) for the holder, but stranger things have happened.

A cutoff tool is not used for turning diameters or facing as a rule. It is primarily a one-purpose tool.
 
Not the correct insert for the holder. Look on Ebay for tool holder and inserts for ideas. The square inserts can be installed incorrectly, too. The lantern tool
ls holder very used and may not be complete. you will find many on ebay to see what is available. Maybe you can find a copy of "How to run a lathe," too.
 
I have done some wood turning and understand parting from that viewpoint.

muckalee & engineBill

I can't see how any flat blade in this tool holder will correct the vertical tilt. The tool will always rub the sides of the cut. I set a block next to the tool to illustrate this angle.
IMG_5545_S.jpg
Maybe this Armstrong 82R is a specialized tool holder for cutting grooves up against a shoulder. Maybe there are 82L, 82, and 82R versions.

In regards to my lantern tool post it has the cone washer, the rocker wedge that sits on the cone washer, and the clamping bolt. What else is there?

Watched Joe Pieczynski's 30 minute video on parting tools, scanned a pair of the old "how to run a lathe" type documents online.

Now this is interesting. The parting tool was ground along the top to make clearance for the clamp bolt. So this at least confirms how the tool was assembled when last used.
IMG_5547_S.jpg

Looks like I'm going to have to buy or make a parting tool holder.
 
Last edited:
Thank you Andy for the identification and catalog link.
And thanks to everyone who replied.

I was hoping not to buy any tooling until I could find an affordable QCTP. But such is life.

Again thanks everyone.


Back
Top