What's new
What's new

Old anvil I acquired today

Raybmarlow

Cast Iron
Joined
Feb 11, 2014
Location
New Hampshire
It’s antique and historic I’m thinking... picked this up today and was wondering if the markings mean anything to someone out there ... it’s a 166 lb anvil, very nice shape, at least to me ...
3d773e7303345f638dd13edd85feed45.jpg
5397aec8301d9f369dcf71e11435230a.jpg
12a58f16575b74cb974d8ec8897fb5f3.jpg
8d684b835aae2700d7c968f051cf8f1f.jpg
3cb11d51e43de787591d92c0de345e57.jpg


Sent from my iPhone using Tapatalk
 
Nice! Looks to be American maybe, as the pattern is rather long/skinny compared to London pattern anvils or even later Peter Wrights. Also, the weight is marked in pounds, not hundredweight. It would seem to maybe be an older one since the waist appears to be forge rather than arc welded... although I don't recall whether Hay-Budden ever had an arc welded waist. This one could be an HB, who re-branded a lot of anvils for other resellers. I'm not familiar with that semicircular mark, which is also hard to read... but a bit different that it's on the left side of the anvil.
Wish I had a copy of AiA to look into it more.
 
Looks like you scored very well. I see these at flea markets, etc. all the time. But they are really beat to death and the asking price is usually $250 and up. I keep on walking.
 
Nice! Looks to be American maybe, as the pattern is rather long/skinny compared to London pattern anvils or even later Peter Wrights. Also, the weight is marked in pounds, not hundredweight. It would seem to maybe be an older one since the waist appears to be forge rather than arc welded... although I don't recall whether Hay-Budden ever had an arc welded waist. This one could be an HB, who re-branded a lot of anvils for other resellers. I'm not familiar with that semicircular mark, which is also hard to read... but a bit different that it's on the left side of the anvil.
Wish I had a copy of AiA to look into it more.

Thank you, I at first was thinking the numbers on the side where the stone weight, but not knowing much about anvils and doing some research there appears to be too many numbers in the stamping for that, so I’m not really sure what those four numbers indicate. All be it, it’s in very nice shape, I think it looks good just sitting there, now I need to find a nice block of wood to put it on, it will come in handy for something I am sure.


Sent from my iPhone using Tapatalk
 
... the asking price is usually $250 and up. I keep on walking.

girepesh, you see lots of these, huh? If I found one for 250 and was in the market for an anvil, I would stop walking and consider it seriously.

The OP anvil is in nice overall shape, seems to have no missing chunks of any consequence, is big and heavy enough for serious work, and looks to have nice crisp table edges. While I can't help with an ID based on the markings shown, what's there suggests that this was no hobby-grade cheapie.

-Marty-
 
May We Have More Photos of the Markings, Please?

If you could please use white chalk or paint to improve the readability of the markings, and then post some photos of the enhanced markings, we might be able to help you ID this anvil!

Paint, Lumber Crayon, Kid's Crayon, China Marking Pencils, Chalk, anything that will highlight the letters and the trademark can be used.

Thank You. - John Ruth

This was my plan this evening, I will post those pictures tonight .


Sent from my iPhone using Tapatalk
 
girepesh, you see lots of these, huh? If I found one for 250 and was in the market for an anvil, I would stop walking and consider it seriously.

The OP anvil is in nice overall shape, seems to have no missing chunks of any consequence, is big and heavy enough for serious work, and looks to have nice crisp table edges. While I can't help with an ID based on the markings shown, what's there suggests that this was no hobby-grade cheapie.

-Marty-

Thanks Marty, it was clear to me, even with my limited knowledge of blacksmith equipment that this was a nice old and professional use piece


Sent from my iPhone using Tapatalk
 
Hard to tell exactly from the photo's, but that sure looks like a Hay Budden to me. The upsweep on the horn, and the look of the waste. Those are great, American made anvils that are tool steel from the waste up. Many equals, but none better.

The stamped/engraved number on the side is most likely the serial number. You can date the anvil from that on certain forging forum/websites where someone has the serial number book. I don't know if anyone here has it. I don't.
 
It's time to mount that anvil correctly. The staples holding it to a wood box is untidy and ....

If it's wood that you like then a clean cut end tree stump mounted on a steel base that can be adjusted for level on a uneven floor.
 
Hard to tell exactly from the photo's, but that sure looks like a Hay Budden to me. The upsweep on the horn, and the look of the waste. Those are great, American made anvils that are tool steel from the waste up. Many equals, but none better.

The stamped/engraved number on the side is most likely the serial number. You can date the anvil from that on certain forging forum/websites where someone has the serial number book. I don't know if anyone here has it. I don't.

Thank you for the input, I will search around for a suitable forum for that information, also will post clearer photos


Sent from my iPhone using Tapatalk
 
It's time to mount that anvil correctly. The staples holding it to a wood box is untidy and ....

If it's wood that you like then a clean cut end tree stump mounted on a steel base that can be adjusted for level on a uneven floor.

Exactly what I was thinking


Sent from my iPhone using Tapatalk
 
You've gotten an anvil in nearly pristine condition as anvils go. Usually the "table" or face is saddled wth wear, and corners or edges are chipped and worn. crisp edges, a flat face, and no signs of hard usage on an old anvil are almost unheard of.

I agree: it looks to be a an anvil with a wrought iron body. My first thought when I saw the photo was also that it was a Hay Budden anvil. As far as weight goes, it is light enough to be weighed on a bathroom scale if you want to verify the stamped numbers. The two rectangular holes in the waist of the anvil are for heavy tongs which were used to hold the anvil body under a steam hammer when the body was forged. This is a giveaway as to the type of construction and age of the anvil- it is probably
pre 1930's.

It's a new one on me that Hay Budden made anvils that were "re branded" with the seller's name or emblem. The shape of the emblem on the anvil does look like the insignia of Chicago Bridge & Iron Company. CB & I is perhaps the largest builder of steel tanks and similar plate work and has been for many years. Possibly, the anvil dates to the earlier days of C B & I when they had blacksmiths in their fab shops. The joke with C B & I is that they are not in Chicago and haven't built bridges in maybe 100 + years. They got into tank work back in the riveted days, and have been at it ever since. Smiths would be needed in the old days to make pipe supports, braces, and similar for tank work. CB & I is big enough to have ordered tools with their insignia on them. I've been on jobs with CB & I and have seen the type of shop that they are, so this idea is not out of the realm of probability.

My own belief is a person can never have enough anvils around a shop, and the heavier the better. I agree about the mounting. An anvil on a plywood box, held by sloppy and loose staples is hardly useful if you get into any kind of forge work. If you are setup for it and handy at welding and fabrication, a stand made of steel angle makes a nice job of supporting an anvil. Using the angle so it forms an "L", a frame is made for the anvil to "nest" into. Using heavy enough angle, and you can put a piece of hardwood (oak, ash, maple) in the angle frame for the anvil to sit upon. A stand for the anvil made of steel is great if you plan to keep the anvil outdoors. Some of us who do not have smithys or forge shops tend to work outdoors with our forges. My 200 lb Kohlswa anvil sits outside the garage, as does my forge. I was given a log butt (ash) to put the anvil upon. Not a good thing to have outdoors as rain gets to the end-grain of the wood. I secured the anvil to the log butt with a fabricated steel angle frame (bolted connections to get it into place on the anvil), and 5/8 threaded tie rods to pull the frame down onto the log butt. I treated the log butt with a mixture of used crankcase oil, linseed oil, and turpentine. The crankcase oil was added to the mix after ants seemed to like the linseed oil.

The mixture of crankcase oil, linseed oil & turpentine has no proportions. However, it does dry handily and forms a nice rust-resistant film on the anvil. It also adds an "old look" to the log butt due to the carbon black in the used crankcase oil. I don't worry about the coating on the anvil's working surfaces- as soon as hot steel lands on them, the coating is gone.


From my own experience (I have two Peter Wright anvils as well), an anvil that is not solidly mounted is a nothing but trouble when you are doing any kind of work on it. If I had not been given the log butt for my 200 lb anvil, I'd have made a fabricated steel stand for it. As for levelling the bottom of the log butt, I screwed some strips of pressure treated lumber to the bottom. I used "headlock" screws. This gives me a skid base and it seems to sit solidly with no rocking. The Pressure Treated Lumber is an attempt to keep the bottom of the log butt off the ground. The old smith shops often had the log butts for the anvils set into the ground. The old smith shops usually had a clay floor topped with a mixture of cinders, clinker, and sometimes lime was added to create a mortar-like floor surface. A hole was dug for the log butt that the anvil was set upon. This gave a very solid mounting for the anvil, and the height could be adjusted to suit the smith by simply throwing some gravel in the bottom of the hole before setting the log butt in it.

My other piece of advice is to consider the height of the anvil carefully. The old rule was to stand alongside the anvil, make a loose fist with your hammer hand, and with your arm hanging freely, the knuckles should just rest on the anvil. This is OK as a rule, but I've found that using anvil tools such as hardies, fullers, bottom swages, etc, cause the working height to be a little too high. As a result, I mounted my anvil maybe 3-4" lower. Kind of a compromise. If you foresee using anvil tools, I'd suggest setting your anvil a little lower than the "knuckle height".
 
IMG_0082.jpg

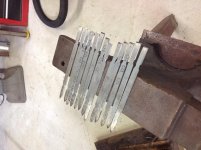
Here's a pic of my Hay Budden on its stand, which is not as rusty as the photo makes it appear. The three legs are heavy-walled 1.5" X 3" tubing, the anvil rests on a 1" thick steel plate, which is 12" X 12" The legs are welded on at I believe a 22-degree angle, IIRC. The anvil's feet are cradled by sections of angle iron welded to the steel plate. The anvil is of course not welded, but is bedded in 3M 5200 marine adhesive, which holds in in place and also deadens the ring nicely. The adhesive is pretty strong, I can lift the anvil (136 lbs) and the stand comes up with it.

Two advantages of the stand are 1) a tripod lets me work close to the anvil from most angles, and 2) the heel of the anvil extends beyond the base plate, so that the pritchel and hardy holes are over the floor, not the stand. This let me use a certain style of holddown, although I rarely need it.

The bits resting on the anvil are partly-made potters' trim tools btw.
 
The metal stand sounds like the way to go and I have a full Ability and the equipment to fabricate one , this will be a few projects down the road of course!! All your input is much appreciated very much!
cc50d032cddebc60e1512b3c08bd1388.jpg
607825c4b1601fd872e16bfa45ed724f.jpg


Even after chalking, the marks are unclear, it almost appears they have been chiseled off ...
bce7f8de120c8a3ef44c28bf9eb9b2d1.jpg

The serial number is a bit clearer tho


Sent from my iPhone using Tapatalk
 
View attachment 210478

Here's a pic of my Hay Budden on its stand, which is not as rusty as the photo makes it appear. The three legs are heavy-walled 1.5" X 3" tubing, the anvil rests on a 1" thick steel plate, which is 12" X 12" The legs are welded on at I believe a 22-degree angle, IIRC. The anvil's feet are cradled by sections of angle iron welded to the steel plate. The anvil is of course not welded, but is bedded in 3M 5200 marine adhesive, which holds in in place and also deadens the ring nicely. The adhesive is pretty strong, I can lift the anvil (136 lbs) and the stand comes up with it.

Two advantages of the stand are 1) a tripod lets me work close to the anvil from most angles, and 2) the heel of the anvil extends beyond the base plate, so that the pritchel and hardy holes are over the floor, not the stand. This let me use a certain style of holddown, although I rarely need it.

The bits resting on the anvil are partly-made potters' trim tools btw.

I like the three leg idea, your anvil looks to be in nice shape also .


Sent from my iPad using Tapatalk


Back
Top