What's new
What's new

Yet another Hendey! #27733 alive and (mostly) well. Crossfeed issue

THax

Aluminum
Joined
May 9, 2007
Location
Wellsville, Kansas
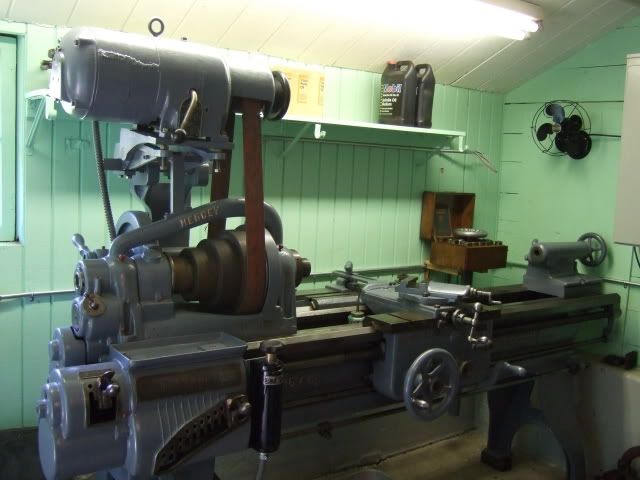
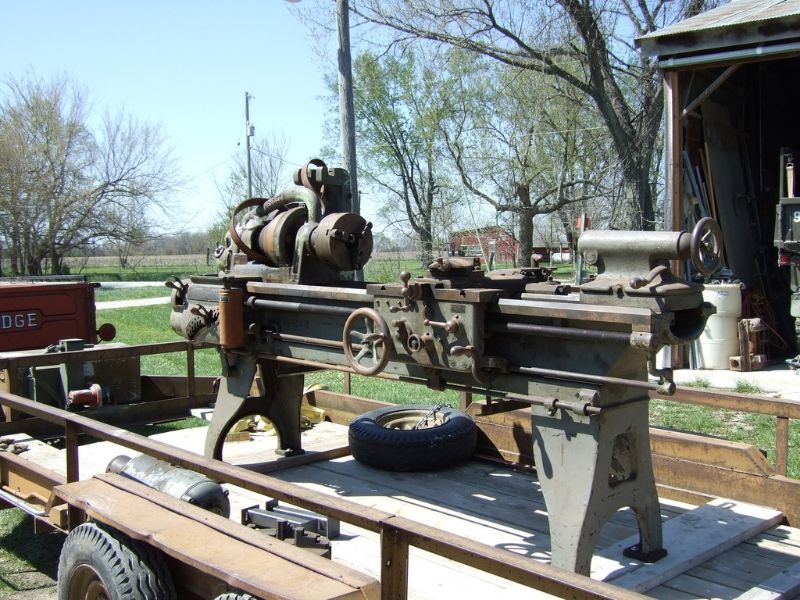
Below should be before and after pics of the 16 X 8 Conehead I picked up about 10 years ago. From what I've read here, I surmise it to be a late '29. (Hendeyman, If you can shed any further light on the history I'd sure appreciate it!)

Overall, I'd say this lathe is in pretty good shape. Heavy loading from the tailstock on occasion does reveal the beginnings of the Hendey spindle thrust issue, but that will be a project for another time.

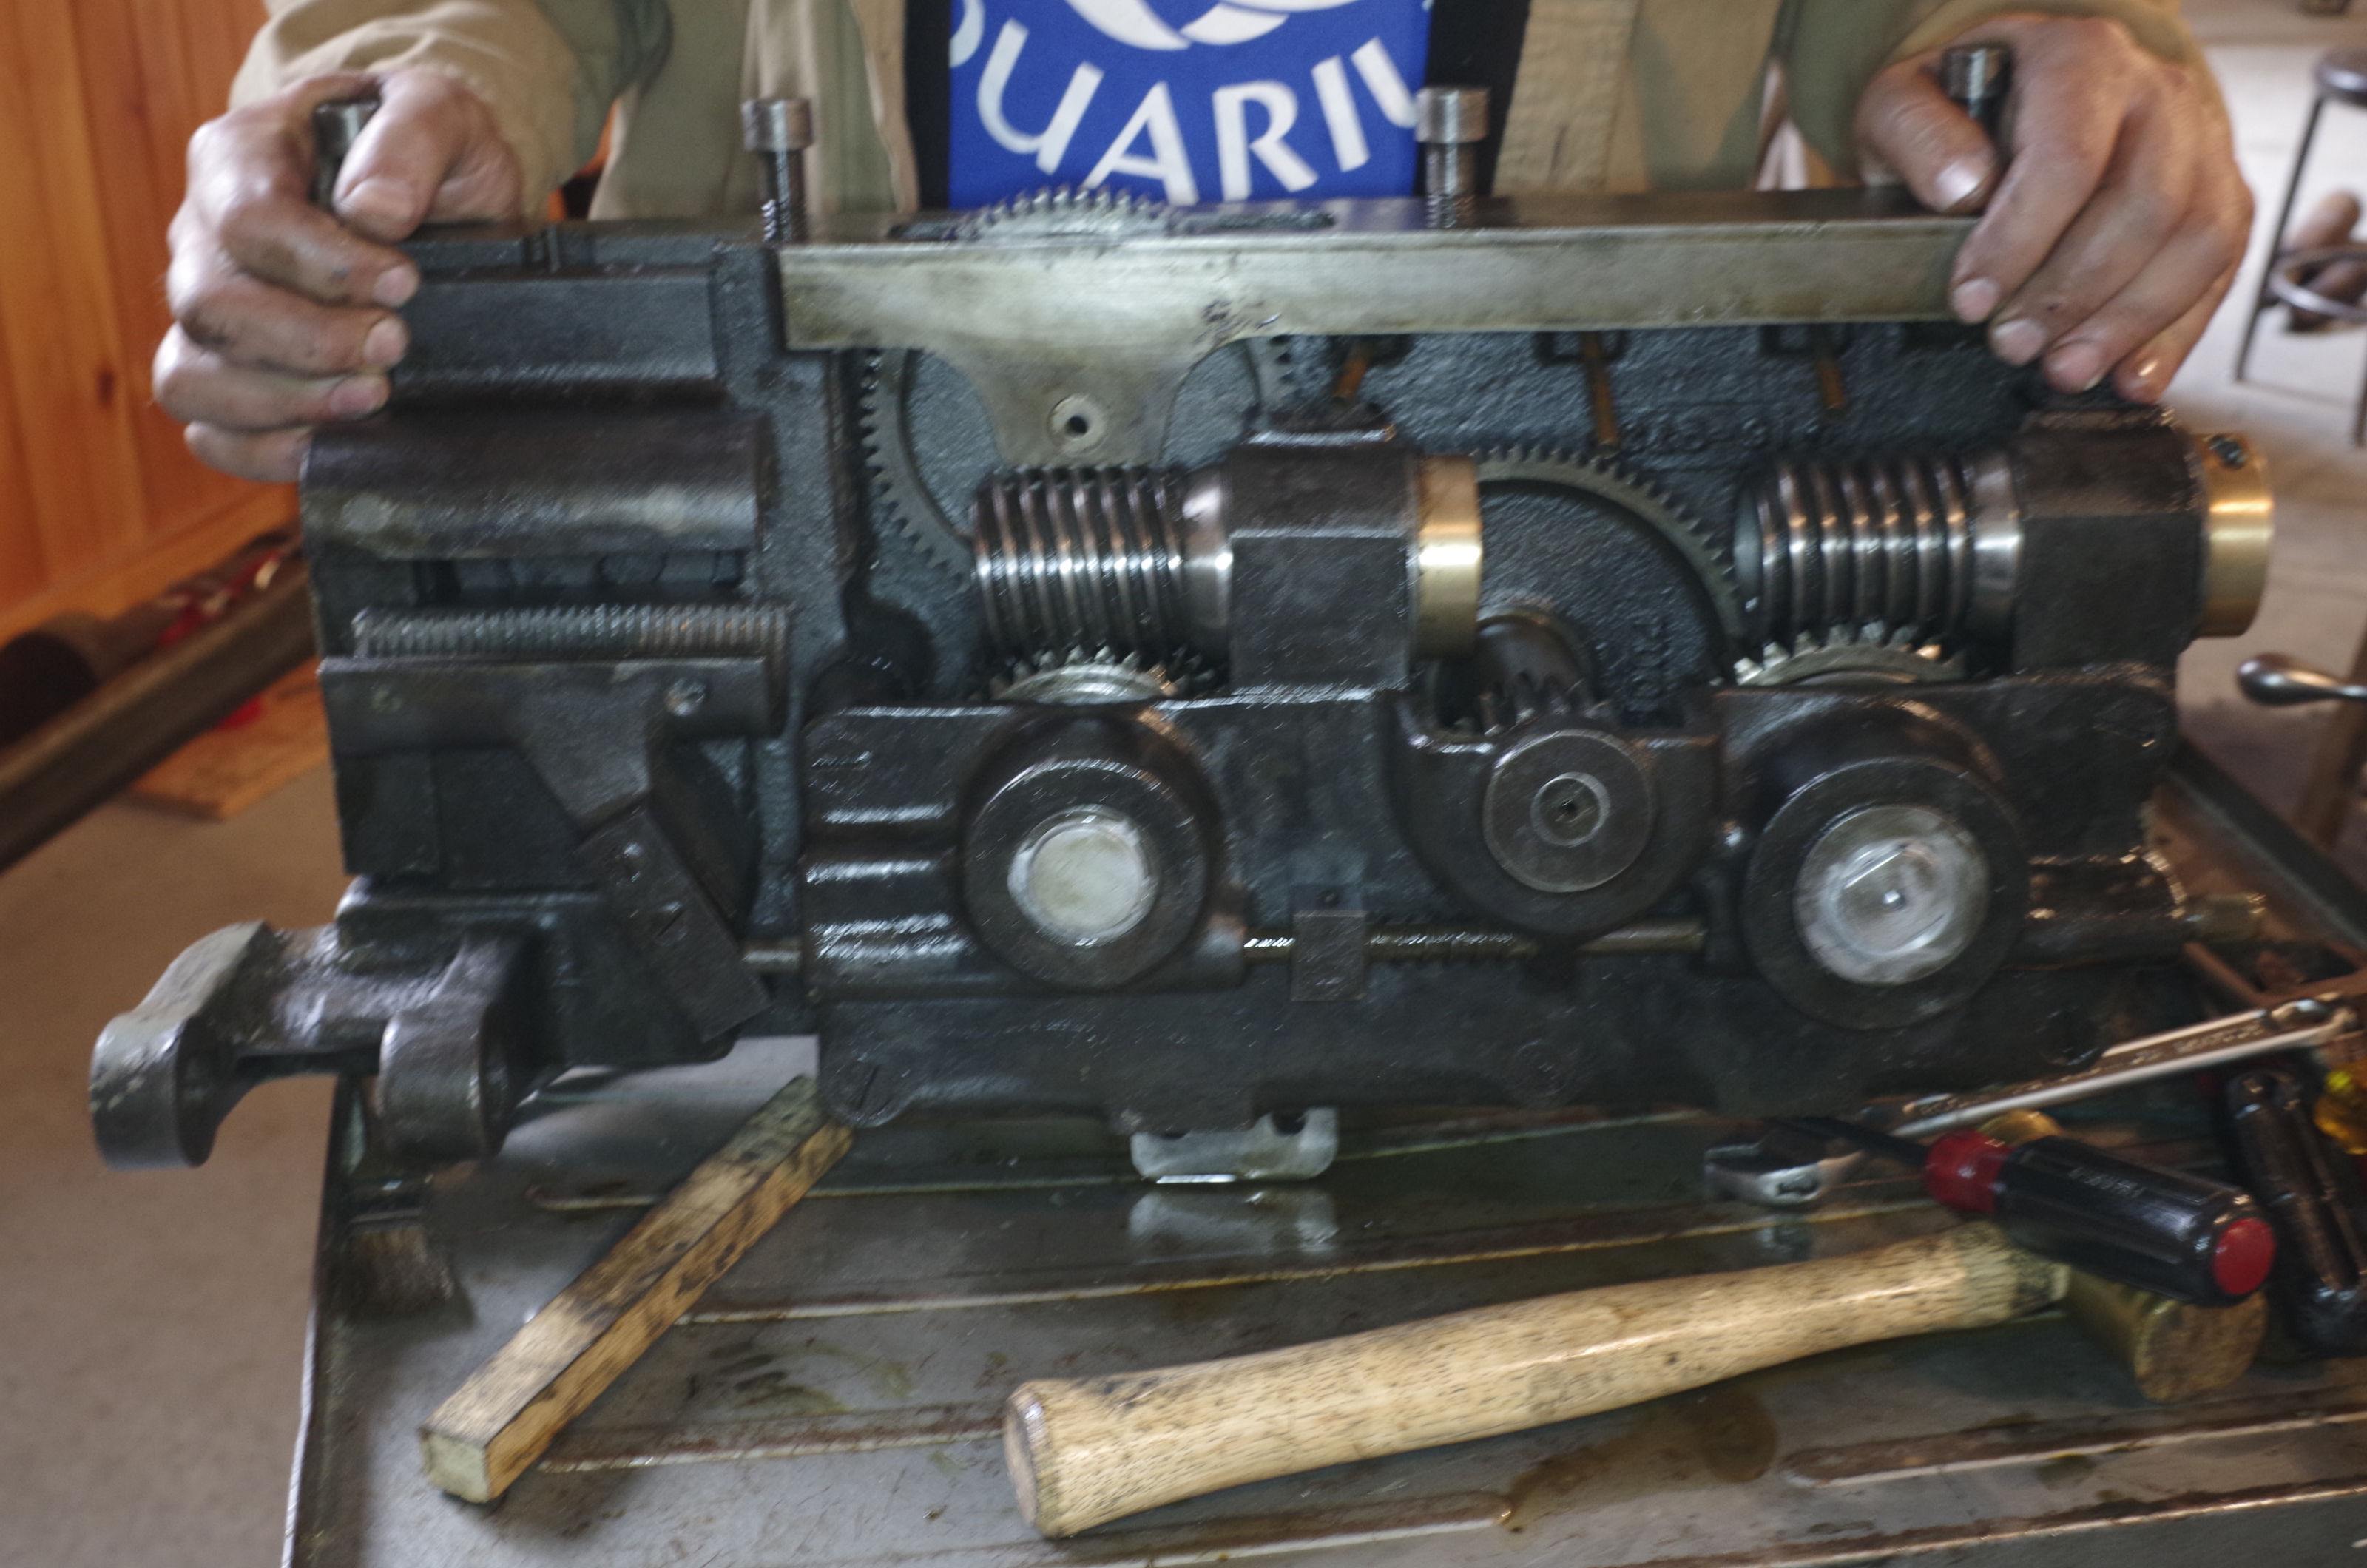
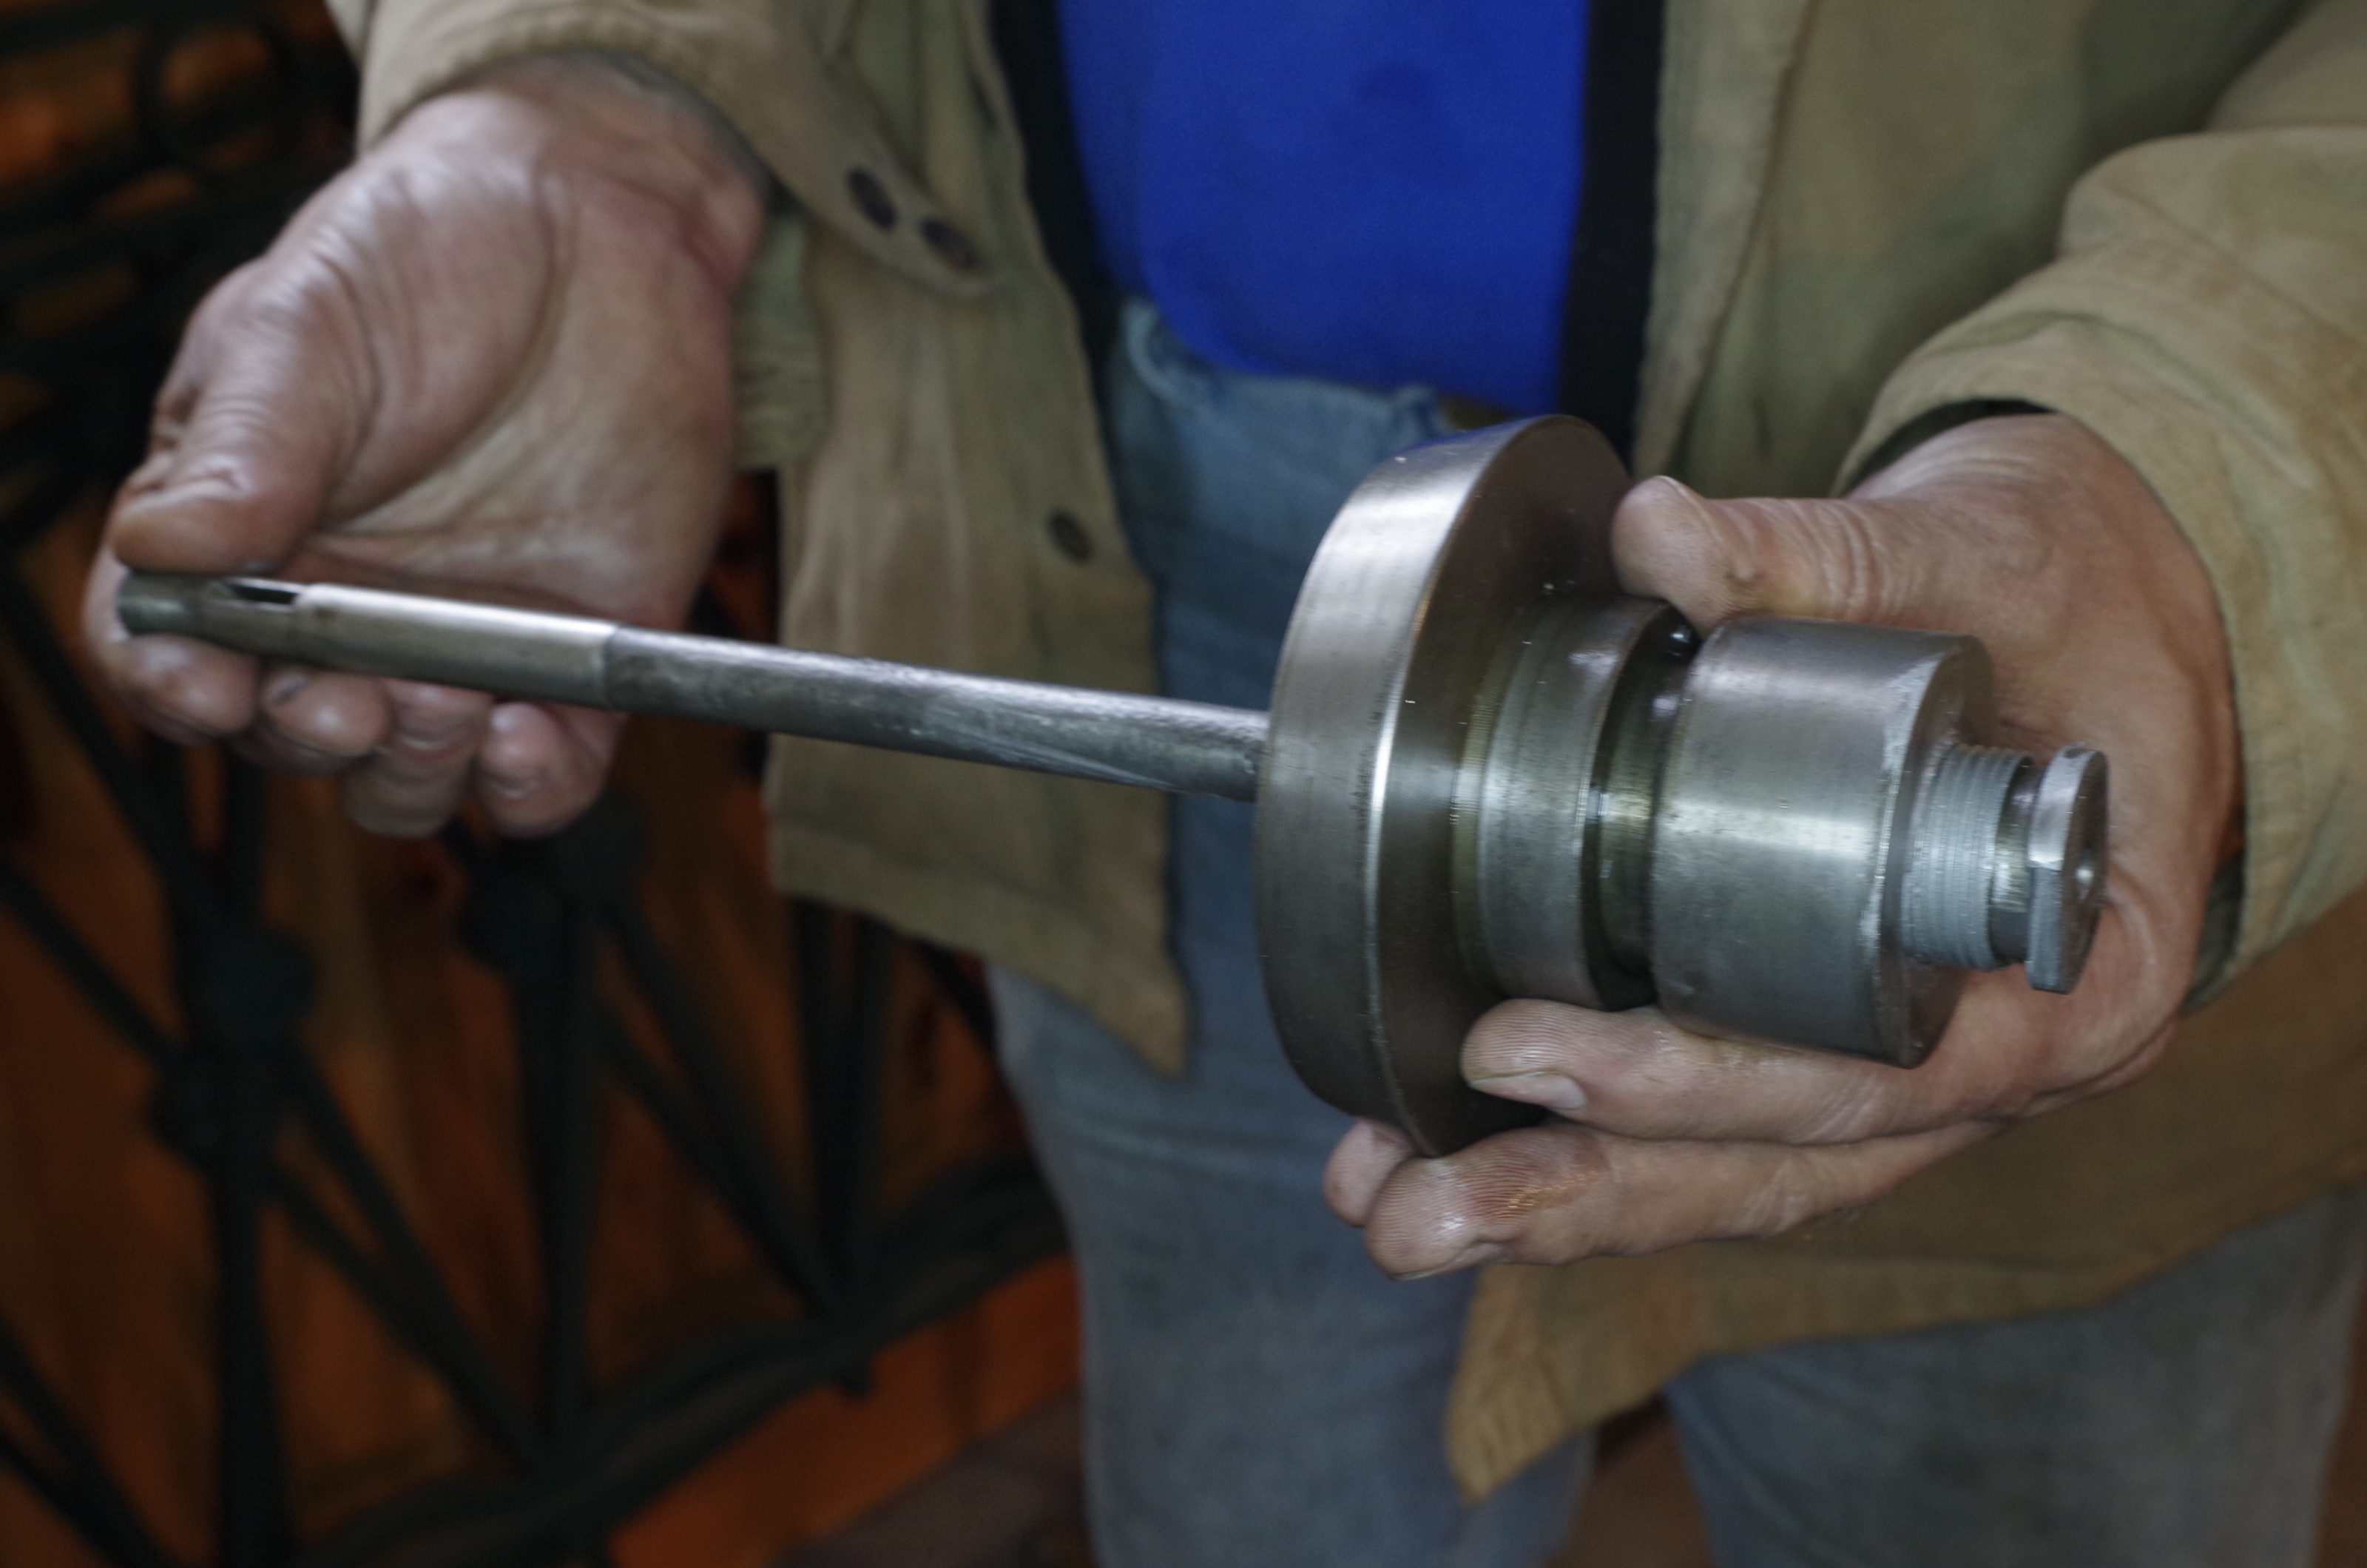
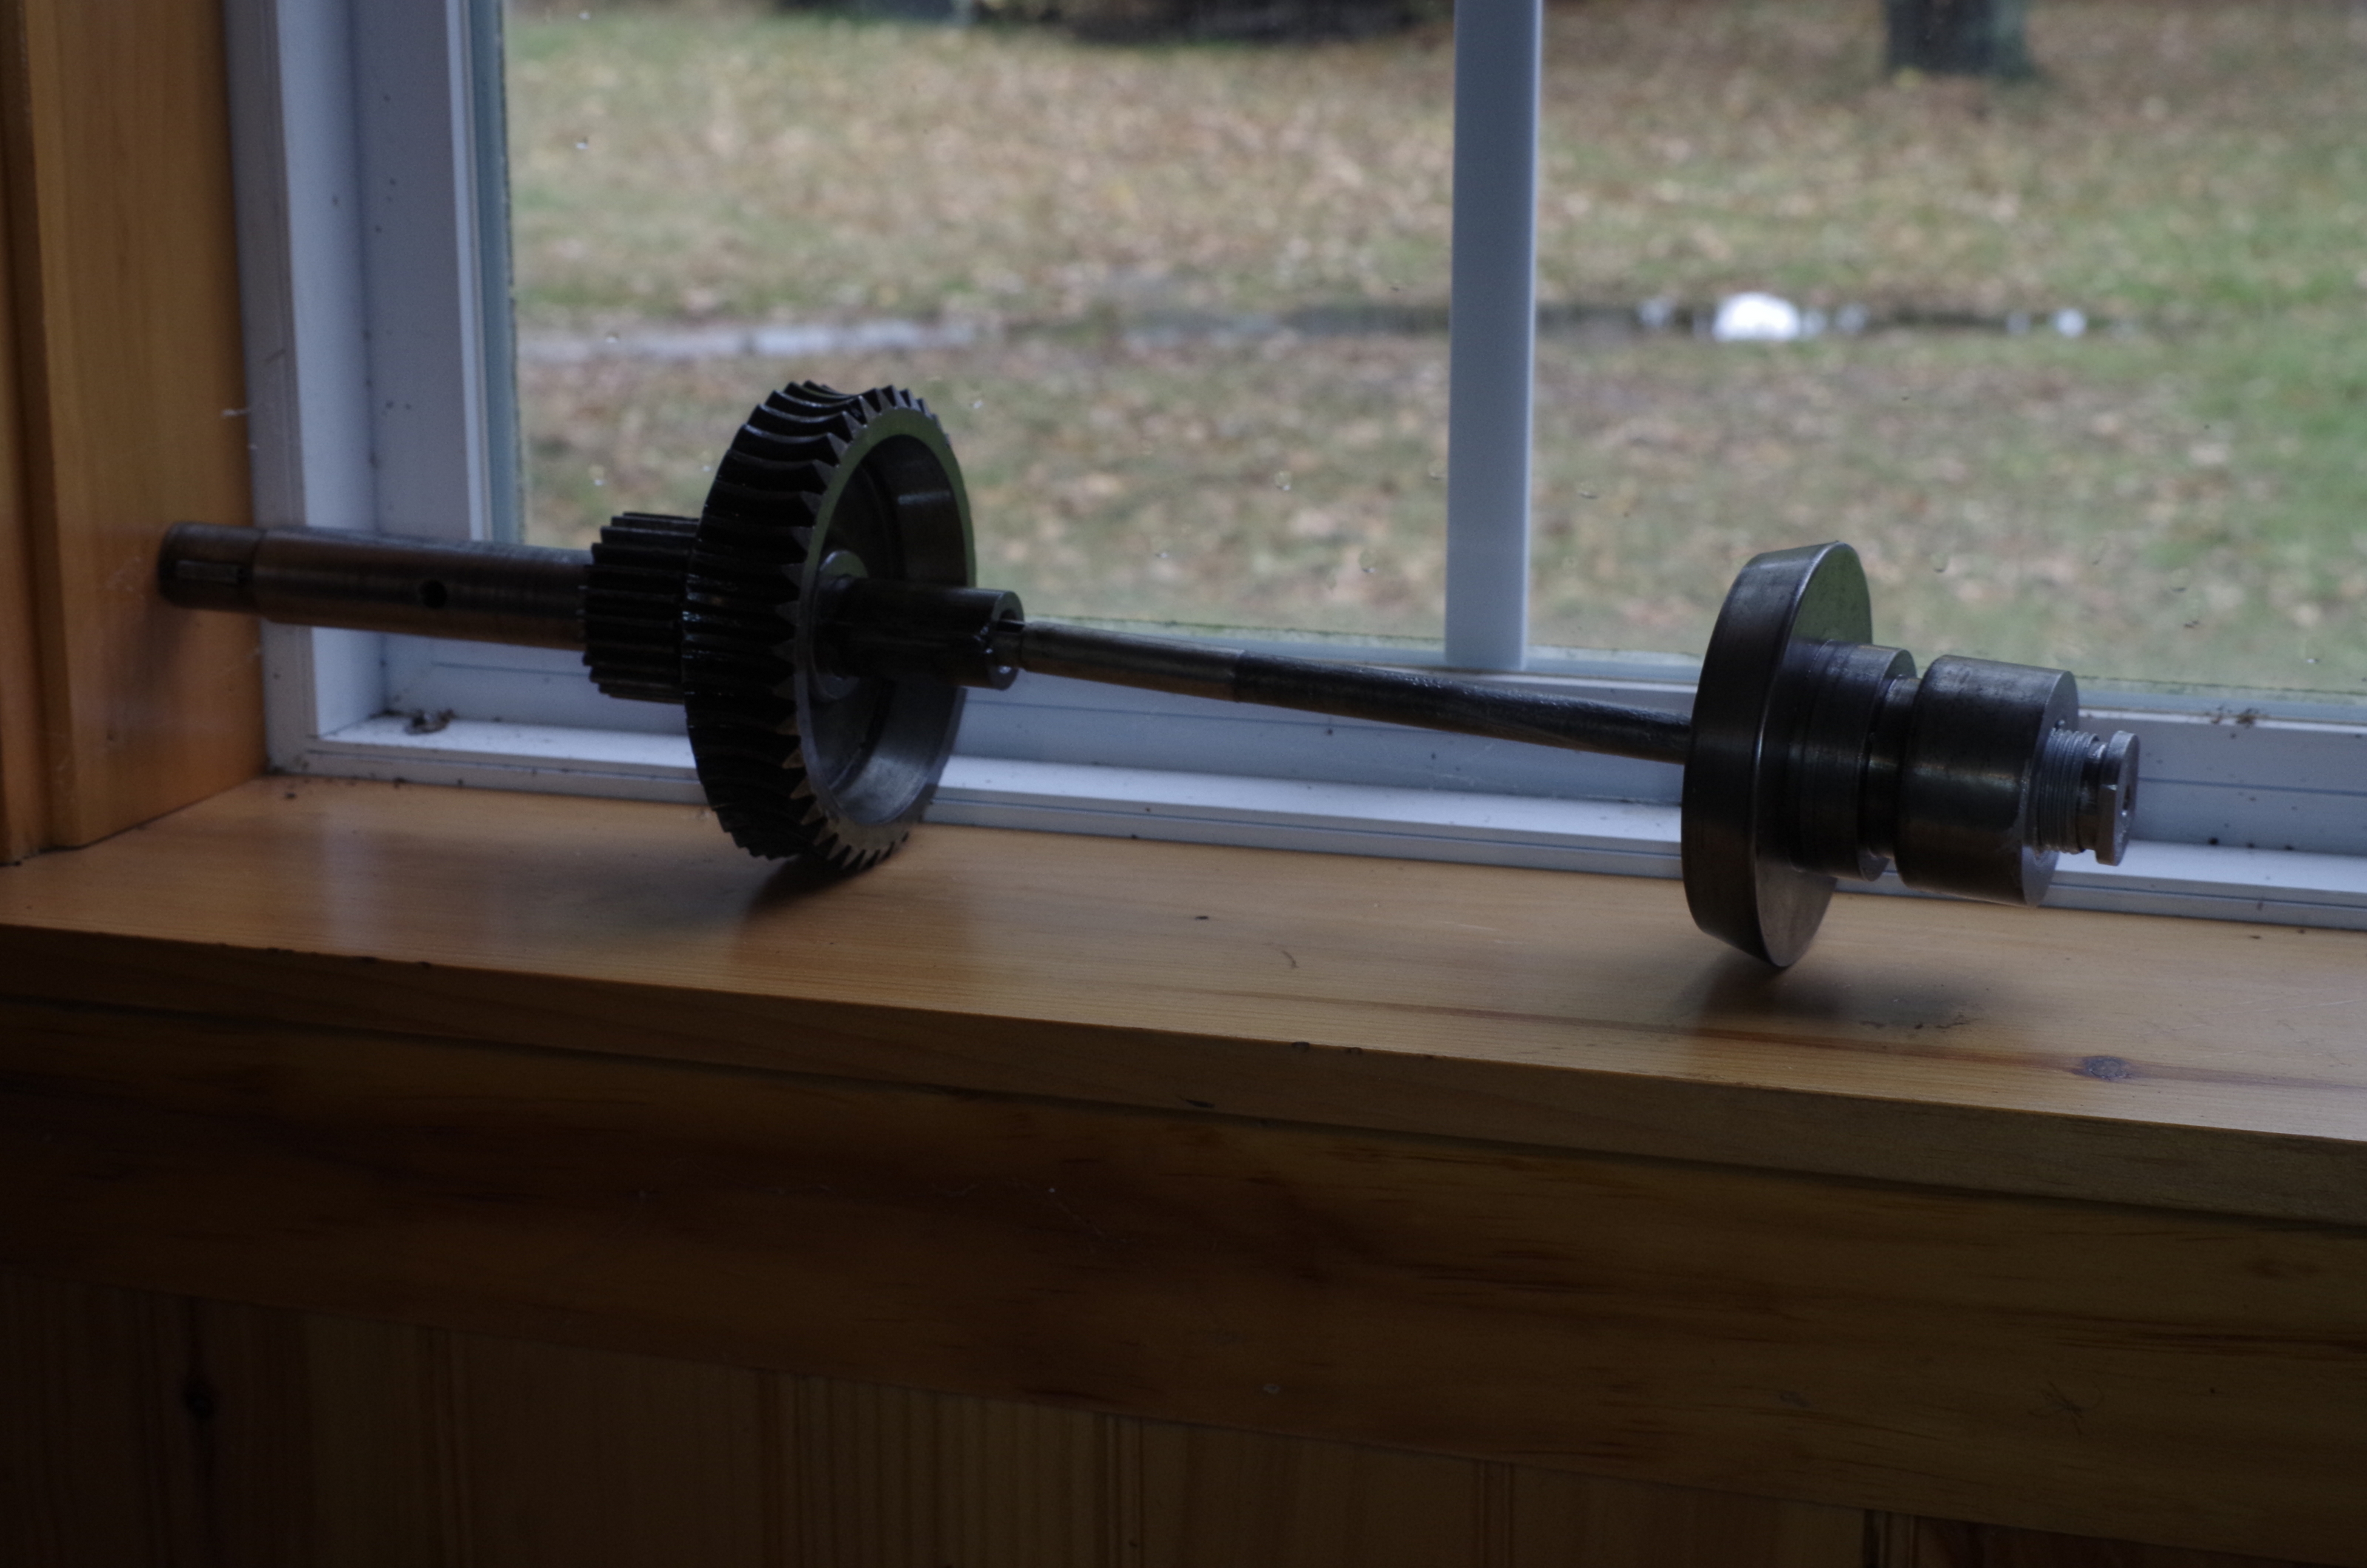
The problem at present is the power cross feed. After engaging it I cannot get it to dis-engage! Of course, this locks up the manual feed. I seem to recall reading something about this before, but can't seem to find much about it. An exploded view of the apron assembly would be damned handy, but doesn't seem to exist. Has anyone else run across this problem? Anyone know of a quick trick to get this thing to release! I figure an apron teardown is in my future, but I'd like to at least have my lathe 90% functional in the meantime


I have photographs of a later gear head apron removal and rebuild. Pm me with your email address and I will send them to you. Also search for old threads here on this site on repair/rebuild of the apron.
 
A few pictures of aaaaaatuckehoe's 16x8 gearhead

THax,
If it could help, here are a few pictures from the apron of our 8-speed gearhead Hendey (ca. 1915-16)

One thing that is not obvious is that the threads of the collars of the two worm screws are left-handed.


The weak point of both clutches is that the knob is connected to a somehow flimsy stem, terminating in a substantial thread and shoulder: I believe we had to cut flats on the shoulder in order to unlock the threads. We used a generous amount of anti-seize paste when reassembling it.


Paolo
 
Gentlemen, Thank you

A picture is, as they say worth a thousand words...

From looking at what I see here, this is what I gather:

The gear that meshes with the worm is free to spin (normally) on the hollow shaft sleeve.

The small gear that meshes to the intermediate gear (up to the cross feed) is keyed or otherwise held fast to the shaft sleeve.

The apron knob shaft is threaded into the inner cone at the far end.

Does this sound right?
 
I’ll start by saying that I do not own nor have I ran or worked on a hendey, however from what I see in the photos you have a typical cone type clutch, these tend to stick on occasion, you can loosen the star knob and then hit it with a soft blow hammer and it will disengage.

Trouble with these clutches is that they get worn and the cone tends to stick in the gear, a common problem seen on many other lathes that used tat style clutch, I immagine that the problem could be solved by carefully machining the cone and gear to a slightly shallower taper.
 
Paolo_MD:

An addendum or two to your post for those who what to work on their apron clutches.

As you have noted, the Nuts are left- Handed and each Worm is a different start, one is Single Start and the other is a Triple Start. All
thrust is taken by the Tapered Thrust Collar, make certain that its mating surface on the Bearing Casting is dead flat, if not, resurface
and lap in if necessary. When you have removed the Worms from their Bearings, give them a good cleaning and inspect the Hook Keys. In
most cases the Keys will be worn narrow and no longer suitable for service. Measure the Featherway in Leadscrew to see if it is over
size from the original specifications. As long as the over size is uniform through out the length of the Leadscrew, it will only be
necessary to fit a new Hook Key to accurately fit the Leadscrew. Hook Keys are no available off the shelve, so you will have to make
whatever size you will need. When you assemble the Worms in the Bearing Casting, make certain that all mating pieces, including the
Bearing Collars, are parallel and bur free. Using a thin film of oil on all surfaces, lap everything together as you tighten the Collar.
Using a Feeler Gage, set the clearance between the Locking Collar and the Bearing Casting at .003" and tighten the Set Screw. Rotate
and feel for high spots. That covers the basics for installing the Worms.

The overhaul of the Friction Clutches is a bit more tricky, since from 1907 changes were being made to the basic design. Your Apron
represents the early Double Walled Apron design, which was changed in 1918, 1922, 1929, 1933 and 1937. The first time I worked on a 1934
Clutch, I wound up using three Sectional Assembly Drawings just to find out where they hid the adjusting screws. No wonder they redesigned it in 1937. One thing to watch for when fitting the Friction Clutches to the Worm Gear, with both surfaces clean and dry and
Friction snugly seated, measure from the top of the Friction to the top of the Worm Gear. The Friction should set "proud" of the Worm
Gear, if it sets flush or recessed then there is no longer the necessary adjustment Between the Worm Gear and the Friction and it should
be rebuilt. Since I have spent the last week in bed with the flu, I will save a more detailed explanation on Apron Clutches for a later
time.

Hendeyman


Back
Top