What's new
What's new

1991 VF1 Tear down, clean and repair

STJ7780

Cast Iron
Joined
Jul 9, 2009
Location
Dallas, Ga
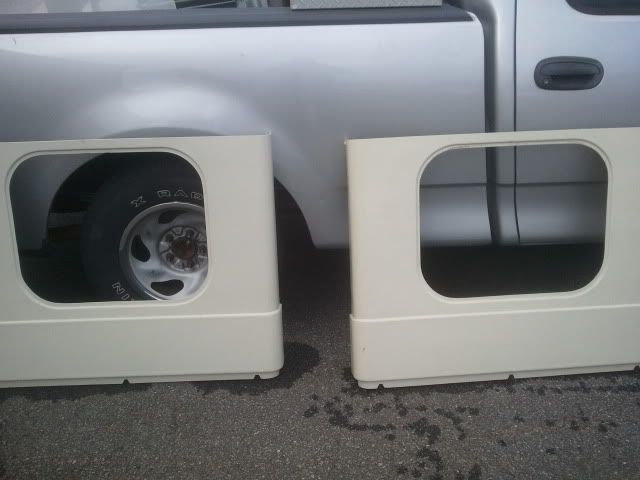
I have taken the outer panels off of the mill in the past couple of days. The plan is to get it taken apart, clean everything, fix what needs to be fixed and reassemble it. Tear down has gone smooth so far, just messy. I did find that industrial floor cleaner and a pressure washer will do wonders when it comes to the plastic housings on these old machines.

2011-12-14204720.jpg

2011-12-15143353.jpg

2011-12-15144014.jpg


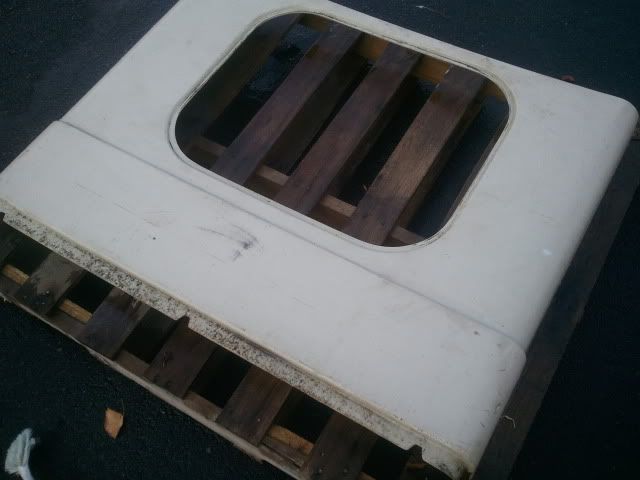
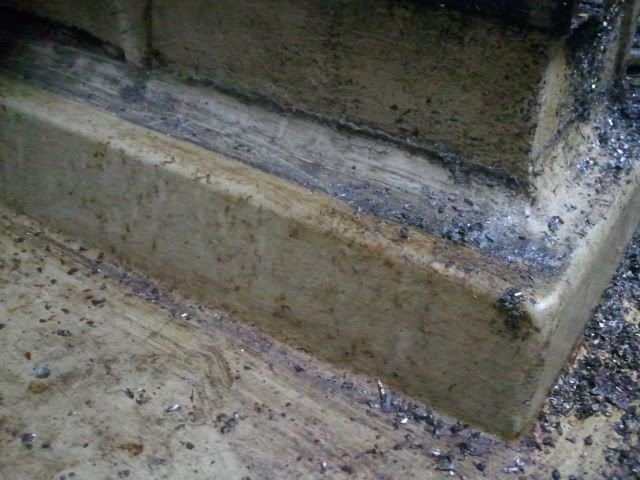
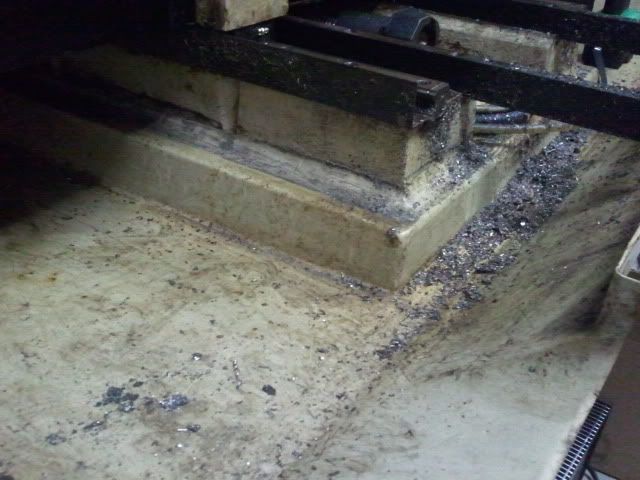
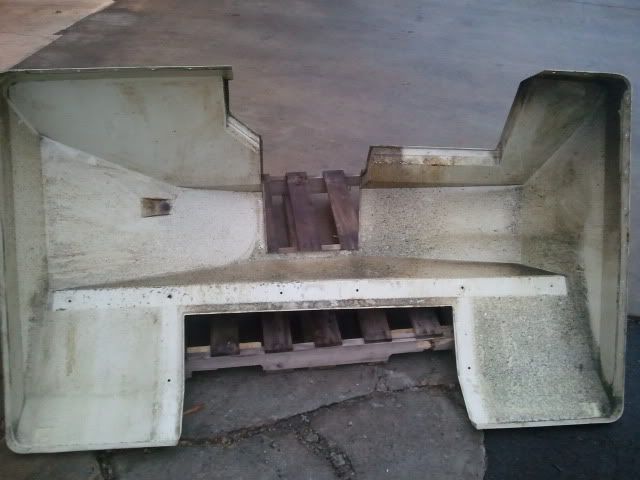
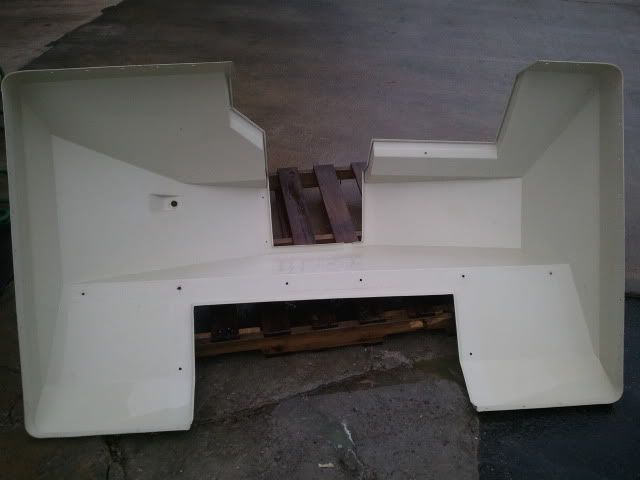
First big question I have is can I take the lower tray off of the mill without a lot of headache. It has a fairly thick layer of sealant where it meets the base. I could clean it where it is but I had such good success getting the sides clean I would really like to give the lower tray the same treatment. I would also be replacing the sealant, which I am sure is original and couldn't hurt.

2011-12-15192114.jpg

2011-12-15192102.jpg


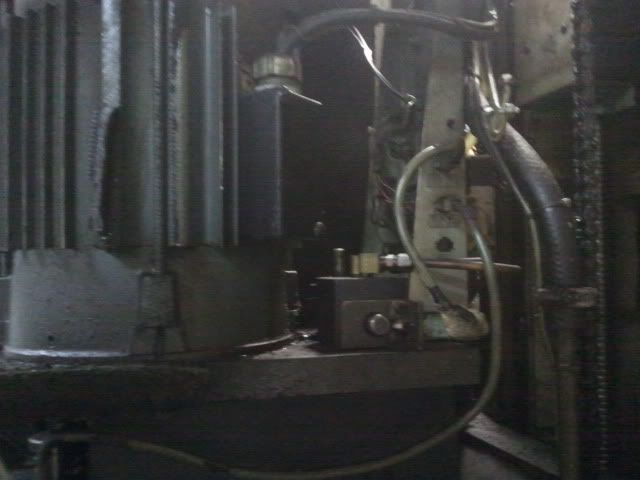
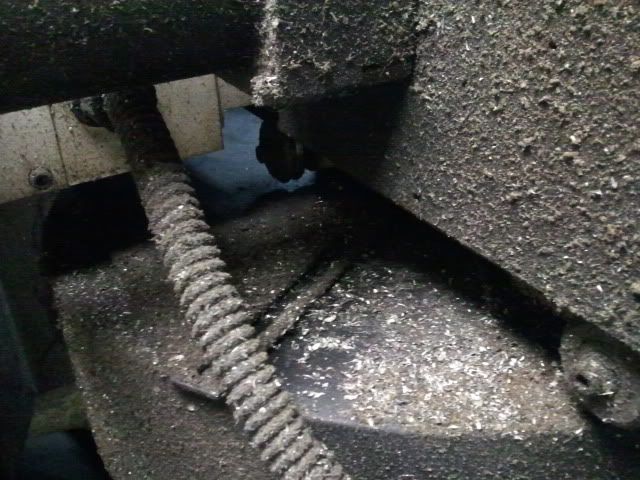
Next issue I ran into is the moving side cover for the tool carousel. Sorry for the terminology, I am just not sure of the technical name but it is the curved door that hides the taper portion of the tools when the carousel moves away from the spindle. The door is there but the mechanism that makes it open and close appears to be gone, why I don't know. :confused: I can see the slot on the rear side of the door that I am sure is part of the mechanism but the rest is just not there. In the picture the slot can be seen just behind the cable. Does anyone have any pictures of the correct setup or any other info that will help me sort it out?

2011-12-15192505.jpg


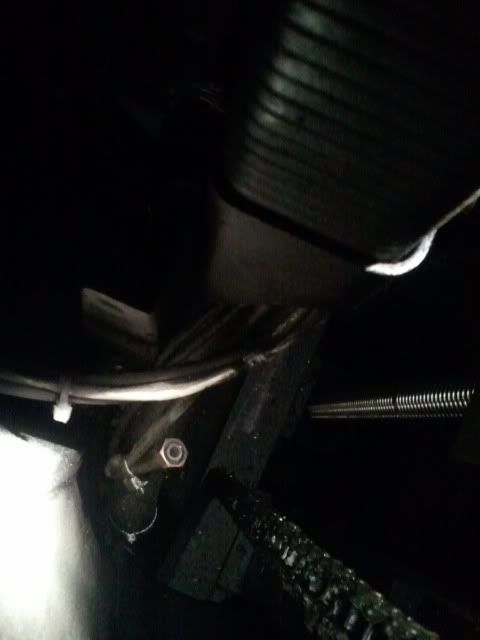
Next issue is a random hose, blocked off, at the top of the machine next to the spindle motor. It is a plastic line, bent over itself and zip tied to seal it off. It looks to be too big to be way lube. It comes out of the service loop and I have not been able to find an empty fitting where it might go. I have not traced it back to its origins just yet, figure I would toss a picture out here and see if someone recognized it.

2011-12-15192317.jpg


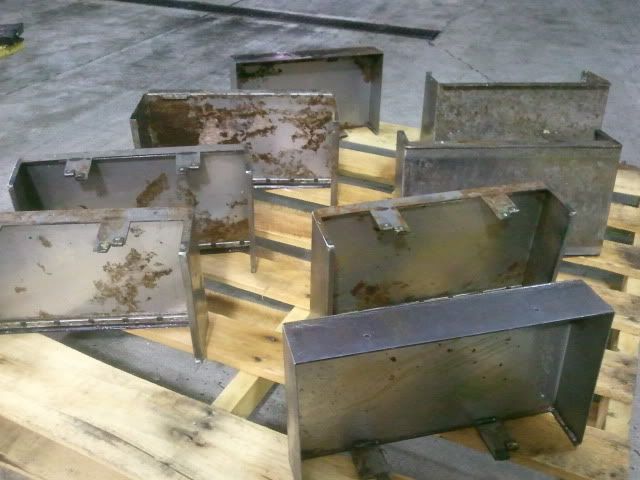
On another one of my posts it had a picture of the mill as I was buying it and someone commented on the tarp covering the z axis ways. Well I found out the the way covers are not on the machine, they were badly mangled and showed up in a box with the mill when it was delivered. I have 3 pieces of the cover, one piece not usable and the other two are badly bent. Aside from the three pieces I have I am not sure what all is supposed to be there. Does anyone know where I can find a whole cover, new or used, or does anyone have any pictures or other info?

2011-10-23185553.jpg


And last but not least. The wiring to the door switches is pretty bad. Would it be horrible to take the switches out of the circuit eliminating them. Are you guys disabling the door alarm when you run your mills? I know safety wise that's a bad idea but I am trying to come up with a game plan while it is apart.

Steve
 
There is a pin that bolts to the changer with a little bracket, and rides in that slot, moving the door as the changer travels back and forth. They get mangled if the slot gets full of chips or something jams it up in any way... Usually big face mill curlies.

I would leave the switches or repair them, even if you just disable them. Im sure some sort of aithority can give you a nasty fine, and you are opening the door to liability if an operator gets hurt. Not worth it to save a fwq bucks on some wire.

Pete
 
Tool changer door bracket and pin should be available from your HFO. I believe the z covers shoud be available still also.

Regarding the air hose, a better picture is needed. If you can post a picture where the one side is still connected, that will help a lot.

With the switches, you can bypass if you want, but new ones can be sourced from your dealer.

Good luck with the rebuild!
 
Thank you for the help guys! I got to thinking about the door switches and I guess common sense took a break when I thought that. :rolleyes5: The connector is damaged and I will be the only one using the mill right now and I figured what the heck, I'll just hot wire it so I don't have to worry about the door open alarm. In retrospect, that was not a good idea. It will be easy to fix the wiring and the switches, aside from being covered in chips, are still there and working. I will put it back to factory.
Not worth it to save a fwq bucks on some wire.
Pete
peter.blais put it best, better safe than sorry.

Haastec, I am planning to get the cover off of the X axis and get some better pictures here in the next day or so. I need to get it off anyway and replace the release valve rubber while it is easy to get to and before it starts to cause problems. Are there any other preventative items you can recommend while I am in there? I want to make sure that when I put it to work that it is as reliable as I can make it.

Well I did a little more cleaning today and managed to get the front cover and the top clean. They turned out pretty darn good, if I do say so myself.

I also started on the doors. The metal trim appears to be anodized black and it is fading pretty bad so I am going to get the hardware cleaned up and give it all a thin coat of flat black. While taking the doors apart I found that one of the plexiglass doors is falling apart. It is cracking all around the perimeter. This got me thinking about what they are made from. One of my doors is in great shape, aside from being cloudy. The other is cracking all over. Are they lexan or plexiglass doors? I have not tried to find and replacement door yet but I have tossed around the idea of making my own to save a few bucks. It is only 2 bends and about 10 drilled holes, how hard could it be? ;)
Steve

2011-12-16074743.jpg

2011-12-16080720.jpg
 
K so your tool carousel looks fine from here. clean it up and you will see the pin hanging down that runs the slot. the whole carousel moves forward, on the 2 roller wheels, into the spindle and the pin in the slot swings the door open to expose the tool.

Leave the door switches so you don't cut your fingers off, greenhorn.LOL you need those digits to push the buttons i'm gonna tell you about. damn it fix it proper. Kids....

If you pull the lower pan your gonna need alot of marine grade silicone. I suggest leaving it in place and just clean it.

Z axis way covers are available. they are not the OG sliding plate style. This new style they have is a type of accordion. It is suppose to fit all years. We picked one up from the factory last week, $350.00 plus the tax. I am going to install mine this sunday, i'll let you know how it goes. if you need a band aid a plastic trash bag and some magnets works well. :) in the heat of battle you cant stop just cuz of some lousy sheetmetal lol.

The doors are lexan. you can bend your own using heat at the bend point. I would use a hi heat gun and a couple 2x4's with the bend point sandwiched in between. Match drill your holes to the frame and your good to go. If you need to replace the door handles let me know I have it programmed already, I made some aluminum one for mine.

Did you see this machine run? The hoses are air that go into the manifold located lower left corner in your photo. It is under the electrical box, hard to see from the top. Pull the covers off the spindle and you can see the manifold easier from the side. I would replace it with copper and compression fittings. I believe this is what drives clamp/ unclamp for your tool changer and spindle orientation lock pin. My machine would hunt for orientation, when this hose was leaking air.

Let me know when you get her back together so I can give you your lesson.

Good Luck.

Side Note: Steve I know you won't mind.

I posted in Machinery wanted as well.

If anyone is looking to sell there old Haas of this vintage I am looking for a few more to buy. Running or not. Please send me a pm.

Thank, Justin
 
Hey Justin, I hope all is going well. Are you ready for Christmas? :D

K so your tool carousel looks fine from here. clean it up and you will see the pin hanging down that runs the slot. the whole carousel moves forward, on the 2 roller wheels, into the spindle and the pin in the slot swings the door open to expose the tool.

I went down and looked long and hard trying to find where the pin might have been but I can't even find a mounting location for the thing. I am going to give Haas a call on Monday for a list of parts, the pin included but I just can't seem to find out how it is attached. I found a blurry picture of a newer machine with the covers off and I have an idea of how it should mount but I just can't seem to find the mounting location. From what I can see in the pictures it should be just above the slot.


Leave the door switches so you don't cut your fingers off, greenhorn.LOL you need those digits to push the buttons i'm gonna tell you about. damn it fix it proper. Kids....

Yeah, Im still not sure what was running through my head when I thought of that. :nutter:


If you pull the lower pan your gonna need alot of marine grade silicone. I suggest leaving it in place and just clean it.

I decided tonight as I starred at it, its coming off. Its just way to grungy to try and clean it where it is. I can get the 3M 5200 in the 10oz calk gun tubes for about $20 each. 2 or 3 tubes should be enough to do the lower pan and the rest of the panels. Money well spent in my book. I just keep thinking about all the swarf and chips I cleaned out of the coolant tank and pump. I am going to get it all really clean and run some sort of coolant filter at the sump. Also having the lower tray off will make some of the cleaning and repairs to the top end a lot easier as well.

Z axis way covers are available. they are not the OG sliding plate style. This new style they have is a type of accordion. It is suppose to fit all years. We picked one up from the factory last week, $350.00 plus the tax. I am going to install mine this sunday, i'll let you know how it goes. if you need a band aid a plastic trash bag and some magnets works well. :) in the heat of battle you cant stop just cuz of some lousy sheetmetal lol.

$350 :eek: I have all of the old pieces of the covers. I think I will try to resurrect them first just because I won't feel justified spending that on new covers until I try. Let me know how they turn out. Snap a few pictures to if you think about it.


The doors are lexan. you can bend your own using heat at the bend point. I would use a hi heat gun and a couple 2x4's with the bend point sandwiched in between. Match drill your holes to the frame and your good to go. If you need to replace the door handles let me know I have it programmed already, I made some aluminum one for mine.

I went by Home Depot on the way home tonight and they have the right thickness Lexan for $55. I figure Haas will want and arm and a leg if they still have any so I will bend one up myself. I have all the hardware for the doors, just needs a lot of cleaning. The front braces will get a coat of black to freshen them up. All I need to do is get the Lexan bent up and drilled. Ill toss up a few photos when I get it done.


Did you see this machine run? The hoses are air that go into the manifold located lower left corner in your photo. It is under the electrical box, hard to see from the top. Pull the covers off the spindle and you can see the manifold easier from the side. I would replace it with copper and compression fittings. I believe this is what drives clamp/ unclamp for your tool changer and spindle orientation lock pin. My machine would hunt for orientation, when this hose was leaking air.

Unfortunately I never saw it run. I bought it sight unseen from a guy in Ohio, I am just north of Atlanta. I jumped on it because even with rigging, shipping and misc repairs I still got a good deal. I am going to get the covers off of the X axis in the morning so I can get a better look.


Let me know when you get her back together so I can give you your lesson.

I can't wait to get it powered up! Whenever I get new equipment I like to go through it and make sure that I am not going to have any problems. It gives me a chance to familiarize myself with how the machine works so that if there is a problem in the future I have a better understanding on how to figure it out and fix it. Once I can get my butt in gear and finish you know you are the first call I am going to make. :D Thanks again for all of your help.

Steve
 
Hey bro, my bad on the pin, I looked again at your pic then at my machine. You are missing the pin/ bracket part.

In your picture look at the wheel towards the left in the photo. This wheel is towards the spindle. Between the wheel and the machine casting (where the toolchanger wiring loom goes into) you should see 2 tapped holes right above the wheel. That is the mounting point for the bracket/pin. The pin will point down into the slot on the door.

You will probably use more than that buy the time you are done. When I resealed I used the good stuff on the lower 6" portion of the panels and then used clear window caulking w/ silicone on all the upper portion of the panels. Kept the cost down and it's working awesome so far, no leaks.
 
Hey Steve I recently bought new front windows for my 92 VF2 and they are about $70 a piece. You might want to get a quote on some of the parts you are planning to build before spending the time to source materials.
 
Ditto!

The original widows and doors are 1/4" thick polycarbonate - safety first, don't expect 1/8" to be the same. Don't cheap out here, think sharp hard bullets coming at you!

The 3m 5200 is perfect, the seal can be cut with a windshield gasket cutter cable gizmo. It's a big pain to reassemble but worth is as you can easily access everything. I had my machine proof run before I put the covers back - your looking good!
 
Be sure to check the cables and hoses that flex under the front Y-Axis way cover. This is a common place for the cables to develop a break after becoming brittle from prolonged exposure to coolant and oils.

You have probably done this already, but look at BGL's wirte up for his machine rebuild. His machine had bad cables in the area I described.

Good luck with the repairs.
 
Hey bro, my bad on the pin, I looked again at your pic then at my machine. You are missing the pin/ bracket part.

I talked to Haas today and they said the bracket and roller was in stock so now I just need to get it ordered.


You will probably use more than that buy the time you are done. When I resealed I used the good stuff on the lower 6" portion of the panels and then used clear window caulking w/ silicone on all the upper portion of the panels. Kept the cost down and it's working awesome so far, no leaks.

I planned to use 3M 5200 marine sealer but the techs at Haas said they are using Sikaflex 1A. It works out good too because it is a lot cheaper than the 5200 and your right, I need a lot of it. :D


Hey Steve I recently bought new front windows for my 92 VF2 and they are about $70 a piece. You might want to get a quote on some of the parts you are planning to build before spending the time to source materials.

Haas has the new front door lexan for $70, the sheet from HomeDepot is $55 and I would still have to bend it and drill it so that is a no brainer. Saves me a lot of time fabing up a door.


The 3m 5200 is perfect, the seal can be cut with a windshield gasket cutter cable gizmo. It's a big pain to reassemble but worth is as you can easily access everything.

I brought home a windshield removal tool today. Hopefully that will make getting the lower tray off easier because it has been a royal pain so far. :willy_nilly:


Be sure to check the cables and hoses that flex under the front Y-Axis way cover. This is a common place for the cables to develop a break after becoming brittle from prolonged exposure to coolant and oils.
Good luck with the repairs.

I did check the Y axis cable under the Z cover and mine is no exception, it is split. Can I put new sheathing on the cable if the wiring is not damaged or is it better to get a new cable? My parts list is getting up there in cost.

I started to clean up the side windows. I found that the 3M headlight restoration kit from an auto parts store works great. I took out a lot of the scratches and they polished up pretty well. The kit was less than $20 and should do two windows. I will get a couple of pictures tomorrow and put them up.


Justin, did you get the Z cover installed? I got the same price today from Haas, $350. I didn't want to spend that much but I am not keeping the current rubber mat cover in place.

Thanks again everyone for all of your help. Ill post up a few more pictures and progress here in the next couple of days.
Steve
 
Steve,
As long as your wires are good a section of liquitite from one of the big box stores does the trick; bit of a pain but low cost. There are two types of liquitite, use the one that is all plastc.
Regards
B

PS did you figure what that one 1/4" line went to?
 
I did check the Y axis cable under the Z cover and mine is no exception, it is split. Can I put new sheathing on the cable if the wiring is not damaged or is it better to get a new cable? My parts list is getting up there in cost.
Just to be clear, I am talking about the X-Axis cables routed under the front Y-Axis cover. They slide and flex as the Y-Axis is jogged back and forth.

You can try new sheathing, just be sure to check it's condition from time to time. Before you do that, check the condition of the inner wires closely. Once the outer sheathing cracks open the inner wires become brittle and crack also.

If you have any doubt, replace. If the motor wires short it can cost far more that what a new cable costs to fix everything.
 
Steve,
As long as your wires are good a section of liquitite from one of the big box stores does the trick; bit of a pain but low cost. There are two types of liquitite, use the one that is all plastc.

Thanks for the info, I was hoping there was a lower cost way to fix it. I think I am also going to put a piece of plastic sheet up under where the cable rides to hopefully prevent it from rubbing thru or grounding to the base in the future.


PS did you figure what that one 1/4" line went to?

I had a few ideas about it and I have a better picture with the side cover off. See what you guys think. You can see the line bent over and zip tied in the upper right corner of the picture. I am still not sure what it is for. I have looked around on the net and found that the spindle is air cooled from the compressed air lines. I can see from pictures of other machines that it looks like the air line is visible right under the cover only about 5 inches up from the bottom of the spindle. My machine does not have any such air lines or fittings. Is it possible that the air line is supposed to be for spindle cooling but my machine does not have that option?

2011-12-18140613.jpg


Just to be clear, I am talking about the X-Axis cables routed under the front Y-Axis cover. They slide and flex as the Y-Axis is jogged back and forth.

You can try new sheathing, just be sure to check it's condition from time to time. Before you do that, check the condition of the inner wires closely. Once the outer sheathing cracks open the inner wires become brittle and crack also.

If you have any doubt, replace. If the motor wires short it can cost far more that what a new cable costs to fix everything.

That's the cable I am referring to, right under the front most way cover. It makes a curve right where the air line comes out for the front hose. My gut tells me to replace the cable but the wires look fine and the cheap side of me says to put a new cover on it. I suppose I will sit on it, I have a week or so until I make a parts order. I have read the horror stories and posts about cables, drives and motors on the net and it does worry me some. I don't want to cheap out and cost myself more in the long run. I guess I just answered my own question typing out this reply. :nutter: New cable it is.
How do I get the old cable out? It looks pretty long. Any tips or pointers to putting the new one in or is it reverse of removal?

While I am thinking about it, is there any preventative maintenance I can do to the servos? I don't have a mega-ohm meter to test them or I would while its all apart. Can cleaning them and a brush change be of any benefit? Thanks again for the help and information. :cheers:

Steve
 
To paint or not to paint?

Another question while I am cleaning today. A lot of the covers and the door trim appear to be anodized black. The coating is coming off and rusting. Is is OK to paint the covers to prevent future rust and clean up the appearance or do they need to be anodized again? Also, what about painting the undersides of the way covers to prevent future rust on them? Thanks again guys!
Steve
 
Steve,
The steel door parts are black oxide finished, I suppose they could be refinished but I did not bother. If I were to bother painting I would powder coat. I never did like the door handles on this model machine and replaced mine with a set of handles from the hardware store, round and smooth, no nick and crannies for stuff to build up in, had to drill extra hole, no big deal.
Also the rollers are in the window/door section of the hardware store, the exact same thing and there cheap.

Brushes, yea it would not hurt to remove them, vacuum all the holes then and GENTLY blow clean dry air through the opposite opening while vacuuming to get as much residue as you can out of there, handle brushes carefully. I would NOT recommend a spray solvent wash, could cause more harm than good – I did not replace them, might regret that later.

Now this air line.. yours look a bit diffrent than mine but they have the air/oil lube in commen. Looking at the right side of the spindle [operators view] should be an air line that runs along the coolant line to the spindle and connects to nearly the back side of the spindle, there is also a small bronze air filter gizmo there too. What the deal is that air is tapped off the back of the main regulator to a secondary regulator then runs to a metering block where way lube is added. This block is located at an opening you will see in the castingat the back bottom of the machine. Sitting on the floor at the back of the machine look under the electric cabinet to your right you should be able to see it. Looks like a zinc colored fitting with both the ¼” air line and 1/8” oil line connected to it. You may want to add a small gage 0-30 psi to the side of this regulator as I did, I cannot recall if it needs to be 13 or 17 psi… not near my book right now but it’s posted here some place. There is a solenoid that opens when the spindle is on, air flows, picks up a metered amount of oil and travels to the spindle, excess air flows out the little bronze deal on the spindle and also keeps a positive pressure at the spindle face. This is critical that this is in place and clean oil is supplied at the correct air pressure! ALWAYS run at least a short warm up program at the start of the days run – an oz of prevention. There should be a warm up program in the memory, if not I can send you a copy, it’s very simple. There are two other air lines, if I recall correctly, one is 3/8” dia comes off the oiler and to the top of the drawbar release, this is the air blow to clear chips during a tool change. The other ¼” line goes to the solenoid that then travels to the drawbar piston assembly. There is also the orientation shot pin, believe its feed off the set of solenoids up there from the one ¼” line.

My gut feeling is this airline was AIP, Abandoned In Place from someone too lazy to remove it - least that’s what I hope, would not be pretty if its been running without air/oil to spindle or air blast

On the way covers, after dent removal with some body hammers and blocking I used a random orbit sander with 220 grit, cleaned them then past waxed three times, on the inside I just left a thick coat of unbuffed wax, you will not see rust in a lifetime if you manage your coolant correctly. BTW remove that coolant hose and replace it with clear braided reinforced pvc [plumbing section] replace or seriously clean the steel down tube and thourghly clean the nozzle block, your coolant will flow better and last longer.

I hope my word pictures are helpful!
 
Now this air line.. yours look a bit different than mine but they have the air/oil lube in common. Looking at the right side of the spindle [operators view] should be an air line that runs along the coolant line to the spindle and connects to nearly the back side of the spindle, there is also a small bronze air filter gizmo there too. What the deal is that air is tapped off the back of the main regulator to a secondary regulator then runs to a metering block where way lube is added.

I thought the same about the air lines and I could not find the air fittings on the spindle. I found a few other pictures on the web for similar year machines and I could see where the fitting is supposed to be but my machine does not have them. Is there a spindle that does not use that system?

2011-12-21204649.jpg
 
After writing the thought came to me that perhaps your machine may have had the spindle replaced to the later model that does not use this system. It looks to be so, bonus for you!
 
After writing the thought came to me that perhaps your machine may have had the spindle replaced to the later model that does not use this system. It looks to be so, bonus for you!

SWEET!!
I have been racking my brain trying to find out why that line was blocked off but if thats the case I'll take it. Thanks :cheers:

It has been slow at the shop this week, Christmas and all, so I have had some time to make some more progress. I got the windows polished and cleaned up. 3M headlight restorer from an auto parts store. Worked pretty well considering what I started with. There are a lot of deep scratches from chips on the inside of the panels. Too deep to sand out but they are still better than they were and I can always buy new windows later.

2011-12-21143152.jpg


I also cleaned and painted the rear 2 steel panels. Almond appliance paint is almost an exact match for the stock Haas color on my machine. I painted them to protect them but more so to brighten up the interior of the machine, making it brighter when I get the new lights in it.

2011-12-21183425.jpg


I also got the X axis way covers off and pressure washed. I asked about paint on the underside of them for the reason shown in the picture. That's how I found them when I took them off. I am going to run them all thru my blast cabinet to get rid of the rust. If I can control the rust in the future then I won't bother with painting the bottoms.

2011-12-21182338.jpg


I also thought about a washdown kit for the mill, anyone out there put one on the older Haas? Just trying to think of ways to keep it clean when it is up and running.

Steve


Back
Top