David Bodkin
Cast Iron
- Joined
- Jun 13, 2014
- Location
- Navarre, FL
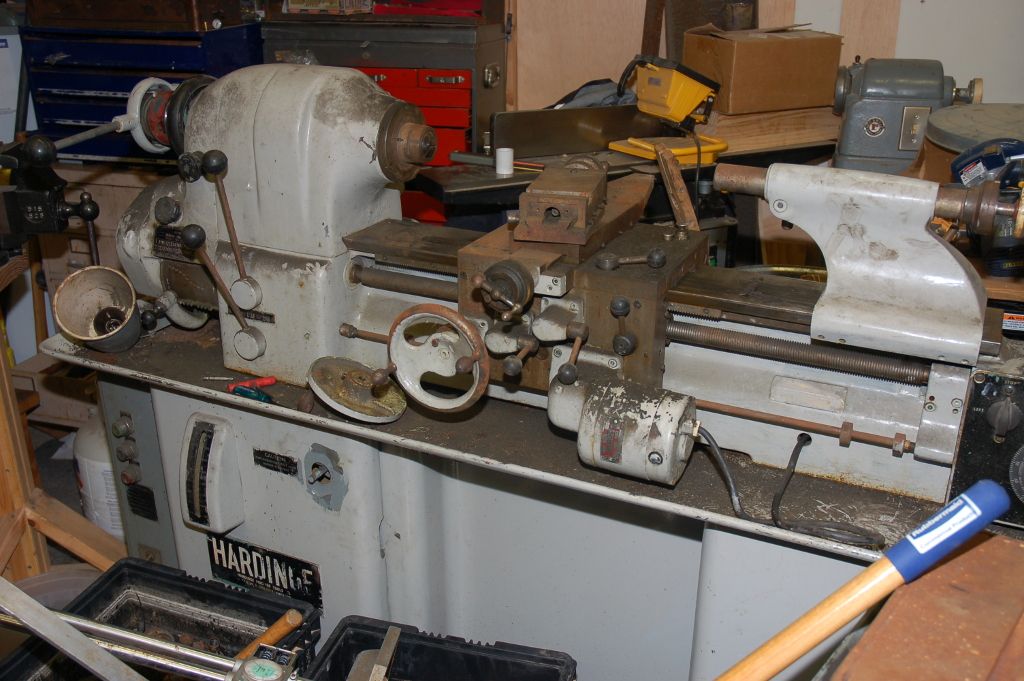
I picked up a Hardinge HLV a while back and am finally getting around to working on it. Poking around I found a serial number of 0875 on near the headstock which I think means it was built in 1956. It wasn't under power when I bought it unfortunately. Everything seemed to turn well free hand and nothing seemed to be broken though. It does have a bit of grime, rust, and a $5 paint job on it but I'm working through it.
Here's a pic of the machine right after I brought it home and shoved it in my garage.
I'm currently going through the carriage and apron. The oil reservoir for the dovetail was full of muck and the previous owners decided that grease was what to run in the apron. Sigh. So, it needs cleaning.
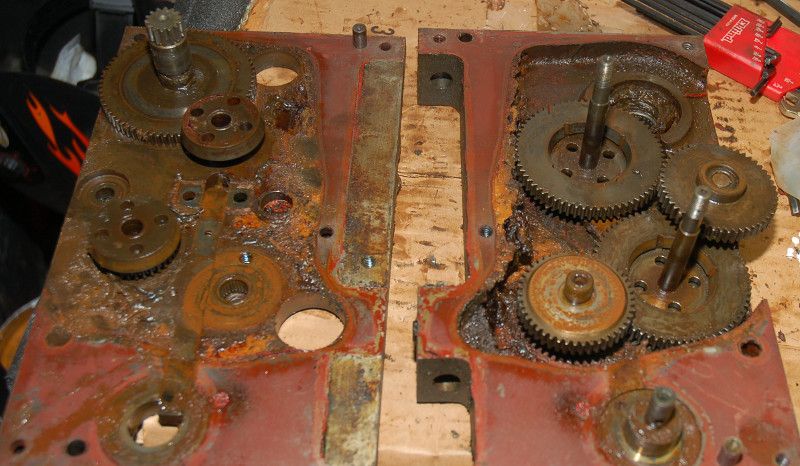
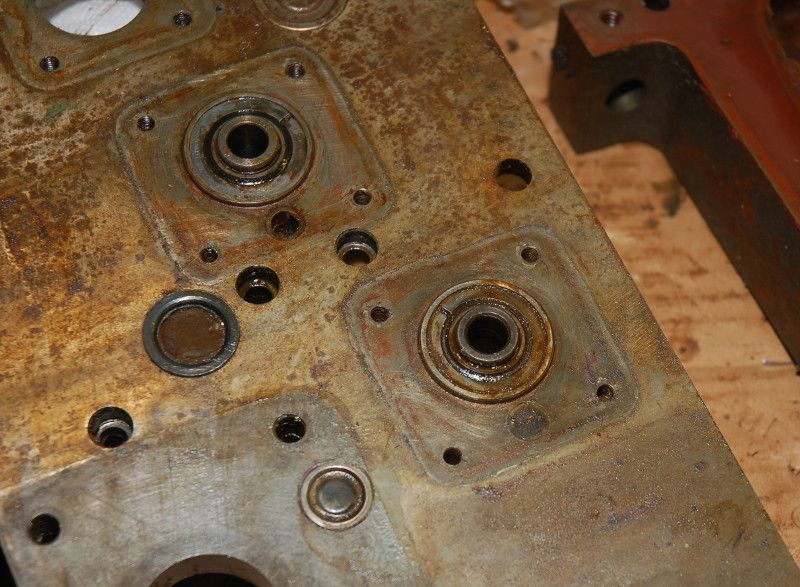
One question I have is how do I get these out? These are the inside cones to the clutches and I believe they're pressed into the bearings. If so I figure I'll have to press them out but wouldn't mind a second opinion.

Other side. There was a circlip on each shaft. I removed them and both parts are still held firm.
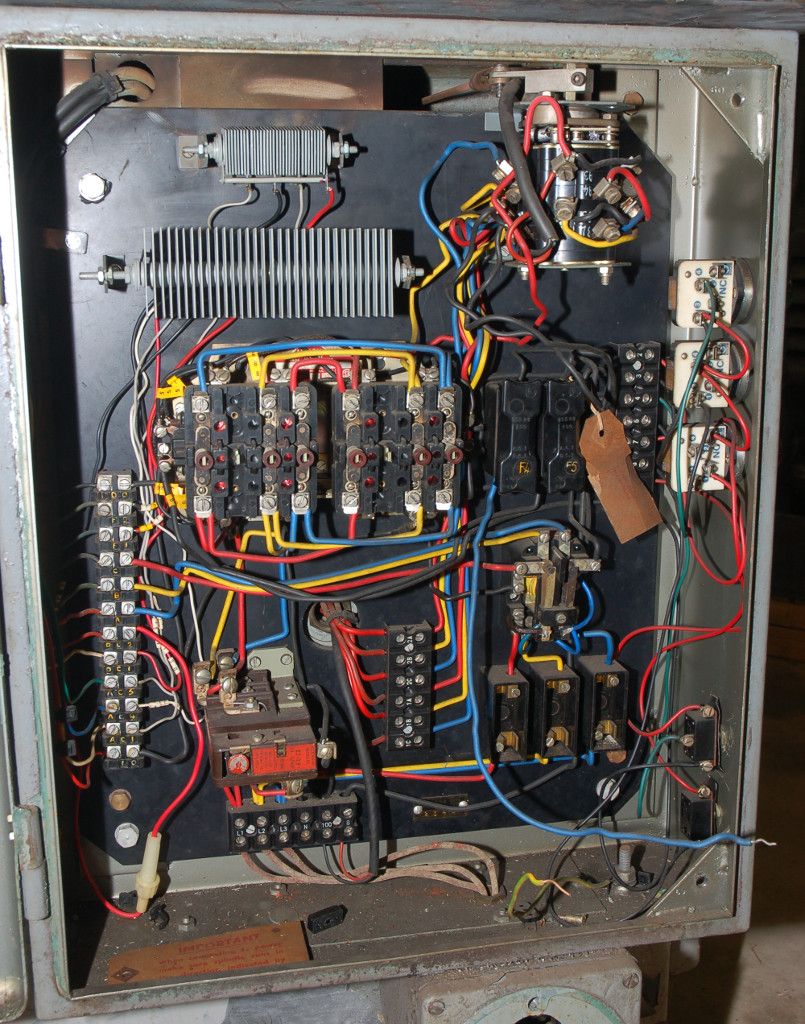
My other questions are on the electrical side. I've found a few electrical diagrams that appear to match my machine on PM but they're a little hard to read in spots. There's a blue wire coming out of the bottom of the F4 fuse that isn't connected to anything. I "think" it goes to L1 but it's hard to make out on the diagram. If anyone can confirm this I'd appreciate it. Also, what are these types of fuses called? I haven't encountered them before. Someone has also added a more modern fuse in on a wire seen in the lower left corner. I'm wondering why but haven't investigated it yet. Here's my electrical cabinet.
I'm taking a lot of pics as I'm going through it and will share if people are interested.
Thanks,
David
Here's a pic of the machine right after I brought it home and shoved it in my garage.

I'm currently going through the carriage and apron. The oil reservoir for the dovetail was full of muck and the previous owners decided that grease was what to run in the apron. Sigh. So, it needs cleaning.

One question I have is how do I get these out? These are the inside cones to the clutches and I believe they're pressed into the bearings. If so I figure I'll have to press them out but wouldn't mind a second opinion.

Other side. There was a circlip on each shaft. I removed them and both parts are still held firm.

My other questions are on the electrical side. I've found a few electrical diagrams that appear to match my machine on PM but they're a little hard to read in spots. There's a blue wire coming out of the bottom of the F4 fuse that isn't connected to anything. I "think" it goes to L1 but it's hard to make out on the diagram. If anyone can confirm this I'd appreciate it. Also, what are these types of fuses called? I haven't encountered them before. Someone has also added a more modern fuse in on a wire seen in the lower left corner. I'm wondering why but haven't investigated it yet. Here's my electrical cabinet.

I'm taking a lot of pics as I'm going through it and will share if people are interested.
Thanks,
David


