What's new
What's new

My Bridgeport Round-Ram M head

Jeep-Power

Plastic
Joined
Apr 9, 2009
Location
North Plainfield, NJ, USA
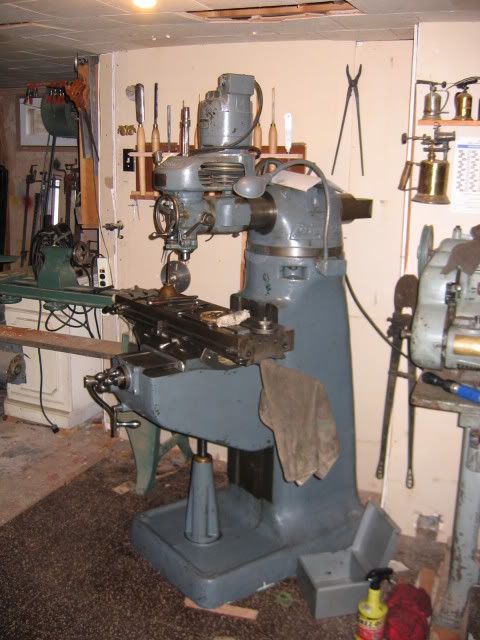
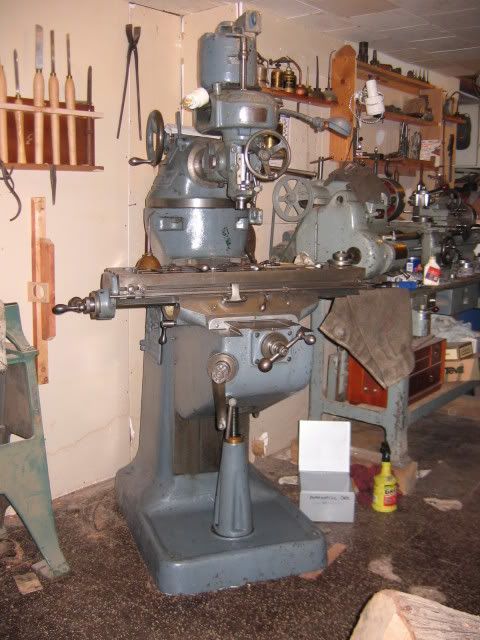
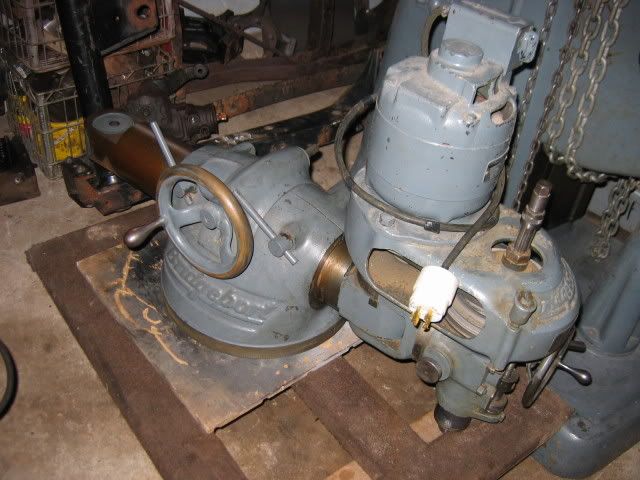
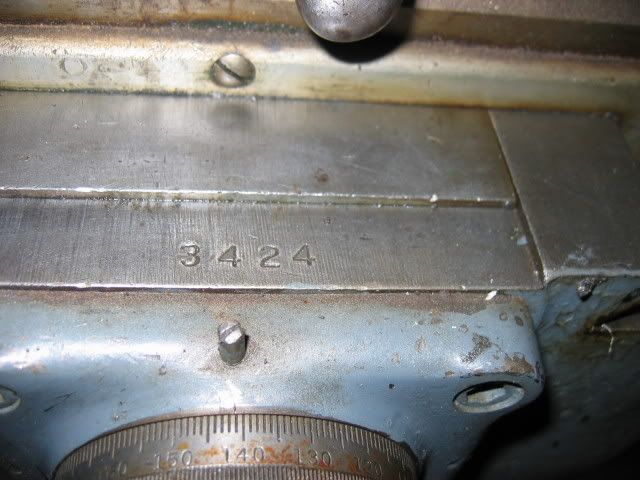
Hello all-- I am now the proud owner of 1620 lbs of early Bridgeport. The serial number is 3424. As Gordon has pointed out (thanks!), it looks to be from 1943. Serial Numbers/Dates here

My friend at the junkyard called me this past Wednesday telling me a Bridgeport came in for scrap and that I had better get down there fast.

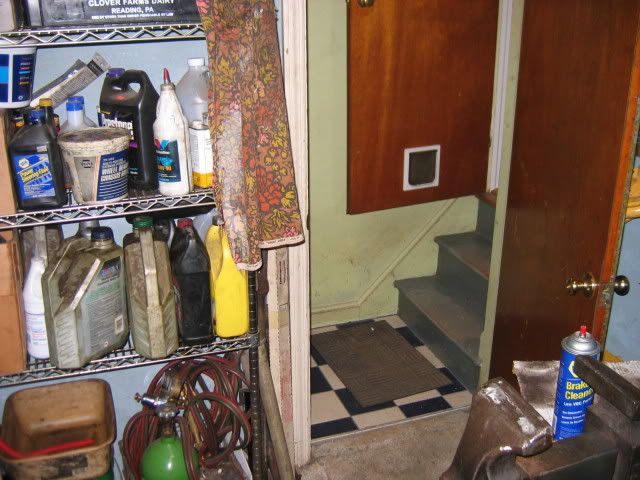
When I first spotted it amongst the junk-- I was happy to see it was a smaller model-- as i am planning on putting it in my basement. I have about 82" of headroom and have to get it down some tight stairs. So the smaller weight ad height are perfect for me. The 'clincher' was that it has a power feed on the table. :smitten:

I was able to get it for about what scrap is ( I realize I may get a few "YOU SUCK!" 's ) --$300

I will post pics soon-

I have been scrubbing this forum, (which I have been very grateful to have found-- thank you!!) figuring out what it is, what it's strong points are, etc.


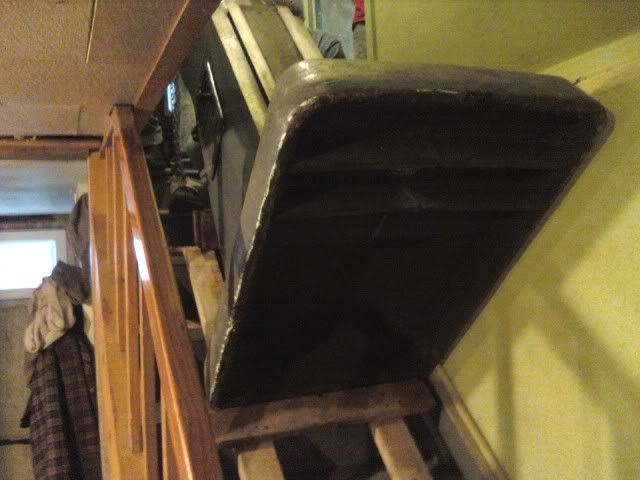
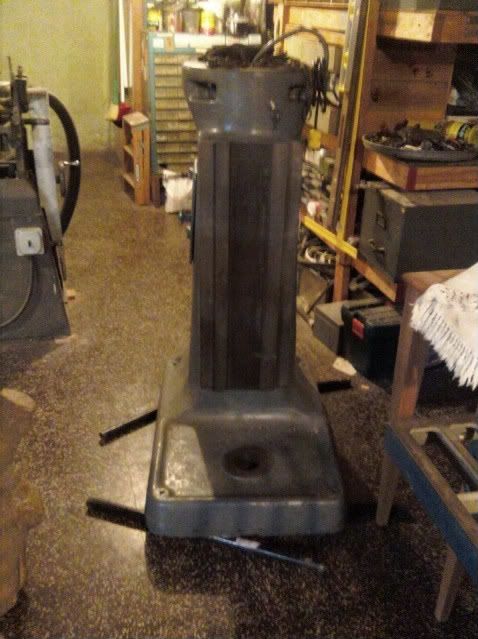
The turret is off it now.

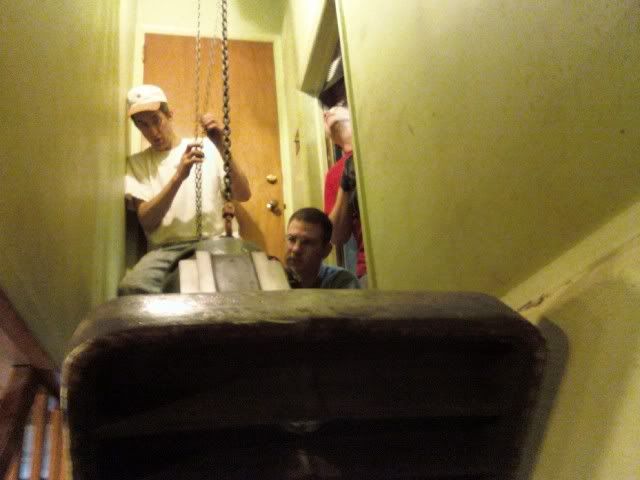
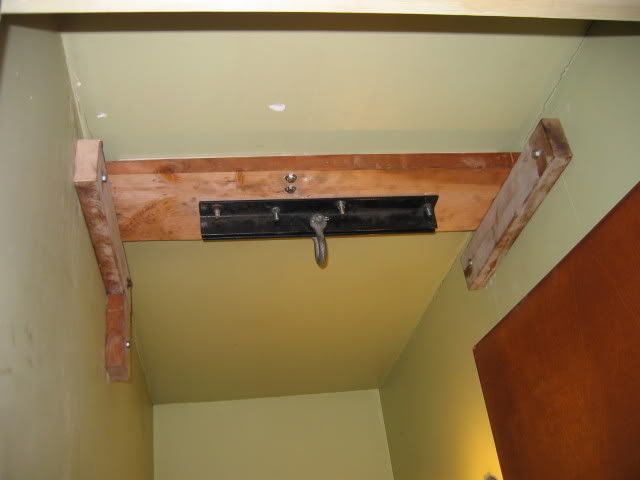
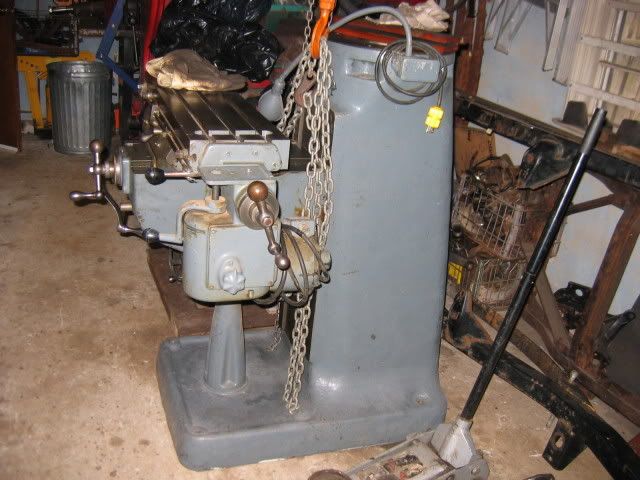
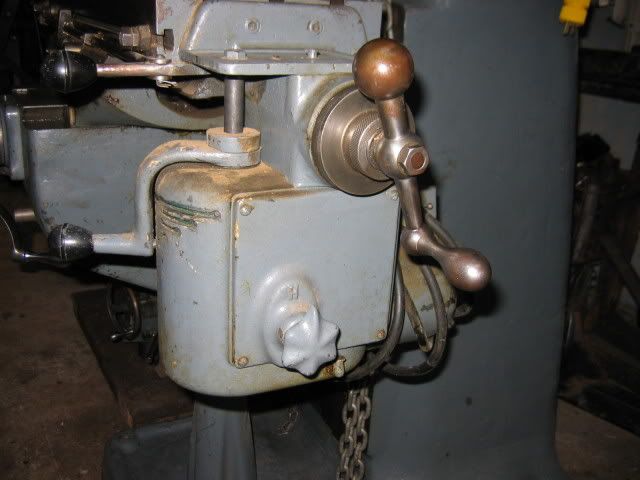
I plan to remove the bed and knee, for the trip down the stairs. My first question lies in that. Will someone please tell me what is the best plan of attack for removing the bed and knee? I have an overhead hoist (it handled the roughly 1400 lbs of the machine, less turret) to help remove the said items. I simply don't see som obvious bolts or screws to go with. The brass wipers look like a good place to start. :confused:


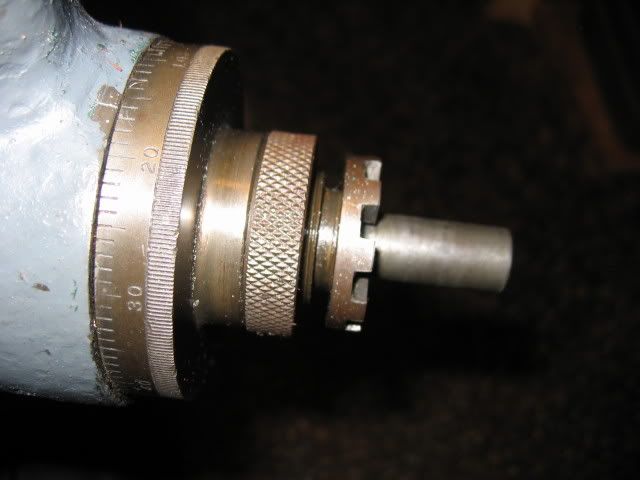
additional plans are a phase converter for the motors and picking up some #2 Morse Taper collets and other tool stuff-- Need a bigger vice too.


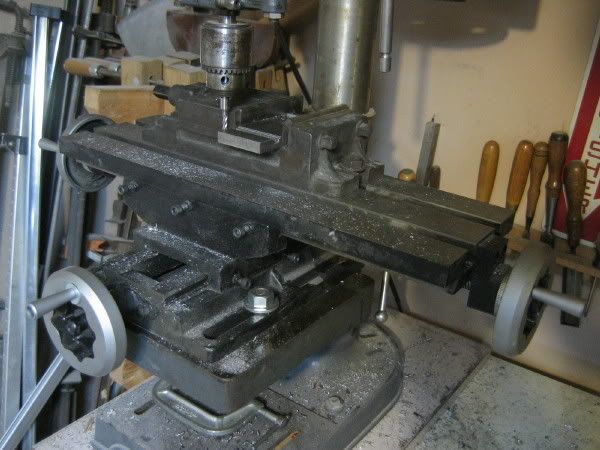
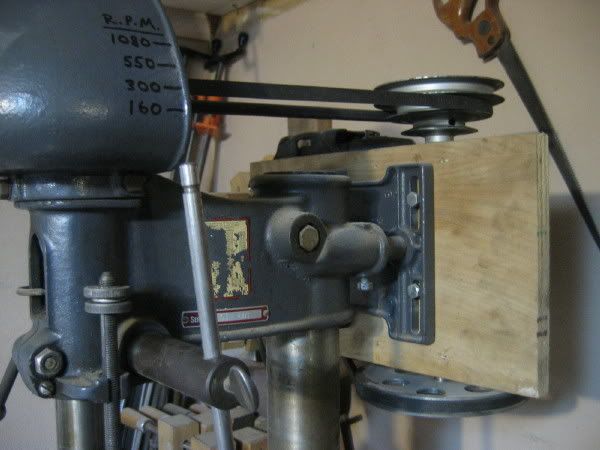
This is what it will be upgrading me from :D

IMG_7773.jpg


IMG_7772.jpg
 
Last edited:
$300? you got ripped off, i only paid $400 for my '68 J head and that included the boom truck to haul it to my place:)


seriously now, download the manuals and study the cutaway drawings, it'll clear a lot of things up.

table: take out the screw and it's end brackets, remove gib and slide it off to one side. two strong men can support it pretty easily but it's best to do a test lift (it can be lifted off the ways a bit once gib is out) before actually going for it.

saddle: gib screw hides under the front wiper cover, yank it. with table off you can get to the yoke that houses both leadscrew nuts and with that off you can slide the saddle off the knee.

knee: with the saddle gone you can undo all the crap that connects tthe Z screw to the knee but first crank the knee down against a block of wood. i guess you could just leave the screw connected and undo the nut from the Z pillar but then you would have trouble moving the knee around without doing damage to the screw...get your hoist in position wrapped around the bearing bridge inside the knee and put just a hair of tension on it. gingerly remove the gib that hides under one of the wipers, DO NOT DROP IT BACK DOWN BETWEEN THE DOVETAILS! now hoist the knee off, best to have a helper to make sure it comes off straight and doesn't get damaged. oh, and before you lift it up look at the area between the ways on the column near the top. if there is a bolt there then remove it, it's a stop to limit upper knee travel.

have fun.


dave
 
yeah, I was hoping for $200 :D

Sweet Dave-- Thanks for the tips!

I read this recent thread on primary tooling. Great stuff there.

The quill has s Morse #2 taper (M2)-- I have a bunch of M2 stuff already for my small Clausing lathe. is it acceptable/common practice to use a standard taper (taper with the flat tang on the end, not set up for a drawbar) drill and/or chuck in the quill? Of course, I'd have to remove the drawbar in order to use them. I figure I can then use a 1/2" (or so) ramrod to remove them, as I do in a lathe headstock.

I am concerned about the ways-- there is little evidence of scraping marks... is this a sure sign that this thing belonged in the scrap heap or is there still hope? Anyone recommended in the Central NJ area who scrapes ways?

Before all this-- as stated in other threads, I need to get this thing running first, before I go investing in tooling.

Before that , I need to get it down the stairs and into the basement!
 
The tooling that your Bridgeport uses will be Morse #2 taped for a drawbar rather than have a tang. You can take tooling with a tang machine the tang off and drill and tap to use in the mill. I don't think tanged tooling will fit without modifications.

Before worrying about scraping the ways get it cleaned and take out the play with the gibs and see how it mills. How did that mill survive a trip to the scrap yard without so much as a handle getting knocked off?

PS: I like your speed chart on the drill press.
 
Jeep,
There are a number of fairly lengthy threads on the Round Ram and M head, here. Lots of great info.

First, are you sure it's MT2? They also came in B&S 7 and a third I can never remember (it's rare). There are a least a couple threads on this, too. Some dye (black marker works too) and a couple minutes with some test collets will answer this question.

I've got nearly every manual that's come up over the last 2 years or so, as PDF's. I used to have them on my company website so people could FTP them, but I changed hosts recently, and lost the ability to have custom ftp accounts. If you are interested, and have ftp available to you, I can 'put' the files there for you. About 65mb total. Worst case I can write them to a CD and mail it.

I've got the younger brother to your's, #6140, in south jersey. I overpaid for mine though .... but still better than a cheap mini-mill!

I took mine totally apart when I got it, to inspect and clean. Take the time to properly clean out all the lubrication passages. These machines are regularly greased, instead of oiled. I probably spent 20% of the cleaning time just on this. Mine was packed tight with hardened grease. I bought new 'zerk' fittings specifically for oil from McMaster Carr, and replaced them all.

I used a hydraulic boom lift (aka engine hoist) and nylon rope to support and remove all the major parts - Head, table, saddle and knee. As Zagnut described, remove the feed screws (retaining rings are under the dials), then unscrew the gib screws fully, remove the gibs, and the table and saddle will easily slide off. Careful not to twist as they near the ends. My power feed was very difficult to get off the screw, although I don't recall exactly why.

I would also recommend that you 'split the nuts' while you have it apart. The orginal bronze nuts slide into the mounting assy, and can be removed and cut in two (half cut already), then when you put them back, you use the retaining screws to eliminate the slack. If the screws are well worn in the center then they may be too tight at the ends of travel. I had to settle for a half way point. But, I don't need to hold better than a handful of thou's. I only use mine for jigs, fixtures and maint.

If you have to buy collets, beware. I found that all imported B&S7 collets are longer than the original BP collets (Hardinge sells oem ones, but big $$. Others on this forum have some as well). I had to modify my drawbar to use the imports. I found an 'NOS' drawbar assy on ebay a while back, so I did not change the original. It came with some MT2 tang tooling (and led me to believe it was MT2 initially), and a 18" long 3/8" socket extension with the male end cut off to use to knock out the MT2 tools. I have no use of any of this since it's a B&S7. Maybe you could use it?

John
 
i think that any evidence of the original flaking on the ways means it's in pretty decent shape. especially if the marks are consistent along the whole length of the ways.

easiest way to identify an abused machine is to look at the ways and dovetails on top of the knee. lots of lengthwise gouging from from chips that were never cleaned off and lots of dents and dings from using the surface as a work bench means the previous users/owners didn't give a shit about the machine.


dave
 
Zagnut,
Sounds like you are describing mine. I can see flaking amongst the scratches and dings!
It's not a candidate for restoration....

John
 
More thanks guys! Keep it comin', please!

I have seen a few threads on the round-rams. I'll have to search deeper. If someone has a link handy, please...

I really appreciate the suggestions/clues on disassembly!

yeah, this one has been greased.... :wall: I'll be digging into that, for sure. Is there a relatively simple oil gun to use? I saw they are available commercially, but I'm sure I can come up with something DIY, no? What is the proper viscosity/ composition? Will straight 30W work? 10W?

I've printed out a small booklet of manual shots. I'm not sure how much I'll need.

can anyone suggest a used parts/tool dealer in Northern/Central NJ? I did a quick Google search... nothing concrete. I see vices and stuff on Ebay, but the shipping (as usual) is a killer. :rolleyes5:
 
Mcmaster sells an oil gun. I'm happy with it, but others have not been. A pump handle style, just like the grease gun.


Some other threads:
M Head: http://www.practicalmachinist.com/vb/showthread.php?t=173502
M Head: http://www.practicalmachinist.com/vb/showthread.php?t=170444
M Head: http://www.practicalmachinist.com/vb/showthread.php?t=116572
Oiling: http://www.practicalmachinist.com/vb/showthread.php?t=153908
Quill Issue: http://www.practicalmachinist.com/vb/showthread.php?t=153269

The more useful ones were from before the forum software upgrade, and no longer linked to my login. You'll have to search for them. Try Round Ram, but I've found the search feature to be poor at best.
For example, Searching for 'ram' in Bport forum: Sorry - no matches. Please try some different terms. Clearly broken?

John

OIL: Way Oil ... NO MOTOR OIL!!
 
Last edited:
a pressure washer works great for getting all that nasty grease out of the oil passages once the machine is in pieces.

for oiling i got a pneumatic grease gun like harbor freight sells for around $20. rigged a plastic bottle in place of the grease canister and turned the head around 180° so that when holding the pistol grip the bottle is pointing up. this thing is a cheap piece of trash though and will leak like a sieve if stored with the bottle pointing up.

way oil: for the life of me i can't find anything over here even though i'm sure the factories buying mega buck cnc machines are getting it from somewhere. what i do have is a few gallons of gun oil that the army uses on just about everything that slides from side arms on up to vulcan cannons and bigger. works nice and has rust inhibitors so i think i'm OK. for sure better than the grease my machine was force fed in its prior life...


dave
 
This is my first post as I'm a new member. I'm glad to find this forum as I too have a Bridgeport Round-Ram (but J head) mill. Rescued mine from a scrap yard about 25yrs ago and rebuilt it. I've been very happy with its performance and plan to add a 3 axis DRO in the near future.

My serial number suggests production early in 1951. Anyone know what the model number of this machine (round-ram type) is and where I should search for a manual? I haven't located one on this site as yet but then again I'm not certain of my exact model either!

Thanks,

Mike
 
That's quite an upgrade, even if the ways are crappy. I did the drill press milling thing. Once. :D

The table looks decent, which is good. Most old mills and jig borers get turned into drill presses, with the resulting zits, cavities, and craters in the table. I guess the little M head doesn't have enough gumption to turn much of a drill, which is probably what saved the table! They probably had a nice big Linley or Pratt and Whitney jig borer that needed a few 2" "oil holes" in the table instead.

I'm surprised it made it off the truck intact! Obviously, your contact at the junk yard was looking out for your interests.

Have fun with the repair work and be sure to post photos!
 
got it down the stairs, cleaned up, grease blown out of the oil passages, and almost fully reassembled

pics to come

now to purchase the Variable Phase Drive, endmill holders, and some table clamps...

I just scored a 5" ebay vise! :D
 
Sorry for the lack of pics of the actual move-- it went fast! There are some cellphone pics, that I'll post when I get them.

We got it out of the pickup by using the chain hoist, in the garage. That was the easy part.

Getting it from the garage into the stairwell was the trick-- it is tight! Up those three stairs is the kitchen, take a hard left and you go intl the basement. The base was too big to swing on the landing-- so we needed to get it above the first tread.
IMG_0009.jpg


looking down, from the kitchen
IMG_0012.jpg


Looking up, from the cellar floor.
0503091256a.jpg

0503091256b.jpg

IMG_0013.jpg


I mounted a shackle to the ceiling of the stairwell-- this allowed us to use a chain hoist to lift the column (less everything) high enough to clear that first step up and rotate it on it's back.
IMG_0011.jpg


We had laid plywood down t protect the tile on the landing and we had screwed 2x4's to the stair treads. The column slid down on to it's back, using the hoist to control it's decent. Once we got it down the stairs, it was back on the 4 steel pipe roller to get it into position.

0503091309.jpg


We installed the turret, ram/head, knee, table in place.

Here it sits!
IMG_0016.jpg

IMG_0018.jpg
 
Last edited:
the toothed doohickey is only keyed to the shaft and should slide right off followed by the dial older which shares the same key. under the dial are 3 screws that secure the bearing holder to the knee, undo them and the whole mess slides out....which reminds me: i forgot to put those three screws back in when i put mine back together...

if the shaft doesn't want to come out then look at the end of it, mine was bored about an inch deep so i tapped it and hooked up a slide hammer. i now have a screw in it with a large washer to keep my worn out crank from constantly falling off.


dave
 
You did an amazing job of moving your BP! Don’t know your marital status, but my wife would have divorced me if I used her kitchen as an easement!
 
thanks Chips-- this is the heaviest machine I have moved i my house-- it went very well. I do a bit of vehicle recovery when Jeeping-- the slow, safe, & precise lessons I 've learned there helped alot! :cheers:


I finally got the 220 line wired in this morning and had a few moments to hook up the VFD. It works!! the motor spins and the bearings seem relatively quiet-- now to buy some tooling! :D


Back
Top