What's new
What's new

Bridgeport horizontal milling attachment setup instructions

atwatterkent

Cast Iron
Joined
Nov 3, 2006
Location
Kankakee, Illinois
I just aquired a right angle horizontal milling attachment for my Series 1 Bridgeport mill. Are there published setup & operating instructions on line somewhere? I received two 1" arbors, one 1 1/4" arbor, and the dovetailed rear arm but no drawbar. I would also appreciate a photo with dimensions or a drawing of the drawbar for the right angle head to duplicate it. I would also be open to swap a 1" arbor for a 7/8" arbor. Thank you,
BobM.
 
Sir
The drawbar for my right angle attachment is a 7/16" UNF threaded cap head screw 1 1/2" long with a washer 1/4" thick and 1 1/4" in diameter. This screws directly into the arbour.
As regards instructions none came with my attachment and as I have never used it yet I am not really in a postion to comment but it looks fairly straightforward, but if you find some I would be interested in a copy.

David
 
Could you post a few pictures once you have it all setup and running I am thinking of setting one up my self and would like to see one running.

Marci
 
Be careful they are not like a real horizontal mill, it is good for slots and key ways but you cant hog out with it like a standard horizontal. I have had to fix BPs that have gotten the angle head stuck because the guy thought he could take heavy cuts. They work well as long as you take it easy.
 
Brief bit of setup info, from decades back --

There are a couple of milled flats on either side of the R-8 arbor hole, running parallel to the arbor hole axis from end to end. Use these flats to indicate the head into squareness (or parallelism, however you want to think of it) to the table travels.

There are both clamp screws and jack screws on the split clamp at the "insert-quill" end of the head. Lower the quill a few inches, make sure the split clamp is open (loose), and insert the quill into the right-angle head. As I recall, there may be a shoulder that stops the insertion at some fixed point (fuzzy on that, though). Lightly clamp the split clamp to quill, and screw the drawbar in from the top of the head.

Now indicate the housing flats in the way you want, tighten the split clamp, and you are ready for attaching arbor and spacers, cutters, rotisserie chicken, what-have-you. If you are using a long arbor and the end support that mounts under the ram (for REAL horizontal mill setup), re-indicate along the length of the arbor to assure correct alignment to table axes. More reference length, better accuracy and measurement resolution. REMEMBER that you are also in control of Z-position of the right angle head at the quill, and if you use a second arbor support, the arbor needs to be parallel in Z-plane as well.

Legal disclaimer: These guidelines are meant for reference only. Nothing herein written should be construed as a basis for legal recourse against the writer or writer's representatives in case of injury or death on the part of unwitting user of equipment herein described. Your mileage may vary. Your results may vary. The use of the equipment herein described is entirely at the user's discretion and dependent on suitability as determined solely by the user. Have a nice day.
 
I made my drawbar 5" longer at the hex end. Then you wont have to reach down with a scocket to tighen. Right angle drives turn opposite. Back to drawbars - mentioned above is the one down thru the head, on the right angle drive I use a 7/16 fine socket head & no washer fits nice.
 
Right on that drawbar -- there is a "special" drawbar, as Blake notes it's longer for the reason noted. The ones Bridgeport supplied have the hex portion extended as he said.
 
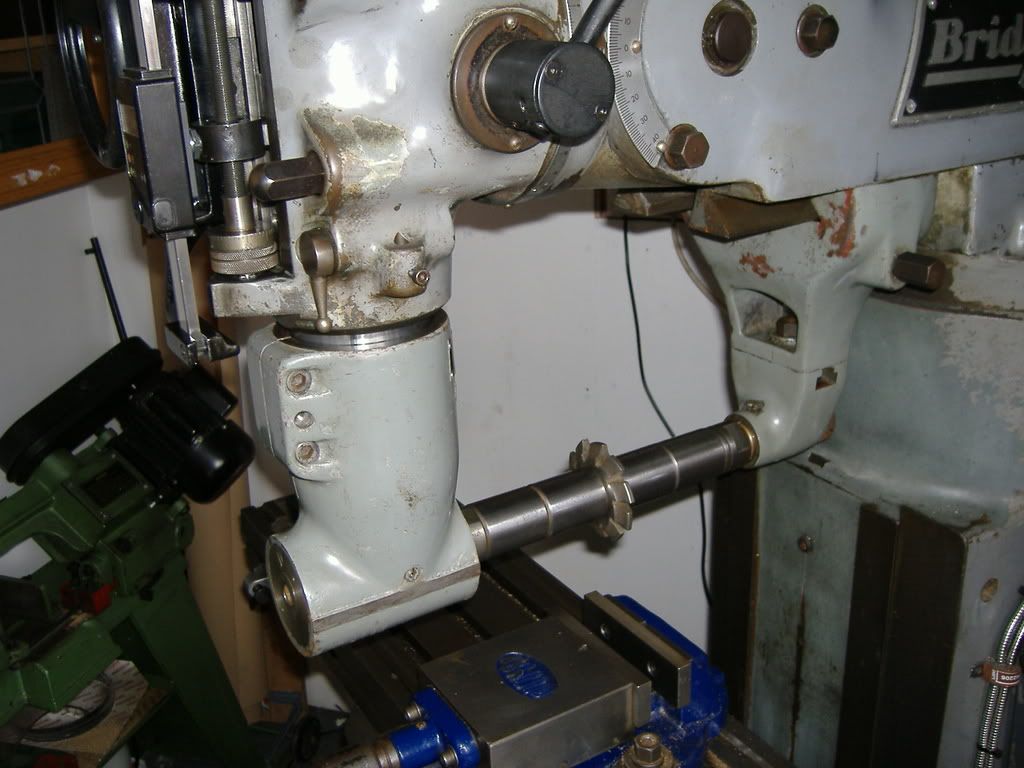
Hi, here is a photo of my horizontal attachment fitted to my Bridgeport, only ever fitted it as a trial to see how it all went together and have never used it in anger. Don't over tighten the jacking bolt on the right angle head to help it slide on the quill or you can crack the casting further along the spit line.

Paul.

DSCF0734.jpg
 
Thanks, everyone,for the info & photo. I found and watched an MIT tutorial on the head installation and went from there. Seems like a lot of work and indicating to align the head and dovetail arbor support. It'll probably only see the light of day when nothing else will work.
 

Attachments

  • PICT2175.jpg
    PICT2175.jpg
    85.5 KB · Views: 8,490
  • PICT2176.jpg
    PICT2176.jpg
    88.8 KB · Views: 7,876
Sorry I do not mean to hijack your tread but I looked on flee bay and found this for $675.00 + $80 shipping. It does come with an adapter so it should work with mill's standard draw-bar.


Any one have any experience with this brand and/or flee bay seller?

Marci
 
Vertex stuff is sorta good quality home shop grade stuff. Will happly hold up for ocasional industrial use. I have one of there rotory tables and its far from the nicest i have used, but it does the job and does it well.
 
I purchased a head that looked like that Vertex several years ago. The gears inside were so bad I'm surprised the thing even turned. The seller refunded my money. This was for home shop use and I figured how bad could it be?Well I found out. Maybe the Vertex is better, I can't say.

I then bought a vintage USA (not BP) head and am very happy. Turns smoothly and works great.
 
Thanx for the links.....lots of good stuff there.

Taka a look at Tom Wade's other vids.
One is about a guy transfering from one glider to another...IN FLIGHT !!

I love this place. I've learned more useful stuff here ,than I ever did in school!:)
 
I have both a Bridgeport brand and an import right angle head and have had no issues with either
just be sure to remove the adapter/drawbar extender before you run the mill, they wobble a bit
I do not have the ram attached "underarm support" and only use it with stub arbors or for milling or drilling long parts clamped to the table, like for a pocket or counterbore or hole on the end of a long part
I have used with the support for slottting before, but much prefer the rigidity of my horizontal mill


Back
Top