What's new
What's new

Spade Drilling

Dupa3872

Stainless
Joined
May 1, 2007
Location
Boston Hyde park Ma.
I Have been in the Biz for over 25 years and believe it or not have never used a spade drill. I have to drill a 1.047 Dia. hole through 8 inches of 6061 aluminum and have decided the best way to go about it will be a spade drill ( carbide Blade ). I will be doing this in an Arrow 750 VMC. I have been hanging around here quite a bit lately and figured I would ask for advise. I intend to spot it with a 90 degree 3/4 Dia. carbide spot drill and then go for it with the spade drill. My work piece is 3.25 square and 8.00 long I will be holding it in a six inch Kurt vise turned on its side or clamping it to an angle Iron. I have to hold +-.005 on the Dia and my hole must be strait through within .005 I am hoping I can get it done with just the spot and spade drill. I would like to here what you think. Should I think about Pre drilling through with a smaller drill ? what do you guys recommend for a speed and feed ? What about pecking? I will not be able to feed coolant through the drill. Thanks for the help Ron
 
Spade!

Hello,

We do some spade drill stuff. Forget the spot drill, they do not like that, and forget about sizing holes with a spade drill, full power and full engagement is the only way they work and they really do work well.
Thru spindle or some kind of coolant setup is a must. Manufactures do not recommend a peck but I have heard of a "shotgun feed" on this forum but never used it and I can't even tell you how it works but I would like to know!
I think the specks are possible but I have never had any luck to those specs consistantly. I usually am on a c.n.c. lathe and finish bore.
We do ream large deep holes on the mills, no peck and feed out but no help on runout. I am thinking of a boring bar finish but chatter is going to be a real issue.
If you are only doing a short run, leave your stock oversized, spade drill full sized, put a pin in each end, put pins on parallels, flycut, rotate, flycut.
Buy an Acme spade drill setup, get the exact feeds and speeds from them. Go through M.S.C., Rutalnd or your usual supplier, ACME will help you out.

Whish I had better news for you, unless somebody has a better idea plan on some tial and error, be sure to let us know how things work out and how many parts you are making.

Good luck!

Landm1
 
Ditto
Spades are great for 4d and deeper material removal but the I don't think you will ever hold that tolerance.
If you are going to make a big run or repeat job, I would use a 4d Komet or Iscar offset inserted drill and go in from each end. You may find a Sumitomo drill that size and not have to buy the adjustable toolholder.
Either way, I'd go in from each end. Maybe a minute of cycle time to complete both holes.
have fun
i_r_machine
 
Hey guys thanks for the help so far ( no one wants to give me a speed and feed Hu? :) I was thinking about 400 RPM with a feed rate of 3 or 4 Im going to use a deep hole drilling cycle and my first peck at about 1.00 I have no way of getting coolant though the drill.
I am not too worried about getting it to size if I have to go with a smaller drill and ream up to bring it to size fine. Getting it strait is my big concern. I took this job from the OEM and the stock has been brought to size 3.25 square so I can't size it after drilling. If I start blowing off parts its going out to be gun drilled. Of course this is the hottest job on the planet for my Customer right now. There is a good reason they stopped and sent it out. This is going to be fun. It's a 30 part run
 
Coolant!

Hello,

If you do not force the chips with coolant you are going to loose the entire setup. The coolant forces the chips out of the hole!
Reading the last reply I forgot that indexable drills are better for mills, the helix helps the chips fight gravity, same deal, no pecking, we use both on our lathes.
I am not at the shop for the rest of the week so I can't tell you what we use for speeds and feeds but any manufacturer will help you out even just for quotation purposes.
In 6061t6, if I remember, your feed should be around 6 i.p.m. and I think the speed was somewhere between 400 and 600 r.p.m.

No coolant = gun drill

Be careful, I do not think a gundrill can handle a .005 runout.

Let us know how it works out!

Landm1
 
You are probably going to have trouble with chip clearing because of the depth you must peck.

I would stay with an extra length HSS twist drill as I think it will auger the chips up better (considering no through the drill coolant). HSS will drill plenty fast enough in that setup. Don't push the feed too much if you are trying to get a straight hole with a long drill.

Probably I'd start with a normal jobber length drill to take advantage of its stiffness to get the first 3 or 4 inches of hole done. For the deep hole drilling, I'd try about 500 rpm and 4ipm and see how it goes. Peck about 1/8 to 1/4" per retraction, as you must allow coolant to get down the hole frequently. Dumping coolant around the top of the hole with the drill in it, doesn't count for cooling :D See how it goes and then maybe boost your speeds and feeds. Listen carefully and watch the spindle load for any sign of chip packing in the drill flutes. Either decrease the peck depth, or increase the feedrate (to make a thicker chip but less voluminous).

BTW, it is entirely possible to break a coolant starved twist drill off in aluminum and get it stuck so bad you cannot push it out. BTDT :D I've not had great success with carbide spade drill blades in non through the spindle coolant settings. They will explode quite unexpectedly.
 
+1 to Hu's post.

With no coolant thru you would be better with a long HSS drill.
If you can get coolant thru with an inducer ring you could use the spade, but use a HSS TiN coated spade bit.

We drill 25+ inches in 6061 T-6 with a 1.25 dia. spade. Pre drill to at least 1x dia deep + point with a short spade. Feed the long spade into hole with the spindle off and coolant on, then turn on spindle and start feeding. Feed until the point is thru and about .1 of the shoulder of the spade bit is thru, then stop spindle and feed out at a faster rate. S400 F6.0 is what we run. DO NOT PECK A SPADE DRILL!

Good luck
 
I guess I am once aggin agginst the grain... :Yawn:

and have decided the best way to go about it will be a spade drill ( carbide Blade ).

I will agree that the spade should make quick work of your hole. But I would not go with the carbide. You would be quite happy with a standard HSS insert.


I will not be able to feed coolant through the drill.

Then your not gunna have a very fullfilling experience.


ACME will help you out.

That would be AMEC.
http://www.alliedmachine.com/default.aspx


You should be able to hold those tols fine with tool holder #25010-003I.

You will need a lot of Z tho. I think that if you take your block out of the vice and set it on the deck you should be fine. The vice may be iffy. (pending on size of machine)

With that toolholder you can git a "rotary coolant adapter". Plumb that ratt into your coolant system via a quick coupling and your in business.

Rec S/F start at 300sfm min and a feed of .017.

The holder that I recomended is spiral flute which will help to auger out your chips. I ran similar in 4140 with maybe 60# coolant with great results.

I would DEFINATELY recommend that you spot that hole! This is a long tool - which is a great advantage to keeping right on size. But should be guided at first.

I was not able to find the drill bodys on the AMEC site.

Also note that this is a #3MT tool. I am sure that a Cat 40 holder will allow the MT shank up inside the spindle zone. (I have some) For whatever reason - this is the only way to git the RCA port assessory.

One more note I guess:
As was mentioned by someone earlier - you doo NOT want to use these as a core drill. One punch - right to size.


HOLD THE PHONE

Just went'n dbl checked my werk and found that I was one line off on my drill body.

You would need a 25020H-004I, or maybe you could git away with a 24020H-003I. These git you into a series #2 insert size (required for 1.047). The -003I/-004I is #3 or #4 MT. You REALLY wunna keep into a #3 if your in a 40 taper machine! (pretty sure)

The 24 tool lists an effective drill depth of 7-3/8, but it's also 8-1/2" to the top of the flute. So I am thinking that you could make it werk. Worst case would be that you git in there and doo some manual grinding to open the top of the flutes for chip evac.

This tool would have a 13-3/4 OAL. Keeping in mind that a cpl inches of that should be above your gauge line. You prolly have 25" of daylight to play with?


Just read last reply:

Feed until the point is thru and about .1 of the shoulder of the spade bit is thru

On longer drill bodies - you want to make sure not to feed the whole insert past the bottom shoulder. It could git cought on the rapid back out and shear off the screws. (Not exactly the end of the werld, but prolly make a mess of your part.)


-------------------------

Think Snow Eh!
Ox
 
Last edited:
Guys Thanks for all the help. Here is were I'm at. I ordered a YG spade drill from US Shop tools but will definitely consider Allied in the future. I decided to stick with cobalt blades. I am also going to set up a coolant ring and get coolant through the drill. Having never used a spade before I was not up to speed on the coolant ring. It should not be hard to do and worth the effort. I am going to have to make up my own because I just decided on it and too late to order something for tomorrow. Can someone direct me to a place that would give me a good look at what I will be making? I have a very basic Idea and getting a look at the real deal may help. I got two blade sizes 1-3/64's and 1-1/32 I know I am going to have to come up with something to bring in my size after spade drilling but I can't resist trying to bring it right to size in one shot I might get lucky stranger things have happened. I am going to do the set up tomorrow after noon and will have all weekend to get it done. I love to work the weekends, no phone calls or Emails just two days of chips. I will fill you guys in on the results Monday or sooner, This should be fun. Well I just remembered I will have to take Sunday afternoon off. I would not want to miss my New England patriots pound the N.Y. Jets into the turf :) Any Foot Ball fans out there ?
 
I know nothing about futball, nor YG, but if the coolant rings are like AMECs, the coolant rings are nothing more than a doughnut that is hollowed out inside. An O-ring goes on each side at the point of contact to the drill body. A snap ring/e-clip - whatever holds the ring in place.


------------

Think Snow Eh!
Ox
 
I know nothing about futball, nor YG, but if the coolant rings are like AMECs, the coolant rings are nothing more than a doughnut that is hollowed out inside. An O-ring goes on each side at the point of contact to the drill body. A snap ring/e-clip - whatever holds the ring in place.

I have often thought about how to go about getting coolant thru a drill body when the machine doesn't have coolant thru capability and this sounds like the simplest way to do it.
 
...AMECs...the coolant rings are nothing more than a doughnut that is hollowed out inside. An O-ring goes on each side at the point of contact to the drill body. A snap ring/e-clip - whatever holds the ring in place.


------------

Think Snow Eh!
Ox

This is what my AMEC ring looks like when it's been dusted off. The O-rings do all the work, but you won't be blasting 1,000 psi through it either. Very simple to whip one out on the lathe, just need to be able to cut the id grooves for the orings. (ps...the AMEC one I have is aluminum)

We regularly drill ~9" deep in 6061 with a 0.906" drill, but with 4-500 psi it's really simple, until the coolant runs a bit low and the spindle stalls!:angry: Fortunately this happened on the Matsuura with a direct drive motor...still ~175ft/lb...on the Toyoda it would have wiped out everything with 450ft/lb. We run this at 1,000 rpm and 10"/min because of the length...it's the extra long drill body.
 
Quick up date. I am roughing with a 1.031 spade and then using a second 1.047 as a reamer to bring it to size. I know its strange but it's working out. I will post more later. Lots of trial and error but fun. Thanks for all the help you guys ROCK !
 
Just a thought here. You didnt specify the quantities so im going to assume (I hate that word) that there is just a few. this being the case why not just 4 jaw it in the lathe then hit it with high speed 1" then use a 4 flute drill (poor mans reamer) to hit the size you need. with the 8" stock and 8" drill and then a holder I dont think it will fit in a 750. If it does you should watch the tool change clearance. I know the lathe wont be as much fun but it would be quick to setup and have good chip evacuation.
 
What is the size/finish of the 1.031 hole?

What is the finish of the 1.047 hole?
I would think it would be a chattery mess! :confused:


------------------

Think Snow Eh!
Ox
 
Quick up date. I am roughing with a 1.031 spade and then using a second 1.047 as a reamer to bring it to size. I know its strange but it's working out. I will post more later. Lots of trial and error but fun. Thanks for all the help you guys ROCK !

and you also said...
hole must be strait through within .005 I am hoping I can get it done with just the spot and spade drill.

I believe the only way to make sure the far end of that hole ends up within the 0.005 location is to bore it... then finish ream to size.
 
If you're making a coolant ring, you can cut the o-ring grooves to the standard width to accept an o-ring plus a backup ring, and then use a quad ring in place of a standard o-ring and a spiral teflon backup ring in place of a standard backup ring. While the spiral teflon ring looks like a rather floppy useless thing prior to installation, once its in place and supported laterally by the quad ring, it becomes stiff in the vertical direction and works as a sort of bearing to keep the fixed and rotating parts running concentric so the quad ring can do its sealing job rather than having to act as both bearing and seal.

The reason for the quad ring is that it supports the spiral teflon ring with two lines of contact rather than the one line of contact you'd have with a standard o-ring. Hydraulic swivel joints use this seal arrangement, and will hold 3000 psi oil without leaking over a few years of use. You can replace them with a standard o-ring and standard backup ring, and if you're lucky they'll seal for a week. Both the quad ring and the spiral teflon backup ring are standard seal parts and not particularly expensive.

Re the part being discussed, I'm with g-coder all the way on the lathe being the easiest place to do the hole.
 
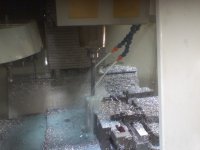
Hey guys It's going good. I thought I had said that the Quan. was 30 parts "sorry" As you can see there is a lot of other work that needs to be done on the ends so I wanted to do it like this instead of a 4 Jaw. I am doing both ends with the one program. Just flipping it over. One end has a C Bore and both ends have a different tap size. There is a .406 hole that goes through 4 places and also goes 6.1 deep on the other side. I am doing this with a jobber and then an extra long 13/32 drill. You can see the other end in the picture too, look close one of the parts is turned around. The finish size on the 1.047 is holding nice at 1.049 1.05 and the surface finish is great with only a slight bit of chatter at the top. ( polishes right out ) I 'm checking it on a CMM and haven't had one out more than .004 Perpendicular. The next Opp. it goes to the CNC lathe. I have a HAAS SL-20. The center gets turned and the part looks like a dog bone when done. OK I'm also getting away without coolant through the drill just pecking every .400 Not kidding. The entire cycle for both ends is just under a 1/2 hour. I could get it done in 20 Min if I wasn't so lazy but it's running good and I have plenty of other stuff to do during the cycle. I'll post the turning Opp later in the week just for fun. Thanks again for all the help.

Ron
 

Attachments

  • 0923001719.jpg
    0923001719.jpg
    43 KB · Views: 1,261
  • 0923001746.jpg
    0923001746.jpg
    79.8 KB · Views: 878
I thought I had said that the Quan. was 30 parts "sorry"

You did - in your second post.


So ... you never said - what was the size and finish of the 1.031 tool? Maybe doo to your .400 peck method it wasn't acceptable to use a once through method?


----------------

Think Snow Eh!
Ox


Back
Top