What's new
What's new

HAAS TM3-P Milling Machine 2014/15 model

ajclay

Aluminum
Joined
May 5, 2011
Location
Baton Rouge, LA
I've been around machines all my life. 60 years old.... I'm the owner, single employee, operator, janitor, book keeper of my own little business.

I have a new Hass TM-3P machine, and I have a problem! Warranty's out, and I want to disable the door switches. I don't give a darn about the safety reasons, but I want the door switches disabled.

Today, I want to put threading oil on a little problem job and I cant get to it while running the program with the doors closed. The coolant just doesn't cut it in this instance.

I can remove the keys off the doors and put them in the door safety switches like so many have done, but the problem with doing that the machine won't let me remove the tool holders manually for setup. It thinks the doors are closed and I shouldn't have access to the tool release button....

There has to be a work-around, some way some how....

Maybe on the I/O board one way or another.

Does anybody have an idea on how to work around the safety switches? If there's a will there's a way!

Thanks for the help.

contact me direct if you don't want people to know that you know...... [email protected] 225-926-9562
 
They must have changed it because I used to have a 2012 VF3 and the only thing about the door was that to start the machine you had to "open" and "close" the door. Now I did have one of the interlocks unbolted and just laying on top of the machine and I would pull the key out as needed.
 
Disable one door, by simply removing the correct bits of hardware. Leave the other door intact. I have a TM-3 2013. Often find myself adding oil during drilling or taping, use a long snout on my oiler, keep your hands out of there. I really like the machine, perfect for the work i do. It has proven to be very accurate.

Andy
 
I just had someone point out about the two key switches on the controller. I don't know what position they are in and that is all tied together with the safety.....

I was told to put both key switches (on controller) in the unlock position and then the door keys could be unbolted, removed, and installed into the door safety switches..

I'm going to follow up on that tomorrow and report back..

thanks for the replies.

aj
 
Leave the left hand door as it came from the factory. Remove the screws from the right hand door latch. Zip Tie the key into the slot on the right hand door so it can't fall out (and get lost in all of the chips and gunk in the auger slot).

Now it is configured such that the left hand door must be shut just as they intended. The right hand door can be just as open as you want. When you need to change tools, just bump the left hand door open just enough to trigger the "open door", and you can use the tool release button. It becomes second nature after a week or so, and you can actually run parts and edge finders.

Some smart bastard ought to be able to re-wire the tool release button such that when triggered, it also tells the controller that the door is open. That way, you can un-bolt both door keys and still use the tool release button... I'm waiting till I'm off warranty.

I'M JUST KIDDING. DON'T DO ANY OF THE ABOVE. YOU WILL GET HURT, MAIMED OR KILLED. DOING THE ABOVE WILL MAKE THIS MACHINE AS DANGEROUS AS A BRIDGEPORT OR A 2 YEAR OLD VMC. AS A MATTER OF FACT, SELL OFF ALL OF YOUR MACHINE TOOLS THAT CAN HURT YOU AND BUY A HOTDOG CART. THEY ARE SAFER AND MORE PROFITABLE.
 
We machine almost every material out there and nver seem to want to add cutting oil by hand. Yes we use to alot on the old machines. What material are you having problem with?
 
We machine almost every material out there and nver seem to want to add cutting oil by hand. Yes we use to alot on the old machines. What material are you having problem with?

I looking for a better finish during threading S-7 material. The problem is that I'm using a spiral fluted tap that's really not the right design for the material. The darn tap needs to be an H11 oversize because of material shrinkage after heat treating. OSG only makes a few taps with that oversize.

So I wanted to try some Moly-Dee threading oil just to see if it would be any better. The door problem just complicates the experimentation..... Along with the 100 degree heat we're having down south too......

The doors are just an aggravation in general. I have a lot of older style manual equipment that is just as dangerous or more so than the Haas Mill. I'd like to have a choice on whether to run the doors open or closed at any given time when no cutting fluid is being used..... Just me I guess, most of the users are fine with the set up, but I Want It My Way....

I disabled one door like instructed above and that seems to be a good work around.

Thanks guys for the suggestions and time...

Aj
 
Read this here before... program the tap to dip into a cup of moly-dee before each hole. Could even have it dwell over the part a moment to drip it in. Or, whatever.
 
Wow, now that's an idea... But I may not survive the code work. I'm really at the limit of my ability on making this job happen anyway. Having to move spindle up and work away before and after tool change was a challenge for me. If not it crash city!! It's getting easier this time around, but it would take me tool long to figure the programing move to dip the tap....

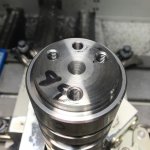
Photos are of part made of 8620 material. No problems with this material tapping.... Taps like butter with coolant...

I'm self taught so sometime the simple things aren't so simple...

How would you go about doing that anyway? All hand code I'm sure. You have an example of a job you did that on I could look at the code?

It would look cool though!

I'll keep that in my memory banks...

Thanks, Aj
 

Attachments

  • 002.jpg
    002.jpg
    93.8 KB · Views: 509
  • 003.JPG
    003.JPG
    88.9 KB · Views: 328
  • 001.jpg
    001.jpg
    89.6 KB · Views: 534
Some smart bastard ought to be able to re-wire the tool release button such that when triggered, it also tells the controller that the door is open. That way, you can un-bolt both door keys and still use the tool release button... I'm waiting till I'm off warranty.

I'M JUST KIDDING. DON'T DO ANY OF THE ABOVE. YOU WILL GET HURT, MAIMED OR KILLED. DOING THE ABOVE WILL MAKE THIS MACHINE AS DANGEROUS AS A BRIDGEPORT OR A 2 YEAR OLD VMC. AS A MATTER OF FACT, SELL OFF ALL OF YOUR MACHINE TOOLS THAT CAN HURT YOU AND BUY A HOTDOG CART. THEY ARE SAFER AND MORE PROFITABLE.

I'm with you all the way.. I was thinking more along the line of wiring and not software.... Maybe someone could figure out how to do a modification at the I/O board or breakout board.... where the door switches hook up. Hell I would be happy with a manual switch on bottom of controller. Just throw the switch change the tooling and throw it back... Couldn't get any easier than that....

If you figure something out....Let Me Know.... [email protected]

Does the door stay locked if you use an M0 stop?
 
I have two keys, one with a wrench symbol is locked the other is unlocked. Cant tell you why as it has been that way since day one 2012.
Both of my doors are "fixed" and I can change tools. But that is a 2012, could be different now.
If you need a little coding help just yell, just takes a min.

Also the idea of programing dipping in a container of tap fluid is great, cant believe I haven't thought of that. :toetap:
Speaking of which I have a 8/32 that is down in a pocket..so the tap hangs waaaay out. So I just just tap 3-4 threads and finish it by hand on the bench.
I use QualiChem for the machines and they comped me a bottle of "quicktap" I havent done side by side tests with anything else but..damn that decreased the pressure on the tap handle by a lot, very impressed.:codger:
Gary
 
Sweet mother of god..just looked at your pictures :willy_nilly: That's one of those fixtures that you take off your pants before you run it the first time..that way its a easier cleanup after. :)
Programing a dip cup with that fixture would be a little different, but I would use two different work offsets and/or two different H values. Again easy peasy. Just yell if you need help
Gary

Thanks for offering to help. I only have a couple of people that I can go to for help and suggestions locally.

I'm a mastercam user and that's a challenge to say the least, but I've made good progress over the past year. I posted the attached file in MC and then edited it by hand. I didn't have any idea on how to make the machine move around the fixture but a buddy suggested using G53 moves. That seemed to be an easy way once I realized that used machine coordinates and not offset coordinates..

I've ran similar to the one attached, I'm waiting on a new tap before I get back on the S-7 Material....

Is that a legit way of accomplishing the task, or am I out in left field?

Later, AJ
 

Attachments

  • LS-1 FRONT S-7.txt
    1.6 KB · Views: 139
Sweet mother of god..just looked at your pictures :willy_nilly: That's one of those fixtures that you take off your pants before you run it the first time..that way its a easier cleanup after. :)
Gary

Gary,
Every time today I thought about your comment on my fixture I had to giggle.... Thanks for the laughs..

Aj


Back
Top