What's new
What's new

What's the best surface finish I can expect milling a 1" diameter bore in 6061?

jasonrodman

Aluminum
Joined
Apr 17, 2013
Location
Seattle
I'm trying to spec a surface finish on a 1" bore that's 1.250" deep. 6061 material. Would like to limit the operation to boring with an end mill and not having to go to a boring head, reamer, etc.

What's the best finish I could expect to get? Most charts say a 32 at the best end of the "average application and 16 as a "less frequent application".

Thoughts?

Thanks!
Jason
 
"IT DEPENDS"
machine age?
quantity vs quality?
characteristics of lay?
$$$$

I've seen a 3 finish off an okuma u3000 in inconel. (not endmilled)
 
You are going about this wrong. You spec out your surface finish based on what your purpose it. Is it a bearing journal or just a clearance hole? Spec the hole for what it needs to function, NOT on what is commonly obtainable.

Reminds me of a guy that told me a part had to be flat but gave me no tolerance. I asked him, how many light bands of flatness did he want and was he prepared to pay for it?
 
Thanks for the input. It's not a bearing journal or a clearance hole, somewhere in-between. The design is fluid enough (not literally) that we'll adjust the mating parts to work with a finish that's most economically attainable. We don't want to increase the price of the part by adding specialty or secondary operations to this particular feature. This is why I'm asking what's possible with an end mill. I'll test this in our own shop but thought I'd start by asking this group. Once we know the best that can be expected we'll adjust the mating parts to work within these limits.

BTW, if you're not considering what's commonly attainable in manufacturing methods then you're going to expense your way out of a lot of designs and projects. It's called DFM - ever heard of it?
 
You don't want to use methods to produce a better hole like reaming, boring etc and have looked up your answer already, what else is there left for us to answer?

A 32 is about as far as I'd like to go before it started getting expensive fast, never mind other factors like roundness and taper.
 
Standard finish has always been 125 around here. If that works, spec it out. If not then 63 would be easily obtainable by milling aluminum. Don't require tighter than that or you are bumping the cost way up.
 
Aluminum is a soft metal and tends to show small tool marks so finishing with a end mill is ok for speed not so for finish also are you plunging with it or circular interpretation? If finish and time is a factor I would hog the hole out with a insert drill then use a burnisher could easily pull 16-8 RMS


Sent from my iPhone using Tapatalk
 
Reminds me of a guy that told me a part had to be flat but gave me no tolerance. I asked him, how many light bands of flatness did he want and was he prepared to pay for it?

As something of a n00b can you explain "light bands of flatness" to me? I get that without a spec you can't know if he wants it to be within half an inch or half a millionth but never heard of light bands as a measuring standard before
 
As something of a n00b can you explain "light bands of flatness" to me? I get that without a spec you can't know if he wants it to be within half an inch or half a millionth but never heard of light bands as a measuring standard before

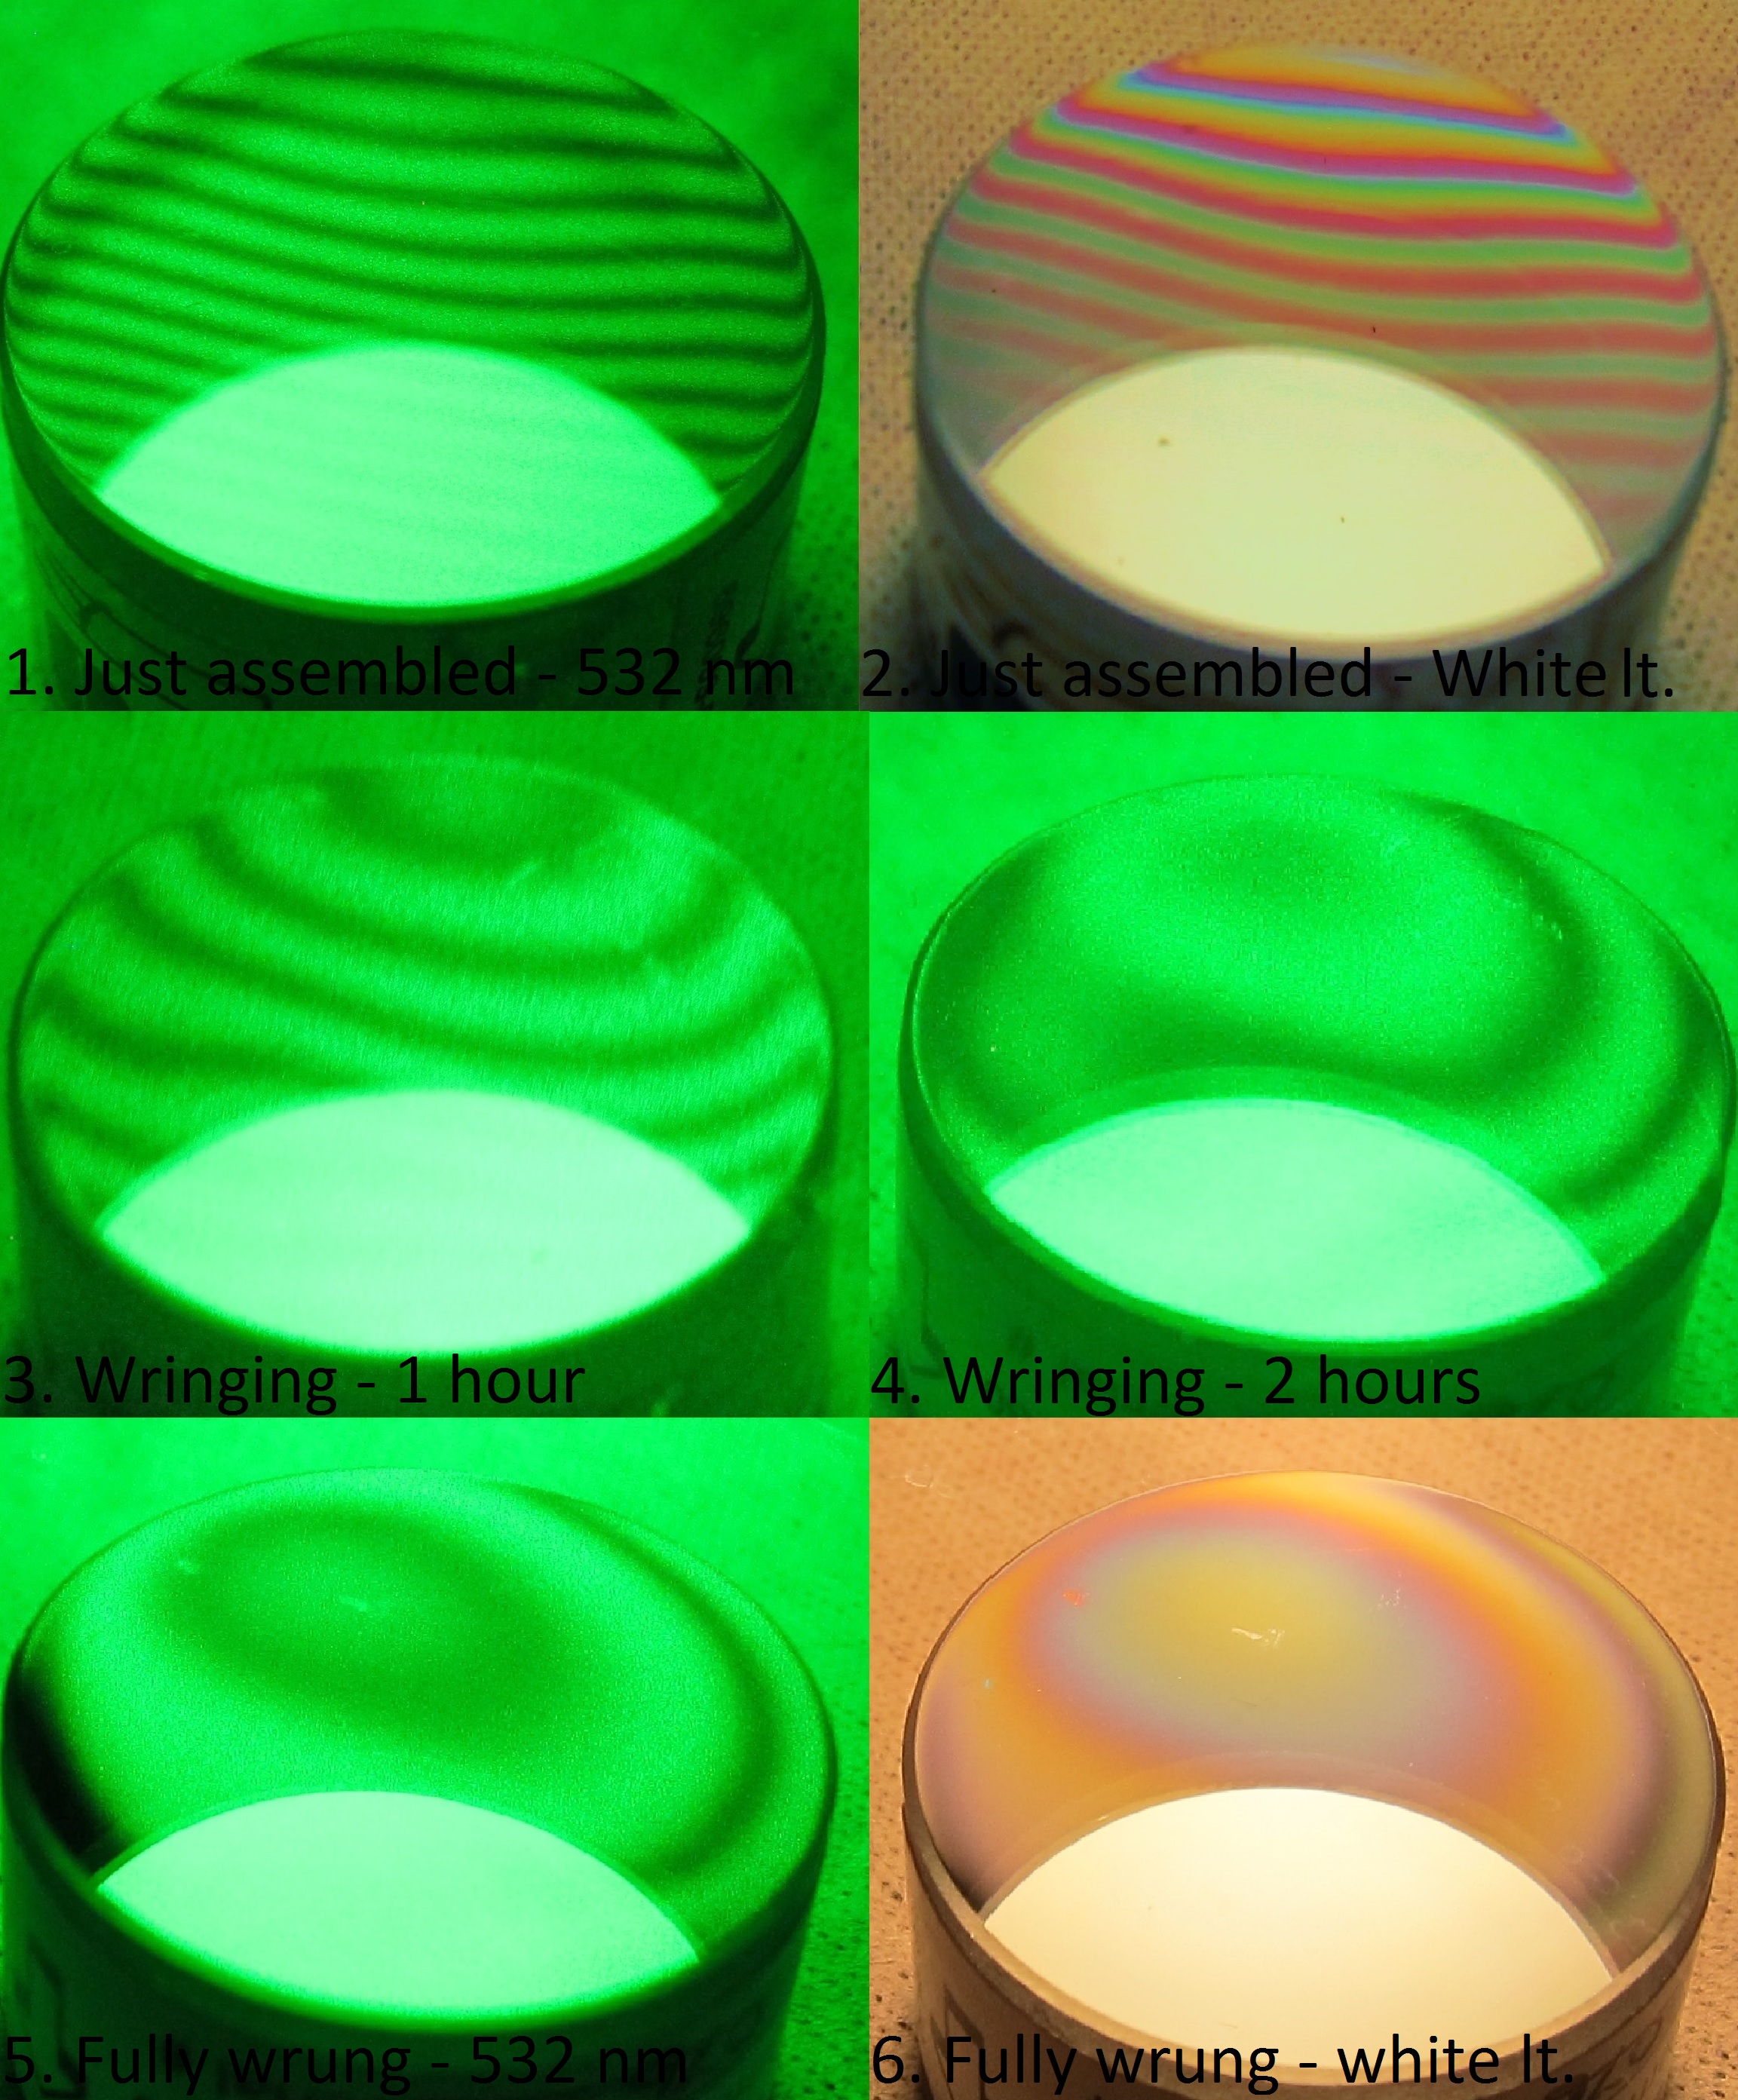
I do believe he's talking about using an optical flat. Which would indicate very, very tight flatness tolerance.

Optical_flat_test_with_green_and_white_light.jpg
 
I just did some 6061 parts that I checked with our Mahr profilometer. They averaged 18-22ra. That was endmilling, not sidemilling, 1/2" 3 flute carbide TiCN coated, 60odd ipm. If you are using the side of tool probably want to do a couple depths to minimize lines around the profile. Should do 32 with no problem and no extra cost, IF the machine/setup is rigid with good sharp tools.
 
I'm trying to spec a surface finish on a 1" bore that's 1.250" deep. 6061 material. Would like to limit the operation to boring with an end mill and not having to go to a boring head, reamer, etc.

What's the best finish I could expect to get? Most charts say a 32 at the best end of the "average application and 16 as a "less frequent application".

Thoughts?

Thanks!
Jason

1) End mills mill. Boring bars bore. End mills don't bore. They can plunge or interpolate a hole.

2) As a designer... the requirements are established by the nature of the design. The manufacturing process is decided upon to meet the design requirements. Only if your design requirements exceed budgetary manufacturing processes should you change the design to reduce requirements. If you just want "as good as milling will get me" then you don't know enough about your design, and you'll probably never be happy enough with the parts the machinist gives you off the mill.

3) I've seen some mirror finish shit come off side milled faces, and not far from it from flat surfaces end milled. Bores will rely upon several factors including elimination of backlash, how intelligently the spring pass is programmed, tool quality, depth-to-diameter ratio (because other things get worse when it does) but... 8Ra micro-inch isn't out of the question. 32Ra all day long.

4) If you don't know enough about this question to know the answer... do you know enough to know how to measure/validate the results?
 
In truth light bands are used to measure flatness, like optical flats, and distance, like the meter.
Use Your google-fu.

(Edit) Previous poster beat me to it.
 
BTW, if you're not considering what's commonly attainable in manufacturing methods then you're going to expense your way out of a lot of designs and projects. It's called DFM - ever heard of it?

You're... not wrong but I'm not convinced you're exactly correct, either.

Also, I'm curious what function the bore would serve if finish is more important than form. It can't be a friction bearing surface or you wouldn't be using aluminum, and you would (hopefully) be more worried about cylindricity or total runout.
 
Under ten microinch finish is attainable on 5D-6D bores in that size range without abrasive post process. In a one inch bore, that shallow? I'd be confident I could hit a properly measured value of six or less in 6061, with optimized insert and programming maybe even half that. Never needed to get a finish that fine, ever.

Typically, nobody bothers speccing a finish unless it's gotta be better than 32, or 16. depending on the geometry, 16 could incur additional expense, or not really at all, on a turned outside surface. depends on the shop and their confidence in fine finishes.

back to the original inquiry: if the size tolerance isn't crazy, just use a flexhone. they will easily upgrade surface finish if used correctly. there's also the "wookie dink" method, with some autosol or a selected cut/colour compound.
 
Your Endmill will likely cut over size and leave a shoddy finish not to mention Endmills are not flat on the bottom so there will be a small dimple at the bottom of your bore. Common sense tells me that unless this is a who gives a crap bore you should either interpolate with a smaller Endmill or ream it to size anything else is really just laziness. If it's a cost factor considering it should take 10seconds for a 3/4 Endmill to walk that and maybe 2-3 seconds for a tool change on newer equipment you should do the extra leg work. A nice product is worth more where as an ugly haphazard one isn't worth the material it's made of. Just my .02
 
To add to the convo, just recently had an "engineer" concerned about us hitting a 63 finish on an aluminum lathe part.

Not to be so snarky on the engineer part, but I am skeptical if he actually is and engineer, or if it is just his job title. Where i work about half the workforce has an engineer title, sanitary engineer, quality engineer, process engineer, etc etc :rolleyes5:
 
You don't want to use methods to produce a better hole like reaming, boring etc and have looked up your answer already, what else is there left for us to answer?

A 32 is about as far as I'd like to go before it started getting expensive fast, never mind other factors like roundness and taper.

My "looked up answer" came off of charts from Googling the question - my purpose here is to back that up. Thanks for the input.


Back
Top