If your machine has a lube pump then probably all is fine, that ensures that oil rather than grease goes to the slideways.
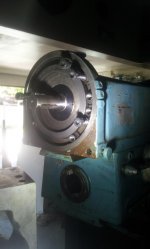
The backing/bearing plates are steel, and bear against cast-iron ways. The curious thing is that almost all of the wear takes place in the harder (steel) plates, because the cast-iron part acts like a lap to wear away the harder material. So this is not conclusive but very indicative
Cheers,
Bruce
Pretty sure that FP3's use Turcite as a wear surface on the back "keeper" plates.....
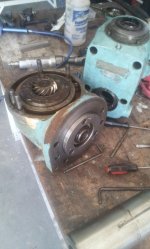
Also FP3's AFAIK all had "One Shot" lube systems.....Pretty sure all Deckel machines originally
fitted with the "one Shot" setups have 220 way oil specified. Earlier versions with oil nipples use the ISO68 way oil....
FYI...Replacement for the "Vactra #4 (ISO 220) is now Mobil Vacuoline 1419....Vactra i not the same product as it used to be...
Dave111:
Can't nail down your production date , but i will offer that that i believe your machine is fairly early in the FP3 production....
Looks different from my FP3 (Ser# 3779) which i believe was built in the mid to late 70's...
Your handwheels appear to be a transition handle style between the early "put the handle peg in the hole", and the pull out to engage later style handles.
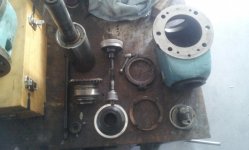
Perhaps they were changed along the way, or something Deckel used for a short time. Your "One Shot" pump is different...End castings on the "X" slide look different to me as well, and
the electrical controls only have two buttons ....(no e-stop)
Also, your machine has 3 "T" slots on the vertical table mount...Pretty sure later they went to a 5 slot configuration with tables to match.
Cheers Ross


")


