What's new
What's new

draw bars and mt4 tooling for alexander toolmaker

bob531

Aluminum
Joined
May 9, 2015
Location
U.K Cumbria
Hi ,
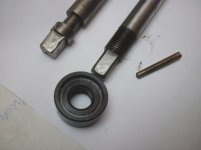
Bit of a silly question but im confused by my drawbars that came with my alexander. Its the mt4 spindle but i have two draw bars ,one has a collar that threads on and had a taper pin taped to it (this one looks like a proper one), The second one i have is totally different and just has a square head top and no collar .It is also a touch longer and has obviously been joined /welded or repaired at some time..
I havent managed to use the mill much yet but i am getting more time at the moment .

Also are the drawbars supposed to eject mt4 tooling with the s20 thread or what is the correct way to use them????

I also have some mt4 tooling that has a longer taper than the original alexander stuff with various threaded sizes like m16 or 5/8" ??? Will long tapered tooling have to be cut down somehow in order to use it in the vertical head?
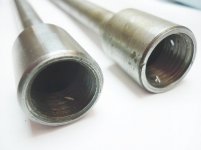
Photo attached of the two drawbars i got with the mill.
P1280906.jpg
 
Draw bar with the red tape looks original, probably an S20x2 thread. The S = Sägegewinde which means saw-tooth profile. In English this is called a buttress thread. 20 =20mm diameter. The x2 means 2mm thread pitch.

The other drawbar might have been made up for tooling with a different thread.

The "eject" feature works because the OD of the threaded cylindrical section which goes onto the tooling is large enough to "block" in the spindle. So when you unthread the drawbar, this cylinder pushes out the tooling from the taper. That's important for MT4, which can easily get stuck in the spindle. The collar at the top is needed to retain the tooling. It looks like it's missing from your non-red-tape drawbar.

Bruce
 
Bruce, thanks for your reply. I think i understand most of your explanation but what i dont quite get is ,the one you say is ok /original has a collar that threads on but what is the taper pin for ,there is no hole for it ???
The other has no threads on the top and the thinner bit with the square head which looks like a thin bar threaded in ,is actually brazed or something in. The botton end is internal s20 x 2 thread like the first.
P1350154.jpg
P1350148.jpg
P1350156.jpg
 
Last edited:
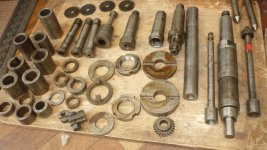
Further to the previous query , i have since bought some more mt4 tooling and the shanks are all longer and have various threads in the end. Do these have to be cut down and all adapted to use in the alexander spindle? The 3 on the right came with my machine
P1350159.jpg
P1350164.jpg
 
All the tooling will work as is without modification but you'll be switching draw bars to suit what is used. I have been through this on many pieces of Non Deckel MT#4 tooling by single pointing a proper size Butress thread on them in my lathe. One thing I really liked was threading the tang on drill chuck shanks, the only other way to use them without lots of overhang was in collets and a straight shank. If you search you should be able to see one of my examples here somewhere.
I didn't find the idea of switching draw bars appealing and wanted all tooling standardized, My situation is different than others as I have more than one machine.
Dan
 
Thanks Dan and John.
Dan do you mean threading the actual outside of the shank with s20 x 2 thread, if so how easy is this as i expect the stuff to be hard . I have made a change gear for my imperial south bend to enable me to thread these but havent really tried it yet as was unsure of the best tool shape and how is best to cut this type of thread . But i know the pitch is almost dead on using the changegear i made.
Ive only really done acme threading with an appropriate hss threading tool and feeding in with the top slide at an angle.
Also how do you hold something like this in the lathe ,i use a south bend 9a.
This was a test cut using the change gear i made around 12 months back ,havent a clue what tool i used but i was just testing if the pitch was good enough over a short length.
184191d1479050042-metric-2mm-pitch-thread-p1300262.jpg
184194d1479054482-metric-2mm-pitch-thread-img221.jpg
 
Hi Bob, I think you are off to a good start. Run a few more practice threads and work out your dial reading for the final cuts. You may need to play around more with the tool geometry, what lube you are using etc. to improve the surface finish. There are a few ways of ending the thread up near the shoulder - again, decide how to approach that and run a few practices.

Another option is to cut off / then drill and tap the back end of the tool holder (most any thread you feel like) and either thread in, or bolt on an adapter. One example is the "Deckeldapter".

The shank should not be too crazy hard.

Regards, David
 
Thanks David , as i said that was just to get the pitch on the imperial lathe right, the piece of steel was some horrible stuff to cut that was part of a chinese machine that was scrapped.
I will just use neat cutting oil (the sulphur smelling stuff when i do it properly as it worked fine with the acme threads ive done. Is it right the tool should be 50 degrees,and to a sharp point ??
 
What i dont quite get is ,the one you say is ok /original has a collar that threads on but what is the taper pin for ,there is no hole for it ???

On my drawbar, the collar threads on to the top of the drawbar, and then is retained by the taper pin. Are your drawbar and collar drilled and reamed for the taper pin? If not, you may need to mount the drawbar, get the collar in the correct location, and then drill and ream the cross hole yourself. Beware that the standard metric taper pin has a 1:50 taper, but the standard imperial one is 1:48. So make sure your taper reamer matches your pin.
 
On my drawbar, the collar threads on to the top of the drawbar, and then is retained by the taper pin. Are your drawbar and collar drilled and reamed for the taper pin? If not, you may need to mount the drawbar, get the collar in the correct location, and then drill and ream the cross hole yourself. Beware that the standard metric taper pin has a 1:50 taper, but the standard imperial one is 1:48. So make sure your taper reamer matches your pin.

Thanks so the taper pin is supposed to go through the collar and the threaded part ? What is the correct location and is the taper pin supposed to be a slack fit so it can be removed easily or is it supposed to be permanently in place.
Sorry for the questions which may seem a bit dumb to some on here but these are things that are not mentioned in the Alexander manual and the cheap mill i used before had a straight threaded drawbar that you had to knock out with a mallet.:)
 
What is the correct location

These two photos from a spare drawbar for my FP2 should give the idea:

attachment.php


attachment.php


The taper pin goes through the collar, then through the drawbar, then through the collar on the other side. In the photo just above you can see both holes in the collar.

Is the taper pin supposed to be a slack fit so it can be removed easily or is it supposed to be permanently in place.

On mine it is tapped in hard enough to stay there but not so hard that it is difficult to remove. But I do not change my drawbar, so this may not be the right thing if you are planning to change the drawbar frequently.

Cheers,
Bruce
 
To properly fit the collar on your draw bar, here is a tip:
Fit the draw bar and install the threaded collar...tighten the collar till it is just free to rotate...No friction from being too tight and not rattling loose....

That is where you want it to be fixed....carefully measure the distance from the top of the draw bar to the top of the collar..(depth mic?)

Take the collar off and remove the draw bar....Set bar up on the mill (can use horiz. spindle) holding via vise, with the threaded section extending from one side, locate the true center of the bar diameter(Z) ...fit the collar and screw on to the exact depth measured on your mock up...

Without changing the "Z" height (bar center) move in the "X" to locate the pin on the thickness of the collar.(think Deckel draw bars have the pin positioned toward the top...see photo above)...Drill through (may need to fit a lock nut on the bar to secure the collar)
This way you will get a hole through that is in the middle of the draw bar....and fits as original....

Ream the through hole to the appropriate taper and fit a pin...
Cheers Ross
 
Bruce ,thanks for the explanation.
Ross ,thanks for the tip , i`ll get around to doing that once i figure what taper the pin i have is and buy/borrow a reamer.


Back
Top