What's new
What's new

FP4 Surgery

sneebot

Stainless
Joined
May 14, 2001
Location
Massachusetts
A bought this FP4 some years ago and wanted to install a DRO on it. Looking at most of the FP4 DRO retrofit images on the web they generally look like a mess with cables all over the place. I wanted a cleaner installation more like the FP3 DRO retrofit I did here: http://www.practicalmachinist.com/vb/deckel-maho-aciera-abene-mills/fp3-dro-install-167732/
(Although it looks like the images may have disappeared)


I machined a similar arm for the DRO box (a used Positip 880). The FP3 had a factory installed mounting point for the DRO arm whereas the FP4 did not. Removing the operators side panel (a hefty cast iron piece) I milled this out on the CNC to allow for mounting of the ‘knuckle’ joint for the DRO arm. This knuckle allowed me to route all the scale cables into the machine itself to produce a much cleaner install.

FP4 Arm 1.jpgFP4 Arm 2.jpgFP4 Arm 3.jpg
 
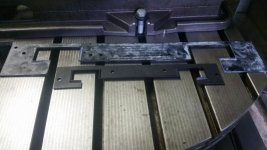
The biggest challenge of the project was mounting the x-axis scale. There are not a lot of options to mount this scale without affecting other machine functionality. The obvious location, below the x-axis slide, gets in the way of the table stop dogs and the chip pan. I wanted to mount the scale inside the table like the FP3 install but again unlike the FP3 there were no provisions for this and there was not enough clearance. To make this work I needed to mill a slot into the back of the x-axis slide. This posed a few problems- none of my other machines had the travel or the weight capacity to handle the x-axis slide casting. So I decided to use the FP4’s Y axis to mill the x-axis slide. Travel of the y-axis slide is about 16” plus another 8.5” of upper ram travel. The scale itself is ~34” long so I needed to mill part of the slot and then flip the casting 180 degrees and mill the rest of the slot. All in all it worked out pretty well.


FP4 X-mill 1.jpgFP4 X-mill 2.jpgFP4 X-mill 3.jpgFP4 X-mill 4.jpg
 
Nice job! That's the machine I saw about a year ago when I came by your place, right? Glad to see you are getting it into operation again.
 
This image shows a FP4 Z-axis way wipe versus the same part for a FP2/FP3. It's not that the machine is particularly large, just that it is extra stout.


Wipes.jpg
 
Absolutely impeccable work. Love the attention to detail in the mounting arm, console, wiring, scale mount, the whole thing. Looks like the factory did it, perhaps better.
 
Matt:
Nice work...
Any worries about changing the shape of the "X" slide by milling in the clearance for the scale?
Just wondering if you might have spotted the ways with a qualified straight edge or surface plate before and after making the trench.
I like your approach. Very creative setup using the "Y".
Cheers Ross
 
Ross,
I did worry about the potential for geometry change- not so much in the bottom or the top of the slide (where the bearing surfaces are) but in the relationship between the two. I did find an image some time ago of an FP4 x-axis slide casting with the back milled out for a scale. I assume this was a factory modification to the design of later machines. However they probably did final geometry finishing after this milling op. Either way it gave me a bit more confidence to go in and mill out a chunk of the back. It's a substantial casting- I'm guessing 800#s or so.

But to answer you question directly, no I did not do a before and after geometry check. I considered it but figured I'd address it if it became an issue (which of course is a bit harder to tell without an initial measurement). I did not spot it but did compare the t-slot surface to a straight edge (vertically) to see if there was a gross issue. I saw zero problems on reassembly and everything moves smoothly.

I did check rock of the saddle with the table on before starting but this was more to prevent movement while I did set-up and so I could use the top of the saddle to rest one end of the x-slide on. Moving the saddle up and down I could bring the slide into tram for milling. I adjusted the z-axis gib to remove some play, I have not yet gone back and re-checked after reassembly.

As a fun calculation-- I think I removed about 7-8#.
 
Can´t believe I missed this whole thread!
Nice work and as usual, your attention to detail and follow through is nothing but admirable.
Wish you many happy working hours with that fine machine.


Back
Top