What's new
What's new

EDM'ing the key ways

asraraleem

Plastic
Joined
Jul 8, 2012
Location
GERMANTOWN,WI,USA
We just got our first new Makino EDM.We EDM a lot of key ways and some time on some smaller key ways(.188-.4) wide key ways, the slug seems to push against the wire causing it to break. I tried to play with my tension but it does nothing,only thing seems to be working is EDM'ing as far as I can,the break wire and come from other side. Is there anything I can do to minimize this problem?
 
asraraleem,

Congrats with your new Makino Wire EDM! I am the EDM Applications Manager at Makino, and I would like to start by asking if you have called into our Technical Support line at 888-MAKINO4 (625-4664)? This will be the quickest and easiest way for you to get in touch with our Applications Department, and we would be happy to assist you with your current issue.

To best answer your question, I would like to understand what material and thickness is being cut, what Machining Method or E-Code settings you are using (such as High Speed or Precision), and where exactly your wire breaks are occurring (how much material is left before dropping the slug). Also, how many hours do you have on your current position of the Energizer Plates, as these should be indexed around 70~80 machining hours. By what means are you holding on to your slug...are you just letting it drop, or are you using some magnets?

As a guess, it sounds like you might have too much flush pressure during your part/slug cutoff (say the last 0.040" of cut length). The flushing might be moving your part around, which can cause wire breaks, but you might also be facing some material stress relieving movement. If you look on the right-side of the OPERATION page, what is the actual flush pressure readings of the Upper and Lower flush pumps, and do you see an orange tab that reads "On", which indicates an issue with flushing? Rather than mess with several E-Code element parameters (such as wire tension, machining power, and flush pressure), the Makino control does provide some convenient functions to help you process your work that are located on the OPERATION screen:

EZ-Cut: This is a slider bar function that allows you to easily change the cutting condition characteristics by (+) or (-) 25% by 5% increments. Each click represents a 5% change to the active Rough Cut E-Code, and the colors on the slider bar change to represent the edits that have been made. More aggressive settings are HOT colors (Yellow, Orange, Red), whereas as SAFE settings are cool colors (Shades of Blue). In your case, you might want to try lowering the EZ-Cut by 10% or 15% in your problem area. This function can also be G-Code programmed so that it can be incorporated into a production program.

CutOff: This is a function that is located on the same tab as the EZ-Cut, and is designed to automatically change the flush and power settings when dropping slugs. The biggest advantage to this function is that is drops the flush levels to a point that will eliminate slug movement, and the machine should just "sing" through the rest of the cutoff/tab section.

I hope that you will find some of this helpful, but if you are still experiencing an issue, please call our Technical Support. Good luck!


-Brian
 
+1. Brian's giving some very sound advice. I'd tend to think that it's the flushing pressure giving you problems since you didn't mention this about larger keyways or slugs. Larger slugs, guessing because of their mass, don't seem to flutter as much when there is only a small tab left holding them on. A small magnet overlapping the entry of the cut before cutoff, or a small piece of shim stock in the entry of the kerf, will help if you're still having problems after dropping the flush pressure. Anything you can do to minimize movement of the slug right before the cutoff will help.
 
I do a bit of keyways too and usually have the same trouble you experience when using Esprit and letting it pocket from the inside out. I see that you are not using Esprit, just saying.

The only way I've been able to have reasonable success on production parts when doing keyways is to manual EDM withing Esprit, where you place points where you want them then pocket from the outside in. No slugs, no contact alarms or broken wire. Pain in the butt to program though.

lot of stuff That we do ,I write the program at the machine,but if there is something complex we use SurfCAM. I still need to figure out how to use it 100%.
 
asraraleem,

Congrats with your new Makino Wire EDM! I am the EDM Applications Manager at Makino, and I would like to start by asking if you have called into our Technical Support line at 888-MAKINO4 (625-4664)? This will be the quickest and easiest way for you to get in touch with our Applications Department, and we would be happy to assist you with your current issue.

To best answer your question, I would like to understand what material and thickness is being cut, what Machining Method or E-Code settings you are using (such as High Speed or Precision), and where exactly your wire breaks are occurring (how much material is left before dropping the slug). Also, how many hours do you have on your current position of the Energizer Plates, as these should be indexed around 70~80 machining hours. By what means are you holding on to your slug...are you just letting it drop, or are you using some magnets?

As a guess, it sounds like you might have too much flush pressure during your part/slug cutoff (say the last 0.040" of cut length). The flushing might be moving your part around, which can cause wire breaks, but you might also be facing some material stress relieving movement. If you look on the right-side of the OPERATION page, what is the actual flush pressure readings of the Upper and Lower flush pumps, and do you see an orange tab that reads "On", which indicates an issue with flushing? Rather than mess with several E-Code element parameters (such as wire tension, machining power, and flush pressure), the Makino control does provide some convenient functions to help you process your work that are located on the OPERATION screen:

EZ-Cut: This is a slider bar function that allows you to easily change the cutting condition characteristics by (+) or (-) 25% by 5% increments. Each click represents a 5% change to the active Rough Cut E-Code, and the colors on the slider bar change to represent the edits that have been made. More aggressive settings are HOT colors (Yellow, Orange, Red), whereas as SAFE settings are cool colors (Shades of Blue). In your case, you might want to try lowering the EZ-Cut by 10% or 15% in your problem area. This function can also be G-Code programmed so that it can be incorporated into a production program.

CutOff: This is a function that is located on the same tab as the EZ-Cut, and is designed to automatically change the flush and power settings when dropping slugs. The biggest advantage to this function is that is drops the flush levels to a point that will eliminate slug movement, and the machine should just "sing" through the rest of the cutoff/tab section.

I hope that you will find some of this helpful, but if you are still experiencing an issue, please call our Technical Support. Good luck!


-Brian
very nice to know that you work with Makino.Its been about 4 months since we got the machine.Its an awesome machine. I actually have quite a few questions but I will only ask two questions (please bare with me). how do I rotate the program. for example I have two key ways across from each other and if I write the program for the one and wanna know how to rotate it 180 degrees if the X0 and Y0 is in the center.Second question, Can I mirror the program?.
 
very nice to know that you work with Makino.Its been about 4 months since we got the machine.Its an awesome machine. I actually have quite a few questions but I will only ask two questions (please bare with me). how do I rotate the program. for example I have two key ways across from each other and if I write the program for the one and wanna know how to rotate it 180 degrees if the X0 and Y0 is in the center.Second question, Can I mirror the program?.

A 'K' value can be entered into the g code to rotate the program's orientation. This is read in decimal degrees. For example, if you had a keyway oriented at 3:00 and needed the program to run at 12:00 (90* difference), you would enter a 'K90.;' (with decimal) line into the g code. The line needs to be added before any x,y movements in the program. All positive values start at 3:00 and progress CCW through 360*. Negative values can be entered to rotate the program CW, if you prefer.

As far as mirroring, there should be a line close to the beginning of the g code labeled "G62 X0 Y0;". This is the program's mirroring function. Changing the 0 value to a 1 will turn on mirroring for that axis.

If there is a graphics screen (program check) on Makinos, you can edit the code to reflect the changes you want, then run the program through the graphics to see if it is doing what you're wanting. Also, Makino may have "softkeys" to allow both of these functions to be activated without going into the g code itself, but I'm not familiar with their controller setup.
 
asraraleen,

I have sent you a PM. Please give me a call so that we can talk directly, as I would like to discuss and cover all the questions you have!

-Brian
 
A 'K' value can be entered into the g code to rotate the program's orientation. This is read in decimal degrees. For example, if you had a keyway oriented at 3:00 and needed the program to run at 12:00 (90* difference), you would enter a 'K90.;' (with decimal) line into the g code. The line needs to be added before any x,y movements in the program. All positive values start at 3:00 and progress CCW through 360*. Negative values can be entered to rotate the program CW, if you prefer.

As far as mirroring, there should be a line close to the beginning of the g code labeled "G62 X0 Y0;". This is the program's mirroring function. Changing the 0 value to a 1 will turn on mirroring for that axis.


If there is a graphics screen (program check) on Makinos, you can edit the code to reflect the changes you want, then run the program through the graphics to see if it is doing what you're wanting. Also, Makino may have "softkeys" to allow both of these functions to be activated without going into the g code itself, but I'm not familiar with their controller setup.


you would enter a 'K90.;' (with decimal) line into the g code....what G code are we talking about here?,and also I think you are confusing makino with some thing else because ( there should be a line close to the beginning of the g code labeled "G62 X0 Y0;". This is the program's mirroring function. Changing the 0 value to a 1 will turn on mirroring for that axis) that I have not seen that on the control. You are right about the graphics screen .
 
you would enter a 'K90.;' (with decimal) line into the g code....what G code are we talking about here?,and also I think you are confusing makino with some thing else because ( there should be a line close to the beginning of the g code labeled "G62 X0 Y0;". This is the program's mirroring function. Changing the 0 value to a 1 will turn on mirroring for that axis) that I have not seen that on the control. You are right about the graphics screen .

Hello asraraleem,

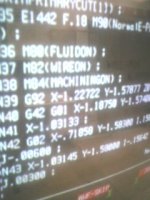
Yes, you are correct. I program & operate Mitsubishi edm's, not Makinos. I do want to ask though, do you have a screen on your controller that looks like the picture that I've attached? This is the program page from one of the Mitsubishi's that I operate. The G & M code shown is what controls all of the machine's functions and also gives it X,Y coordinates to machine and rapid to. The two codes that I listed (G62 and K values) are both just part of this type of code. I also thought that those two that I listed were fairly universal commands, at least throughout wire edm. If I'm incorrect about the coding in reference to Makinos, someone please correct me.
 

Attachments

  • 082302_023500.jpg
    082302_023500.jpg
    22.3 KB · Views: 260
Hello Fellow Sparkies,

For everyone's knowledge, there are subtle differences between each EDM OEM's G & M code commands. The EDM world has not standardized its coding like the Milling world has, but most (not all) are standard Fanuc G&M code based. For example, Wire Thread commands in a Makino are done with M06, other machines use an M60 or slight variation. The point being, most commands can commonly be G or M code controlled in a similar format, but the actual numbers and controlling variables (like the K value) will be different. Below is a typical section of program from the Makino:

G90 (Absolute Positioning)
G500G54 (Active Work Coordinate System)
G0 X0. Y0. M06 (Position to program start point and thread the wire)
E1D1 (Set your E-Code and Offset value...this example uses an indirect register library that the operator selects on the machine)
M17 (All encompassing M-Code that Fills the Tank, Turns on the Flush Pumps, Turns on the Generator, and begins operation)
G41G1X___ Y___ (Cutter Comp Left and begin straight line movement)
G1..... (Program Geometry)
G2.... (Program Geometry)
G3... (Program Geometry)


Common commands like Rotation and Mirror can be done with "Quick" buttons on the Makino control, or can also be accomplished with G&M codes.

Rotation: G68 X___ Y___ R___ (Rotation On, X Rotation Center Point, Y Rotation Center Point, R = Rotation Value)
For more info, please see page 7-79 of the Programming Manual

Mirror: M71 X1 Y1 (Activate Mirror function per X & Y axis...to Mirror only X-Axis, then input M71X1)
For more info, please see page 7-82 of the Programming Manual


-Brian
 
Hello asraraleem,

Yes, you are correct. I program & operate Mitsubishi edm's, not Makinos. I do want to ask though, do you have a screen on your controller that looks like the picture that I've attached? This is the program page from one of the Mitsubishi's that I operate. The G & M code shown is what controls all of the machine's functions and also gives it X,Y coordinates to machine and rapid to. The two codes that I listed (G62 and K values) are both just part of this type of code. I also thought that those two that I listed were fairly universal commands, at least throughout wire edm. If I'm incorrect about the coding in reference to Makinos, someone please correct me.

Thanks for going out of your way to take the picture and explaining me. I think I got this now.
 
asraraleem,

I'm glad that Brian set the record straight on the programming aspects of Makinos. I apologize if I caused you any confusion from this.

Brian,

Thank you for clarifying the differences in the machines. I knew there were differences in coding for propitiatory machine functions from one manufacturer to another, but thought that coding for general machine motions were mostly standardized.


Back
Top