What's new
What's new

Timing multiple threading electrodes

RJT

Titanium
Joined
Aug 24, 2006
Location
greensboro,northcarolina
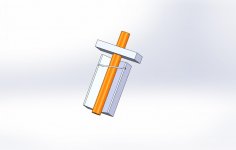
Being asked to quote internal Acme threaded parts 5/8 -8 2GLH by 4.75 deep. Material is 17-4 stainless, customer will supply gages. We have a Mits EX8 CNC sinker, probably have to burn it sideways (too tall) . I'm thinking I would need multiple electrodes for each piece and trying to conceptualize how to time each electrode so we don't "cross thread". I can buy orbiting tapping electrodes, we burn threads all the time, but much smaller and never done an Acme. Never had to use more than 1 electrode per piece (just orbit to size), so this has never come up. I don't mind a challenge, but this one has me scratching my head.
 
Hi RJT:
Have you considered making a trode setting cradle with a dead stop at one end, then clamping square collars onto the trodes so you have a reference height and can clock in radial orientation for each trode before it goes in the sinker?
The cradle can be made of anything convenient, and you can index the thread with nothing fancier than a gage pin in an angled slot (make the slot at the helix angle of the thread), or you can cast a section of the thread in Bondo so you can drop each trode in one after another and clamp your orientation collar onto it.
The gage pin method is more accurate but more of a pain to make
If they're all indexed in this way first, you can mount them one after another, align them and then burn with confidence, so long as you can touch off the end of each trode on the workpiece top and then drop down the same amount each time.
You should easily be able to get within 0.001" for position of each successive trode, and if you rough with one then finish with a second, you should clean up OK.
If you need better, stick the trode out of the end of the setting jig and grind the end face of each trode to a known height.
I've done it both ways and it works well.
Cheers

Marcus
Implant Mechanix • Design & Innovation > HOME
www.vancouverwireedm.com
 
I used to burn a lot of tapered pipe threads that required multiple hits. My supplier sold trodes on a square blank, one side was marked for reference. No sweat! Talk to your supplier, probably fix you right up.
 
Thanks for the ideas. I'll look into both. Marcus, I think i understand what you mean, would a sketch of your description be something you are willing to share? Probably save me trying to re invent the wheel.
 
Hi RJT:
Here is a Solidworks sketch.
The most important thing is the width of the slot.
It obviously needs to be a close fit with your gauge pin and the pin needs to be pretty close to the helix angle of the thread.
Obviously too, the pin needs to be small enough to fit between the thread flanks.
This one was drawn without an end stop: the expectation is you'll grind each trode to the same height once it's in the fixture.
The square collar can be removed once the trode is mounted in the machine and clocked in with your C axis or it can just be left in place until you need it for the next trode.
You can just hold the pin down with your fingers or with a rubber band.
That way small differences in the pitch diameters of the trodes won't force you to make a super precision rig; all can be dirt simple because it's self-aligning.
The gauge pin can be any convenient size that will touch the thread flanks without touching the thread root.
You do need to keep the pin reasonably horizontal, but you can just put a little collar on each end of it so it can slide on the sides of the vee block.
Alternatively you can restrict the height of the slot so the pin bottoms out but you need to do it accurately which is a PITA and it destroys the adjustibility of the rig.
Cheers

Marcus
www.implant-mechanix.com
www.vancouverwireedm.com
 

Attachments

  • vee block.jpg
    vee block.jpg
    52.2 KB · Views: 131
We start with square shanks and time the threads to a flat when we thread mill them. We do a lot of multiple start threads so running the same thread program on a square shank blank makes it easy to keep track of the correct orientation.
 
I liked the super accuracy and repeatability of the 3R Macro chuck / holder. Mount a macro chuck on a cnc lathe, cut your acme trode using the same offsets / starting points, and your thread will time within a tenth or two. Of course this means another macro chuck on your machine's platten. Good investment in tooling for electrodes that need to 'sync'.
 
Electrodes will be timed to a square shank, problem solved. They will have a flush hole all the way through also. Now all I need to do is figure out how long it will take to burn an internal 5/8 -8 2GLH Acme by 4.75 deep. Care to hazard a guess? That's a lot of area to erode.


Back
Top