blackboat
Stainless
- Joined
- Nov 16, 2001
- Location
- Conyers, GA
Got a chance to put some scrapers together today. Thought I would show a few pics since it gives a general idea what the desired result should be, though some of my grinding work isn't the best. They're lapped at the cutting edge though, where it counts, and all cut nicely. See if you can find the test piece in the pictures as we move along.
All the parts and pieces had been ordered over the past 3 months or so, with the exception of the diamond wheel. MSC had them on sale lately so it was time to get on with this.
Put the new wheel on the HF grinder, which required a trip to the hardware store to get it all married up.
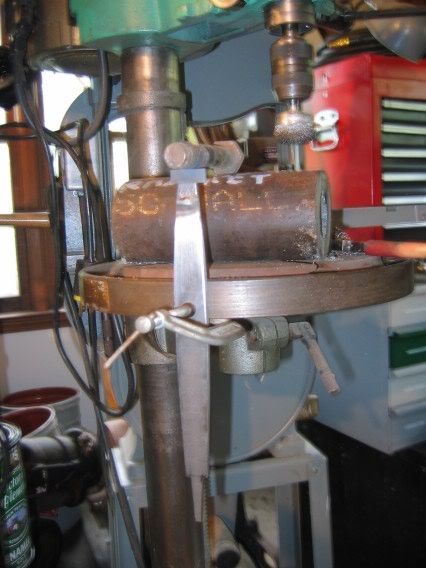
Steel blanks were cut for the shafts, tangs cut on the bandsaw, ends tapered to match the carbide(roughly). Lengths were determined by holding my wood lathe tools as if they were metal scrapers, deciding what length would feel good for which scraper, and then turning the wooden handles for each scraper. Once the handles were made, steel was cut to the target length.
Next step was to braze the C2 carbide to the shanks. The carbide was .125" x .375" x 1" from MSC. It was pretty rough and I wound up using some diamond paddles to dress the joined edge.
Here's the deluxe brazing jig:
The silver solder I had was round, and it took a bit of playing before I realized I had a hammer, and, voila, now we have ribbons of solder. After a couple of false starts to figure out how much heat was needed, the tips got stuck on.
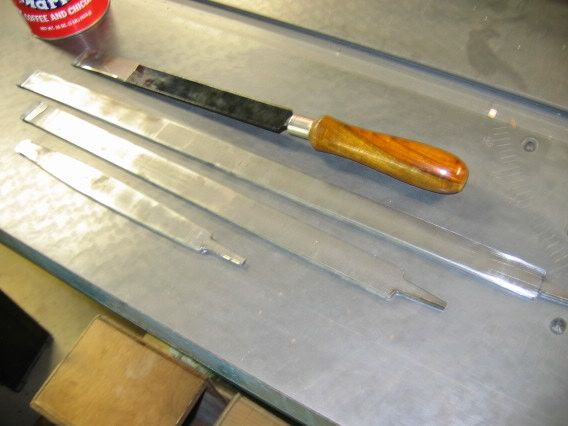
Grinding the tools to shape was the next step, followed by installation of handles. After screwing around for a couple of hours with the brazing, I decided to forgo carefully fitting the handles and driving them home on the shanks. I ws worried about breaking the carbide, so some basic stabbing with a hand drill and a dollop of JB Weld later, shanks are in the handles with no shock applied.
Here's the shanks, rough groud tips, awaiting their handles. The one with the handle on it already is my official "cheap ass" scraper, presented with much ceremony to me by one Forrest Addy ("Here's your cheap-ass scraper.") Also note the radius gage in the photo (the red thing).
Along in here I had to stop and turn a lap for the little grinder. All I had in the size I needed was aluminum, so aluminum it was. It needs some more refinement (screw heads countersunk), but I don't have a CS that big, will have to borrow one from work on Monday.
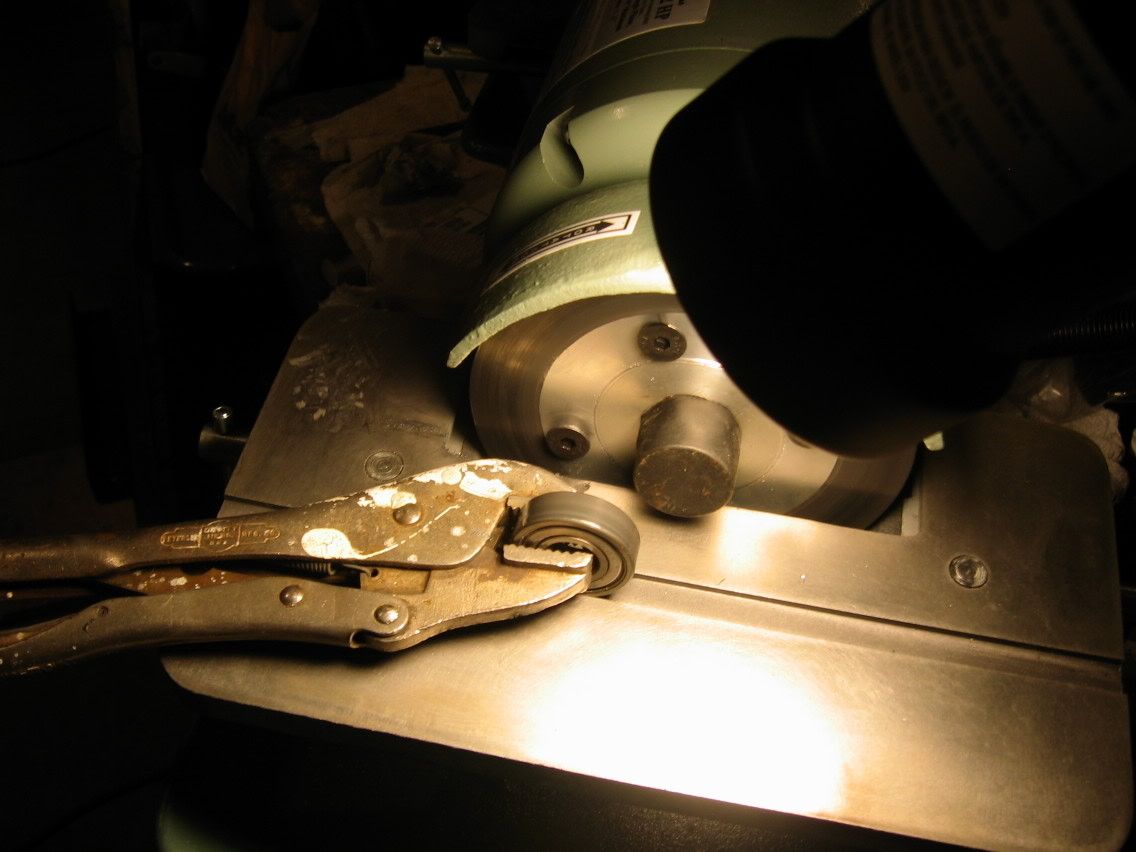
At the scraping class Forrest showed us a tool that was basically a ball bearing on a little axle on the end of some scrap. Purpose of this roller is to mash the diamond paste into the lapping wheel.
Having mounted the lap and found the diamond paste, I needed a masher. Since this is basically a redneck operation, here's my version:
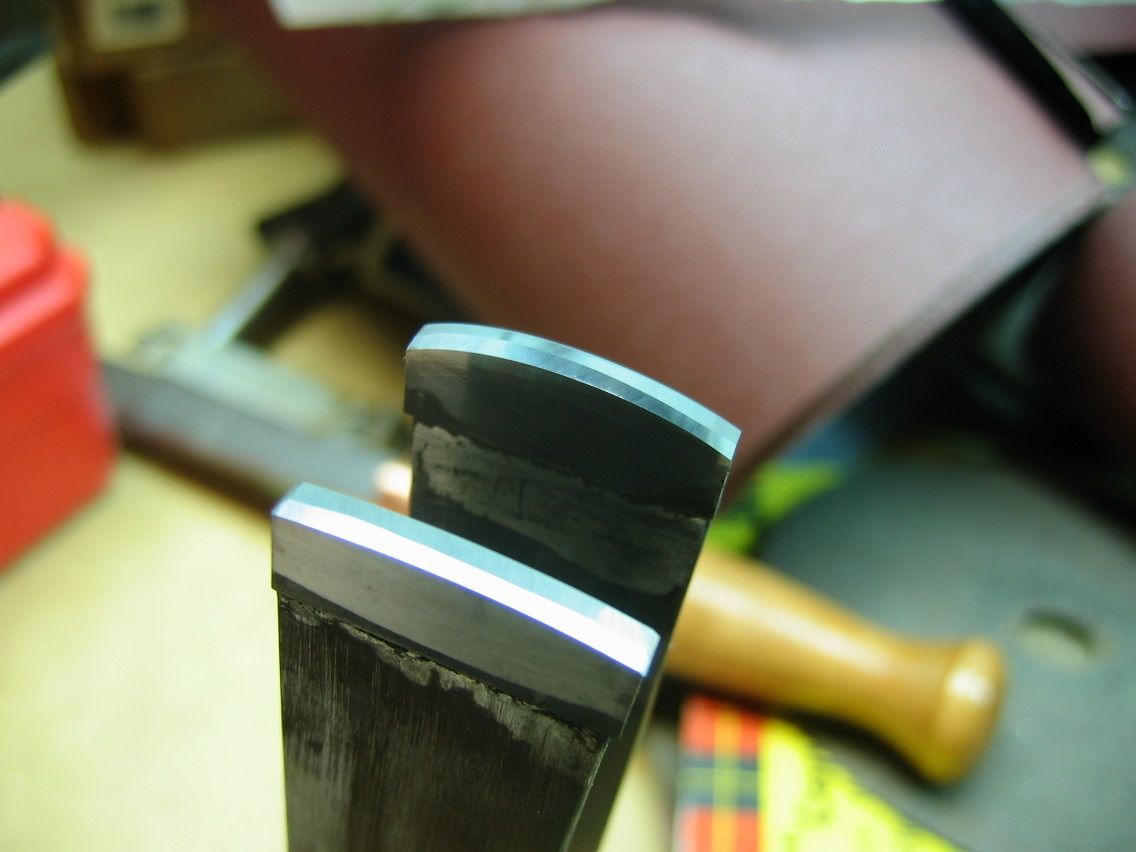
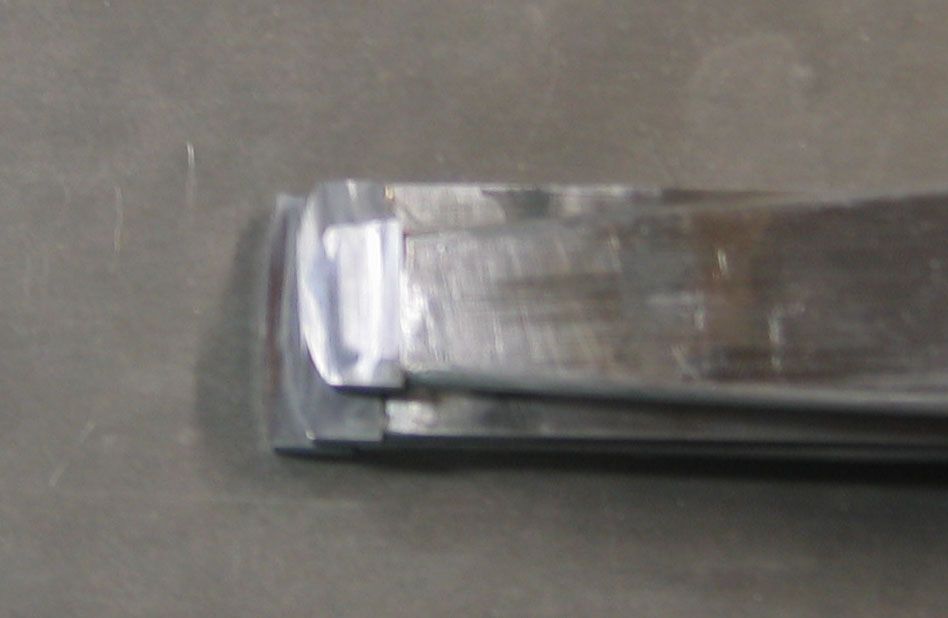
This next picture is an attempt to show the negative rake applied to both sides of the blade. The one in the foreground is off the 220 diamond; the one in back has been over the lapping wheel.
Here's another close up showing the different radii; the shallowest is 1 unit of coffee can. Then smaller than that, and then real tight for picking at stuff. These are based on my experiments in Savannah.
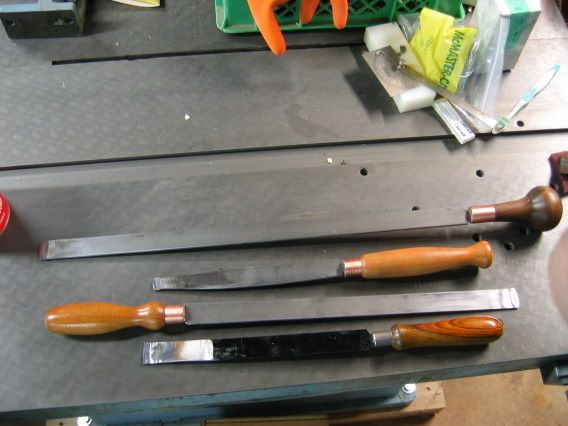
And finally, all done. Not real pretty, but they work. I noticed at the scraping class that scrapers get a lot of "patination", so I didn't waste a lot of time polishing and so on in areas where it didn't matter.
At last I'm ready to go. Maybe tomorrow I'll try a little test project, had enough fun for one day. Having attended the scraping class made this a lot easier. It gave me a clue as to what sizes and shapes to try, and most importantly, what it should feel like when it's cutting.
Hope this isn't too basic, thought seeing some pics might help someone else.
Rob
All the parts and pieces had been ordered over the past 3 months or so, with the exception of the diamond wheel. MSC had them on sale lately so it was time to get on with this.
Put the new wheel on the HF grinder, which required a trip to the hardware store to get it all married up.
Steel blanks were cut for the shafts, tangs cut on the bandsaw, ends tapered to match the carbide(roughly). Lengths were determined by holding my wood lathe tools as if they were metal scrapers, deciding what length would feel good for which scraper, and then turning the wooden handles for each scraper. Once the handles were made, steel was cut to the target length.
Next step was to braze the C2 carbide to the shanks. The carbide was .125" x .375" x 1" from MSC. It was pretty rough and I wound up using some diamond paddles to dress the joined edge.
Here's the deluxe brazing jig:
The silver solder I had was round, and it took a bit of playing before I realized I had a hammer, and, voila, now we have ribbons of solder. After a couple of false starts to figure out how much heat was needed, the tips got stuck on.
Grinding the tools to shape was the next step, followed by installation of handles. After screwing around for a couple of hours with the brazing, I decided to forgo carefully fitting the handles and driving them home on the shanks. I ws worried about breaking the carbide, so some basic stabbing with a hand drill and a dollop of JB Weld later, shanks are in the handles with no shock applied.
Here's the shanks, rough groud tips, awaiting their handles. The one with the handle on it already is my official "cheap ass" scraper, presented with much ceremony to me by one Forrest Addy ("Here's your cheap-ass scraper.") Also note the radius gage in the photo (the red thing).
Along in here I had to stop and turn a lap for the little grinder. All I had in the size I needed was aluminum, so aluminum it was. It needs some more refinement (screw heads countersunk), but I don't have a CS that big, will have to borrow one from work on Monday.
At the scraping class Forrest showed us a tool that was basically a ball bearing on a little axle on the end of some scrap. Purpose of this roller is to mash the diamond paste into the lapping wheel.
Having mounted the lap and found the diamond paste, I needed a masher. Since this is basically a redneck operation, here's my version:
This next picture is an attempt to show the negative rake applied to both sides of the blade. The one in the foreground is off the 220 diamond; the one in back has been over the lapping wheel.
Here's another close up showing the different radii; the shallowest is 1 unit of coffee can. Then smaller than that, and then real tight for picking at stuff. These are based on my experiments in Savannah.
And finally, all done. Not real pretty, but they work. I noticed at the scraping class that scrapers get a lot of "patination", so I didn't waste a lot of time polishing and so on in areas where it didn't matter.
At last I'm ready to go. Maybe tomorrow I'll try a little test project, had enough fun for one day. Having attended the scraping class made this a lot easier. It gave me a clue as to what sizes and shapes to try, and most importantly, what it should feel like when it's cutting.
Hope this isn't too basic, thought seeing some pics might help someone else.
Rob


") Being a little aggressive here aren't we?
Being a little aggressive here aren't we?