What's new
What's new

Standard Modern 26x30 Taper Attachment Removal

dalmatiangirl61

Diamond
Joined
Jan 31, 2011
Location
BFE Nevada/San Marcos Tx
Started working on cleaning up the Standard Modern Series 4000 26x30 lathe this week, I would like to remove the carriage and taper attachment for a thorough cleaning. I'm just not sure where to start on removing taper attachment. Anyone familiar with the SM lathes? Anyone have the manual for one of these? From research, it is a raised version of the 16/17" swing lathe, so the manual for that machine might be applicable to this machine, for the most part.
 
Started working on cleaning up the Standard Modern Series 4000 26x30 lathe this week, I would like to remove the carriage and taper attachment for a thorough cleaning. I'm just not sure where to start on removing taper attachment. Anyone familiar with the SM lathes? Anyone have the manual for one of these? From research, it is a raised version of the 16/17" swing lathe, so the manual for that machine might be applicable to this machine, for the most part.

US Military bought some. Unless "classified", by Law, (since taxpayers footed the bill), manuals for most things the gummint buys (NASA as well) go into the public domain.

The "MIL" version manuals for Standard Modern are online as .pdf's.

Swing should not much matter as to taper attachment design and implementation, raised or otherwise.
 
Last edited:
Thanks Limi Sami! I looked around the SM website but did not see those. I think that is a slightly newer version, mine was made in 1979.

Yes this is a military model, I purchased it 20 years ago, just got it out of the trailer last year, long story, time flies...

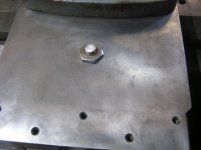
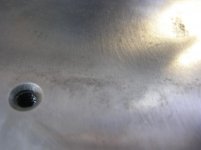
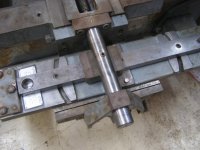
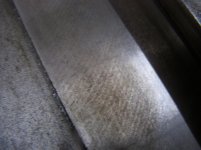
Got a few pics today (tailstock is on floor), I'm thinking that plate with the bolts that is attached to crosslide is where I need to start, any second opinions?
 

Attachments

  • smlathe 14.jpg
    smlathe 14.jpg
    97.2 KB · Views: 166
  • smlathe 15.jpg
    smlathe 15.jpg
    90.9 KB · Views: 136
  • smlathe 16.jpg
    smlathe 16.jpg
    90.5 KB · Views: 181
If it's more than 25 years old, the bed was cast just down the road from me. Along with grand piano frames from the same foundry. Been some time since either were being made in large numbers and the foundry's long gone.

Lucky7
 
If anyone else out there ever needs to know, there are 2 ways to remove the taper attachment.

#1 Remove the 4 bolts holding taper attachment to the cross slide, pull out a few inches, remove set screw, jack with it a few more minutes, decide you are doing it wrong, put the 4 bolts back in. Go to front of machine, remove compound, remove cross slide knob, remove cross slide screw nut retainer, remove tapered jib, remove cross slide. Put a rolling cart under taper attachment, remove the 4 bolts again, slide TA straight back (with cross slide screw still attached), when you have enough room unscrew the nut off the shaft, then pull unit all the way out of the machine.

#2.Remove the 4 bolts holding taper attachment to the cross slide, pull out a few inches, remove set screw, use a spanner wrench to unscrew nut/bearing assembly from the taper attachment, then pull taper attachment away from machine. The trick is knowing that you need the spanner wrench because when you are working from back side of the machine its hard to see those 2 little holes in the nut:o.

In a pinch, the spanner wrench for a 4" grinder does work. Oh well, it all had to come apart for cleaning.
 
US Military bought some. Unless "classified", by Law, (since taxpayers footed the bill), manuals for most things the gummint buys (NASA as well) go into the public domain.

The "MIL" version manuals for Standard Modern are online as .pdf's.

Swing should not much matter as to taper attachment design and implementation, raised or otherwise.

I'm still looking for the manual for this machine, the one Limi Sami linked is very close, but a slightly newer model. Any idea where I would find the manual in a pdf for this model, or its 17" equivalent?
 
Called Standard Modern this week, giving them 26x30 they referred me to the manual linked above, giving them model# on tag had them asking me if I was sure it was an S-M, giving them serial# had them looking but not sure if they had anything, finally when I said it was a Series 4000 they knew what I had, but could only provide the manual for the 17" swing model it is based on, they emailed it to me free of charge and it is good enough.

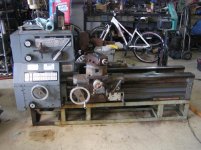
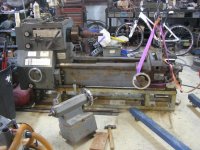
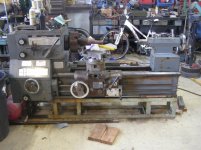
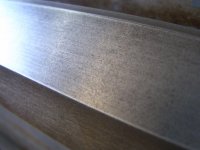
Pics below, first pic was taken about a year ago when I got it out of the trailer, it has been sitting in whse since then and getting rustier, started cleanup day before I started this thread. The detailed pics of ways in next few posts are for those of you trying to use belly button jelly to remove rust to show you what can be done with a razor blade in a fraction of the time.

Pic 1. How it looked fresh out of trailer.
Pic 2. Last night moments after getting carriage back on
Pic 3. Tonight, still need to clean apron.
Pic 4. Closeup of front way at tailstock end after scraping with razor blade, the lines you see are from original grind, I do not scrape rust in perfectly straight lines
 

Attachments

  • smlathe 13.jpg
    smlathe 13.jpg
    92.4 KB · Views: 91
  • smlathe 17.jpg
    smlathe 17.jpg
    95.7 KB · Views: 109
  • smlathe 18.jpg
    smlathe 18.jpg
    94.4 KB · Views: 95
  • smlathe 19.jpg
    smlathe 19.jpg
    94.3 KB · Views: 60
More detailed pics

Pic 1. Closeup of front way by tailstock.
Pic 2. Back way by tailstock, staining is where taper attachment was clamped for past 20 years.
Pic 3. Closeup of back way.
Pic 4. Cross Slide surface
 

Attachments

  • smlathe 20.jpg
    smlathe 20.jpg
    90.5 KB · Views: 45
  • smlathe 21.jpg
    smlathe 21.jpg
    93.2 KB · Views: 41
  • smlathe 22.jpg
    smlathe 22.jpg
    93.2 KB · Views: 49
  • smlathe 23.jpg
    smlathe 23.jpg
    88.4 KB · Views: 52
More detailed pics.

Pic 1. Up close pic of cross slide
Pic 2. Taper attachment, compare to pic above
Pic 3. up close on ways of crosslide
Pic 4. The tools I used, forgot to add the 0000 steel wool wad. Die grinder with scotchbrite pad was only used on non-precision surfaces, everything precision was razor scraped and scrubbed by hand.
 

Attachments

  • smlathe 24.jpg
    smlathe 24.jpg
    92 KB · Views: 50
  • smlathe 25.jpg
    smlathe 25.jpg
    88.1 KB · Views: 74
  • smlathe 26.jpg
    smlathe 26.jpg
    89 KB · Views: 51
  • smlathe 27.jpg
    smlathe 27.jpg
    93.1 KB · Views: 66


Back
Top