What's new
What's new

Problem with Biax scraper after rewinding

Marcuschrist

Aluminum
Joined
Jul 11, 2017
I just drove to Brisbane to pick up my 7elm Biax from Braithwaite electrical and now the assembly that reciprocates moves back and forth freely. when I turn the scraper on it doesn't move but if I apply pressure to the blade holder it does. I paid $700.70 to have it rewound from 110v to 220v but they're also put new bearings according to the bill ($11 each which seemed uncomfortably cheap), could they have have put the wrong bearings in shifting the position of the armature in relation to the mechanism or assembled it incorrectly?

I never tested it before dropping it in as I don't have a transformer but the bladeholder assembly was definitely not like it is now, you couldn't push it back and forth freely like this. I tested it while I was there and when it didn't work the tech came out and told me you had to press it in to make it work which doesn't seem right at all. The only experience I've had with a biax is at Richards class in Denmark so I'm a complete novice and might be missing something obvious so any advice would be appreciated.

Send an email to Richard, He can help you..... He has owned more of them than any person alive... Hell he probably sleeps with one of them under his pillow!
 
I never kept up with how Dapra re-named the machines. Are you sure its not a flaker / half moon model? The ram on those does that, it needs to be pushed to bring the follower bearing up against the cam. It free to float in the other direction.

Regards Phil.

P.S If you don't get it sorted out, your welcome to send it down, and I'll have a look at it. I've been into many of them. Not sure your re-winder would have had to open the gearbox up, to get at the screws that attach the motor. They are the 4 deep ones in from the end of the motor case.

Fairly certain. There's a schematic for them down in the machinery manuals section. I know I scanned in the manual for my HM10's. That might be a wash out now, as I would have hosted them on photobucket. R.C from Qld, had a thread showing the internals of his.
 
its definitely a scraper not a flaker.

They had no idea what it was and had never heard of a biax before I'd brought it in but I left it with them and they said they'd take a look and see if they could do it, they eventually called up and said they could. There is clearly something drastically different from when I first had it and the current condition. when it arrived I turned it over using the allen key and had a go adjusting the stroke, the blade holder would move when I turned the mechanism over a few turns and it still will now but unlike before it can literally just flop back and forward with no resistance. there's a two black sharpie mark on the rear two sections and one line either side of the front so I assume that means they had the gearbox apart? I'm going to call in the morning and see if I can get hold of the tech to see exactly what he did.

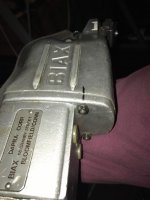
21040505_1542821902443022_741452706_n.jpg21100479_1542821915776354_110215257_n.jpg
 
Sounds like the linkage is not put back together correctly pull the end off and it will be obvious, i dont have a picture or mine apart but think i remember something like a pin in a slot, if not in the slot it will not pull back, but will oscillate if you put pressure on the blade holder.
Edgar

Sent from my SM-G935V using Tapatalk

This is the issue exactly, I'm sure they must have taken it apart to have a look how it worked/give it a clean and just failed to assemble it correctly. I'll call in the morning to call the tech a goose and if I'm feeling brave I'll have a go at taking it apart and reassembling it correctly.
 
To bad that the tech didn't take a careful look at it before disassembling the front of the gearbox. Thankfully it shouldn't be hard to fix this , if you have access to the manual for a
7 ELM (there are pdf's out there) it list the "spindle" that comes out of the housing (p/n76) as the "scraper spindle" the shoe that the blades bolt to is affixed to the end of this spindle, the other end of it (that's inside the housing) has a yoke that a pin (p/n75 swing pin) with a hole in it fits into. The hole in this pin (p/n75) slip fits into the crank that comes off the motor (p/n61 wobble wheel spindle) it would be my guess that they didn't get the hole in the pin (p/n75) assembled onto the crank (p/n61) and that's why its free floating.
I have no doubt that you will be able to fit it back together in short order. I hope that helps.
Cheers Don
 
Not real complicated to take apart,
Look at post 34 in the link above for a parts diagram
Edgar

Sent from my SM-G935V using Tapatalk
 
Not real complicated to take apart,
Look at post 34 in the link above for a parts diagram
Edgar

Sent from my SM-G935V using Tapatalk

Oh wow you weren't kidding about it being simple, had it apart about it and back together in a few minutes, they'd pushed the bit the pin sits in to the side and just had it flopping around in the slot. feel a bit silly make such a deal of a simple issue, I have no idea how the tech managed to mess up something so simple. Works beautifully now, feel's way smoother than the one I used in richards class.
 
Oh wow you weren't kidding about it being simple, had it apart about it and back together in a few minutes, they'd pushed the bit the pin sits in to the side and just had it flopping around in the slot. feel a bit silly make such a deal of a simple issue, I have no idea how the tech managed to mess up something so simple. Works beautifully now, feel's way smoother than the one I used in richards class.

Glad we could help, you can learn a lot here once you can sort the B.S.
Edgar

Sent from my SM-G935V using Tapatalk
 
Oh wow you weren't kidding about it being simple, had it apart about it and back together in a few minutes, they'd pushed the bit the pin sits in to the side and just had it flopping around in the slot. feel a bit silly make such a deal of a simple issue, I have no idea how the tech managed to mess up something so simple. Works beautifully now, feel's way smoother than the one I used in richards class.

The hardest part in taking it apart, is dealing with the little nut that also secures the the rear end of the strap! When you had mentioned a bit of apprehension regarding how inexpensive the bearings were, I had assumed they were the bearing that supported the main stroke rod. I just replaced mine, and they were less than 2 bucks a piece from McMaster, and took less than 5 minutes to install ..... I spent more time fiddling with the little case nut that supports the strap!
FWIW .....it was a vast improvement and all should check their own Biax. I also had considerable grooving in the wear plate that the toolholder slides against, and a bit on the bottom of the holder itself. The combination of the wear on all of the parts, has a considerable affect on the cutting blade. Because of the funky angle on the bottom side of the wear plates, I set up the entire head in the grinder in order to get both sides ground correctly. Being the wear was was under the toolholder only, there are portions of the wear plate that are original. After taking off .010" to clean them up, I simply added a .010 shim under each side, to get them back to where they were originally. I also ground a groove off the bottom of the toolholder, so all back to original specs! Other than having no idea of how to use it.....it works great, and a lot better than before! In all....an easy fix, and well worth the little amount of time than it took. I might add....McMaster part # 6658K17 for the rear, and 6658K19 . The length and ID were a direct fit, but had to turn the 18mm OD to a bit over 17mm in order to fit.
Biax ground 1.jpg


Back
Top