What's new
What's new

Schou grinder rescrape

Demon69

Titanium
Joined
Mar 3, 2013
Location
Area 69.
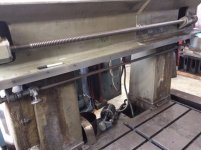
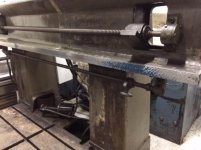
Heres a quick run through of what I did on the old Schou grinder. Will try and let the pics do most of the talking :)
j100.jpg

Before the job, I made up some vee blocks that attach to a mercer indicator stand for the levels to ride, used them to keep an eye on the top vee angle to make sure I didnt wander.
j1.jpg

Found out that the ways were in fact soft, not hard as previously thought.
j2.jpg

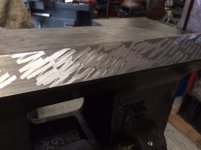
First job was to survey the machine. After removing the wear ridges, I used a base level to be sure the machine wasnt moving with me tramping all over it, as you do, or as you dont :D
j3.jpg

Original machinings were present at all corners of all the main surfaces. Result!
j4.jpg
 
Last edited:
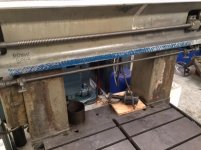
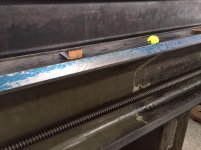
I clocked the depth of wear ridges if present, this was the bottom rail.
j5.jpg

And the numbers were.
j6.jpg

Next I ground in some reference points at the ends. Was aiming for 0.009" on the bottom rail.
Opsie! :D
j7.jpg

Thats more like it :)
j8.jpg

Did the same for the rest of the surfaces, being more careful using a cutting wheel rather than a sanding disc.
j9.jpg
 
And so it begins.
j10.jpg

Getting close, time to head straight down. Golf ball handles worked out great :)
j11.jpg

Done.
j12.jpg

Taking the kick out the other end.
j13.jpg

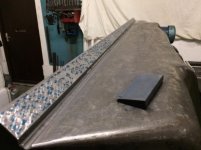
And done. First surface roughed in. All with a large radius scraper.
j14.jpg
 
I had some material to remove on the bottom rail so got the grinder out. A new 18v cordless makita with a the brushless motor, nice piece o kit that worked a treat. I made a smaller nut and collet to accept the 4" disc, the 4.5" feels big by comparison.
j15.jpg

Close up, criss cross. As I got used to it the cut got shallower and wider by altering the angle of the grinder to the work. TIR is around 0.001"
j16.jpg

I used some packing tape to hold the SE off the bottom of the hole. I wanted to leave some material to have a straighten up if needed. Worked very well.
j17.jpg

And the other end.
j18.jpg
 
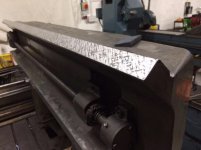
With a feel for the grinding I hit the rear vee surface, same MO of get close with an overlapping print, head straight down through the hole....
j19.jpg

And take out the kick.
j20.jpg

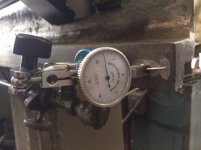
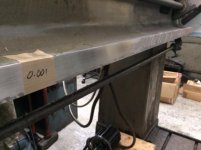
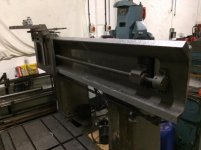
Quick n dirty check for vee way twist. Youll also notice the clock on the bottom of the carriage, we swept the bottom surface where the gib goes so see how it aligned with the top vee. Steve (the owner) watched closely as the needle held less than a 0.001" the whole length till the last few inches, where it popped a 0.001". "WOW! You gota be happy with that!!". Was fricken hilarious :D.. But I was happy, and slightly relieved :o
j21.jpg

Bespoke 3 point mount for the well used parallel I was using the wrong way :D
j22.jpg
 
The carriage printed far better than I expected.
j23.jpg

Didnt take long to rough it out and relieve the centre a pass or 2.
j24.jpg

A quick check for parallelism of the top and bottom surfaces.
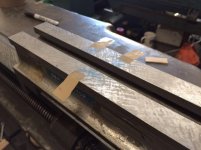
I placed tape at 2 points on the bottom surface as far as my long SE could span, so as the carriage would be mounted on three points and bearing on a scraped surface. I could then measure the error and take it out of the higher side.
j25.jpg

As it turned out I needed to remove 0.002".
j26.jpg
 
Knowing im square over this distance I headed straight down, taking out the hole.
j27.jpg

Then I took out the kicks at each end.
j28.jpg j29.jpg

Luvly Jubly :)
j30.jpg j31.jpg
 
All roughed in twas time to final things up. Using modest blue I set too with the 2' SE.
j33.jpg

And done.
j34.jpg j36.jpg

It was silly oclock on wednesday evening, still wanted to take the last check after all surfaces had been finaled. Along its length theres no perceptible move in the 0.001" in 10 bubble. Across the vee (measuring twist) theres something like a line width of movement off the zero.
j37.jpg

All up im very happy with how things turned out :)
j35.jpg
 
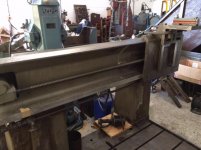
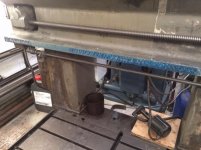
The machine is all back working an earning by saturday. Steve has relieved the vertical slide a touch, opposite the lock, so as to solid things up when the lock goes in. He also had to move the screw a fair bit, easy job on that machine. He suspects the the carriage was jacking up on the screw before, I wouldnt be surprised given the machines history, but I dont know for sure as I didnt check it.

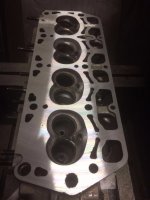
Gona pop in when I get a mo and see it in action and go over whats been done and and possibly do a few more checks. Hes very happy with how its cutting as its now well accriate (private joke) :D. Aint no 0.002" dip in this head ;)

j38.jpg

Be interesting to get something up on a table a really see what the Schou can do. :)
 
Nice work. I used to work on Van Norman Auto machines too in my younger days. When your ready to rebuild his Crank Shaft Grinders and need some advice. I would be honored to help. It is wonderful to see how your lightbulb has fired up and you have grown from the days of a window weight straight edge! Rich
 
Looks proffesnial to me ,I see you are still using the girder straight edge ,with all that nice measuring kit you have now you will know exactly how acriate you can work with it.
 
Nice work. I used to work on Van Norman Auto machines too in my younger days. When your ready to rebuild his Crank Shaft Grinders and need some advice. I would be honored to help. It is wonderful to see how your lightbulb has fired up and you have grown from the days of a window weight straight edge! Rich
Thanks Rich, really appreciate that comment :)
AFAIK, the crank grinder is doing great work atm. Good job n all as its a beast of a machine to my eyes :crazy:. If I ever go there tho, youll definitely be getting a pm or 3.

Cheers ;)
 
Looks proffesnial to me ,I see you are still using the girder straight edge ,with all that nice measuring kit you have now you will know exactly how acriate you can work with it.

lol. The old dumpster steel I beam is still going strong mate, heavy for its size and not pleasant to scrape, but it certainly does the job. Ive some aluminium I beams winking at me from the corner of the garage, they might be getting machined and glued to some CI flat some point soon :scratchchin:
Then we can run the mirrors over everything for the definitive numbers straight from the alternate universe ;) :D
 
I had an email last week wondering if I was ever going to do a class in the UK. I told him I would go if he could find a place. How big is your shop Demon? I told him I could write a couple of used machine dealers I used to buy Gleason Gear machines from that I could write to and see if we could do one at their shop. I can contact BIAX and see if they have a rep there or know a pro. Or you guys may know small shop or hobby shop to host one? Remember the class is free to the hosts. Rich

PS: Your handscraping looks super, I'm not a huge fan of the fuzzy edge, but that could be your own special trademark signature.
 
One thing about this machine Demon ,what lubrication does it use on the traversing head that you have worked on ?most grinders use some kind of pumped system but I can't imagine how that would work on this one.
 
lol. The old dumpster steel I beam is still going strong mate, heavy for its size and not pleasant to scrape, but it certainly does the job. Ive some aluminium I beams winking at me from the corner of the garage, they might be getting machined and glued to some CI flat some point soon :scratchchin:
Then we can run the mirrors over everything for the definitive numbers straight from the alternate universe ;) :D

Does that mean you got that autocollimator working?
 
I had an email last week wondering if I was ever going to do a class in the UK. I told him I would go if he could find a place. How big is your shop Demon? I told him I could write a couple of used machine dealers I used to buy Gleason Gear machines from that I could write to and see if we could do one at their shop. I can contact BIAX and see if they have a rep there or know a pro. Or you guys may know small shop or hobby shop to host one? Remember the class is free to the hosts. Rich

PS: Your handscraping looks super, I'm not a huge fan of the fuzzy edge, but that could be your own special trademark signature.
The shop isn't huge Rich. I've got approximately 9 x 6 metres in total, but half of that would be taken by machines. The place is in a state atm but I'm planning a huge clear out at some point. The main garage is around 4 x 6 metres and stays pretty cool in the summer. How many folks normally makes up a class?
 
One thing about this machine Demon ,what lubrication does it use on the traversing head that you have worked on ?most grinders use some kind of pumped system but I can't imagine how that would work on this one.
It's just oiling points. Springs loaded balls that you use a pump gun on. For most of its life at the previous firm it wasn't oiled at all. Until a new bloke came in and generously greased it :o. Steve said he bumped into one of the old crew and he told him about how the machine was worn. The guy said he already knew, It was like that 20 years ago lol.
I don't think oil will be a thing the machine wants for, Steve's fitted new oilers and cleaned out. The oil gun has its own spot on the tool board next the machine. He's a motivated man :)
 
Does that mean you got that autocollimator working?
Yeah for sure Pete. I took it with me to have go a gauging the horizontal bow on the top vee way but we needed to fab a mount for it and ran out of time. Have been over my 3x2 plate with it so I've some idea as to how things go. Was confusing in the beginning but once you get the gist you can get through things pretty quickly. Nice simple piece of kit.
 
Aah maybe one day we can meet for beer and burgers :cheers: and you could run it over my 3x2 granite plate? It looks to be in very nice condition but being second-hand you never know...


Back
Top