dcsipo
Diamond
- Joined
- Oct 13, 2014
- Location
- Baldwin, MD/USA
As promised, i am starting a new thread, I took my levels to the surface plate, just to realize that i have a lot of cleaning up to do in the shop before i can start this project, I was thinking if i am going to to this it should be a twofer. I have two Starrett levels: a new to me, older 199 and an even older 98-12. As all good stories start, here is chapter 1.
The only thing i did today is a bit of discovery. Stoned both levels lightly before the start.
Discovery #1: was the mess in the shop, but immediately after that
Discovery #2: the plate not being level. Since it is sitting on a concrete ledge covered with some framing and flooring it is not bedrock, but not a bouncy floor either. I proceeded to level out the granite which led to
Discovery #3: the level is not calibrated. So i calibrated the 199 using the usual process. Got the plate level with the level in one direction, blocked in the level in XY, flipped it 180 adjust to split the difference, flip verify the offset is the same on both side, re-level the plate in X&Y, checked on 180 flip. Plate is level now and the level is calibrated.
Me still being a slob, and not in the mood to clean up the other project, i just blued up a small part of the plate and blued up the levels. that led to
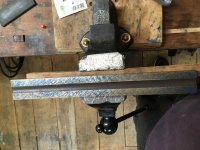
Discovery #4: As you can see the spotting is a bit strange pattern for a level. Not exactly what i expected. The edges touch the middle is hollow, also touches in the center, still hinges close to the outer edges of the ends, good news it makes it easier to scrape and spot, the level bottom is fairly flat. This spotting indicates that someone surface ground it or had a very good sense how to lap something like this. At this point i had an ohwhatthehell moment and blued up the 98-12. As luck would have it i made
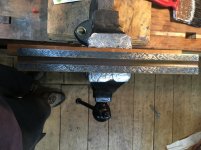
Discovery #5: The 98-12 is actually shaped like a level should be, since it cannot stand on its head i took a picture with the 199 supporting it . There is wear on the corners and the bottom is scratched, but it is a good start. So tomorrow after my bike ride, i will get the gumption to clean up the mess and get into some scraping. But i had enough stuff out to try one more thing, i qualified a spot on the surface plate to be level, blocked in the 199 then used a couple of 123 blocks to mark the perpendicular center of the level, turned the level 90 degrees keeping the vial center approximately in the same spot, the cross level looked like it was dead on, the bubble smack in between the two lines as I looked at it with a 2x magnifying glass. Then i located some of the 0.0005" mylar shims i got from Nathaniel. (I could not find anything thinner. )Even sticking one shim under either edge of the 199 shoved noticeable change on the cross level. and that was
Discovery #6 for today, if you off more than a tenth or two the little cross level will show it, i was not expecting it to be this sensitive. Extrapolating it a bit further the cross level is about 0.003"/12" or better. Once i finished i will measure it in a more sensitive setup, W\will put my CI surface plate on the granite and shim that with thin stock.
After all this i gave up and came in from the shop.
Hopefully i will be getting to the next chapter tomorrow.
dee
;-D
The only thing i did today is a bit of discovery. Stoned both levels lightly before the start.
Discovery #1: was the mess in the shop, but immediately after that
Discovery #2: the plate not being level. Since it is sitting on a concrete ledge covered with some framing and flooring it is not bedrock, but not a bouncy floor either. I proceeded to level out the granite which led to
Discovery #3: the level is not calibrated. So i calibrated the 199 using the usual process. Got the plate level with the level in one direction, blocked in the level in XY, flipped it 180 adjust to split the difference, flip verify the offset is the same on both side, re-level the plate in X&Y, checked on 180 flip. Plate is level now and the level is calibrated.
Me still being a slob, and not in the mood to clean up the other project, i just blued up a small part of the plate and blued up the levels. that led to
Discovery #4: As you can see
 the spotting is a bit strange pattern for a level. Not exactly what i expected. The edges touch the middle is hollow, also touches in the center, still hinges close to the outer edges of the ends, good news it makes it easier to scrape and spot, the level bottom is fairly flat. This spotting indicates that someone surface ground it or had a very good sense how to lap something like this. At this point i had an ohwhatthehell moment and blued up the 98-12. As luck would have it i made
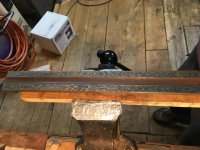
 Discovery #5: The 98-12 is actually shaped like a level should be, since it cannot stand on its head i took a picture with the 199 supporting it
 . There is wear on the corners and the bottom is scratched, but it is a good start. So tomorrow after my bike ride, i will get the gumption to clean up the mess and get into some scraping. But i had enough stuff out to try one more thing, i qualified a spot on the surface plate to be level, blocked in the 199 then used a couple of 123 blocks to mark the perpendicular center of the level, turned the level 90 degrees keeping the vial center approximately in the same spot, the cross level looked like it was dead on, the bubble smack in between the two lines as I looked at it with a 2x magnifying glass. Then i located some of the 0.0005" mylar shims i got from Nathaniel. (I could not find anything thinner. )Even sticking one shim under either edge of the 199 shoved noticeable change on the cross level. and that was
 Discovery #6 for today, if you off more than a tenth or two the little cross level will show it, i was not expecting it to be this sensitive. Extrapolating it a bit further the cross level is about 0.003"/12" or better. Once i finished i will measure it in a more sensitive setup, W\will put my CI surface plate on the granite and shim that with thin stock.
After all this i gave up and came in from the shop.
Hopefully i will be getting to the next chapter tomorrow.
dee
;-D


