What's new
What's new

1986 QT10 Motor Bearing Rumble

gmc1724

Aluminum
Joined
Oct 24, 2013
Location
United Kingdom
As the title suggests our 1986 Mazak has developed a rumbling sound from the rear bearing, unfortunately I don't have a name plate on the motor, all I know is it is fed from a fr-se 2-22k drive. Is there any way of lubing the bearing or is it a re-build job?
 
If it is the rear bearing, then definitely a rebuild job.

It could also be an out-of-adjustment, or malfunctioning PLG unit. The PLG is a sensor that reads the teeth on a little gear as feedback for the motor RPM's. There is a little circuit board associated with the PLG as well.

I have an '88 QT15 that rumbles and grumbles like hell from the rear of the spindle motor when it's really cold. Once warmed up good, the noise goes away. I just haven't taken the time to tear into the rear of the motor...I'm pretty certain it's the PLG-to-gear needing fine adjustment for the spacing.

Good luck with it,

ToolCat Greg
 
This is worse when it's cold too but I'm suspecting a rear bearing based on when I run the spindle up to about 1500rpm, where the noise seems at it's worst, and then kill power to the lathe, the noise is still present as the spindle ramps down.
 
This is worse when it's cold too but I'm suspecting a rear bearing based on when I run the spindle up to about 1500rpm, where the noise seems at it's worst, and then kill power to the lathe, the noise is still present as the spindle ramps down.

Take your belt off of the spindle and run the motor. That will isolate it from the spindle.
A piece of tubing on a screwdriver makes an excellent stethoscope.

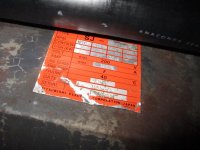
My 1986 QT-10N Universal nameplate says it's type: SJ 22 XU
Spindle Motor Name Plate in my QT-10N (20171118).jpg
 
GMC1724
I have lived this issue before. You can test if it's the PLG issue that cnctoolcat suggests by putting the machine in Open Loop Control. If the spindle runs quietly in Open Loop then its likely a PLG sensor adjustment or the Sensor going bad. If its a grunt at low speed you may want to check the condition of the speed / positioning PLG gear. The sensors don't like the slightest blemish on the gears, chips or coolant present in that area.

Kind Regards
Romefu12
 
Thanks for all your replys. The shop has been quite warm today and the noise has been all but absent. I take it by killing power to the machine whilst the spindle is running and still getting the noise as the spindle ramps down should discount any sensor issue?
 
Bearing Rumble

Thanks for all your replys. The shop has been quite warm today and the noise has been all but absent. I take it by killing power to the machine whilst the spindle is running and still getting the noise as the spindle ramps down should discount any sensor issue?

Yeah, that should tell you. I would be interested in how much those bearings run if you could purchase them yourself. I would also be interested in what they quote to rebuild the spindle as well. It does not look all that difficult to rebulid.

Regards
Romefu12
 
Yeah, that should tell you. I would be interested in how much those bearings run if you could purchase them yourself. I would also be interested in what they quote to rebuild the spindle as well. It does not look all that difficult to rebulid.

Regards
Romefu12

I rebuilt my spindle a year ago with help from this forum. If you're a competent/clever machinist with access to a grinder and some patience, you can pull it off.

Search this Mazak forum for threads started under my name and you'll probably find the lengthy thread where we detailed my QT-10N spindle rebuild process including some drawings, specs and lots of photos. It should at least give you an idea what you're getting into before you start.
 
I think we're at crossed purposes here, it's not the spindle that's making the noise, it's the rear bearing in the motor. I have replaced a front bearing before (pulley end), access to the rear bearing seems a lot more difficult, I think it'll be getting sent out to a rebuilding specialist.
 
Bearing Rumble

I rebuilt my spindle a year ago with help from this forum. If you're a competent/clever machinist with access to a grinder and some patience, you can pull it off.

Search this Mazak forum for threads started under my name and you'll probably find the lengthy thread where we detailed my QT-10N spindle rebuild process including some drawings, specs and lots of photos. It should at least give you an idea what you're getting into before you start.

cwtoyota
Why would I need access to a grinder? I don't plan on waiting till I wipe a bearing or destroy one before I rebuild. What would a grinder be necessary?

Kind Regards
Romefu12
 
cwtoyota
Why would I need access to a grinder? I don't plan on waiting till I wipe a bearing or destroy one before I rebuild. What would a grinder be necessary?

Kind Regards
Romefu12

I haven't been into the drive motor, but I have to imagine the motor uses standard deep groove ball bearings that can be pressed on and off of the shaft with minimal complication. The motor should be a simple task.

You mentioned a spindle rebuild. That was what I was talking about with the grinder. You need a grinder to adjust the bearing spacers which are used to set pre-load on the large double row roller bearings. A proper spindle rebuild is not as simple as simply tossing in some fresh bearings. Here's a long thread detailing my QT-10N spindle rebuild. It should give you a good idea of what it entails.

QT-10N Spindle Bearings
 
I think we're at crossed purposes here, it's not the spindle that's making the noise, it's the rear bearing in the motor. I have replaced a front bearing before (pulley end), access to the rear bearing seems a lot more difficult, I think it'll be getting sent out to a rebuilding specialist.
Replacing bearings in spindle motor is a simple task- done it on my QT-15 in one evening. Now motor is soo quiet even at high rpm's.
 
Replacing bearings in spindle motor is a simple task- done it on my QT-15 in one evening. Now motor is soo quiet even at high rpm's.

Care to elaborate, I'm not looking for hand-holding just a brief description of how you got to the rear bearing, plus did you have to disconnect the electrics or can it be done by just swinging the motor out of the machine and working on the deck?
 
Care to elaborate, I'm not looking for hand-holding just a brief description of how you got to the rear bearing, plus did you have to disconnect the electrics or can it be done by just swinging the motor out of the machine and working on the deck?
The motor in my QT-15SP (year 1988) should be the same SJ type like on other QT's from that time. First of all You should disconnect motor phase wires and somehow mark them (phases U, W, V) to avoid any connection mistakes later, then disconnect connector from magnesensor board and fan wires. Remove motor out of the machine (engine crane or somewhat similar would be very useful)- I just slip it out on a wooden planks. :D Then carefully remove magnesensor and its disc (located underneath aluminium cover)- for that purpose there is two threaded holes in it (as far as I remember for M8 screws).Under that disc is located 4 screws that hold bearing in motor aluminium cover with round plate. I replaced both bearings in motor (this is a recommended practice in these cases)- in front side where pulley is mounted sits 6310N bearing. In rear where we removed that magnesensor disc is located 6308N bearing. Now here the most complex part is removing of pulley to get to 6310N bearing (both bearings and pulley are pressed on rotor shaft). You can use any suitable pulley remover to take these off or use a press. Replace bearings and assemble everything together. Only notable thing here is setting of magnesensor- it looks like aluminium cylinder that is fixed at a certain distance from magnesensor disc. Distance should be set at 0.25mm- for that just place a thickness gauge blade between sensor and disc- and fix sensor by two screws. Thats all. Reconnection of electrical wires is the easiest task here.
 
The motor in my inQT-15SP (year 1988) should be the same SJ type like on other QT's from that time. First of all You should disconnect motor phase wires and somehow mark them (phases U, W, V) to avoid any connection mistakes later, then disconnect connector from magnesensor board and fan wires. Remove motor out of the machine (engine crane or somewhat similar would be very useful)- I just slip it out on a wooden planks. :D Then carefully remove magnesensor and its disc (located underneath aluminium cover)- for that purpose there is two threaded holes in it (as far as I remember for M8 screws).Under that disc is located 4 screws that hold bearing in motor aluminium cover with round plate. I replaced both bearings in motor (this is a recommended practice in these cases)- in front side where pulley is mounted sits 6310N bearing. In rear where we removed that magnesensor disc is located 6308N bearing. Now here the most complex part is removing of pulley to get to 6310N bearing (both bearings and pulley are pressed on rotor shaft). You can use any suitable pulley remover to take these off or use a press. Replace bearings and assemble everything together. Only notable thing here is setting of magnesensor- it looks like aluminium cylinder that is fixed at a certain distance from magnesensor disc. Distance should be set at 0.25mm- for that just place a thickness gauge blade between sensor and disc- and fix sensor by two screws. Thats all. Reconnection of electrical wires is the easiest task here.

That's great info, thanks very much....


Back
Top