What's new
What's new

Rigging a Smart and Brown 1024

shapeaholic

Stainless
Joined
Oct 14, 2003
Location
Kemptville Ontario, Canada
Hello folks,
In a weeks time I am heading off on a roadtrip to pick up a S&B 1024.
I am looking for some advise as to how I should (could) lift it.
Current plan is to remove it from its current location with a backhoe loader equipped with forks, lifting from the bottom of the base.
This will work fine until I get to placing it on the trailer, because of the wheelwells.
So I will have to lift from above for that bit.
Can this lathe be lifted by placing the forks under the bed?
Is there a way to lift using straps?

I have rigged lots of equipment in the past, and have a reasonable amount of equipment. I figure it's better to ask the stupid questions before rather than after😎

Thanks
Peter
 
The official method (which you can find in the operators manual) is to use the two through holes cast into the base of the lathe. These are about 1.5 inches diameter, and they take a 1.25 inch bar about 3 feet long each. Then sling with rope that passes under the bars and around the ends of the casting up to a hook at least a couple of feet above the lathe. The lathe can be balanced with the carriage, but when you get it balanced, lock the saddle and the tailstock. Protect the front of the control section with carpet or similar.

This method is obviously ideal if you have headroom and a handy crane. An engine hoist is no use - you can't get close enough and the lathe weighs a minimum of 2600 lbs. I have used an engine hoist to temporarily lift the light end a small distance off the floor but I wouldn't reccomend it. You might well be able to use the backhoe in place of the crane and this would make it easy to place it on the trailer. Obviously you would need to take the bars with you.

I moved mine into a restricted space using solid rollers and pinch bars - safe but slow and sweaty.

My floor is not very level so I used levelling feet. In the past I found that I could modify leveling feet so that the vertical threaded portion can be fitted from above so the machine does not need to be lifted very far to get them in. My feet have sufficient adjustment to allow the lathe to be lifted on them enough to slide rollers underneath, and then the feet can be removed and the lathe moved. Details available if this idea would help you.

Don't forget that the required floor footprint is bigger than you would expect. The manual shows this and you should have a look at it before deciding on position. Unlike many lathes you need to get to the back for maintenance.

This is a great lathe and I am sure you will like using it. I have done some significant modifications to mine which are described on this website.
 
Shapeaholic, are you never satisfied with one tool room lathe? :)

Well this one has a story.....
Good friend Jack had bought this several years ago as a project. He did lots to fix the things that were wrong, and got the machine working very well.
But... The bed is worn and he figured it was beyond his ability to fix that. Jack asked me if I would consider purchasing it and finishing the job.
So I will try to complete it and then see which lathe I like better; the Hendey T&G or the Smart and Brown.
One will have to go eventually as I just dont need 2 lathes.

Pete

I'd make a great home for one of those lathes :D
 
Had slightly similar issues when I picked up my 1024 MK 2 in that we had to get it just so on the trailer so it could be slid out without overhead lifting. Fixed sides on the trailer that it had to go over too so needed a decent amount of lift. Had a taller type forklift to load. We used the straps and lifting holes as per the book but choked them off tight over the forks so they were very little higher than the headstock. Maybe a spacer to get the straps closer to vertical too. Was discussed but can't remember if we actually needed it. That gave us the lift to clear the sides of the trailer.

Probably the easiest way it get it up so forks can go under if you don't have overhead capability is to use one of those click-click climb up a pole farm jacks. Take the door in the lower casting under the headstock off and use the jack in the aperture to lift one end. Suitably padded to protect casting and spread load of course. Up a couple or three inches. Insert blocks and drop down then pry-bar up the tailstock end from the side block and repeat if need be. OK it probably wont be level but good enough to get forks under. Lash down and lift. You may need to make up a cross bar for the back to take the load so as not to bend the bits under the coolant tray. Can't recall how strong that area is. Not the best way for sure but can be done.

If you anticipate playing much machine solitaire vertical screw type car jacks engaging in scaffold poles thrust through the lifting holes are effective. I have a tall one, ex Rover SDI 3500 I think, permanently strapped to the back at the tailstock end which sits too tight in the corner to get any lifting gear in. Nut welded on in place of the handle. Show it the windy gun or electric impact wrench and it comes up a treat ready to slide my low level skate substitutes under. Three more shorter ones, pretty much unmodified, do the honours on the other more accessible corners.

Clive
 
Clive, got an mk2 1024 and used to own an SD1 Vitesse!! Coincidence?

Both iconic machines and very territorial.. always mark their spot ;)
Apologies for hijacking..
 
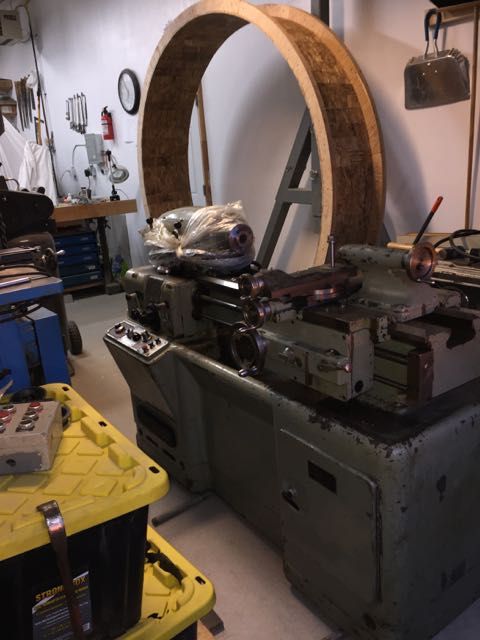
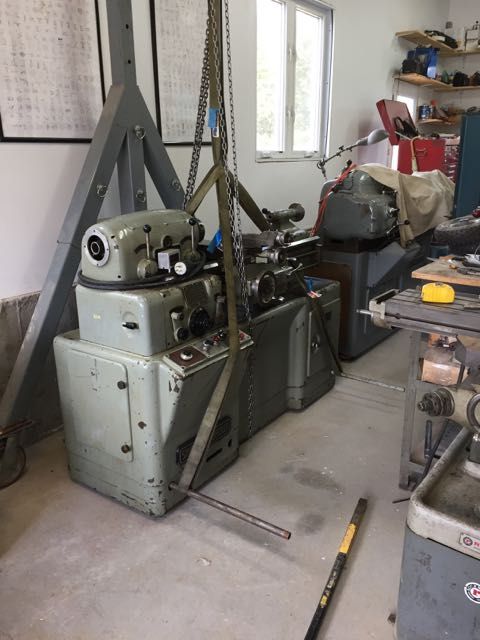
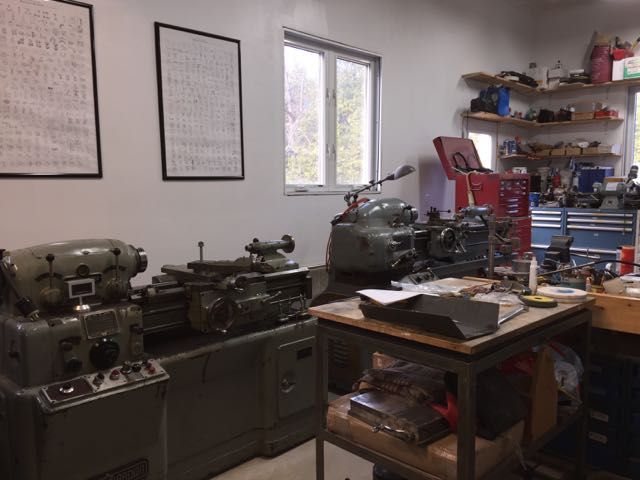
As a follow up I thought I'd post a couple of pictures of the machine which is now resting comfortably in my shop.

Just in the door

Lifting by the "approved method" (sort of)

Sitting next to the Hendey T&G.
Note the differences in height. (the hendey is up about 1.5" due to leveling feet) Even taking the levelers in to account the S&B1024 is about 6" shorter. The controls are in much more comfortable position for a person of my 5'7" stature.

I'll start a new thread as I start to get ready for the repair of the bed.


Peter
 
I'll be watching closely. I just got my 1024 yesterday. 550 volt machine so first job is wiring two single phase transformers open delta and attach to back of machine. My machine is Imperial but with a 50 and 100 tooth rather than 35-70 as shown in manual. 24dp-20pa so tough to source a 127. Will have one made by a friend along with a 60 and 70t. Gears are easy to swap so I won't compound them for the little metric threading I will do.

My Santon three speed switch has been swapped out so I'd like to see what is on yours. Dave
 
And I as well be watching. I'm one year in on the rebuild on my 1024. It's been a long process and I am not even scraping anything. Really curious how you compare the two as I have a friend with the T&G.


Back
Top