StrayAlien
Cast Iron
- Joined
- Aug 18, 2014
- Location
- Melbourne, Australia
Well, time to get started. I bought a 10L last weekend and figure I'll get into 'phase 1' which will be tearing it down and inspecting it to see what needs replacing or repairing.
It is my opportunity also to get to know how the machine works. I am not familiar with them at all. So, it'll be a learning opportunity. This project will be quite a challenge for me, so I am thanking all in advance for any assistance offered. Much appreciated.
I bought the heavy 10 renovation book and I must say that what they describe is not very much like mine at all. I am guessing that my model year must be earlier than they have had access to when creating the book. I'll be contacting them to offer some help in getting the book correct for future buyers. I am glad to have the book, but be warned - it ain't correct for some models. I do understand models change over time. Fair enough. But so far, for my model, the book has been more of a rough guide than anything.
Some typical examples are differences in oil feed paths and wicks and so on. I just spent $60 (international) getting a wick/gasket kit from them as well and now I am doubting if it be suitable - we'll see!
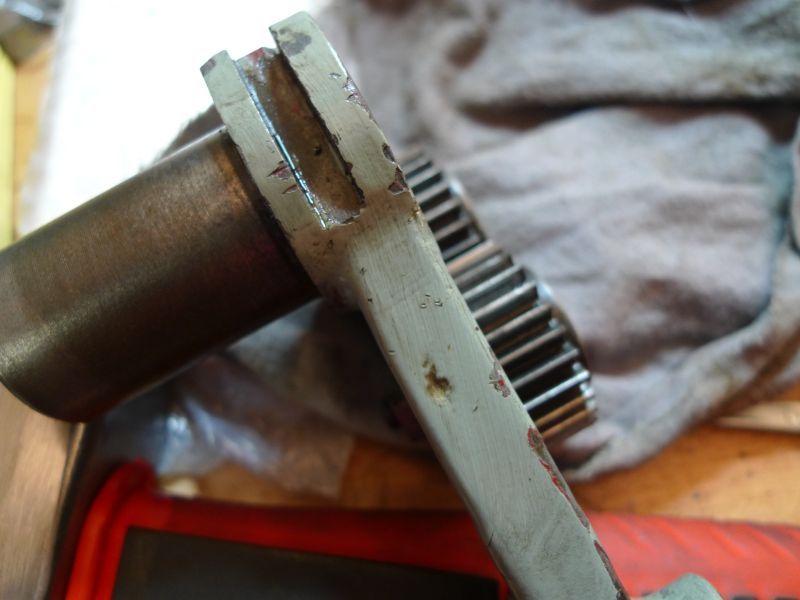
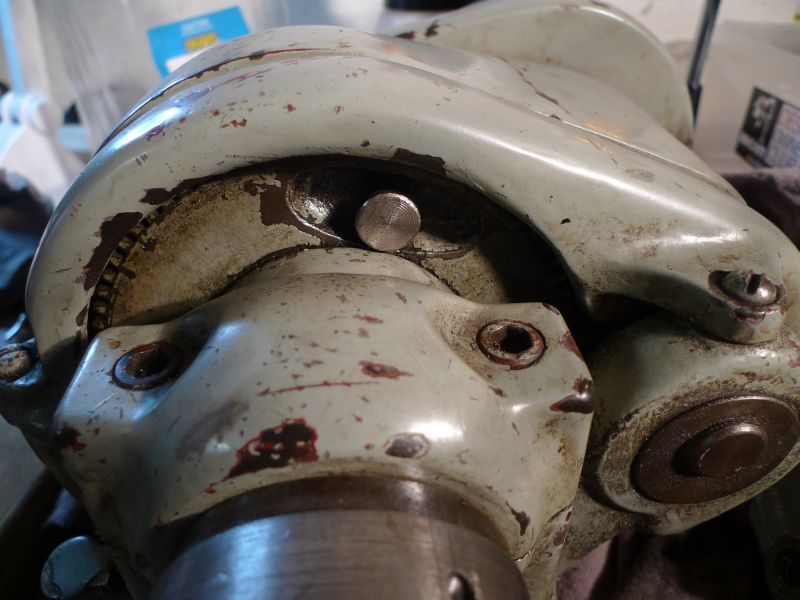
As an example, the book refers to oil passages that don't exist on the reversing tumbler and recommends expanding and tapping out holes underneath it which don't exist on mine:
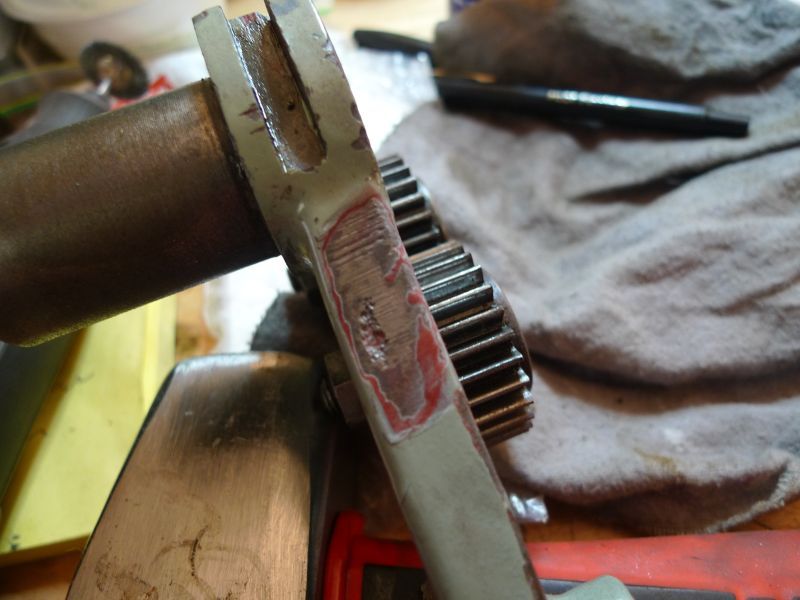
The paint is slapped on pretty thick, so I removed some to see if a passageway was covered. Nope:
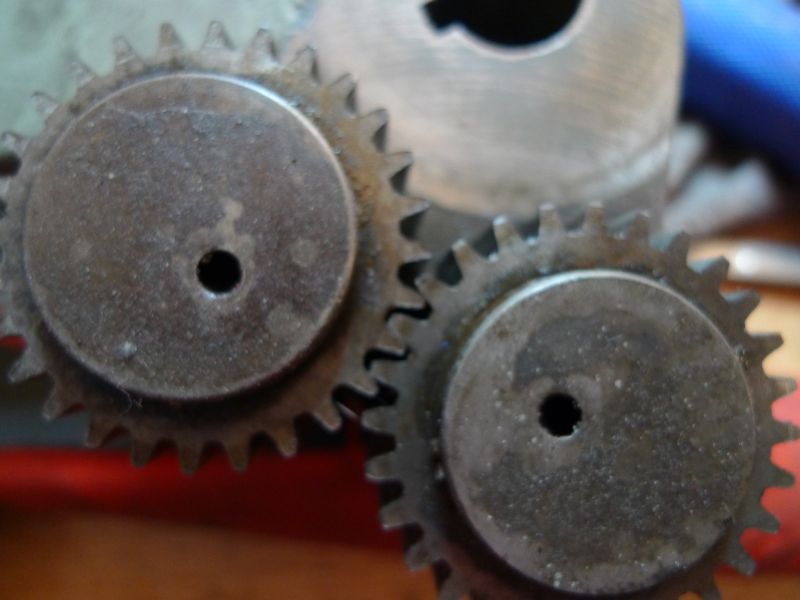
It describes oil passages and wicks around the gears that aren't there so I am gussing ..
the reversing tumbler gears are oiled via these holes? :
You can see from the above pic the gears have some play in them. Here are some closeups:
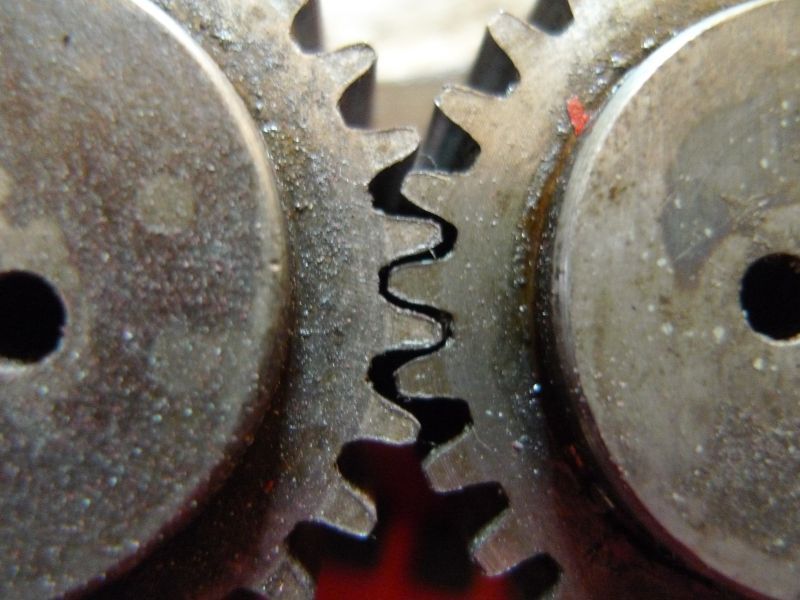

Is that too much play? Not having had much experience with old lathes I don't have a feel for how lose or tight they should be.
The manual describes a guard to the bull gear pin, I don't have a guard, nor is there anywhere to attach one. I guess those came on later models.
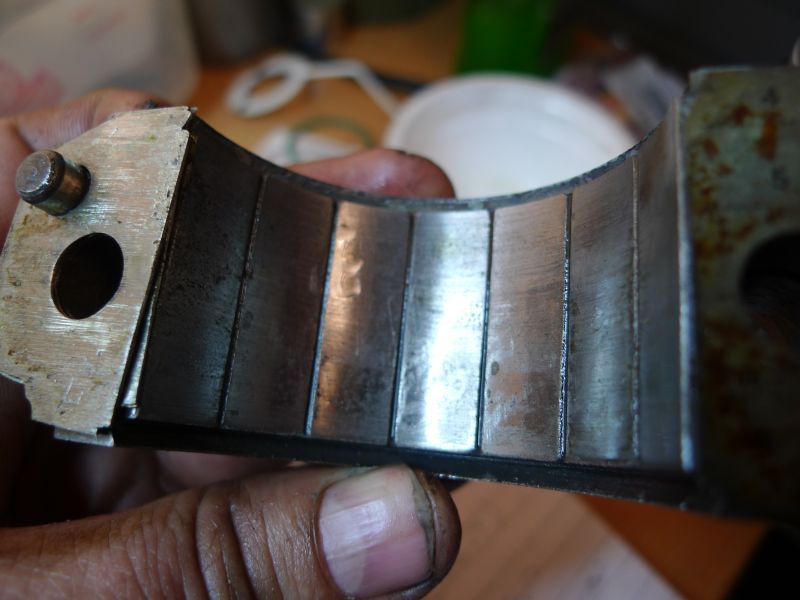
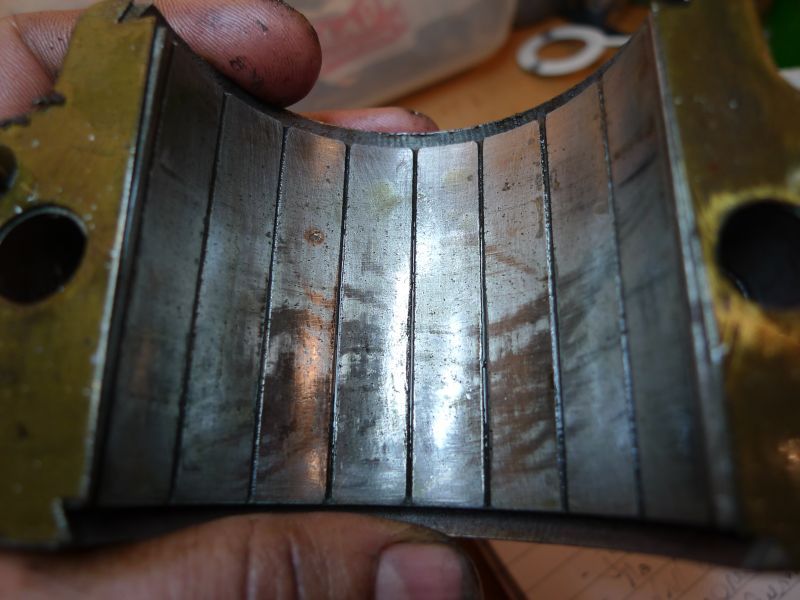
Certainly one huge surprise was not finding bronze spindle bearings. Mine are plain and are machined into the casting. I haven't quite read all of that bit in the book, but I am pretty sure it covers only the bronze ones. Might be on the next page, so I'll not say it aint there!. :-)
Some quick research on this forum reveals that plain bearings were used up to and during the war years.
The old gent I bought the lathe from was using automotive oil for everything I think ..... so I am interesting in opinions on bearing condition, and how I might test they are still in good shape. They had oil on them when, and the lathe was very oily when I got it, so at least it was being oiled. Likely the wrong oil is better than no oil at all! :-)
Here they are:
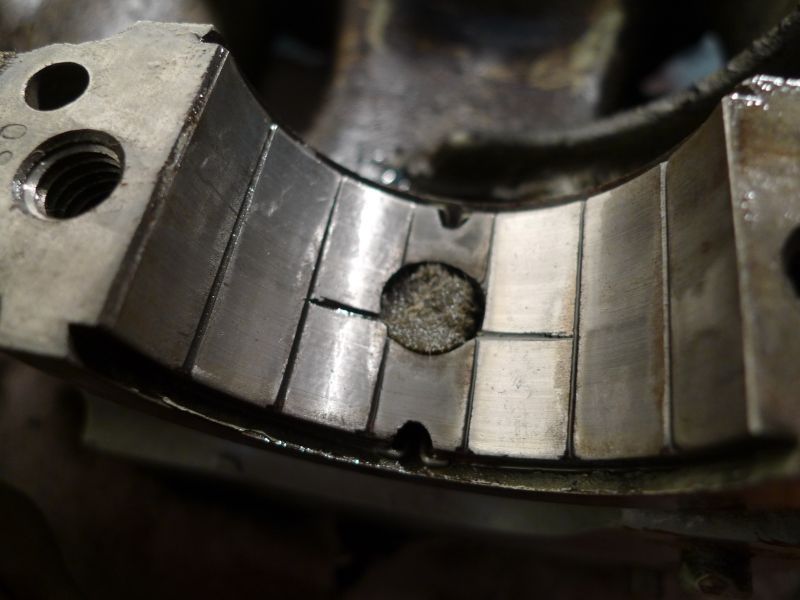
Not the diameter of the wick in the lower bearing.
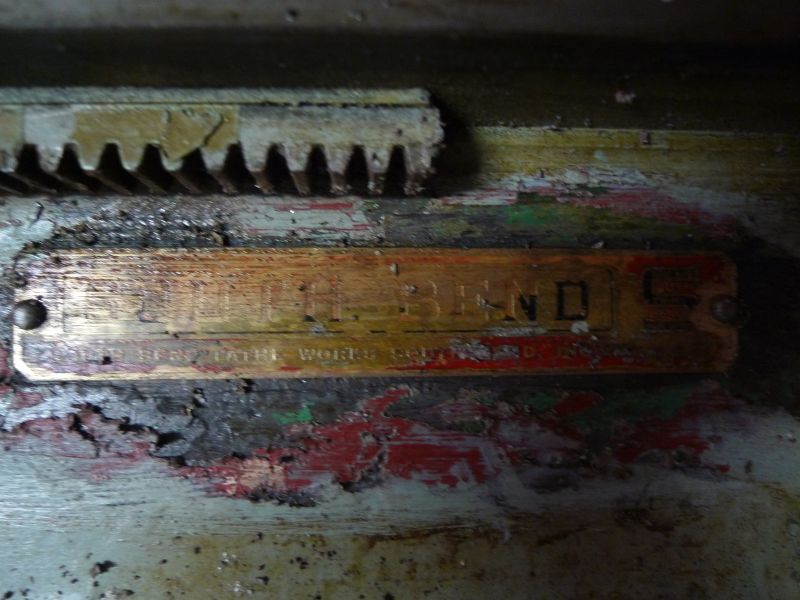
The day's final act was to let that fabulous SB plate on the bed see the light of day again. The intoxicated chimps that painted the lathe just layered gobs of paint over it.
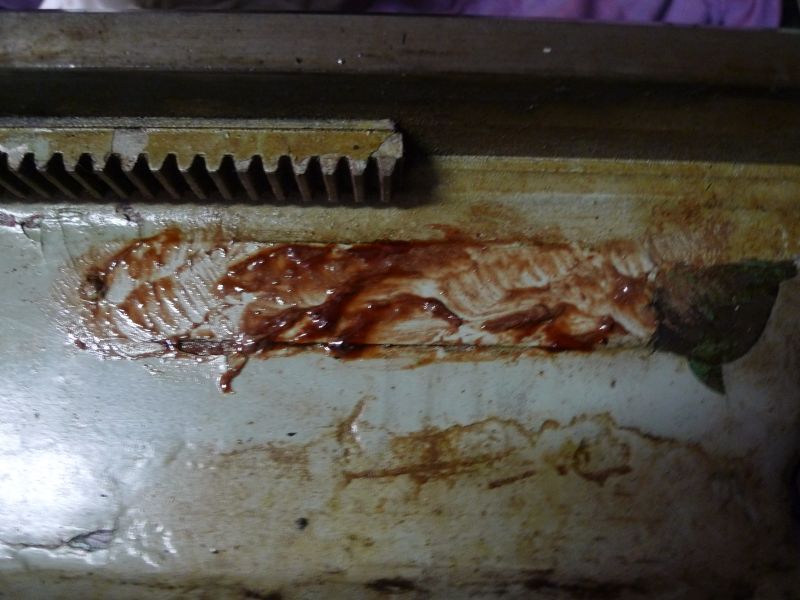
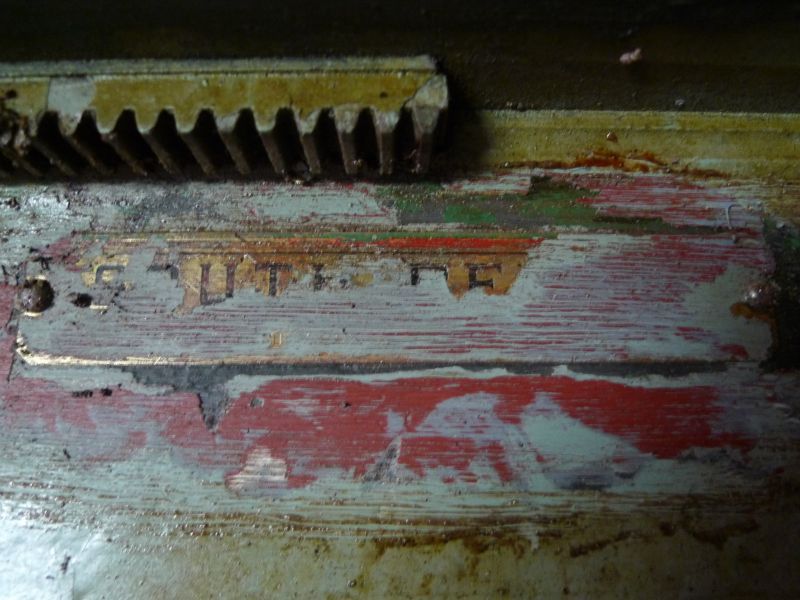
Unfortunate that to get the paint off of it, also takes the paint off the plate as well ... a real shame, but at least it is still there!
It is my opportunity also to get to know how the machine works. I am not familiar with them at all. So, it'll be a learning opportunity. This project will be quite a challenge for me, so I am thanking all in advance for any assistance offered. Much appreciated.
I bought the heavy 10 renovation book and I must say that what they describe is not very much like mine at all. I am guessing that my model year must be earlier than they have had access to when creating the book. I'll be contacting them to offer some help in getting the book correct for future buyers. I am glad to have the book, but be warned - it ain't correct for some models. I do understand models change over time. Fair enough. But so far, for my model, the book has been more of a rough guide than anything.
Some typical examples are differences in oil feed paths and wicks and so on. I just spent $60 (international) getting a wick/gasket kit from them as well and now I am doubting if it be suitable - we'll see!
As an example, the book refers to oil passages that don't exist on the reversing tumbler and recommends expanding and tapping out holes underneath it which don't exist on mine:

The paint is slapped on pretty thick, so I removed some to see if a passageway was covered. Nope:

It describes oil passages and wicks around the gears that aren't there so I am gussing ..
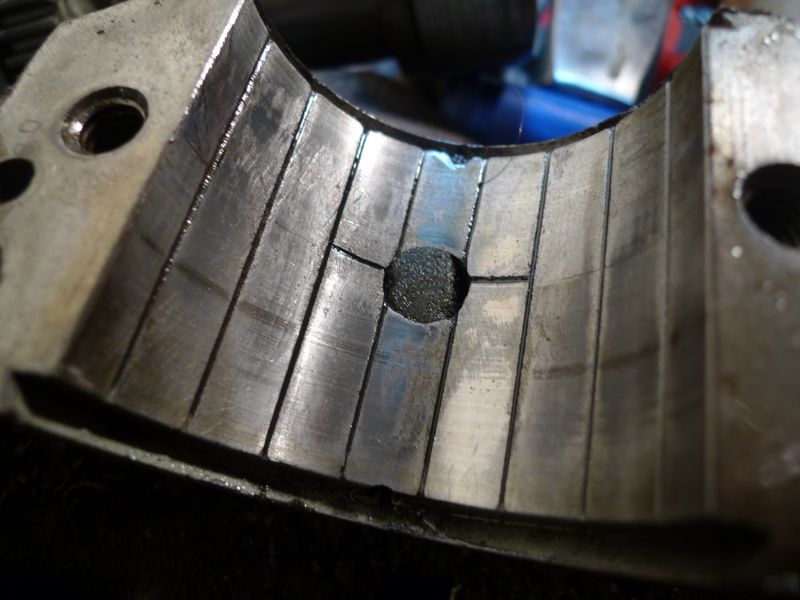
the reversing tumbler gears are oiled via these holes? :

You can see from the above pic the gears have some play in them. Here are some closeups:


Is that too much play? Not having had much experience with old lathes I don't have a feel for how lose or tight they should be.
The manual describes a guard to the bull gear pin, I don't have a guard, nor is there anywhere to attach one. I guess those came on later models.

Certainly one huge surprise was not finding bronze spindle bearings. Mine are plain and are machined into the casting. I haven't quite read all of that bit in the book, but I am pretty sure it covers only the bronze ones. Might be on the next page, so I'll not say it aint there!. :-)
Some quick research on this forum reveals that plain bearings were used up to and during the war years.
The old gent I bought the lathe from was using automotive oil for everything I think ..... so I am interesting in opinions on bearing condition, and how I might test they are still in good shape. They had oil on them when, and the lathe was very oily when I got it, so at least it was being oiled. Likely the wrong oil is better than no oil at all! :-)
Here they are:


Not the diameter of the wick in the lower bearing.
The day's final act was to let that fabulous SB plate on the bed see the light of day again. The intoxicated chimps that painted the lathe just layered gobs of paint over it.


Unfortunate that to get the paint off of it, also takes the paint off the plate as well ... a real shame, but at least it is still there!


