BTD
Aluminum
- Joined
- Apr 10, 2009
- Location
- Houston, Texas, USA
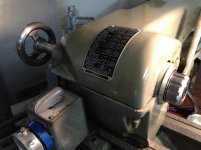
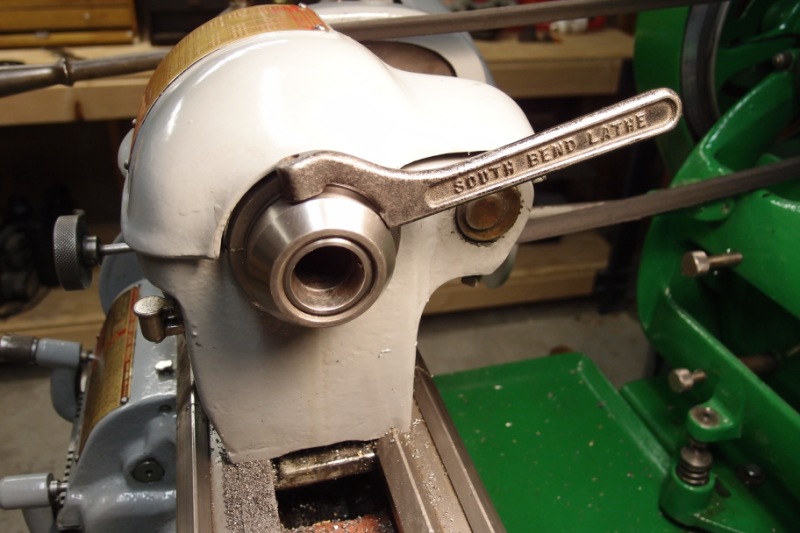
Made a collet closer for my 10K. Basically three components….handwheel, bearing carrier, and tube.
First photo....
Tube is 7/8” OD x .109” wall DOM tubing turned down to fit thru the spindle and threaded one end for the 26 tpi 6K collet.
Bearing carrier is 1-1/2” 1018 CR counter-bored and grooved for washers, bearing, and retaining ring.
Handle is 5” unfinished cast iron from McMaster Carr. PITA to file/sand/polish. Probably should have bought the already polished version from McM.
Handwheel, bearing carrier and tube are silver soldered together then all turned down to make it pretty.
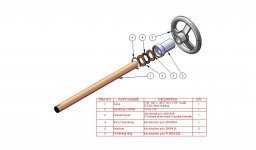
Second photo....an exploded view of the assembly
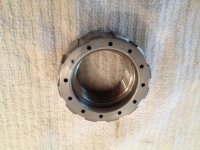
Third photo....Detail of the bearing carrier.
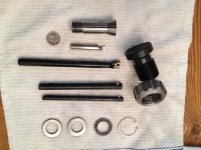
Fourth photo....Various parts and tools. Clockwise from the right:
Delrin thread gauge I made for the thread protector.
Thread protector.
Retaining ring, thrust bearing, and washers.
Two boring bars I didn’t have. These are real cheap…uses a little set screw to lock down the HSS tool. Didn’t think my tool grinding skills were up to the task but they cut beautifully..smooth as a baby’s butt.
Internal threading tool w/ insert from Shars.
Retaining ring groove cutter. $15 on ebay. Works great.
A 6K collet….those things are tiny.
Fifth photo....Backside of the thread protector. The holes are for indexing to cut the grooves. Tom from Oxtools has a youtube that describes this technique. Thanks Tom! It works perfectly. Challenge question: Can you tell which hole I broke the drill off in?
Thanks for viewing!
First photo....
Tube is 7/8” OD x .109” wall DOM tubing turned down to fit thru the spindle and threaded one end for the 26 tpi 6K collet.
Bearing carrier is 1-1/2” 1018 CR counter-bored and grooved for washers, bearing, and retaining ring.
Handle is 5” unfinished cast iron from McMaster Carr. PITA to file/sand/polish. Probably should have bought the already polished version from McM.
Handwheel, bearing carrier and tube are silver soldered together then all turned down to make it pretty.
Second photo....an exploded view of the assembly
Third photo....Detail of the bearing carrier.
Fourth photo....Various parts and tools. Clockwise from the right:
Delrin thread gauge I made for the thread protector.
Thread protector.
Retaining ring, thrust bearing, and washers.
Two boring bars I didn’t have. These are real cheap…uses a little set screw to lock down the HSS tool. Didn’t think my tool grinding skills were up to the task but they cut beautifully..smooth as a baby’s butt.
Internal threading tool w/ insert from Shars.
Retaining ring groove cutter. $15 on ebay. Works great.
A 6K collet….those things are tiny.
Fifth photo....Backside of the thread protector. The holes are for indexing to cut the grooves. Tom from Oxtools has a youtube that describes this technique. Thanks Tom! It works perfectly. Challenge question: Can you tell which hole I broke the drill off in?
Thanks for viewing!