What's new
What's new

Make own bearings for a 16"

PHDesigns

Hot Rolled
Joined
Jan 4, 2002
Location
Oklahoma, USA
Did a little cut off job the other day and it chattered like mad. First time to really do anything on my lathe. Checked end play and it was .035. Then checked spindle up and down at about .006. Pulled the caps off, and there are no shims, well there was one under one side off the back cap. Anyway figured I could make new bearings no problem. Just curious if any body else has done that. BTW, I got it back together and adjusted end play, and will be trying another cut off test later tonight. When reassembled the spindle sits at about 4 thou up and down.
 
We have 13" SB at work with the same problem - I thought about addressing it at one point and making the new bearings but I do almost everything on the trusty 20 x 80. There's a guy on this forum that has made replacement laminated shims for the 13" and I think the 16" too
 
Was looking at cast bronze bushings close to size to start with. I have seen the shims and will probably get a set when I go that way.
 
Ted-

Was the original material 660 CDA/93200 or something else?

Since they are slit and shimmed, can you describe which aspects make them (less easy)" to make as you might think".

This is a serious question.

I do understand that for practicality, off the shelf option is the slam dunk answer. :)

Thanks!
smt
 
Hey Ted your pm box is full so here is my message.
Ted,
Do you have any information about spindle journal bearings for a 13" SB circa 1939 that does not use the expander in the top cap. I have not seen any info about this type of early bearing. I am thinking of kiss grinding the journals and making new bearings. I have made this style of bearings while in a job shop. However, I suspect that South Bend may have finished to size by using a roller burnishing tool.
Any thoughts are welcome.
Regards,
John
 
Last edited:
The South Bend split bearing with expanders is a clever idea that wasn't adopted by many other makers, eh?

I'd be hoping to find a Clevite 77 shell bearing that fit.

That, or a strip of packing tape on the back of the bearing. (It's cheap, and you won't have much time in it)
 
Ted-

Was the original material 660 CDA/93200 or something else?

Since they are slit and shimmed, can you describe which aspects make them (less easy)" to make as you might think".

This is a serious question.

I do understand that for practicality, off the shelf option is the slam dunk answer. :)

Thanks!
smt

The info I have on the material is:
Bronze alloy. 80% copper, 10% tin, 10% lead

Difficult, but certainly not impossible.
Long, thin walled, tight tolerances (.0005" on the ID and OD, and concentric within in .0005") and a very good finish (~ 16 rms)
When they are slit, they spring open and twist. Then you need to cut a straight dovetail the correct width.

Good luck
Ted
 
Hey Ted your pm box is full so here is my message.
Ted,
Do you have any information about spindle journal bearings for a 13" SB circa 1939 that does not use the expander in the top cap. I have not seen any info about this type of early bearing. I am thinking of kiss grinding the journals and making new bearings. I have made this style of bearings while in a job shop. However, I suspect that South Bend may have finished to size by using a roller burnishing tool.
Any thoughts are welcome.
Regards,
John Hruska

1939 was a little before my time. :rolleyes5:
I don't have any info on those bearings, but I would assume a similar material as the late models would work. The originals for yours were castings.
I don't think they were roller burnished. South Bend did very little of that.
Ted
 
If the bearrings come out could not one first order shims...place epoxy under bearrings then shims and reassemble?

If only needing a couple thou that the epoxy would force bearrings to tighten up.

May need to remove a bit from ends.

Also need to confirm spindle not worn as well.
 
Difficult, but certainly not impossible.
Long, thin walled, tight tolerances (.0005" on the ID and OD, and concentric within in .0005") and a very good finish (~ 16 rms)
When they are slit, they spring open and twist. Then you need to cut a straight dovetail the correct width.
Good luck
Ted

The thin wall is the kicker. I've made thin wall bushings. With a fixture counter bored to depth, the ID finished ground to the bushing OD.
After roughing the OD of the bushing, the stock is ground to finish. Placed in the fixture, pinned in place and then the ID finish ground to suit.
Lucky I did not have to do the dovetails. Could be done if held in a fixture cut away for that purpose.
Buy em from Ted if he has them:)

Some screen grabs from the 1952 South Bend catalog and one from 1963 Model Engineer.
SB 16 inch Headstock~.JPG1952 SB parts~.JPG1952 SB Catalog Bearing Description~ .JPG1963 Machining Split Bearings from Model Engineer~.JPG
The bearing wall thickness looks pretty slim.
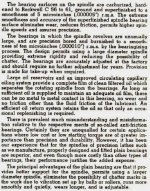
The description of the finish requirements as given in the write up mentions that the bearings are finished by burnishing.
That's where my earlier question about burnishing to finish came from. When looking at finished bushings I see a lack of turning tool marks.
Would not burnishing leave a work-hardened surface with a better finish than a turned surface?
Has anyone considered taking a clean-up cut on the ID of a bronze bushing and then use babbit to bring the shell back to size?
John
 
Not really concerned about the machining part, just the dove tail being right. What exactly is the purpose of the splitter? Is there supposed to be some adjustment there?
 
Not really concerned about the machining part, just the dove tail being right. What exactly is the purpose of the splitter? Is there supposed to be some adjustment there?

I understand it as the "crush" that seats the bearing. Insert (automotive) bearings are just a bit too tall for the bore; tightening the saddle caps push them in tightly.
 
Mine has a similar problem OP, same bearings, also with no shims, I asked about it on here a few weeks back. Although I've not got around to putting it back together yet (just finished stripping it down), I did some tests by sanding the mating surfaces of the two bearing halves on a flat surface with some 240 grit paper. A very little amount has brought it down from "loads of play" to nothing noticable by eye, so I reckon I can get it back to spec just by doing that, and by adding a shim here and there if needed. Worth a try as it only takes a few minutes.


Back
Top