What's new
What's new

"The Machine Shed" - Building a Line Drive Shop from Scratch

M.B. Naegle

Diamond
Joined
Feb 7, 2011
Location
Conroe, TX USA
I've had several threads relating to rebuilding and setting up my growing collection of old line-shaft driven machines, and they seem to be converging together. I pretty much grew up in my dad's shop where he repaired leatherworking machinery and in 1999 we purchased an old (1882) manufacturing company to refurbish and put back to work, then again in 2006 we bought an old competitor (started 1858) and merged the two together. After school I served a mission for our church, did a little college, got married, and came home to settle into my carrier as a leather machinery manufacturer and service technician. Our family business has always been a blend of old technology that's running along side modern stuff, and that's had an impact on how I see the fun side of "The Shop" (the Machine Shop!).

This endeavor starts with this 2011 thread (Cincinatti Tool & Cutter Grinder), learning about this old grinder that had been modified to be non line-shaft driven. I tried to think of ways to keep it that way but eventually decided that the motor and upper pulley-works shouldn't be "on" the machine and in the way of tooling and travels. Similar story with this thread (Brown & Sharpe #12 Production Mill). Old mill - puttered around trying to add motors - decided going back to line-drive was best. Both of these machines were missing enough pieces and far enough gone to have merited the scrap pile, but I'm stubborn and sentimental. I've had various operations over the years that they would be great for, but found ways to get by and they have just stayed as "Projects" going on in the back of my head/shop. That drawn-out process has been at times depressing, but also beneficial in some ways in that I haven't rushed through them and every time I've changed directions, I've ended up closer to the current plan.

The most recent attempt at a line shaft shop came when we moved to our current home in 2015 with it's 2-car attached garage. I moved the Cincinnati in there and started building a sort of cube around it that would also serve to power a line-shaft bench J.G. Blount bench grinder. That plan expanded with the 2020 addition of my Whitcomb Blaisdell lathe (Whitcomb Blaisdell 14x12 Lathe) as well as an old flat belt driven Curtis air compressor (Curtis Air Compressor). I hadn't planned on bring in the Brown & Sharpe Mill due to it's weight and kept it in storage, but then I picked up the little Brainard Hand Mill (Brainard Small Hand Mill) and while it might need the most parts replaced and might be the longest to complete, I was thinking about adding it to the shop shafting as well. I also decided that rather than running wires through the walls to power a phase converter and 5-10HP electric motor, I would use an extra 235 Inline 6 of mine as the powerplant for the shafting.

While this is all going on, I work on a few classic cars as well. Growning up, that was done at "The Shop," but over the years as business has grown we've tried to make it more professional and such, which means the old cars and other personal projects keep getting more and more out of sight. One piece at a time, I've been bringing pieces of my 54' Chevy 4-dr. 2100 home to assemble on one side of the garage and using the other side for the machine shop, but MAN it gets cramped, and that's even before the body and frame have made the journey. You can build floor to ceiling shelving, put things on wheels, and lots of other home-shop-harry stuff to "make room"... but there's only so much space at the end of the day.

NOW, a Whitcomb Plainer becomes available, closeish-by, PERFECT size for so many projects, and it's of course an old line shaft machine.... It's big and heavy though. It's not going to fit in the garage. For a long time, I've dreamed about one day building a "classic" machine shop. If it would happen, I'd wait until we could move to a new home with some property and no HOA to keep happy, but with the worlds economics and the housing market, It's going to be a long time before that could happen. The Plainer deal is still in the works (Whitcomb Plainer) but even if it were to fall through, I think new floor space is in order.

When we built our new business shop in Conroe Texas in 2015, we built it on approx. 4 acre's inside city limits. Most of that is the shop, crushed-concrete yard, and a large containment pond, but over the years I've been clearing brush and leveling dirt (see this thread Ford 8N Tractor) and gaining room so that one day we can build a warehouse to move our freight operations into, and in addition to that we've added about 12 20' cargo containers for storage and an enclosed 10'x30' lean-to tractor shed. There's still a little room that's out of the pond zone that could be used, so I'm drawing up plans and seeing what city requirements would be for a basic wood frame concrete floor outbuilding.

I've been studying a number of old construction handbooks (mostly Audels and Popular Mechanics) as well as reading through the city stuff online. The construction of this building would be tailored to the machinery, but otherwise a "shed" for all intents and purposes with very basic amenities. I'm looking at 15-20' wide, and will start with 20-30' long with the intention of being able to add onto the slab, roof, and walls if needed. My "dream shop" would be a brick structure, which is a possibility if I can get enough good deals on bricks, but more likely it'll be galvanized corrugated tin over wood frame throughout. Provided the city doesn't come at me with code requirements, there'll be no electricity or plumbing. The general design of the building Is a Stepped Gable roof, that seemed to be a common basic industrial or commercial building 100 years ago. It's essentially a basic peaked roof, but the front and back walls come up above the roof line (Not finding any stock images like what I'm envisioning, so I'll scan drawings). I'd also like to add a row of short windows on each side of the roof for light, so there'll really be two levels to the roof on each side, as well as ventilation louvers on each end. Might eventually extend the roof on each side for additional covering at a later date, but at this point that would only matter to keep the eaves up high enough to permit it. Other than being a rectangular building, there'll be a small extension on the back to house the motor and air compressor with a small door for access, and the Plainer will also have a small extension for the tail end of the bed and table to project into.

The pad will likely be 4-6" thick, except under certain machines. In another thread it was advised that the plainer should have approx. 24" of pad under it. The walls will have a deeper footing as well and the first 24" will be concrete. I'm going to try to build it as well so that in the future the walls could be upgraded to brick. I'm planning to do most if not all of the construction myself and once I have plans approved I'll likely start with the part of the pad/building that'll house the Plainer.

More to come!
 
Best of luck with undertaking an interesting project of this size .
I thought I had seen something about foundations for planers in one of my old I.C.S books but I think it must have been in this one on machine shop construction instead .
There is also a 1917 edition that seems to be much the same as far as foundations go.
https://catalog.hathitrust.org/Record/001615888
You may not want to go to the extreme of adopting a stone foundation for your planer but you may want to keep the planer foundation separate or isolated from the rest of your floor so that the vibration from the planer doesn't affect your other equipment .
I just thought I'd share the links .
There is a chapter on erecting a planer in this I.C.S. Book that may apply more to your other planer thread .
There is a chapter on Planer Work in this volume
you may need to use the 2 page view to get some of the pages to a readable size or see if the book is available on Google Books or the Hathi Trust site that may display better on your screen.
Machine foundations are also discussed here.
Jim
Thanks, those are good resources to have.

With the foundation, It won't be a continuous pour as I'm doing it myself and am planning to buy or rent a little mixer, so it'll for sure come together in sections. Most of those sections would be joined at the ends with rebar, but keeping the planer foundation entirely separate makes sense. I'll likely do the same with the Brown & Sharpe #12 mill as it's one I could see taking a hefty cut.

I'm also toying with the idea of doing concrete for only the part of the building that'll have heavier machinery, and parts with lighter machinery doing a wood floor. This would make for a fun layout IMO, but would take a bit of planning as I couldn't squeeze the little machines between the big machines then. You don't see many pier-n-beam foundations inland in Texas, other than the coast of course, but most of the old houses built that way need re-leveling every couple decades due to Texas' sandy soil. We learned in school that this was because millions of years ago most of inland Texas was a big lake, so the soil is now sitting on an old silty lake bottom (makes for some fun fossil digs though). Buildings have to either be flexible/rigid enough to move with the soil, or have deep pilings drilled in. I'm thinking for this job, I'll make the machine foundations rigid enough to keep their shape, but the collective foundation will be flexible via expansion joints. Other than the plainer and perhaps the 12' long lathe, the separate sections will be no larger than 5' square. Best case scenario, I expect to need to re-level the big machines and adjust belt tensions as time goes on.
 
Last edited:
On the political front: It's looking like if I build anything over 200 square feet, I'll need a commercial building permit, which will need to be re-upped every 12 months. Expected, but kind of a pain. That could be tricky as even if I get the plans approved how I want them, I'm not going to have the resources to build the whole building that fast (remember I'm doing this on my lonesome).

Looking at the plans last night however, I think I can change the building to 15 feet wide and still have plenty of room for everything. Then if I build it in 10 foot instalments every year or two, it kinda falls under the "lean-to" domain which the city doesn't seem to mind. The permits and codes are of course to ensure safety and keep people from building hazardous structures and eye-sores, but the red tape can be a pain. That first 10x15 block would be plenty of space to get the plainer operational.

The other hurtle is that a lot of the space on our property that I would want to put the structure on is reserved as "woodland understory." When we initially developed the property (was a grandfathered pipe yard previously), the city required certain trees to be inventoried and spaces under them designated as understory so that we wouldn't be an evil corporation clear-cutting the property and the community can retain our woodland terrain. I actually don't mind and like that part, but I'm trying to figure out what the limitations of that understory designation imply. The property around our shop has become a bit of a zen garden for me to tend after hours and I'm all about keeping the trees in place. The understory area need some management though as the vines and Juniper just keep growing.
 
Vegetation control comes in bottles and bags......we gots all kinds of crazy laws here too....Vegetation Preservation Zoning.......which is where on of my favourites come in handy ....called Graslan here,and in the US things like "Stomp"....tebuthiruron pellets.
 
Vegetation control comes in bottles and bags......we gots all kinds of crazy laws here too....Vegetation Preservation Zoning.......which is where on of my favourites come in handy ....called Graslan here,and in the US things like "Stomp"....tebuthiruron pellets.
We've tried Round-up sometimes, but we'll go broke doing it on everything. We'd buy a 5 gallon bucket of concentrate and spray it out along the face of the brush (thick enough that you can't get to the interior). It would kill it for 6 months to a year, and then new stuff would come in and grow over the dead brush. We have a mowing service that comes every few weeks that'll tend to the frontage along the street and mow as much as they can around the rest of the property, so when I can I've been cutting brush out and burning it and leaving the stumps at ground level so the mower can zip over it without hitting anything. The weeds and brush fight it for the first year or so, but eventually the grass wins out. Tried digging a few stumps out but decided it wasn't worth it as It'll rot out eventually once the grass overtakes it. If I had my way, it would be just trees and grass. Much easier to manage, less places for critters to hide, and more pleasant to look at.
 
20220519_120532.jpg
20220519_120538.jpg
20220519_120544.jpg
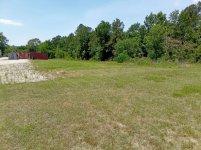
Here's some pics of the property. These first three are a panorama of the back end of the property. The property is essentially a rectangle with the top right corner stretched out to a point like a diamond. You can just see a white post to the right of the big power pole that is one corner, and from there it runs diagonally back behind all the big trees on the right. The right side boarders a couple residential properties and the left and back side is a commercial zone that is all easement for the power lines, a storm drain, and a creek bed that also serves as a storm drain for the surrounding properties.
 
Last edited:
20220519_121414b.jpg
The area straight back from the crushed concrete yard is the containment pond. It's a poor excuse for one however. It was put in when they built the shop and they built up three sides with a spill-way in the middle back, but they left all of the earth and vegetation in the middle except for a low spot you see on the left. When we have a hurricane come through, it fills up the low spot and the rest of the "pond" never sees water. If we get enough water it'll back flow and flow out the left side of the property. A separate project of mine is that I want to get a back hoe in there and dig it down so that the bottom is at least level with the bottom of the spill-way, if not a few feet under it so we can have a nice pond there. The bigger trees in the middle I'd like to dig around so they remain as little islands and peninsulas. I did a crude topographical map a while back and it'll mean moving a lot of dirt, but the lowest point will still be in front of the spill way. All that dirt would stay on the property and be moved over to the left side:
20220519_121451b.jpg
This area is is the largest open and unrestricted space we can build on, but it is a bit low currently. Moving all the pond dirt here would fill in low spots and get it all level with the main building. When the economy improves enough and we have some money to spend, we're planning to build a 50x100ish warehouse here, but there's additional space as well.
 
Last edited:
20220519_120659b.jpg
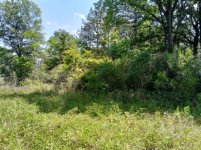
The right side of the property is the Woodland Understory area I mentioned before. It runs along the side of the containment pond and has an open area pictured above, which is behind the containers and shed in the first pictures.
20220519_120741b.jpg
Going further back to the very back of the property in the understory area, there's a good size spot that's currently full of brush, but no big trees, that would make a nice more secluded spot for the shed. I would need to bring in some more crushed concrete however to make a drive way up to either of these spots. The clearing in the foreground of the picture is the top of the containment pond. I could run the driveway along it, but don't think I would want to build there (if it was an option).
20220519_121001b.jpg
The other drawback of this understory area is that when we developed the property, the larger of the residential properties beside us was abandoned and had no storm water drains. There's a pond there that overflows every time it rains, so we had to put in an additional concrete gutter and ditch on our side of the boundry to catch the run off and divert it back to the creek behind us. The property has since been sold and the new owner is doing a fantastic job fixing it up. He's working with the city to see what can be done to improve his drainage, so the ditch might not be necessary in the future. If it remains however, I'll need to bring in a few culverts to burry in the ditch to get across it. The dirt from when they dug the ditch is still piled up under all the brush in the back. The ditch isn't very visible in the pictures but runs between the open grass and the brush.

I like this area the most to put the shed on, but even if it's not against the city rules, I'm looking at needing to add a driveway and culverts at the very least, before I can get into clearing brush and stacking out the slab.

20220519_120809b.jpg
This is another shot standing on the back side of the pond and looking back at the main building.
 
Last edited:
Just sayin,shed doesnt want to be too secluded,or thieves will strike.
Definitely a concern. We've had thieves steal the cat. converter out from under our shop truck, and another time on the same vehicle mutilate the door and steering column trying to steal it (unsuccessfully). After that we stopped leaving vehicles there overnight (or gave warning to friends/employees who wanted to). Also put up a bunch of "No Trespassing" signs, the only point of which is that with them the cops can arrest someone if caught walking on the property. Without them they can only ask them to leave.

On another occasion they literally took my tractor apart so they could walk off with the 6 volt group 1 battery (old Ford 8N). I guess they just wanted it for a core, because they'll be disappointed if they try to put it in a car. After that I started parking it inside, but will start leaving it out in the tractor shed pictured once I finish hanging the front sliding door.

Another time they walked off with a friends log splitter he had parked out back. It had flat tires and a dead motor, but from the evidence that didn't stop them from dragging it off into the brush (before the property beside us started getting cleaned up).

The only time our building was a target was last year we had a break it. The guy used a pick to manipulate the sliding bolt on the door. The alarm did it's job and My brother and I were both called (after the cops) and we showed up to watch the show as the cops cleared the building. One of the cops in route stopped a guy a mile down the road who was booking-it on a bicycle. He had a big bar or brass stock on his lap and one of our LED shop flashlights in his backpack. We knew it was him as we had other flashlights in the building like it with the same "Machine Shop" Dymo sticker on the back. We got lucky on that one.

After that break in, we started using snaps to secure the sliding bolts on the doors and have been upgrading the security cameras. The next step will be to get the property fully fenced in as currently only the frontage and a line with one of the residential properties is fenced. Eventually I want to put in some more flood lights out away from the building too. In the end, all this stuff is just going to continue. All we can do is make it un-attractive to people casing the place, while also making it a hassle for them to attempt something. I've thought about having a dog on the premises too after it's fenced. That kind of "active" security is IMO the only way to stop a burglary. The lights and cameras only serve to provide proof IF they catch someone.

For this shed, my only plans for security will be to have it locked up with no windows at ground level. The windows I want to put on the roof would be 12" tall at most. You're right though in the location playing a part in things too. If it is closer to the building in the space on the left, it's partially covered by the main building cameras and lights, but is fully visible from the street. If it's in the back, it's not visible to casers walking by, but if someone is walking through anyway, there'll be less light and cameras to see them back there.
 
Last edited:
Doing some figuring tonight for the line shaft RPM's, pulley diameters, etc. It's a puzzle to sort out as I have some direction knowing what each machine's input RPM and pulley diameter should be. Most of these machines I'll be recreating all of the overhead works, and a couple even the spindle pulleys, so If I need a smidge more or less to get the ideal RPM, I could use pulleys a little bigger or smaller than OEM. I'm trying to keep it all "stock" in that regard, but in the end I'm also trying to avoid making too much from scratch. I'm fortunate to have a good collection of single step pulleys from 3" to 30", mostly stamped steel with a few iron and a few wood, but the size you need isn't always what's in the pile. Gotta pick the battles.

Using the 235 engine, I'm not very limited with RPM's. Depending how well it's tuned, it could Idle as low as 500 RPM, run comfortably at 1000 RPM, or fast enough to damage some bearings in the machines. My current goal is to have it run around 1000 RPM. Reason being is I have a 12" pulley for the motor and a 30" pulley for the main shaft that are both 7" wide, so will work with a 6" main belt and produce a nice even 400 RPM on the main shaft. I can bump it higher or lower for certain jobs, but I want to keep the "general duty" speed set to where everything can work without needing too much pulley fabrication or concern of over-speeding bearings.

Now going down the list:

The Whitcomb Plainer, I know it had a 10" input pulley originally, but I don't know what the ideal RPM was. The current motor set up used a 1160 RPM motor with an 8 1/2" pulley and a 16" pulley on the jack shaft, which would then be spinning about 616 RPM, which sounds like a good zone (opinions?). With my 400 RPM main shaft, I can use the 16" pulley on the main and a 12" jack shaft pulley I have and get around 533 RPM. I don't have plans for an overhead clutch currently.

The Whitcomb Blaisdell Lathe, I know it originally had a 12" input pulley that spun around 225 RPM. I was going to use 2 stacked pulleys to make a pin type clutch, but have decided instead to use 3 stacked pulleys in an arrangement similar to the Plainer with the center pulley keyed to the jack shaft and the outer pulleys idle and then sliding which of two belts is on the keyed pulley to make it go forward, reverse, or neutral. I have three matching 12" iron pullies to do this and to get the 225 RPM, I'll need a 6 3/4" pulley on the main shaft. It'll need to be 8" wide as well to work with the sliding belts, so this one I plan to fabricate out of some pipe we have.

The Air Compressor. Not much to go on for the RPM, but the 400 off the main shaft seems like it would work well, so I'll use a 12" pulley on the main belted to the 12" pulleys on the compressor head. It has an Idle pulley on the compressor and I'm setting up a valve and air cylinder to slide the belt on and off to keep pressure up, which will have an override to turn it off all together.

The J.G. Blount Bench Grinder. Kinda open ended on this one. It's running Babbitt bearings and will be used for grinding cutter bits, and It has a 2" pulley on the spindle. I have a few of cone type clutches to go overhead which have a push/pull rod engagement mechanism, which would be great for this. One has an integral 8" pulley, so would produce 1600 RPM, which will likely be the one used. 3600 RPM would be ideal for grinding, but not sure if the Babbitt will take it and I'll need an 18" pulley on the main, which I think I have, but then I'll need to figure something else out to turn off the grinder.

The Tool and Cutter Grinder. Luckily I have lots of info to go off of for this from the operators handbook, though it'll take a fair bit of fabrication. It needs two jack-shafts for the grinder head and work head, both are engaged via a belt sliding from an undersized pulley to a 5" pulley. The work head jack shaft requires 450 RPM, so would need a 5 5/8" pulley on the main, and the grinder head jack shaft requires 850 RPM, so would need a 10 5/8" pulley on the main. Doing some digging to see if I have those. I might end up using a couple of the cone clutches mentioned above, but I'll need to play with the other pulley diameters to get the right RPMs.

The Brainard Mill. Originally had 130 RPM coming into a 10" pulley, and that would require a 3 1/4" pulley on the main. I might use one of the cone clutches above for engaging this one, but that would require another jack-shaft so this one might end up on an auxiliary main shaft that runs slower, or I'll need to use another form of engagement.

The B&S Mill. Originally had 280 RPM coming into a 10" Pulley, and would require a 7" pulley on the main. Similar situation as the Brainard in I'd like to use one of my cone clutches for spindle engagement, but their small diameter would require an auxiliary main shaft. I can instead make a sliding belt clutch for each mill like they originally had, but more fabrication.

The two mills and the tool & cutter grinder will require the most pulley/clutch fabrication to get their spindles turning, so they'll likely be the last. I'm still staking out space to build the shed on, but I want to have a loose plan in place so that as the lumber goes up, the machine's aren't far behind. It also helps to know where all the overhead stuff will need to mount in relation to the floor so I can make sure the layout and foundation plans will actually work.

The plainer should be showing up Saturday morning if the schedules work out.
 
"The next step will be to get the property fully fenced"
To my way of thinking, this will contribute the most to security - Thieves are basically lazy (although they sometimes seem to put quite a bit of effort into it).
If they have to break into a gate, or scale a fence, they'll likely pass - They like to quietly get right up to a building, etc, not have to spend time working on opening a gate, out at the road.
 
I am using a 25hp Superior oil field engine as the power source for my blacksmith shop. Max engine speed at 25hp is just over 200 rpm. With engine speeds from 130 to 180 rpm, the main shaft speed is 186 to 258 rpm.
The engine cooling system is external to the engine. To get the speed of the centrifugal water pump and the radiator fan up to the required speed, I made 3 split pulleys that were solid wood from maple boards glued together and turned on a lathed to size.

Bob
WB8NQW
 
Thanks. 200 is doable by changing the motor pulley to a 6". I was hoping to keep it bigger so the belt could have better traction, but I doubt a 60" pulley overhead would be feasible. I don't have a 6" pulley wide enough, but see them come up for sale periodically.

I'll add too, I'd be more than happy to do some pulley trading. If any of you are looking for a certain size, message me what you've got and we'll see what can be worked out.

I'll work my way down the list and see how the 200RPM changes things. In general I just need to double the main pulley size listed above for each application.

Does 600 RPM sound right for the Plainer? It looks like with that the input shaft would be running at the same 600 RPM for table forward travel, and then the table would retract at around 1200 RPM. Not sure how that converts to actual table speed.
 
I am using a 25hp Superior oil field engine as the power source for my blacksmith shop. Max engine speed at 25hp is just over 200 rpm. With engine speeds from 130 to 180 rpm, the main shaft speed is 186 to 258 rpm.
The engine cooling system is external to the engine. To get the speed of the centrifugal water pump and the radiator fan up to the required speed, I made 3 split pulleys that were solid wood from maple boards glued together and turned on a lathed to size.

Bob
WB8NQW
I did that same approach to recreate the upper cone pulley for the Whitcomb Blaisdell lathe. Haven't finished the bore and mounting flange yet, but it survived turning in the lathe so that bode well.
I'll likely go wood for any large diameter pulleys I need to make (Good excuse to get a large swing lathe!). We used to have a few examples of this style of construction, but they had disintegrated enough that I think they ended up in the burn pile years ago. The only difference was that on those the ID was "raw" with straight edges exposed and not turned to size with the OD.

All the wood turning I've done has been with a tool post on metal lathes. I'm thinking that to turn a lamination like this It would be best to trim it mostly round on a band saw first so there's less of an interrupted cut.
antique-wooden-flat-belt-pulley-wheel_1_5b0281235e12a7d9df02fc841cd453ea.jpg


Back
Top