ng19delta
Aluminum
- Joined
- Jun 24, 2014
- Location
- Merchantville, NJ
Well, I made somethingwith my lathe... Not sure what it is...
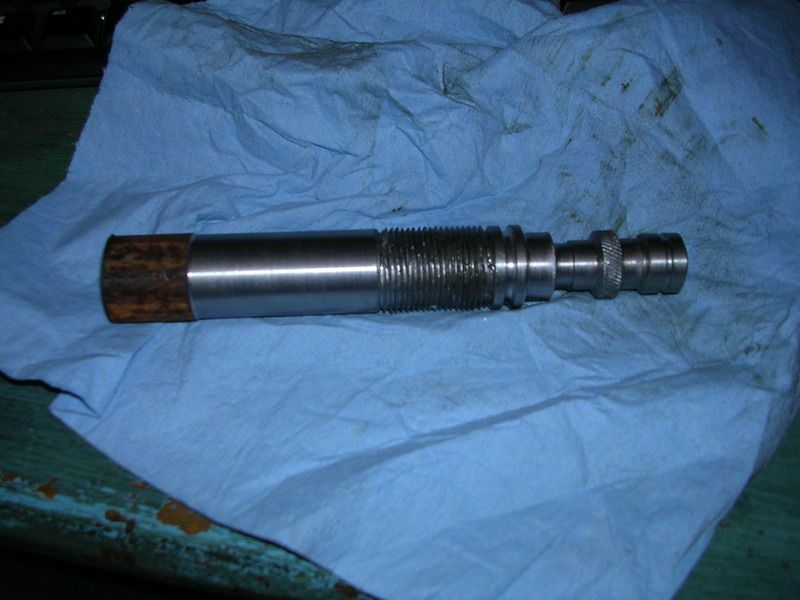
Well, I made it, but I don't know what it is... lol... I started out with a surface rusted piece of 1" rod stock, faced one end, countersunk drilled it in the lathe, and set it up in the three jaw chuck with live center in the tailstock, and just started playing with it...
I was just doing some experimental chip making, really... First, I used one of my HSS cutters to remove the rust from the area I wanted to work- about 6" or so... Then I cut a chamfer at the end, and took a shot at threading, using my HSS threading cutter. I went with a 1"-24 thread, just for S&G. I wasn't happy with that, so I moved inboard a bit, and cut a 1"-16 thread(which is still there). It came out a good bit rougher than I wanted- I was using oil and blame my technique... I need to work on my threading.
I recut my first bit- rounded the nose for a finishing cut, and removed the initial thread, which had been at the one end. I then started playing around a bit, and made successive, deeper passes, till I was turning off about 1/8"depth. The chip was coming off in nice rolls- I think about a foot was the longest one I got this time (my first chip roll was over 3 ft long! I still have it)... Then I started playing with different depths and different places, making plunging cuts... I finally threw the knurling tool on, and gave that a go, mainly on the one raised ring.
I think I'll probably remove the remaining threaded section, remove the rust from the end & face it, then knurl a "grip" area, and bore the larger end out for a battery cavity... Maybe thread the end, and make a cap, as well(from another piece of stock) and make myself some sort of "sonic screwdriver" toy... I can drill back from the small end, and add an LED, and make some sort of electronics board to fit up/in... Maybe part at one side of the knurled ring, and then bore & thread it, and then thread the outside of the area behind, to make a switch section...
Just ideas. I don't know what I have made yet, but it looks neat so far! Everything was "shot by eye"- no specific pattern, no measuring involved at all...") And I'm really happy with the finish- except for the threading...
And I'm really happy with the finish- except for the threading...
Scott
Well, I made it, but I don't know what it is... lol... I started out with a surface rusted piece of 1" rod stock, faced one end, countersunk drilled it in the lathe, and set it up in the three jaw chuck with live center in the tailstock, and just started playing with it...
I was just doing some experimental chip making, really... First, I used one of my HSS cutters to remove the rust from the area I wanted to work- about 6" or so... Then I cut a chamfer at the end, and took a shot at threading, using my HSS threading cutter. I went with a 1"-24 thread, just for S&G. I wasn't happy with that, so I moved inboard a bit, and cut a 1"-16 thread(which is still there). It came out a good bit rougher than I wanted- I was using oil and blame my technique... I need to work on my threading.
I recut my first bit- rounded the nose for a finishing cut, and removed the initial thread, which had been at the one end. I then started playing around a bit, and made successive, deeper passes, till I was turning off about 1/8"depth. The chip was coming off in nice rolls- I think about a foot was the longest one I got this time (my first chip roll was over 3 ft long! I still have it)... Then I started playing with different depths and different places, making plunging cuts... I finally threw the knurling tool on, and gave that a go, mainly on the one raised ring.
I think I'll probably remove the remaining threaded section, remove the rust from the end & face it, then knurl a "grip" area, and bore the larger end out for a battery cavity... Maybe thread the end, and make a cap, as well(from another piece of stock) and make myself some sort of "sonic screwdriver" toy... I can drill back from the small end, and add an LED, and make some sort of electronics board to fit up/in... Maybe part at one side of the knurled ring, and then bore & thread it, and then thread the outside of the area behind, to make a switch section...
Just ideas. I don't know what I have made yet, but it looks neat so far! Everything was "shot by eye"- no specific pattern, no measuring involved at all...
And I'm really happy with the finish- except for the threading...
Scott
Last edited:


")