What's new
What's new

Something new, something old: Four infill planes for the L-N open house

Juan Hovey

Plastic
Joined
Mar 8, 2016
I'm finishing work on four No. 3 infills to take to the Lee-Nielsen open house next month in Maine - two in Honduran rosewood, two in Gabon ebony - and the wrinkle on the prune is that two of them come with more-or-less traditional knobs in front, displacing the "gasping fish" buns that have graced or, as some would have it, defaced my planes until now.

Here they are:

IMG_4826.jpg

IMG_4827.jpg

The rosewood fish-mouth plane won an honorable mention last summer in the Design in Wood competition at Del Mar, and as I happened to glom onto a quantity of ebony earlier this year, I decided to make a second No. 3 to match it, more or less.

There was some ebony left over - and some rosewood, too. So, what the heck, I decided to try my hand at making a plane with a knob.

Make that two planes, one in ebony, one in rosewood.

I sweated the details on these two planes, believe me; as always, my goal was find those points in my work processes which, if I improved on them, would produce a substantially improved plane.

If the proof is in the pudding, take a look at what one of the planes did with some ornery black locust:

IMG_4807.jpg

Here is the same plane working against the grain:

IMG_4832.jpg

The irons on these planes are made of A-2 tool steel, set at 45 or 50 degrees. The sides are mild steel dovetailed and pinned to bases of 0-1 tool steel.

I'm working on a No. 4 in Bastogne walnut in hopes of taking it to the L-N open house as well.

Hope to see folks who frequent this forum there. Meanwhile, cheers from Santa Maria, California, where the summer fog rolls in shortly after dusk and peels back an hour or two after sunrise, giving way to sunshine so brilliant it brings tears to the eyes.
 
Back in May (May 8) my wife & I visited Juan at his shop and house. Afternoon appointments for both of us made the visit too short. Juan had a fascinating career in print journalism, is a great host, and is certainly dedicated (obsessed? :) ) with developing technically and esthetically as a plane maker. Also prolific - puts people like me to shame for sheer productivity.

I tried several planes, (not the most recent he shows here) and the later iterations work very well. The one I used most (again, all this is in about 1 hour in the shop) would plane smoothly in any direction on mildly gnarly softer woods like big leaf maple, and walnut.

There was not enough time to really put the planes through "the wringer" & there were no tuned common planes like LN or Baileys to compare for benchmarking. I also like QS white oak with really roiled grain & maybe a knot area as a severe test but there was none on hand.

Juan & I discussed esthetics, craft, and technical aspects over a long lunch after the shop visit. IMO, the irons at that time are not uniformly up to snuff, and perhaps some of that can be seen in the pictures shown. It is difficult to really assess photos, but there may still be some edge issues with micro "chippyness". Right now he is at the mercy of whoever is making, hardening and final grinding the blades. I know from my own irons there is opportunity for a "glitch" that can yield less than ideal edge structure at any point in those processes. Also at that time Juan was well aware that a lot of work was needed for the lever cap screw design and implementation. Knurls were amateurish, and 60° screw threads IMO are not ideal in that application. Juan knew and was working through those issues.

BTW, not knocking the irons, probably as good as or maybe better than, stock Stanley. But my experience was that there was room for improvement.

During and post visit, I emphasized "science" for some aspects, especially the irons. Set a benchmark, find what works, control for it, and repeat it. Relentlessly. I do wish there had been time for a return visits, but I had an appointment in LA on Monday, and a flight home the next day.

Like any "art", the personal style of Juan's planes may or may not resonate with a given observer or in this case user. For smoothers, they maybe be somewhat long. How a plane feels is quite personal. All in all, though, the good ones he's made work very well; and he is dedicated to continual improvement.

smt
 
SMT – You hit the nail on the head – in fact, every nail on its head: The things you point out are the very items I’ve been working on since you were here.

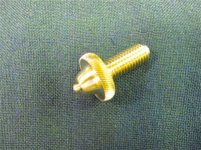
Job One, it seemed to me, was to distinguish between things I could control and things I could not. Job Two was to improve on the things in category one, starting with the easy ones – the lever caps and screws, for example. Here are the results:

IMG_4839.jpg

As you can see, the screws all have 10 TPI acme threads, and the lever caps themselves are identical in shape with the exception of the right-most one, which I hope to replace before I go to Maine next week. My knurling remains a work in progress; what you see in the photo is an improvement on what I was doing when you were here, and my efforts continue.

The irons are a problem; indeed, it may be time for me to stop making my own and turn the work over to someone who knows what he or she is doing. I have the metal (A-2 tool steel) cut on a waterjet and heat treated by a local machinist who does high-end work for the airline industry – in both cases, processes I can’t control.

In an effort to control what happens thereafter - flattening and sharpening the irons – I tracked down and bought a Grade A Starrett surface plate in Los Angeles just last week. As a result, the backs of my irons are now quite flat and polished to a mirror finish, as you can see here:

IMG_4834.jpg

And here, with the camera focused on the overhead light:

IMG_4837.jpg

I’m taking care to sharpen the irons in the same way using a Lie-Nielsen blade holder and Japanese silicon carbide abrasive papers (to 3000 grit) on the surface plate, followed by stropping on hard leather. The edges look good to my eye, but the results are mixed when I put them to work on wood.

If the problem is what you point out – some chippiness in the steel – the solution, as I say, may be to find a maker who can produce irons to my specs.

Ron Hock would be on the top of my own list of likely suspects. If you or other folks on this site know of others, please let me know.

All in all, Raney Nelson was right in telling me to take care with the details, because that’s where the “science” comes in. It’s also where the really hard work starts.

I greatly enjoyed your visit and thank you for your thoughtful input then and now. I hope to be back with good news upon my return from Maine.
 
I made Juan a bunch of cap screws that were very nice. But I guess he gets them cheaper(and less well designed) elsewhere. This is not a dig at Juan.If you are determined to go with these designs,at least I'd recommend going with the cap screw on the RIGHT in the picture. The double thickness ones are just too clunky(and take more brass!)

I use the original style half acme,half square thread screws on my own planes. But,that would cost more,and I'd have to furnish a tap that I'd make. They are nicer and more authentic threads. But,I'm sure the 60º threads will not wear out in a few lifetimes.

I'm not there to test the A2 irons. I think a less acute bevel would help the chipping(I don't know what angle of bevel you are using),unless there is a fault in the heat treating. LN uses A2 with no problem. As do I on a lot of tooling for my wife,made to last long after I am gone(She is younger).

I'd make those snecks a LOT more narrow. And TAPER them down to nearly the thickness of the blade. Unless they can be WELDED on,I think the pins would start showing soon after someone started using them.

Or,just ELIMINATE the chunky looking snecks altogether. No one I can think of used them on bench planes anyway. Not Norris,Speirs,etc.. They are just an un necessary and more costly addition to the planes.
 

Attachments

  • cap screw 2.jpg
    cap screw 2.jpg
    51.4 KB · Views: 166
  • cap screw.jpg
    cap screw.jpg
    53.2 KB · Views: 180
I made Juan a bunch of cap screws that were very nice. But I guess he gets them cheaper(and less well designed) elsewhere. This is not a dig at Juan.If you are determined to go with these designs,at least I'd recommend going with the cap screw on the RIGHT in the picture. The double thickness ones are just too clunky(and take more brass!)

I use the original style half acme,half square thread screws on my own planes. But,that would cost more,and I'd have to furnish a tap that I'd make. They are nicer and more authentic threads. But,I'm sure the 60º threads will not wear out in a few lifetimes.

I'm not there to test the A2 irons. I think a less acute bevel would help the chipping(I don't know what angle of bevel you are using),unless there is a fault in the heat treating. LN uses A2 with no problem. As do I on a lot of tooling for my wife,made to last long after I am gone(She is younger).

I'd make those snecks a LOT more narrow. And TAPER them down to nearly the thickness of the blade. Unless they can be WELDED on,I think the pins would start showing soon after someone started using them.

Or,just ELIMINATE the chunky looking snecks altogether. No one I can think of used them on bench planes anyway. Not Norris,Speirs,etc.. They are just an un necessary and more costly addition to the planes.


George - As you've seen by now, I'm using 10TPI acme threads for the lever caps and screws. I'm experimenting with 12TPI as well to see which I like better.

The chunky cap screws you point out were practice runs. I'm finishing up making screws with caps like the one you mention and will have them on the planes for the L-N show.

You suggested once before either narrowing or getting rid of the sneck. Problem is, what to replace them with? A sneck is a necessity on my planes, as it's the only means by which, using a hammer, you can adjust the depth of cut of the iron. I don't much like the snecks myself but can't think of an alternative and can't picture in my mind what you mean by tapering and narrowing them. Tell me more.

What would you think of a button sneck placed right below my logo?

By "chippiness" I think Stephen Michael Thomas meant flaws in the steel, not chips in the edge. I bevel my irons at 30 degrees for planes bedding them at 45, 47.5 and 50 degrees. Do you think some other bevel angle might work better?

Also, you cautioned once about beveling irons before getting them heat treated, for fear that the high heat would distort the beveled edge. Does this mean that you create no bevel at all before heat treating your blades?
 
There is a SIDE SNECK also,Juan. It is a long,tapering notch in the side of the iron. I don't have a picture of it. You tap the 90º-to-the blade part of the notch.

Other old infill planes got by without a sneck. You have to start over. That(sneck) is a GERMAN feature. The only old English planes I have seen with a sneck are the low angle miter planes,for some reason.

DO NOT BEVEL the edges of your irons before heat treating. That causes the bevel side to have a little more surface area than the flat side. It usually warps the blade across its width. If you have been getting by with it,it is likely because A2 is air hardening,and much more forgiving. But,you are still VERY MUCH risking decarb in the thin part of the bevel. This may be why you are having chipping problems.

The OLD ADAGE "If you would a good edge win,forge THICK and GRIND THIN",still holds.


Back
Top