What's new
What's new

Another New Toy

Thank you for the suggestions, but I was more surprised by the heat than anything else. I was comparing my experience running the CY at approx the same speed, 762 RPM on the SE 60, for sustained periods, but I never really paid any attention to it. I know it got warm, but how hot I can't say. Never gave it any mind.
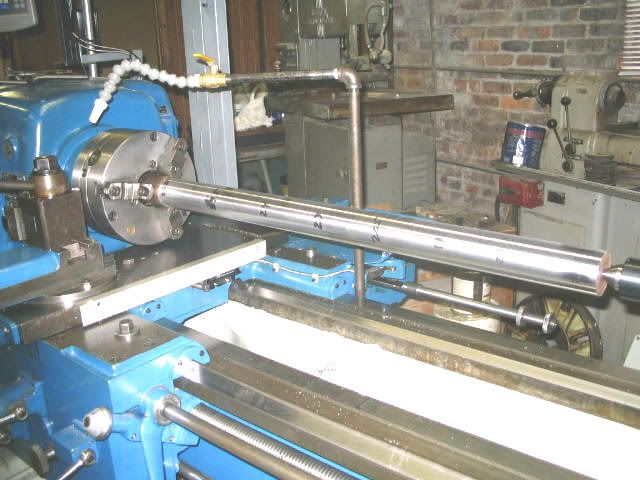
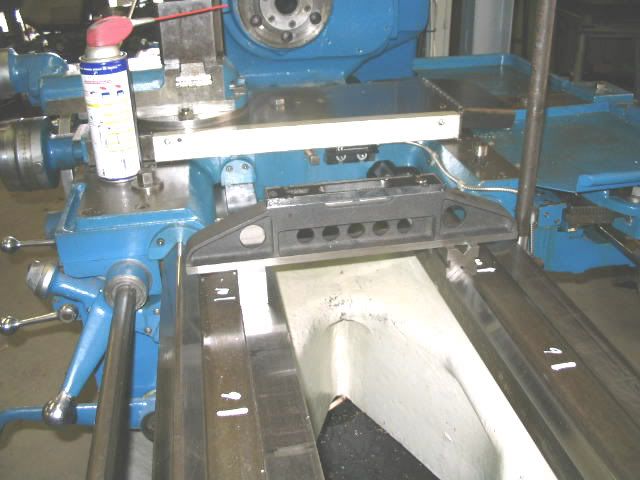
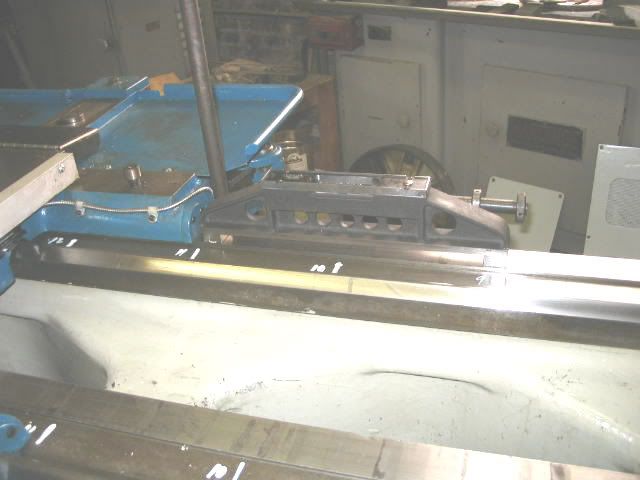
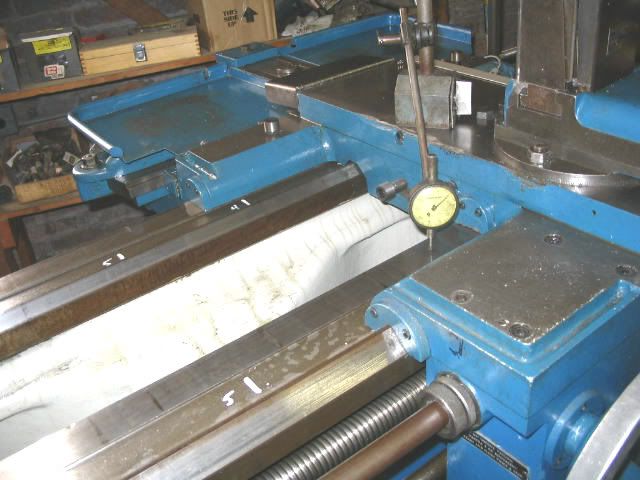
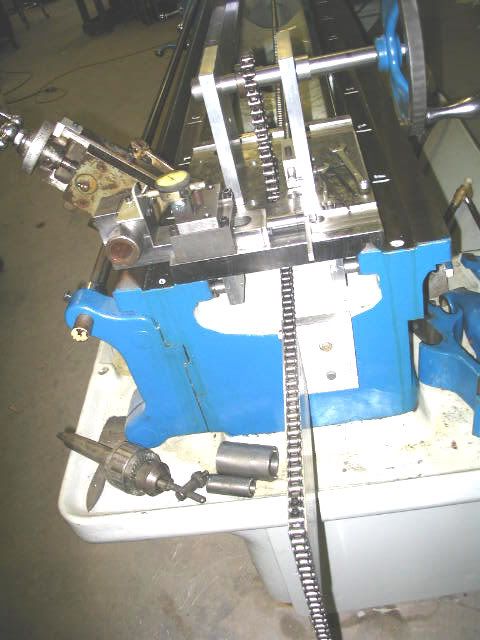
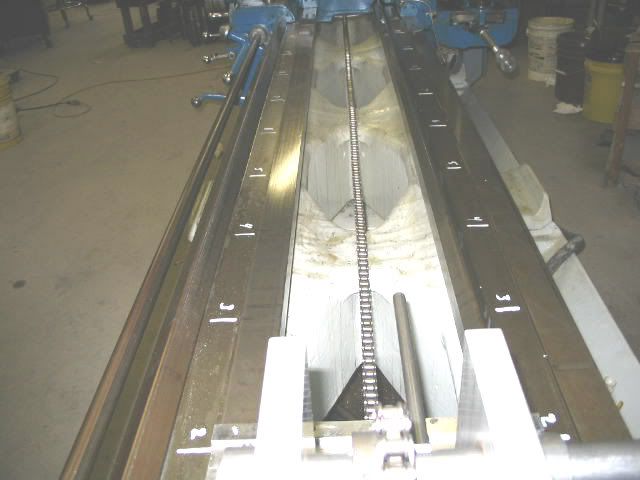
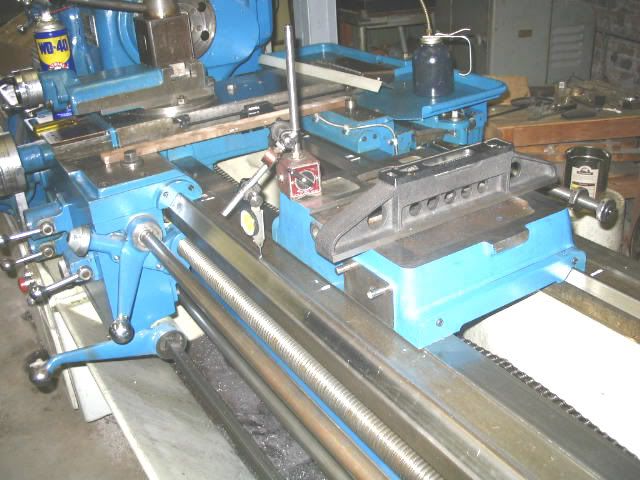
The only thing that really worried me, was that I had the spindle bearings to tight. Remember I had to bump the spindle out to fix the leak on the cap, and then readjust the spindle nuts. A couple weeks ago when I ran the "unresistable" test cuts, the next day I took a pass at .005" DOC and the finish was less than desirable, even for 1018, so I tightened up the bearings, and this is really a guessing game, and got a much improved finish for the same DOC. I started on the job at 600 RPM, which is about what I running the same job on the CY. After about 5 pieces I decided to try the next speed up which is 762. The headstock was already warm, but the temperature definitely increased, as expected, and then stabilized at approx a very warm cup of coffee. I also backed the preload a very little bit, with no effect on finish. At no time did the lathe get so hot that I couldn't keep my hand for sustained periods. As a comparison, when I adjusted the spindle on my #4 Cincinnati, the maximum temperature per Cincinnati is 145*, that temperature I can't keep my hand on the column for longer than a few seconds. The SE 60 never got that hot.
It's just learning the "nature of the beast".
I'm using Shell Turbo T-68, IIRC, in the headstock. According to Shell it's the equivalent of Mobil Heavy-Medium, which is Monarch's recommendation.
Harry
 
I never have gotten around to playing with the headstock bearing on our 60 after I yanked the spindle. Will have to check it out.

I just noticed how small the taper is in your tailstock. Ours has a MT5 in it.
 
Headstock has a #5MT, tailstock a #4MT.
The only time I needed a #5 was on my #5 J&L, core drilling a 2" hole 10-1/2" deep in aluminum tube. 734 RPM, .100" feed. Makes a lot chips fast. 24,000+ parts over 3 years.
Harry
 
You did a great job and provided a wonderful piece of technical exposition and photos. I'm in the process of refurbishing a 1987 Webb 4VH Mill and your thread has been an inspiration. Seeing how this machine was built shows why Monarch is so highly thought of by machinists in general.

Thanks! :)
 
Scraping

Harry great job on your machine and lots off good info I am tearing my Lodge & shipley carraige down on your post 77 after you milled clearance in the two places did you on the other two ways with zigzag oil groves did you scrape those surfaces to allow better oil flow.I have ordered the Richerd King dvd on scraping and the Connley book on machine work I will read and watch befor I do any scraping .Cant find any one up here that can show me the skill of scraping.Had a man come to my shop 12 years ago Dennis D from Saint Paul Minn. had a scraping class at my shop for a day .How the years go by then you come back to wear you started.Wanting to learn about scraping and I have a lot of stuff to learn on.
 
The 2 areas on the carriage that got milled are not bearing surfaces, however there was enough wear in the carriage slides(those are the surfaces with the oil grooves) that those surfaces were making contact. It's my opinion that Monarch really cut the clearances on the close side in the section that goes over the inside V way. The inside flat slide of the carriage is not supposed to bear on the inside flat way, even though the carriage has wipers at that position. In conversations with Monarch, I've heard of clearances from .004" to .030", in that section. You can imagine what happens as these non bearing surfaces start bearing. I will probably have more to say on this in the near future.

I haven't touched the V and flat slides on the carriage.

I haven't seen the scraping video, but I've read MTR, and continually refer back to it. You'll get your money's worth.
I've been keeping up with your L&S posts. Looks like a nice lathe. In case you don't know Monarch and L&S have the same address.
Harry
 
Sometime in the middle of June I ran some cutting accuracy checks. The results were not what I was expecting to see. I messed with this problem off and on for 2 weeks. I rechecked, and readjusted the leveling, even went so far as to put the bed in a severe twist to correct the problem. Nothing seemed to work, except I did get better results with the severe twist for the 35" length I was turning. I then decided I wasn't going to accept the severe twist, because that wasn't going to solve any problems on longer lengths, in fact it would have most likely caused other problems. About that time my uncle stopped in for a visit, saw me looking at the lathe, asked what I was doing. Bear in mind, he dosen't know a lathe from a drill press, and from what I've seen is fairly inept with hand tools, and he works in a hardware store! I explained what I was doing and the nature of the problem, got a travel indicator, set it on the TS, cranked the carriage as far forward as possible, and proceeded to indicate the inside face of the front V way. Told him to watch the needle, and started cranking the TS forward. It was 0 until I got to the middle leg, and from then on the needle started moving. Uncle got a little excited seeing the needle move and let me know about it, of course I was also watching the needle, and all I had was a look of disgust, after I saw the amount. It was at this time that I realized what was going on with my new toy, and the corrective actions necessary. I explained to uncle that there were 3 options to correct the problem, none of of them attractive. The first was regrinding the bed, all the work necessary for this and an estimated cost. The second was to make a sled and rough plane/shape the inside face, followed by scraping, and the procedures necessary, and the third was to do nothing and deal with the inaccuracies when they occurred. Option 1 was immediately rejected, and option 3 was not attractive.
One other factor that I have to consider is that I still need to use the lathe for the job I purchased it for, which isn't affected by the worn the area. All I need is an estimated window of 2 weeks, I hope, to get this work done.
I did need to do some extensive preporatory work before actual work could proceed. First, I had to do an extensive survey of the bed, especially the inside ways, for their accuracy, to see if the results would be acceptable; second I had to build a sled, and third I had to figure out the sequence of operations.
First, I need to explain the nature of the problem. The best way to do this is with the test bar cut. The bar was originally 2-1/2" D 1018, it is now approx 2.3XXX. The XXX readings from left to right are 205, 235, 240, 230, 205, 190, 200, 225 over a 35" length.
se177.jpg

As you can see there a approx .005" bulge in the middle, and as you move to the left there is a slight taper, that will continue right into the chuck jaws. Unfortunately, this is where 95% of the work is done, if I want to make full use of the lathe. It's been said the mark of a good machinist is dealing with these problems. That's fine if you're the employee, but I'm the owner, and in my view that is not economical. I've got enough problems, and don't need to deal with these, if at all possible. When I'm working on a job, all I want to do is get it out the door as quickly as possible, and invoiced.
Subsequent checks have revealed that the wear on the inside face of the front V way very closely matches the above readings in their location. What has happened is obvious. Most of the work done on this lathe in the past has been in this area, coupled with an apparent lack of lubrication, this wear was accelerated. This was not apparent from my initial inspection, the only check I did, was to measure the inside flat way from the carriage. It dropped vertically approx. .005", and considering prior experience with my 16" CY and it's .004" drop with the same test, I felt justified in assuming I could expect the same level of accuracy with this lathe. What happens is as the carriage drops vertically from wear on the inside face it is also pushed away from the centerline by cutting pressure. In the case of the SE 60 the wear was concentrated in a realitively short length, whereas on the CY the wear seems to be spread out over a longer distance. I've never had a problem holding a tolerance with the CY. What I didn't count on was the inside flat way making contact with the carriage in this area, hiding the full nature of the wear. It was my error in not catching this when I noticed a bit of difficulty when I checked with .002" feeler gauge, in inserting the gauge between the carriage and flat way. The gauge went in, and I didn't think anything more of it, until now. I got caught.
Over the next few days, I'm going make a few more posts detailing this part of the adventure.
Harry
 
Last edited:
Rough plane inside front V

Harry;

If you were to make a sled to rough plane the inside of the front V, what would you use as the control/reference surface for the length of the inside V?

Regards;
Steve
 
The only way I can use a sled to plane/shape the inside face of the front V way is to use the inside ways as the reference surface. The ways were verified with the level in both directions as to their condition. There are condition issues with the ways, but not so much so as to render them useless. I will post a chart of the level readings later that will demonstrate this. I will say this, for a lathe that's 55 years old, the condition is very good. I've seen a lot worse, for example the inside ways of the "Wreck" with its "Great Rift Valley". I initially thought the inside ways were in worse shape than what I found after tweaking the leveling last Thursday. This procedure is risky, and has to be carefully planned out before taking the first cut. The first cuts have been taken, and I'm now irrevocably committed to finish it. I can't use the lathe otherwise.
The procedure is thus; I'm not going to remove the carriage unless I absolutely have to; ie: problems with the shafts on the front of the apron. As it is now, the carriage is easier to move in the worn section than the unworn section. Because the carriage isn't going to be removed, it will parked next to the headstock. The remaining 7' of bed will planed/shaped and then scraped for flatness and alignment. Only after this first part is completed, will the sled be removed, the carriage moved to the TS end, the sled replaced and same procedure repeated on the remainder of the inside face.
Because of the procedure being as it is, there are certain design considerations for the sled in the placement of the cross slide slots. There are 2 slots, one on each end, and I'm going to have make another toolholder with extended reach when I do the headstock end. I've incorporated several other features in the sled, mainly from lessons learned on the sled I made for the "Wreck".
It's time for pictures.
Bottom of the sled. The slides have had Multifil 426 epoxied and then scraped. The idler sprockets are in the center, and the gib rollers are inside of the slides. The gib blocks are not directly connected to the base. The slotted screws are guides to keep the roller blocks from tilting. The hex head screws have die springs under them to keep the blocks tight against the base. The gibs also keep the sled on the bed when it is in the starting position on the TS end. I almost lost the "Wreck's" sled because I was pushing to hard and it went off the bed. That incident drew blood.
se178.jpg


Another view of the bottom.
se179.jpg


The top side. The #40 chain will be attached at the headstock's bed clamp, routed under the carriage, through the sled and attached on an extension bracket at the TS end. The TS's handwheel will be used on the drive shaft. The cross slide's feed screw has an arm attached that will retract the cross slide when the rod in the upright makes contact with the carriage. There are some details that have been attended to since this picture was taken, that make the sled fully functional.
se180.jpg


se181.jpg


se182.jpg


The white numbers are for the inside face, the yellow are for the outside face. I don't know how well they'll show up, but they are the indicator readings from the inside ways, of the wear on the outside way. They should be regarded with skepticism as they don't quite correspond with the test bar or the indicator from the carriage of the inside flat way. Never the less the wear is there, as evidensed by the test bar.
se183.jpg


I've also been busy making tool holders. The material is 4140PH.
se184.jpg


More later.
Harry
 
Checking transverse level at 14 positions. This was done for the inside flat way/inside V way and the inside flat way/outside flat way.
se185.jpg


Checking the outside flat way at 13 positions. The inside flat way has already been checked, and the V way was next.
se186.jpg


Checking the wear on the inside face of the outside V way. The outside face was checked in the same manner, as was the outside flat way.
From position 0-8 the wear is 0, from 8-11 the wear is approx .007", from 11- 13-3/4 the wear is approx .002" going to 0.
The outside flat way;
from 0-8 0, from 8-11 +.002", actually I think this is 0, but there is a bit of wear on the inside V way at this point, so I get this reading. There was a bit rocking in the V block in this area of the V way. 10-11 0, 11-12 -.003", 12- 13-3/4 -.0025. I think thiese readings are due to a bit of wear on the inside flat from the carriage. The carriage marks are plainly visible.
These numbers have to be viewed with caution. There is definitely a wear factor to be considered in the reference surfaces. Also I was using a travel indicator and wasn't attempting to get exactness, just a good idea of what I'm dealing with and looking for confirmation of the test bar readings. I also ran the check from the carriage to the inside flat way which showed .006" movement in the affected area.
se188.jpg


The chart. All the numbers are the 4th decimal point. I hope you can read it. I did have to move the carriage to get readings in that area, and the carriage did affect the readings. Keep in mind the carriage weighs 6-800 LBS.
se194.jpg

Harry
 
The sled's chain TS connection.
se189.jpg


The relief actuating bar is lais across the carriage wings to protect the DRO reader and spar. Barely visible spacers put about 1-1/4" away from the cross slide.
se190.jpg


The chain's headstock connection. Just a piece of angle attached to the headstock clamp.
se191.jpg


The setting indicator is firmly attached to the gib bracket. No magnetic base that can be easliy or accidently moved. I had that experiece with the 'Wreck's" sled.
se192.jpg


There is approx 11-1/2' of #40 chain used. I tried it a bit tighter, but it gave a bumpy ride. The non-tensioned side simply lays on the cross bracing.
se193.jpg


Harry
 
Wow Harry, you've really outdone yourself on this one! I'm looking forward to your next report.

How do you monitor the sled to make sure it's not lifting off of the reference surfaces when cutting pressure is applied?

Cal
 
After I planed/shaped about 3/8", I checked with an indicator, it was basically reading 0, considering the surface texture. I did have issues with the ceramic insert cratering, and chipping, went through 3 of them real fast, thinking this was going to be an expensive proposition, but I solved the problem after tightening the gib a little on the slide tool.

A word of advice to anybody considering a sled with a chain drive-don't. The sprockets are transmitting to the surface, and causing me to spend a little more time scraping than I anticipated. I had thought about a cable drive, but I had the drive sprocket and 20' of #40 chain from a discountinued product line, and decided to use it. Live and learn. Just to be sure, I checked the outside face of the front V way on the "Wreck", it's been planed/shaped and still needs scraping. That surface is very smooth compared to what I did on the SE 60. The sled for the "Wreck" is manually pushed, but it is a lot lighter and the lathe is a lot smaller.
Harry
 
Harry;

Seems like this sled application could use a long screw drive for smoothness in lieu of the chain. A screw drive, where the screw is allowed to rotate through two or more large nuts on the sled, and driven by the lathe feed screw at very low speed. The screw could be attached with a bracket near the headstock, that allowed the screw to rotate in a bushing. The rotating of the sled screw could be done by attaching an extension to the tailstock end of the feed screw and a pulley with drive belt to the sled screw/pulley. There would be two brackets of course, one at headstock another at tailstock, both of which would need to be adjustable to center sled/screw for movement without binding. just a thought.
 
I was able to get the first 75" or so of the bed planed/shaped using the sled. That section was then scraped for flatness and straightness, which worked out quite well. The sled was removed, the carriage moved to the TS end and the sled remounted, less the gib rollers, and I attempted to repeat the process with an extended tool holder, but was unable to get the cutter to cut, it just rubbed. The ceramic insert showed no signs of chipping or cratering. I worked on this problem for several hours, but was unable to find a cause or cure. Deflection was checked in more ways than one, nada nothing. I decided that I could scrape the remainder faster than screwing around with the sled. There are approx 37" that remain to scraped, but in reality it is approx 18" or so. This is the area that has the majority of the wear. The only hard area to scrape is the 5" or so beside the headstock, and I may have to resort to unconventional means to get the excess off. The last 3" or so, the carriage will never see, but the first 2" it is quite possible.
There is a major problem that presented its ugly head. The carriage is extremely hard to move over the newly scraped section, due to the vertical drop of approx .012". I was hoping that its removal wouldn't be necessary, but it is. The V and flat slides will get milled, and Multifil 426 epoxied on, and then scraped. The last sentence is the easy part, its all the logistics necessary, that's the hard part.
Anyway some pictures.
The shaped/planed section is the top half, and glitter are chips, in the first picture. The second picture, the entire face has been shaped/planed for the first 75" or so. The yellow line is a 4' marker for the straight edge.
The surface is quite rough, currently, but after scraping itis very smooth The DTI barely moved when I was checking in the third picture.
se195.jpg


se197.jpg


se196.jpg


Harry
 
The scraping of the inside has been finished with the exception of the last 2-3"'s next to the headstock. I simply couldn't get the scraper in there without removing the headstock. That area is a good parking spot for the carriage stop. I did manage to get the rest of that area suitably scraped, not the prettiest looking, but you're going to have to use a mirror to see it.
I also took a test cut on the 35" bar, to see if my efforts paid off. The last 6 or so inches need some more work, about another thou or so, but the rest of it turned very nicely. I'll fine tune this after I get the carriage slides redone.
The biggest problem I have with the carriage is logistical, getting it on and off the bed and turned over. An A frame or jib boom would be great, but at present of limited use afterwards. The solution I came up with is a chain fall hung from my small forklift with a bracket connected to the carriage. This is best told with pictures.
The lifting/rotating frame. There is a 1" D bar going through the CS screw hole and out through a bracket on the backside. Once the carriage is off the bed, the forklift is backed up, the scraping table cart is moved underneath, the carriage turned over, and then lowered onto the table.
se198.jpg


The backside bracket is attached using 2 of the TA/s mounting holes.
se199.jpg


Sketch #1 is the carriage's V slide's relationship the V way of the bed after the inside was scraped. There is approx a .006" gap at the top of the inside face, which I think goes a long way to explaining the difficulty of moving the carriage.
Sketch #2 is the wear in the V slide, approx .012" on the inside face and approx .008-.010" on the outside face.
se200.jpg


2 different of checking the amount of wear. Remember, these are approximations.
se201.jpg


se202.jpg

Harry
 
There is another problem that I've been wrestling with for the past couple of days. I can't reconcile 2 sets of numbers, namely the amount of vertical drop ie; the .012" of wear plus the .007" approx removed from the inside face of the front V way for a total of .019" multiplied by 1.414 for a total vertical drop of .027" approx, to what I'm measuring from the bottom of the carriage to the leadscrew which shows approx .010" difference from the top of the apron to the leadscrew. I can't seem to find the .017". The .010" difference does agree with the total vertical drop of the bed's V way(.007 X 1.414= .009898). I'll check my measurements again, before I take the first cuts on the carriage slides in preparation for the Multifil 426. The .017" may, or may not, be important in the apron's shafts alignments, but I would definitely feel more comfortable explaining this anomally.
When I originally discovered the accuracy problem and its solution, I considered just doing the carriage's inside V slide face with Multifil, but after some consideration and discussion with another member, I decided that both V slide faces as well as the flat slide would be done, in other words do the complete job and do it right. The reasoning for the first consideration was simplicity with cross slide alignment, but then I considered bearing area contact in the other surfaces, and that thought line was tossed. Doing it right is a little more involved, but in the long run it is best.
Harry


Back
Top