Hi miketig:
You wrote:
"I haven't glued it to the board yet, I am starting to consider going the route of a split pattern, My original thought was that it would be easier and quicker for the molder with the gates mounted."
Yes it is, but only if you accommodate everything the molder needs in order to run it on his production line.
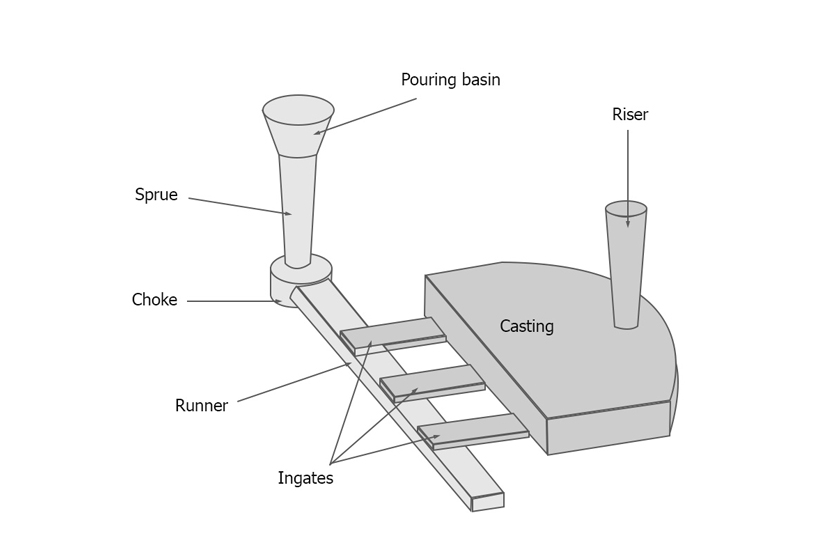
Foundry patterns mounted to a board with the gates and runner system are commonly called matchplates, and need to have some features standardized so they will fit the flasks the foundry is going to use and the handling system the foundry is going to use.
If they don't, they are more of a PITA to the foundry than they are worth.
So my instinct is to recommend making a split pattern unless you can speak with the foundry first and get the information you need to have in order to make it as trouble free for them as you can.
So make sure the drafts are good, that it is smoother than a baby's butt on the draw faces, that the pins do not bind, and that the parting surfaces are as flat as you can make them (and will stay that way).
Make sure the male pins are on the cope side of the pattern (assuming the cope side and the drag side are different), so the drag side of the pattern can lay flat on a molding board.
Put the fancier features on the drag side...it's way easier to pull a pattern out of the drag than to lift a whole cope off the pattern.
If they want to turn it into a quick and dirty matchplate, they can do that themselves, or hire a patternmaker to do it for them.
My guess is that unless they have many to do, they will be happier with a well made split pattern.
If you have little experience with patternmaking (it's a dying art), remember that the sand they use is both abrasive and moist...pattern lacquer is your friend if you want the pattern to survive for any length of time.
If you already know all these things, my apologies for re-stating the obvious.
Mark the pattern so they know which faces you prefer to gate into...let them decide how big the gates are going to be and where exactly they want to place them.
Ditto for the risers and the vents.
Cheers
Marcus
www.implant-mechanix.com
www.vancouverwireedm.com