What's new
What's new

Full tear down and Rebuild of a 10EE Round Dial

I understand using taper pins for their strength and alignment properties, but using them in addition to set screws makes the set screws obsolete. The threaded taper pins in this use also seem to be odd, as a normal taper pin would work just fine..... but I digress I am sure Monarch had its reasons.


How would get a normal tapered pin out? The threaded pin offers the opportunity to pull the pins out with the nut and without punch access to the small end of the pin.
 
How would get a normal tapered pin out? The threaded pin offers the opportunity to pull the pins out with the nut and without punch access to the small end of the pin.

I ended up having to press them out from behind anyways as they where frozen solid on mine and trying to pull up on them with the nut was futile. I do agree if they where not frozen from 80 years of grime then that may have been easier.

BTW, ski hills just opened here, 'bout time for my amazing wife and I to strap our snowboards on our old feet.

I'm really itching to get going early season locally as now and spring are when I get the most time to take my family up. Once, I start traveling I get precious few days to ski with them until the end of the season. It's the only major draw back to my job. At least I get 6~8 months off every year to be with my family.

We where about to open here with a 60" base before we had two atmospheric rivers back to back wipe it all out. 15 inches of rain in 48 hours. Broke every record kept for rainfall for 24, 48, hours etc even the 7 day total for over a 100 years. Most of the farms in the low land got hit pretty bad with flooding and just across the boarder in Southern BC they lost all major mountain pass roads.

We just had another atmospheric river today with two more on tap between now and Tuesday.... Rain is the last thing we need up here right now! Luckily, I do most of the photography for Ikon pass, so I have the ability to buy plane tickets last minute and fly where ever its about to be good, but I have not seen a solid enough of a forecast for any of the locations yet to justify flying a crew in. Typically I need at least 4 feet on the ground and then a few feet of snow in the forecast followed by sun to make a trip worth while. So I get a few more days to work on the lathe after the holiday weekend, before I need to put it to bed for the winter.
 
Yes, that gasket is expensive but I've found that at times the Monarch gasket may be worth the expense. In the case of the back gear box, I did make my own but used a gasket material that's thicker (not materially, but thicker) than the one Monarch supplies. That will throw off the vertical alignment with the other pulleys. Even if it is just 1/16th of an inch, it makes a bit of difference. I still ended up making my own (again, but I did buy the Monarch one and copied it), but used 1/32" blue Garlock. Me being me, I have purchased almost all the gaskets from Monarch, but made my own anyway and had the Monarch supplied gaskets all drawn up in Fusion 360 so they can be laser cut in the future. I'll keep the Monarch ones in perpetuity as templates.
 
Thanks for the documentation! I did a full down to bear casting rebuild of a 1942 in 1995. Mine was missing electronics for the drive, so I built a heavy duty solid state drive. It worked well for 2.0 years of daily job shop work. It’s a great machine for what was a basket case. In 2010 the drive died and motor was having insulation issues so I did the next upgrade. I used a 7.5 premium efficiency Baldor coupled with a Mitsubishi 15 Hp VFD. Removed the gear box back gear drive. Went with open belt no gear or other mechanical chatter in the drive train. It’s absolutely amazing, quiet, almost unstoppable at 5 rpm. The15 hp VFD is for derating as I power it with single phase today (retired 😉 no more job shop or employees and sold industrial building). I did much of what you’re doing, down to reblacking the shcs that I cleaned and polished. All levers chromed, aluminum or white metal powder coated. I built and added a variable speed feed drive motor Ala HLVH, a great non stock addition that also kept chatter out. I did a lot of fancy limited production 300 series audiophile parts (picky German customer). With minor tuning, right inserts the machine produced better then ground finishes. My wife says she wishes I looked at her like I look at my Monarchs, I replied that if she had a spindle hole that tight, I would look at her with that special gleam…. Still married and still running that machine. Good luck, great job on the documentary.
 
Grant,

How did you get that collar off the gear? I've spent hours studying mine and it just will not separate, something is preventing the collar from slipping off the gear and I'll be damned if I can find what it is.

198_Leadscrew4_LI.jpg
 
Grant,

How did you get that collar off the gear? I've spent hours studying mine and it just will not separate, something is preventing the collar from slipping off the gear and I'll be damned if I can find what it is.

View attachment 338581

There are some match / witness marks that need to be aligned to expose the setscrew through the hole that holds it together.
 
Ty, mine has so much gunk in there, despite looking around using that hole I never noticed that small set screw. I went around the whole cog and sprayed PB Blaster in there to clean it all out and I see it now. Wow is that a small Allen key to get that out.
 
Grant,

How did you get that collar off the gear? I've spent hours studying mine and it just will not separate, something is preventing the collar from slipping off the gear and I'll be damned if I can find what it is.

View attachment 338581

I'm back in my busy travel / work season, so not near the lathe right now, so this is by memory.

If I remember correctly, there is a set screw on the busing to the right of what you have circled. I think they may also be a round retaining ring inside of the collar, but I dont remember for sure. Once that is removed, I just pulled the shaft out and used the end bracket on the right as a sort of slide hammer to tap off the collar.
 
Grant

Great job on this rebuild thread. I’ve been rereading it several times. Cal gave you a good suggestion with getting a thread cleaning set instead of taps. I use my set daily. I want to suggest when using, keep in mind they are softer metal and so you can’t torque them like a tap or they will break in the hole you’re cleaning. I give them a easy touch and back them out as soon as I feel slight pressure. I often run them several times back and forth, each time going a little deeper.

Jim

I did end up picking up as complete of a set of thread chasers as I could find. There is a still quite a few sizes that it doesn't cover but at least I should have the most common sizes covered.
IMG_5153.jpg
I try to keep all of my threading tools organized by size, so each compartment has its taps, drills, dies and restorers all in one spot as I hate looking for stuff. It's seems that no matter how many tools your own, a project comes up that you need some odd ball size or specialty tool to complete. Only issue is there is no longer room in there for all of my tap handles. So I need to either reconfigure another drawer, or possibly pick up a set of tap index's to go with my drill index's but it would take quite a few to cover all of my tap sizes and I'm already short on space, plus I have a few odd balls, such as 9/16-20LH ones for bike pedals. etc. So, I need to keep my eye out for a few more Vidmar cabinets.
IMG_3142.jpg
Anyways, after being on the road almost non stop since November, I am departing tomorrow for another 4 day ski shoot, which will most likely be the last or one of the last of the season. So I'm really looking forward in diving back into the lathe when I return.
 
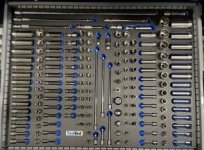
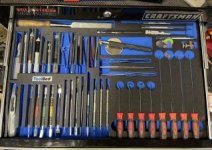
This week has been all about getting the shop switched back over from ski mode. First order of business, was to re-organize all of my tools to make working on the lathe and other projects more efficient going forward. Previously I dialed in my socket, wrenches and punch drawers. Here is what those look like.
IMG_2439.jpgIMG_2444.jpgIMG_2447.jpgIMG_4745.jpgIMG_2455.jpg
 
Next up was the ski tooling drawers
IMG_5285.jpg78AC8CF2-2365-472A-B4B4-A54BA0337D0A.jpg
[FONT=interstate, sans-serif]The bike tooling is a bit more evolved. It seems like the MT. Bike industry likes to come out with a new "standard" every 6 months that then requires new specialized tooling. This is one area, where I see my self using the lathe quite a bit once its finished
[/FONT]A8A27F38-A86F-47AF-8281-2FC9B20FDF91.jpgB0115518-7F2D-4F1A-8A80-9A6D517669FC.jpg
[FONT=interstate, sans-serif]This drawer has all of my bearing tools in it. At least a lot of the drifts have some cross over to working on other things besides bikes.[/FONT]
IMG_5270.jpg
 
And finally the last of the bike tooling.
IMG_5272.jpg
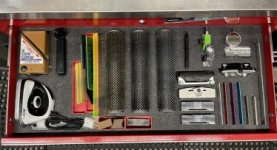
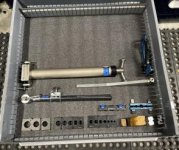
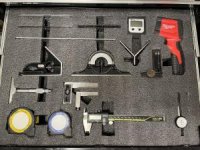
With the bike tools organized, I moved onto my various measuring and more precision drawers
IMG_5264.jpgIMG_5265.jpgIMG_5266.jpg

And then my automotive drawer
IMG_5267.jpg
 
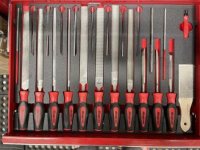
I had a bit of foam left over, so I decided to finish with my pliers and hammers
IMG_5273.jpgIMG_5284.jpgIMG_5274.jpg
So now thats done. It should make working on the lathe and other projects a bit more efficient. All thats left for me to do before I get back to the lathe is to finish unpacking from this winter.

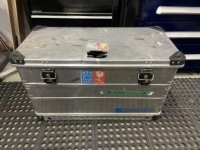
I have basically been traveling constantly since December, and have essentially been living out of this case.
IMG_5299.jpg
The case is made by Zarges, and I have now used it for well over a decade and its been around the world more times than I can count. Which is pretty impressive when I was burning through multiple suitcases a year previously. Along with that case I got several duffle bags of product samples and ski bags to sort and then I'll be in full workshop mode. If all goes well, that will be tomorrow.... finally!

 
Nice job on you drawers! What is the gray divider material?

What do used Vidmars sell for in your area?

BTW, you photos are posting very small again. Don't forget to change the extension from "JPEG" to "JPG" before you post. There's an upgrade to the website in the work that will finally fix the dreaded "JPEG" issue.

Cal


Back
Top