What's new
What's new

Getting a Monarch Series 61 Back in Service

Sure it does, there are dozens of threads regarding excessive clutch linkage wear on Monarch lathes. Must of been the end of the world when it happened to the three model 61s all lined up just for you. Yes sir, who could argue with that. Lets see some photos!
...
Early training here .... Webster Gear / Webster Racing

64-Webster-2Ltr-num76-DV-11-MH-01.jpg


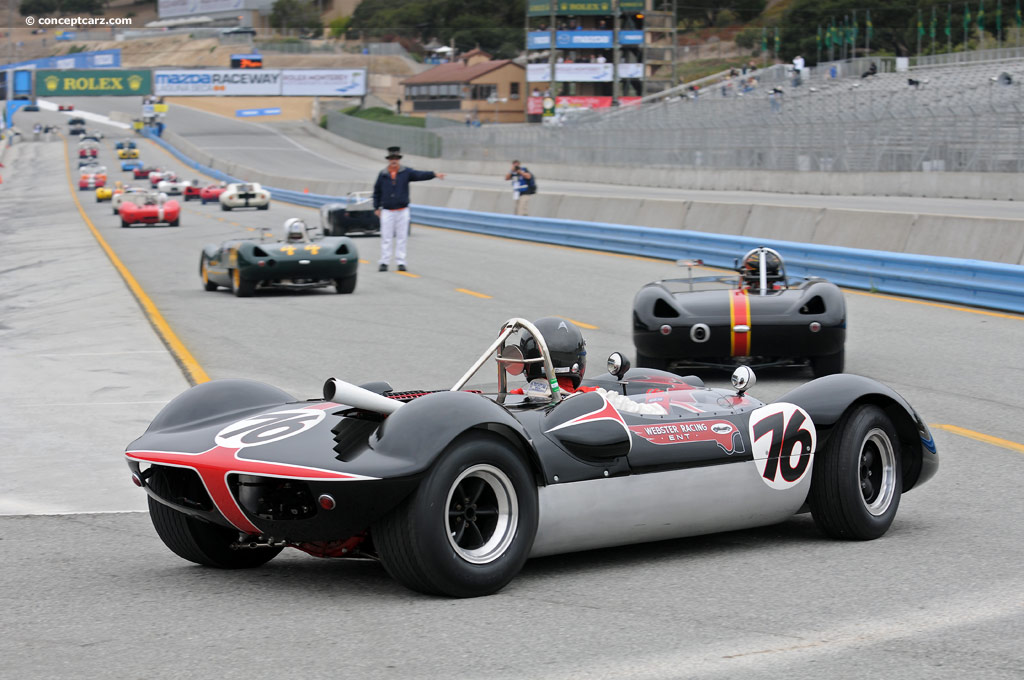
1964 Webster Special | conceptcarz.com

Marin's Father-And-Son Contribution To Racing - Fast Cars Are $150,000 Hobby For Marvin Websters - Newspapers.com

The old man had USAC number 76, moonlight could ask AJ about the 1976 year when Web refused to sell the number to Foyt for Indy. Went 23 times, qualified three, I think. Used to walk through the shop with George Bignotti, telling him "how much experience he had."

4 Monarchs total, one 17" Mori-Seiki, Tree manual mill, some German man-killer lathe, Fellows 7's, involute and lead testers, Reishauer ZA, Landis cylindrical, Heald internal, Liebherr hobber, 0AC Warner-Swasey, an NC Bridgeport, vertical broach, Arter, Barber-Colman 16-36, three Indy cars stacked around the shop, a short-wheelbase roadrace one on top of the lunch room, a complete building full of Offies, and the aforementioned prototype sports-racer stuck in the back. A couple of turret lathes out in the other building used to make transducers for Raytheon. That's where his money came from. Probably some stuff I've forgotten. Back then you did short-run production on an engine lathe. Maybe a tracer, then if you had really a lot, a Sundstrand or Seneca Falls production lathe. There weren't enough Indy cars to justify that.

There were only two of us who stayed there more than six months, Web was the meanest man on the planet during work hours, but I wanted to learn so shut up and stayed out of the way. Dues.

I can run all of them. Particularly liked the ID grinder tho. It was directly across from the homemade water-brake dyno where he ran Offies every spring, that's why I have tinnitus. And my fave rave lime-green Monarch in the middle of the stack of lathes. We built knockoff Hewlands for the smaller cars and LG-600's for the unlimited boost Offies, and non-breaking input shafts out of Vascomax. It was a big secret then. 9310 forgings for the gears, ground teeth, involute and lead within a tenth.

Lots of big names on the purchase orders, that's how I got one of the initial Simpson helmets, the ones that weren't sold to the public - my buddy in shipping told Bill Simpson if he wanted his gears on time .... Still have it but needs a rebuild and no one will do that :(

...

In November spent some time in the US, ran off 1500 splined shafts, milled the locating features on a hundred or so gears, dragged a 1980 lathe outside and together with a friend moved an SL-3 100 yards down a narrow asphalt driveway on skates, around the corner, up a ramp, into the shop, and we got it levelled and running again. For fun. Not too bad for a couple of decrepit old farts.

I never had that many Monarchs, after a few years of burning my skin off with a Pacemaker I went CNC. Back when American Tool was alive, cuz I bought it from them. New. Paying for it almost killed me. Left me with a lifelong dislike of banks.

Webster was the beginning (almost. Built wheels and brakes for drag bikes and flat trackers before that. Mert Lawwill, Carl Ahlfeldt, Marion Owens, and others.) Then I started my own shop.

...
 
Last edited by a moderator:
Love my Monarch. Love my Sidney. Can't go wrong with either, seeing as they're damn near twins.

Both have lead screw reverse.
 
Sweet Jesus, is this section in a rough neighborhood or something ? I started this thread just over a day ago, and we've had two fights and a stabbing already. :D

I thought all that non-sense was confined to General, who left the door open there ? :D
 
I know a few people recommend just running the machine to do an evail, or just change the oil and run it. For me, I already have a running lathe, so I'm not under pressure. Plus I'm more mechanic in trade, than machinist, so tearing stuff down doesn't bother me too much. But also as part of my consideration is the move into my home shop, I really need to tear it down into manageable pieces, where I can work at my own pace.

This also gives me chance to flush gear boxes, clean all mating surfaces of grit and grime, like ways, cross slide etc.

This will not be a full machine recondition. But I will address items along the way, like clutch adjustment, linkage repair, wore out keys, excessive plays and such. A good clean and lube with no doubt a bunch of minor repairs. I'm already committed in the purchase, so why not ? :D
 
So a funny story. . .

Speaking about the clutch, linkages and such. . . Leading up to, and just after purchase. I had started watching vids, reading the manuals and such. Discovered a forum member here, MrWizard, has several vids on this type. A long time member, just not an active poster. Well, he has a 3 part vid on the clutch. Disassembly here:
Monarch Lathe Clutch Disassembly - YouTube

In watching it, I'm thinking, damn the clutch is a baby PTO. While not familiar with Monarch, those I do know.

I went to Vintage Machinery, and opened up the parts manual for a 61 series from 1957. Note assembly part# D65, its the whole assembly, not a single part:

44.jpg

Now going to parts description page, D65 is listed as Twin Disk Clutch.

45.jpg

This is really funny to me. I know Twin Disk. Its a company, not the number of clutch plates. Twin Disk makes a whole variety of engine driven PTO/clutches. In fact, I've built a ton of those clutches/pto's. Just so happens I had a couple examples handy at my job's shop floor. One burned up laying on the floor. Another mounted on a diesel engine pump package for a chemical/petroleum barge:

43.jpg

I do primarily commercial marine work. Tug boats, barges, and such. Besides PTO's, Twin Disk is real big into marine gears. A marine gear is a boat transmission. FWD, neutral, and reverse. Earlier in the year I was on an alignment job. A Twin disk marine gear bolted to the back of a Caterpillar 3512. You can see Twin Disk on the oil filter of the gear. Port main engine package, we were getting the package aligned to the wheel shaft:

40.jpg41.jpg
 
The only cautionary advice about the "have other lathe" I can offer is to PROTECT that as if survival-food-stash sacred!

:)

"At the moment" and for more than 3 year - BOTH 10EE are offline... and so is the HBX-360-BC! NONE of them for anything all that "major".

Human nature to get involved in some PIDDLY item that isn't going to cost much, nor take long, etc, etc. and then it does. Both.

3-offline-lathes-worth

You're not wrong. I've got about a year and a half into yet a third lathe. It's almost complete. When finished I plan to sell to help finance the Monarch. :D
 
My progress is a bit further along than I've had time to post about. But as we were talking about the clutch, thought I'd post that. EmanuelGoldstein was correct in that the square holes in handles are pretty wore. I'll be addressing that. Also not real relevant yet, As I was pulling the clutch assembly out anyway, but the clutch was in need of adjustment.

I've been clearing everything attached to headstock to get it lifted off the bed. The clutch and pulley assembly were pretty straight forward. That whole assembly has to come out to remove rear aluminum cover.

46.jpg 37.jpg 47.jpg 48.jpg
 
While I'm not ready for it yet, trying to plan ahead a little.

According to the manual, they suggest using a .0005" graduated per foot level, we'll say a Starrett no 199. Which I would agree with a new or reconditioned machine.

I have a 12" Starrett no 98. It's .005" graduated per foot. One other thing is being 12" i can just reach each flat way(Assuming I level from flat ways, not from flats between ways. Maybe 3/4 to 1" onto each way.

Any thoughts on how critical it is to split hairs on leveling with an older un-reconditioned lathe ? I'm sure I can level inside of .005", will leveling at .0005" actually gain something I can see on the work ? .001" ? or .00001 ?

I was toying with the idea of getting an 18" no. 98, or the 15" no 199". Or roll with the 12" no 98. No doubt opinions will vary, just curious some thoughts.
 
Hard to say without knowing the condition of every aspect of the lathe. I'd suggest planning on initially leveling it up with the .005"/ft level you have. Most lathes benefit from being leveled, let settle in for a month or so, and re-leveled. By that time you'll have a much better idea of whether a more accurate level will benefit. Personally I've found I have to fight the temptation to go overboard on any one thing on getting a lathe cleaned up, and keep focusing on moving forward overall. So I'd say wait until it shows itself as an issue that you're ready to address.
 
I've got a bunch of pics and info to get posted and caught up on. I'll try to get caught up over the next couple of days. :D

One of my larger concerns was getting QCGB off, besides looking complicated, it was really necessary to handle near the beginning, to get machine tore down. Researching a bit I found a really excellent thread from MichaelP in 2018 on the gear box removal:
Monarch Ser.60 Gearbox Removal Illustrated

I used that thread to great affect, and it got me there. There were some notable differences though. I suspect the differences are because his is a 13", and mine is a 16".

One difference is the bearing/gear retainer for lead screw. On his he could slip all the way out. On mine the retainer hits the bed before gear clears the QCGB. No matter which way I rolled retainer, it wasn't happening. I had to move till retainer stopped on bed. Then when ready, moved gear box off the remaining portion of lead screw:

51.jpg 53.jpg

Also his beveled gears were oriented differently, so he had to remove the upper gear. I did not, I was able to slide away from upper gear with whole box.

52.jpg

On end gears he had a splash guard, I did not, and configuration was slightly different.

54.jpg
 
On through shaft for clutch linkage, there's a 3 screw cover to access a snap ring. My snap ring was missing and ear, and looked to be getting sucked into bushing. I'll need to address something there during assembly:

55.jpg

Some additional pics:

58.jpg 57.jpg 56.jpg
 
I had a good chance to examine gear box. No missing teeth. But I did have two gears with rounded edges from rough engagement. One a little worse than the other, which the gear looks like like it has two steps on side edge of teeth. Not sure if the lower step was machined that way. Anyway, good news is nothing is broken off or missing.

59.jpg

Forgot to get a pic of it, but I flew the gear box with an overhead crane. Flew it right over to a safety clean tank and washed it out.

60.jpg
 
Working toward getting headstock off. There are two bed clamps on the under side, plus two allen bolts top side under chuck.

61.jpg

Before getting to those, needed to clear more off. To remove left side large aluminum cover, the whole clutch assembly needs to come out, to access bolts for that cover. I showed removing the clutch earlier in this thread. With clutch out of the way, there is a handful of bolts holding that cover.

62.jpg 63.jpg

With that out of the way, you can see another aluminum box on rear side, where headstock oil drain is. Just a handful of screws holding it.

64.jpg 65.jpg
 
Another pic with that rear aluminum box out:

66.jpg

To access front bed clamp for headstock, there is a chip shield under chuck with 3 screws:

67.jpg 68.jpg

While I'm sure headstock would sit on bed without support, the way the weight is off center had me a little worried. So I hooked up an overhead crane before pulling bed clamps.

I also flushed headstock out with mineral spirits a few times, while I had easy access, plus fished around with a magnet.

Once I got the hardware out, I flew the headstock off.

69.jpg 70.jpg
 
Worked on getting apron off next. Taking a page from Harry's thread, I used the reverse bar through apron to hold it up until ready to lower. His post on it here:
Another New Toy

I supported with an overhead crane. Removed bolts for it, lowered a little. Need to lower enough to clear some dowel pins.

72.jpg 71.jpg

You can only lower enough to clear those pins, at first anyway. As you lower, the pinion gear for rack, will begin to catch on bed.

73.jpg

Once lower a little, pull apron away from bed a little. Then lower more to clear gear for crossfeed.

74.jpg
 
Once apron cleared, I was able to inspect. Gears and teeth all in tact. Though everything is quite dirty.

75.jpg

Checking half nuts, they don't seem to be wore bad at all. Though its in serious need of a bath.

76.jpg

Another exterior shot. Then I flew it over to safety clean tank and gave it a real nice first stage cleaning.

77.jpg
 
Besides wanting to tear it down into big pieces for easier transport and set up, I wanted to, at bare minimum, give it a good cleaning. Maybe some of these pics justify it. :D

78.jpg 79.jpg 80.jpg81.jpg 82.jpg
 
Flying the saddle off:

83.jpg

Thought I had a pic of bed coming off, guess not, or gremlins. Yea, yea, lets go with gremlins. Anyway, bed has a total of 8 bolts holding it down, Four in motor base, four in tail stick side base. They are run up from the bottom side. The one bolt over back side of motor is a good time, let me tell you.

Motor base:

84.jpg


Back
Top