What's new
What's new

Got Free Interact 1 Mk1

AlexD911

Plastic
Joined
Aug 22, 2022
Hi guys,

Im a noobie here, i've searched a lot of threads but most are quite old and links / pictures dead.

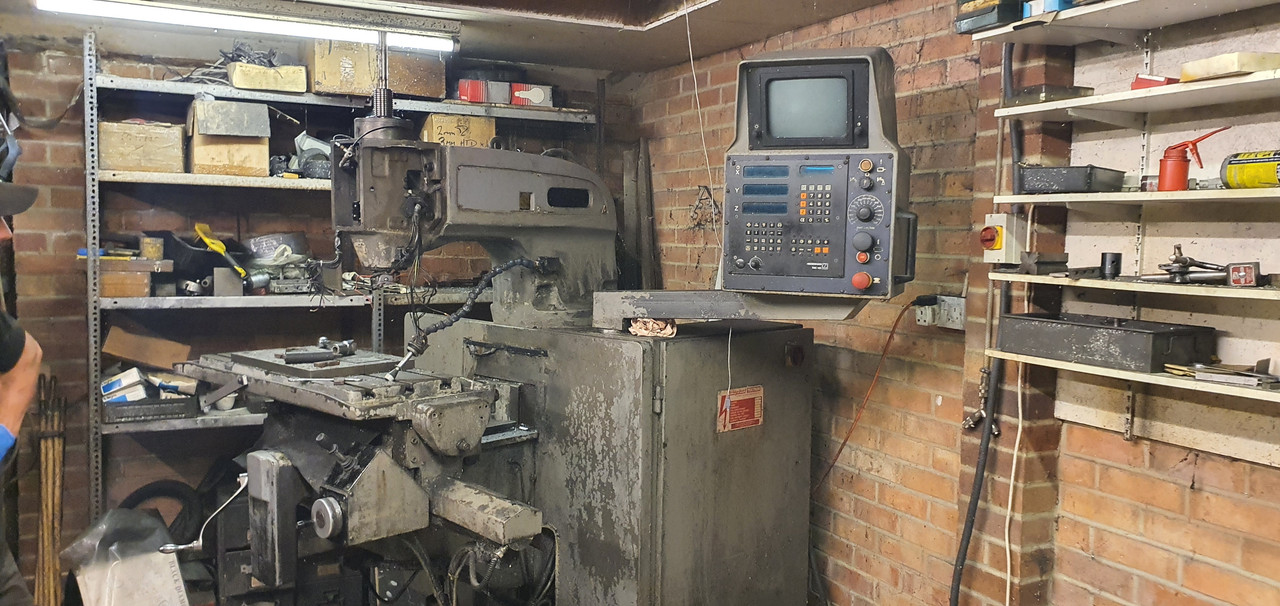
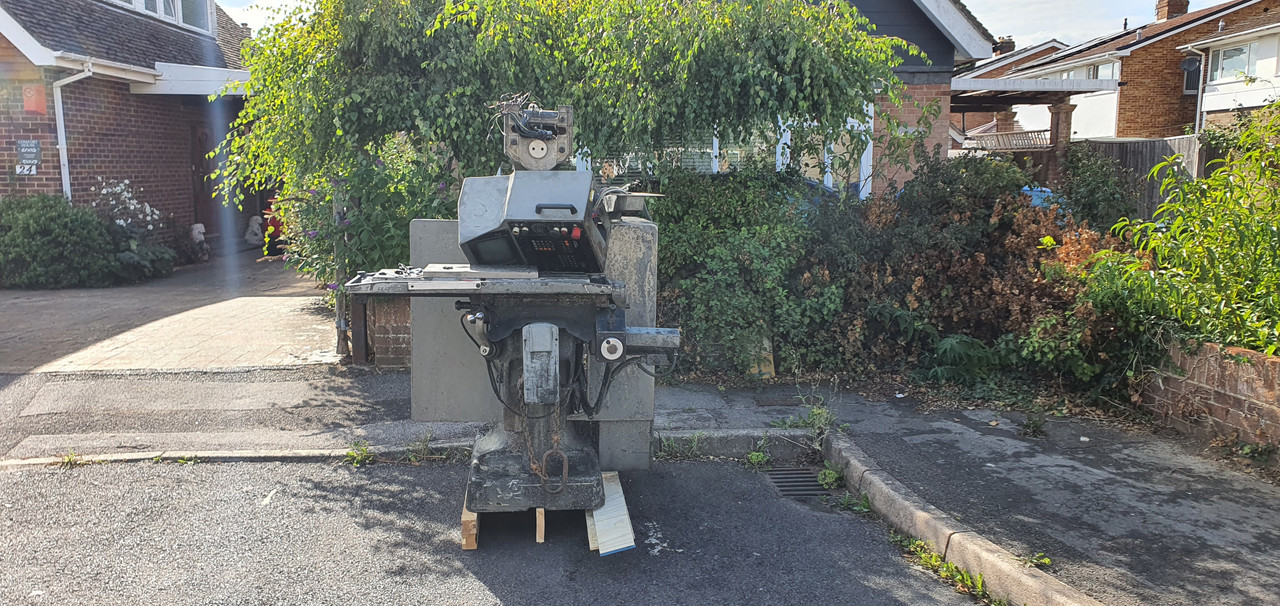
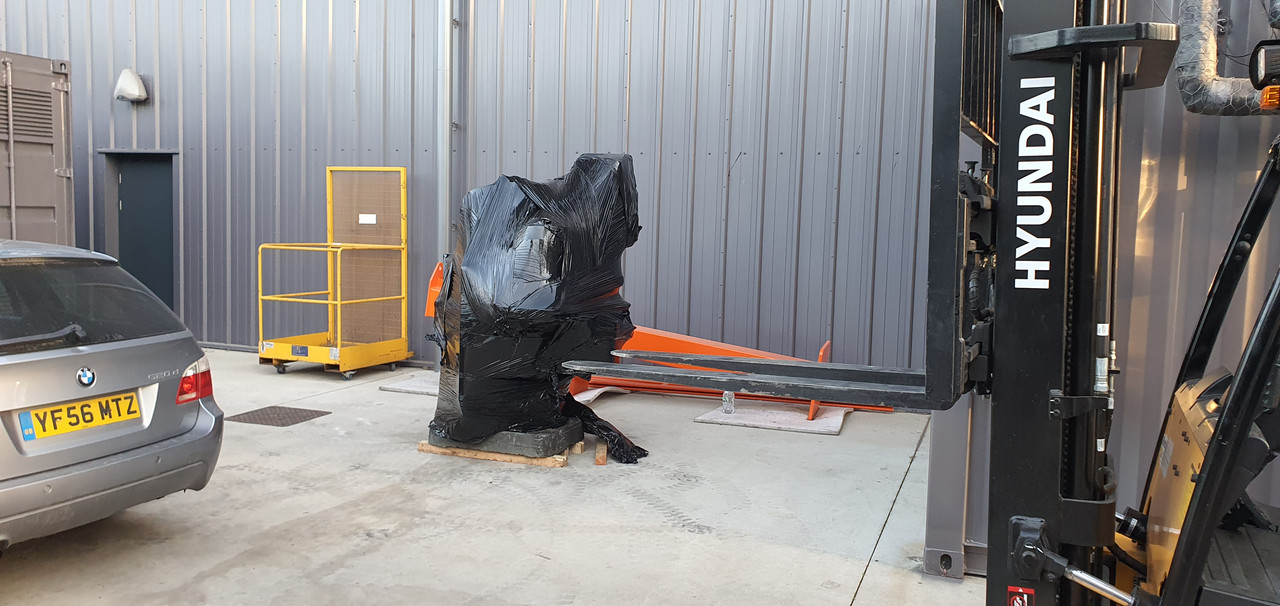
I am gearing up to move a (free) Interact 1 from someone local to me (very nice elderly chap who used to build model RC Race Cars). The machine is of course pretty big (2.2 - 2.3m tall), when they originally moved it into his workshop the door was 2m tall, meaning they only had to remove the motor on top for it to go in.

Since then he has had a new garage door fitted which is 1.8m tall, this means that with skates / tubes under it it wont go out through the door, i need to pull the spindle motor and the neck assembly i believe.

Here are some pictures:

20220822-181831.jpg


20220822-181824.jpg


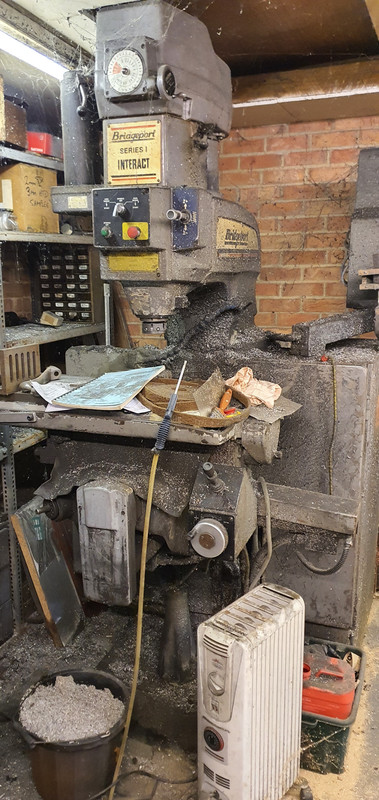
I went there yesterday and cleaned every bit of swarf from his garage, no small task and i also realized right at the end he had been machining carbon fibre on it so guess who had itchy arms and hands that evening :D

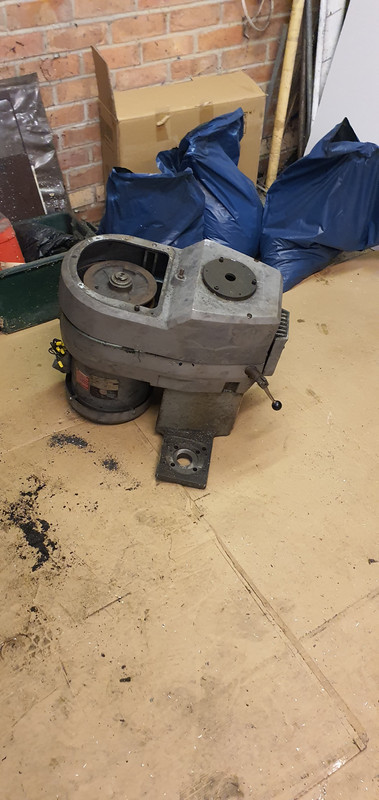
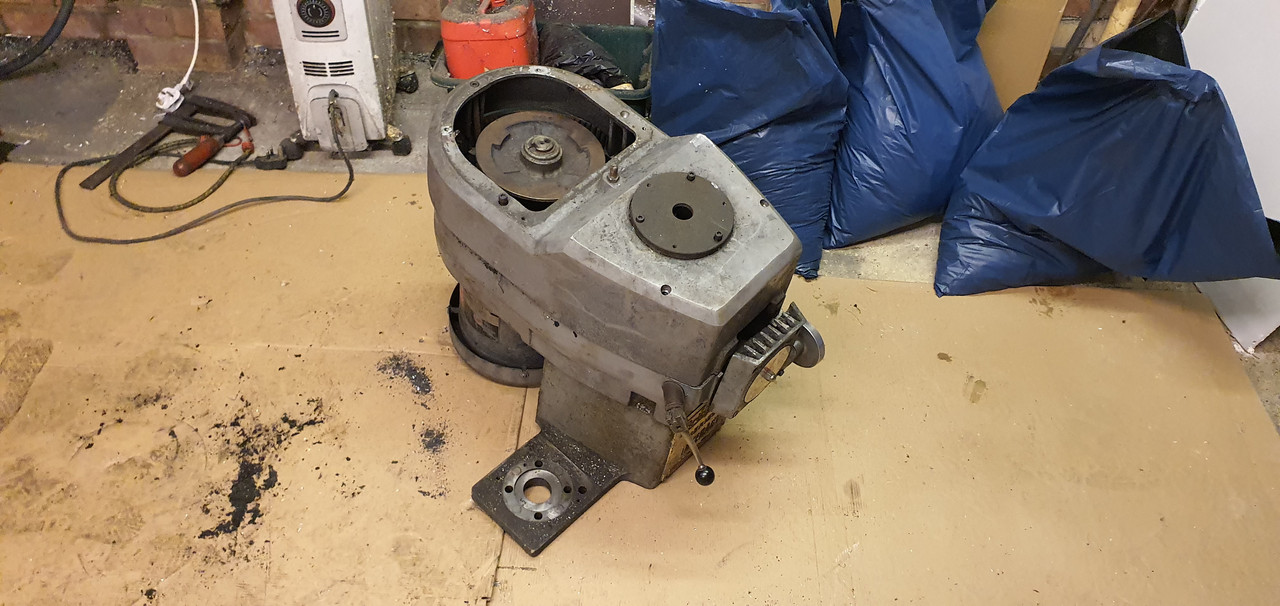
I removed the front & side covers around the spindle revealing what i think is the mounting bolts?

20220823-194750.jpg


20220823-194755.jpg


20220823-194835.jpg


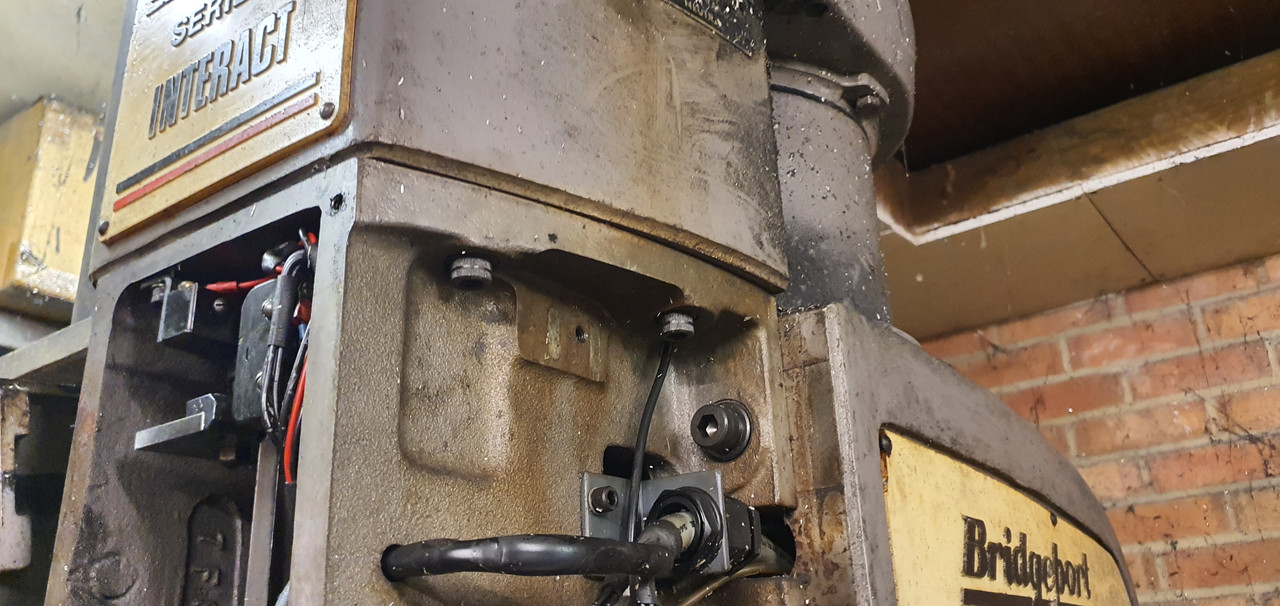
Now as you can see from the images the ceiling is very low, we need to shift the machine back and ideally pull the motor independently from the neck, as there wont be enough head room to pull them as one piece. He told me the guys that moved it in, "the younger" guy lifted the motor onto the spindle by hand, does this seem feasible? There will be 2 of us (i can get more hands probably).

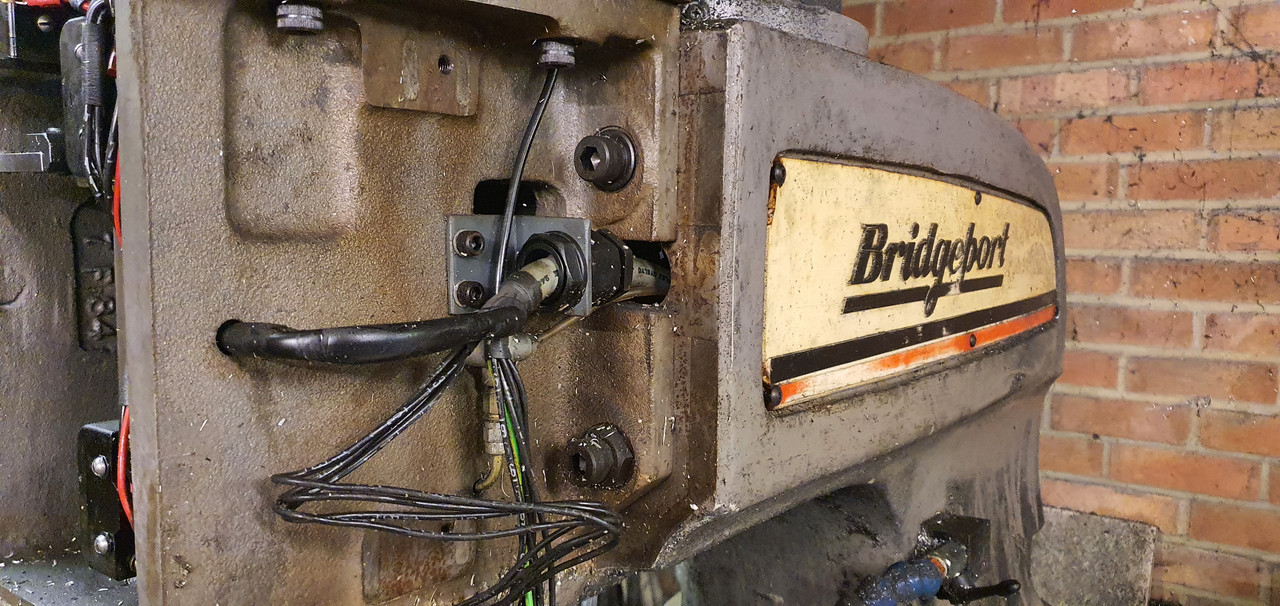
How exactly is the spindle motor mounted, is it just the 4 Upward facing bolts in the last picture? Any oil to worry about when removing it?

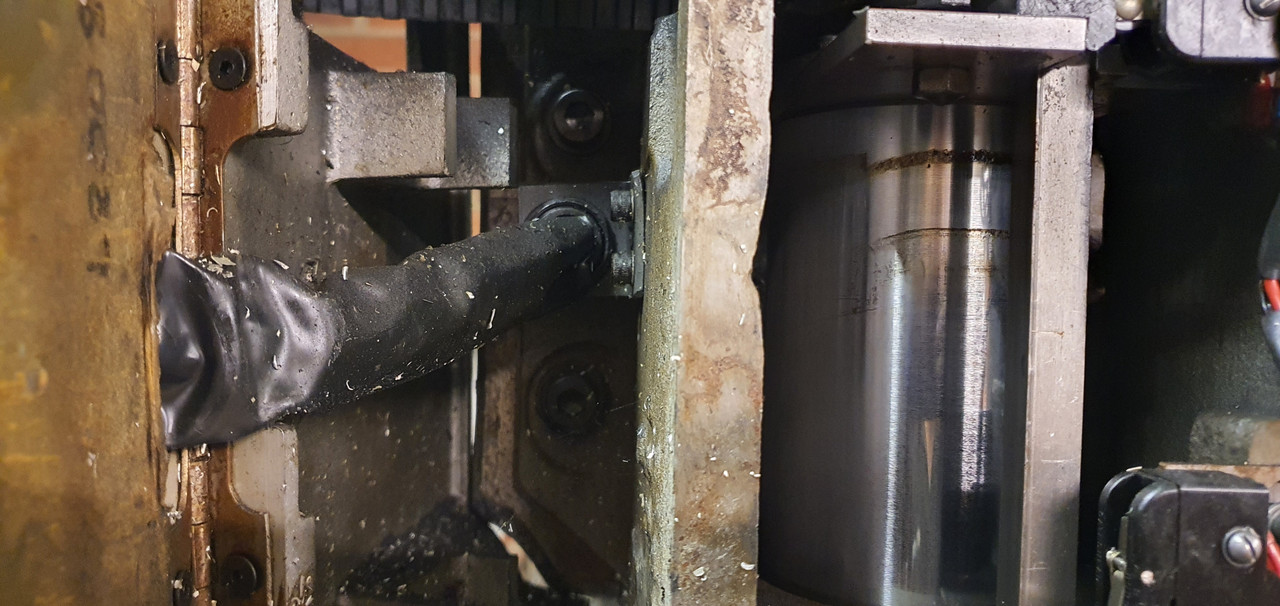
After removing the spindle we were going to use an engine hoist to lift the neck.

I also saw mention of tilting the whole neck forward onto the bed and lowering it down? Any problem with pulling cables tight?

Lastly does anyone have a manual for an Interact 1 Mk1? Theres one for an Interact 2 Mk2 but cant seem to find the one for this machine.

Any help / advice is greatly appreciated.

Thanks

Alex
 
Never done this
The factory manual has pretty detail drawings of the head that might show how it comes apart.
The vari speed mechanism is in there, so hard to say if you can remove the whole shebang and have it slide on a spline or if it is more complicated
 
On a manual bridgeport with a head assembly that weighs half as much, the trick is to bolt a stud into the t slot and grab it with a collet then unbolt the head and wind out the y axis and the head will be sitting there mounted to the table, and you can lower the knee. Not sure I would do that with this much heavier assembly, not sure I would move a machine like that
 
On a manual bridgeport with a head assembly that weighs half as much, the trick is to bolt a stud into the t slot and grab it with a collet then unbolt the head and wind out the y axis and the head will be sitting there mounted to the table, and you can lower the knee. Not sure I would do that with this much heavier assembly, not sure I would move a machine like that
Hi and thanks for your reply, yes i wish i could find the correct manual for it as the Interact 2 has a different type of spindle control (i think through the controller and not on the wheel like this one).

I might have to bite the bullet and buy one on ebay.

I saw a thread on here where a guy rested the whole neck & motor / spindle assembly on the bed with some wood spacers and lowered it down, he did however have to make a cut in the back of the neck where the hole for wiring comes through so that there was enough slack on the cabling. I think i would rather cut and resplice the wiring nicely rather than cut the back of the neck.

Thanks

Alex
 
Here's the thread Alex referenced:


Removing the ram to base bolts and tiliting the whole thing forward avoids having to realign the head afterwards.

Overhead garage doors, sheesh.
 
Last edited:
Well thanks for the advice guys, went back there last night and managed to get the motor and variable belt assembly removed. It was definitely heavy but not as heavy as expected, my brother had a hernia recently so he slid it off the and i lifted it down. Glad we did this and opened the cover on the variable belt assembly because something fucked up has happened in there. I forgot to take pictures of it, but there is a bracket held to the top of the spindle pulley, well this was not fixed to the pulley, both bolts loose in the casing and the boss the bracket bolts into has had its threads pulled. Bearing on top also looks toast.

This is probably obvious to other people, but we were having a hard time lifting it free from the spindle, as soon as we manually wound the Z all the way down it slid straight off.

20220824-195136.jpg


20220824-201245.jpg


20220824-201249.jpg


20220824-201301.jpg


Next i will probably remove the spindle assembly from the neck, and then pull the neck using an engine hoist, also need to unbolt and remove the DRO / Control and get it lower somehow.

The plan is to pinch one of the electric pump trucks from work and get it on that then drive it up onto our trailer saturday.


Thanks

Alex
 
I just keep thinking how cheap carpentry is....
If you lower the quill back down you get another 5 inches

I cannot remember if the control housing is bolted to the arm or not.
IF it is bolted you could just lean it over after unbolting.
Johnson bar and 3, 3/4 steel bars and off you go.
 
I just keep thinking how cheap carpentry is....
If you lower the quill back down you get another 5 inches

I cannot remember if the control housing is bolted to the arm or not.
IF it is bolted you could just lean it over after unbolting.
Johnson bar and 3, 3/4 steel bars and off you go.

Unfortunately its just not possible to remove his garage door easily, its a motorized unit etc.

Yes the control housing is 6 bolts on the underside, should be fairly easy.

Any recommendations on cleaning? I have a non-caustic degreaser and steam wash i was going to use on the chassis / casting. Not sure how to approach the ways & screws though? Its all sticky coolant with carbon fiber dust.

Thanks

Alex
 
Taking the panels out of an overhead door and putting them back after is easy compared to putting an obsolete machine back together. If you'd rebuilt a machine like this before, it'd be one thing, but....

Anyway, good luck. Hopefully, there's a parameters list available and the batteries to maintain the parameters are still holding a charge.
It's not that easy with the door, and even if it was I'd still of have to remove the motor like I've done already.

The machine is fairly basic and I have no worries about reassembling it. I've worked on much more complex machines before.

Also I won't be using the control as I'm going to convert to LinuxCNC

Thanks
 
You sure do know how to make work. Ever done a full retrofit? That Heidenhain control has survived 30+ years and is pretty much bulletproof. Why not retrofit something with a toolchanger instead? Serious question.

My $.02, obviously. Good luck!
 
Because this is a free machine and it's an interesting project?

Like I don't know what your getting at to be entirely honest. I've spent 3 hours spread over two evenings on it so far, and the first night was just hoovering everything up, is that making a lot of work haha?

I know exactly what I need to do in order to get this powered by LinuxCNC, there are multiple cheap options and multiple more expensive ones too, having a tool changer is of no interest to me currently, I'll be coming from a DIY Built router with an ER Collet so just the quick change on this will keep me happy for a while.
 
Do not make the mistake of thinking you know more than others here, there is quite a bit of knowledge, although it may be hidden in a crusty package.


You should try to get the machine to run before making any changes, much easier to troubleshoot a running machine with a new control than both at the same time
While the existing control is solid if working, it is a 2 1/2 axis with a 1000 line limit so it is pretty limited.
If you prove they work the drives and control are worth enough to make a dent in your retro costs. But untested parts are worth nuthin
The fundamental wiring in the Interact was dictated by Heidenhain, this is so much better than anything your cheap cnc system calls for. Once you know the machine runs, the rest[with a wiring diagram] is pretty easy. The servos are servicable although you might need new encoders. I have run them at 300ipm with twice the accel of the original system. The Bosch servo amps are too limited in accel, and have no 100v supply, so you can sell them[I would think anyone who needs one would pay at least 300 a piece] Otherwise I would suggest leaving the power cabinet alone and wiring your new control to it. If you cannot find a wiring diagram, I should have one.
Yes thanks I appreciate the info, I had read similar things about the servo amps and encoders on the LinuxCNC Forum, there are multiple extremely detailed threads on this exact conversion of there. A few interesting ways to use all the original equipment with a more modern controller, or options to keep the servos are replace the drivers etc.

The machine was working previously, the only thing that wasn't was the button the X Y joystick for switching speeds had broken.

I will test the machine before retro fitting it, I have an itch to do that anyway, like starting an old car that's sat for years.

I will keep the thread updated if there is interest.

Thanks

Depending on the thread on LinuxCNC forum, you may have been reading out the one I did on a Bridgeport Boss 5. Same iron but yours came with DC servo motors versus the stepper motors mine had. I had a blast converting mine but it was more a stress relieve and a fun project.

I've since sold the mill and stepped up to a fadal but it was a fun project. Wish I could modify my fadal software like Linuxcnc. But also the fadal works everytime.
 
Because this is a free machine and it's an interesting project?
You'll have a lot of labor in it, time = money, interesting is a good enough reason if you don't mind expensive education. I'm a little crusty, as Gustafson has noted, because I've done a retrofit (more extensive than this will be) and we severely underestimated the amount of time required. Even with our precision requirements and the cost of off the shelf CNC equipment in the late '80s, our return was questionable, at best. In 2022? No brainer from an economic standpoint.

For the cost of your retrofit you could have a mill with toolchanger, not as old, needing minor repair. You don't want one now, but when making more than a part at a time, toolchangers are very useful.
Like I don't know what your getting at to be entirely honest. I've spent 3 hours spread over two evenings on it so far, and the first night was just hoovering everything up, is that making a lot of work haha?
My make work remark was in response to disassembling the z axis ass'y. Part by part disassembly resulting in exacting reassembly required, rather than taking the whole head or ram off. Maybe I'm mistaken, but I thought you ran the Z nut off the end of the screw? That reassembly is clean work, really clean work and could easily been avoided.

Anyway, have at it. It's how we learn, myself included.
 
Hi guys, sorry for the late response, i moved house on Wednesday so its been a pretty crazy week.

You'll have a lot of labor in it, time = money, interesting is a good enough reason if you don't mind expensive education. I'm a little crusty, as Gustafson has noted, because I've done a retrofit (more extensive than this will be) and we severely underestimated the amount of time required. Even with our precision requirements and the cost of off the shelf CNC equipment in the late '80s, our return was questionable, at best. In 2022? No brainer from an economic standpoint.

For the cost of your retrofit you could have a mill with toolchanger, not as old, needing minor repair. You don't want one now, but when making more than a part at a time, toolchangers are very useful.

My make work remark was in response to disassembling the z axis ass'y. Part by part disassembly resulting in exacting reassembly required, rather than taking the whole head or ram off. Maybe I'm mistaken, but I thought you ran the Z nut off the end of the screw? That reassembly is clean work, really clean work and could easily been avoided.

Anyway, have at it. It's how we learn, myself included.
Look you are 100% right, i know that - however, whilst i appreciate the advice you're giving the point is it's not totally relevant to the questions im asking, if you see?

I understand that dismantling the spindle motor & gearbox is probably an arse about face way of doing it but it was truly the only option available given the space restrictions and what equipment we could fit in there.

I I did not wind the screw from the nut, my mentioning of the screw was that, we wound the Z Axis all the way down, which in turn removed the spline from the spindle gearbox / drive (correct name?), this meant we didnt need to lift it as high up before pulling it off the top of the machine.

So last monday we went to collect the machine, and wow to be totally honest it was a bit of a nightmare. It was very sketchy and very nerve racking, we did however eventually get there though the phenolic boards on the base of the trailer didnt seem to be a fan of carrying it.

I looked for a long time for one of those trailers that hydraulically lower to the floor so you can load items like this easily, not so popular in the UK as in the US it seems. I will be renting another trailer to take it to my new house though.

This was it at the half way point, out of his garage and onto the road outside, it sat here a while whilst we made the game plan to get it onto the trailer, pretty awkward to get it done as the road was so small and neighbours were in & out in their cars etc.

20220829-161046.jpg


20220829-161056.jpg


Finally got it back to my work, it will stay here for a few weeks until the new garage has room for it, i coated everything i could see in PTFE Maintenance Spray to try and stop any flash rusting - im not sure i needed to do this as the whole machine has a thick layer of coolant / aluminium chip mix stuck to it.

The method for getting it onto the trailer was, reversing it on using the electric pump truck and using the winch to help it if it needed it.

20220829-172557.jpg


20220829-172601.jpg


Removal at the other end was much easier with the forklift.

20220829-191438.jpg


I wonder if you guys can share some more of your experience with me? Whats best practise for cleaning the machine? I dont want to use anything on it that is going to have any negative effect on any of the components. I was thinking at first maybe to use a non-caustic degreaser with a brush to agitate all the debris and then rinse with de-ionised water?

The guy gave me his toolbox with some old tooling and what looks to be some spare collets and nut for the quick release tool holder. I was under the impression with this machine i could have multiple tool holders loaded with tools and swap those out? Could someone explain a bit better how the setup works?

What is the correct terminology / name for searching for additional collets and toolholders. I am under the impression that they are ISO30 Toolholders? I have all the original documentation with the machine, it does mention this in there but i wanted to be sure i am looking at the correct items before purchasing anything.

If anyone wants me to scan any of this stuff in let me know.

Thanks

Alex


Back
Top