Patrick Black
Aluminum
- Joined
- Dec 11, 2007
- Location
- Middle Tennessee
Good Morning All,
I’m starting this thread to document my efforts to put some life back into this poor old Hendey.
First a brief history: Thanks to Hendeyman, I found out this old lathe started life in 1915 at Bethlehem Steel, PA. After working at the steel mill, who knows, but somehow it ended up in a home shop in GA. The fellow who owned it decided it was no longer useful to him (he had a cobbled up toolrest for woodturning, go figure) and put it up on the ‘bay which is where my brother (Blackboat) found it cheaper than dirt. This is when the machine was first introduced on PM.
http://www.practicalmachinist.com/vb/showthread.php?t=112764&highlight=hendey
Well, Blackboat decided it was a worthy project and dismantled the beast to begin it’s restoration http://www.practicalmachinist.com/vb/showthread.php?t=114798&highlight=hendey. The restoration was moving along nicely, that is until… Miss Monarch moved in ! What’s a guy to do? Hendey got shoved out the door and became a blue-tarp driveway orphan.
That’s how I ended up with the lathe. I posted about its trip from GA to TN back in June http://www.practicalmachinist.com/vb/showthread.php?t=160010&highlight=hendey. I had several time sensitive woodworking projects to finish so the pile of Hendey parts was stuffed in a dark corner to contemplate its fate . Well, now I’ve decided to start a new post as it’s been a seven months since I retrieved the lathe, and also because I’m at the point of asking a lot of “where does this thing go?” type questions. I hope that's ok with Mr. Oder.
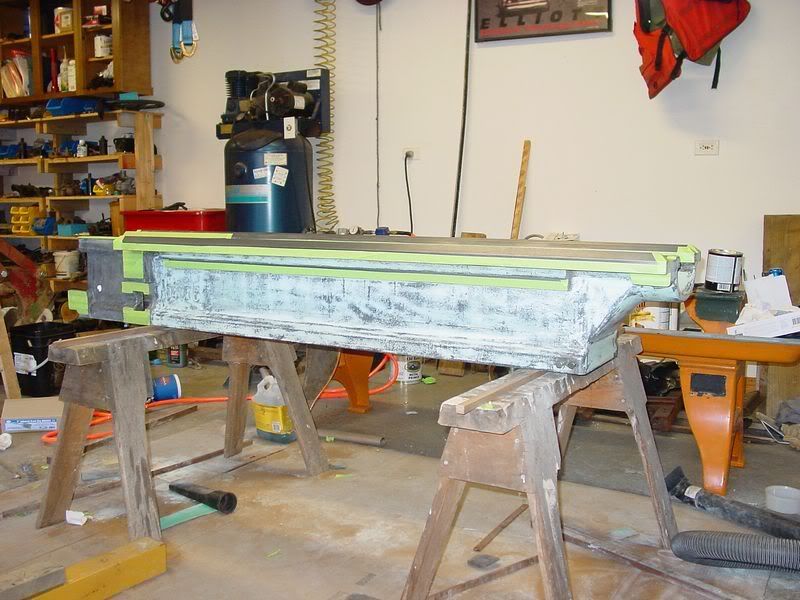
So, where does it stand now? So far, I’ve mostly been doing “bodywork”. After sitting outdoors for several months before I could make the trip to pick it up, the moisture began to work on the black filler and started lifting the bondo and paint that Blackboat had applied to the base and bed. I decided to strip everything back off. The original black filler that remained had become punky and I didn’t think it would make a good base for the new paint so I poured on some citris strip and worked over the raw castings of the legs, drip tray, and bed with a needle scaler and cup brushes. I replaced the old filler with polyester glazing compound (kinda like bondo-lite). I also cleaned up the rust that was over all the milled surfaces with phosphoric acid.
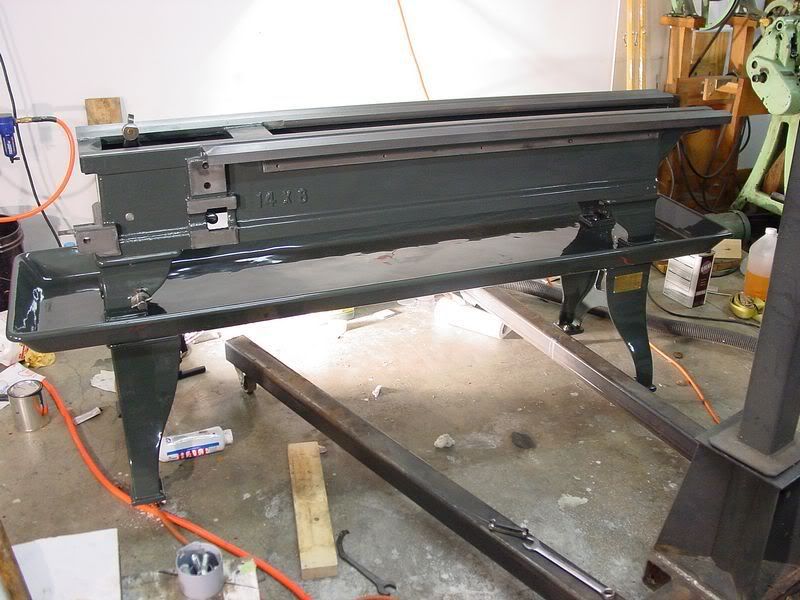
Here is the bed, all bondo'd up and ready for primer:
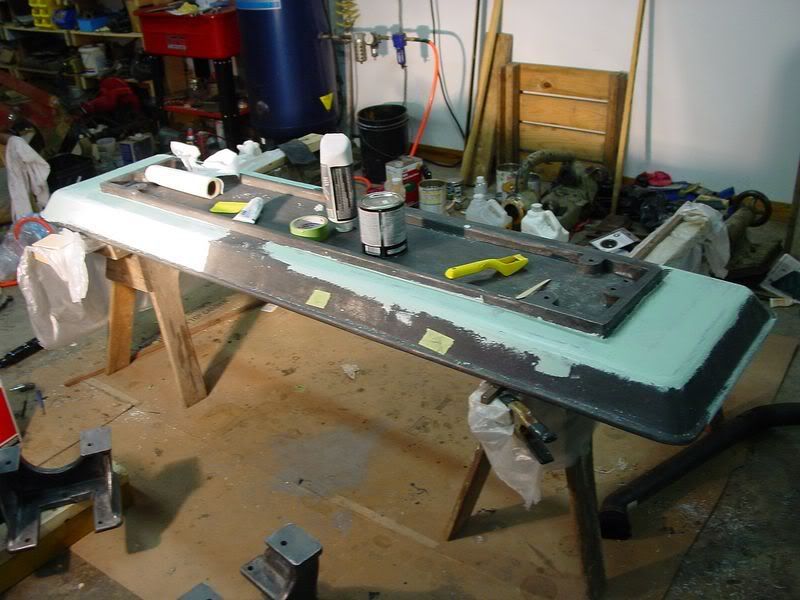
Starting to fill the drip pan:
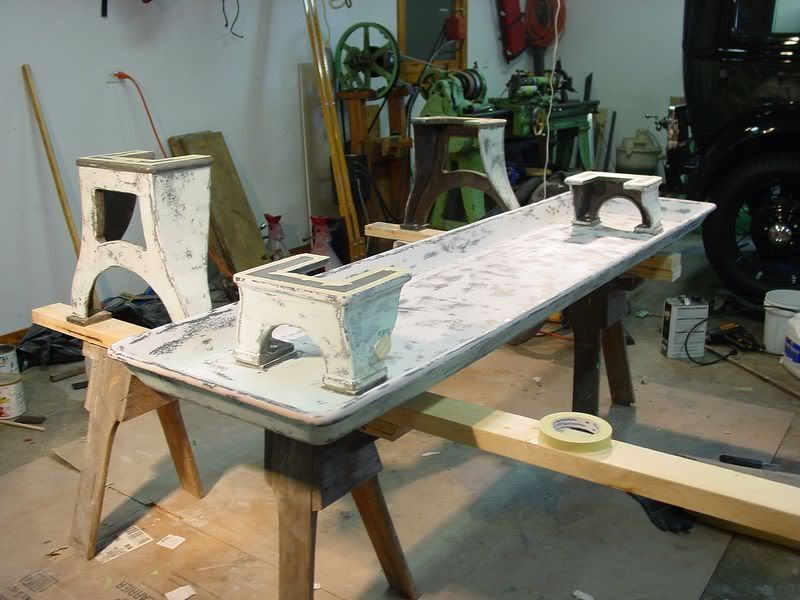
Pan and Legs ready for primer and paint:
After reading all the Hendey posts in the archives, it appears that like there was no “standard” color for Hendeys back in the day. They were apparently painted to order or with whatever color they happened to have a lot of in stock at the time. I decided to do a 'paint to order' job. I chose Rock Moss Green from an old Ditzler Model A Ford color chip book and mixed up my own version with synthetic enamel paints from Tractor Supply. I also decided to brush it on and not spray since the weather’s cold and it’s a lot of trouble to convert a third my shop into a spray booth. Brushing lends itself to doing a few parts at a time and I need a lot of time since I have to paint a few parts and assemble things 'jigsaw puzzle' fashion from the pile of somewhat random parts littering my shop before I move on to the next assembly Here are the results of my slathering efforts:
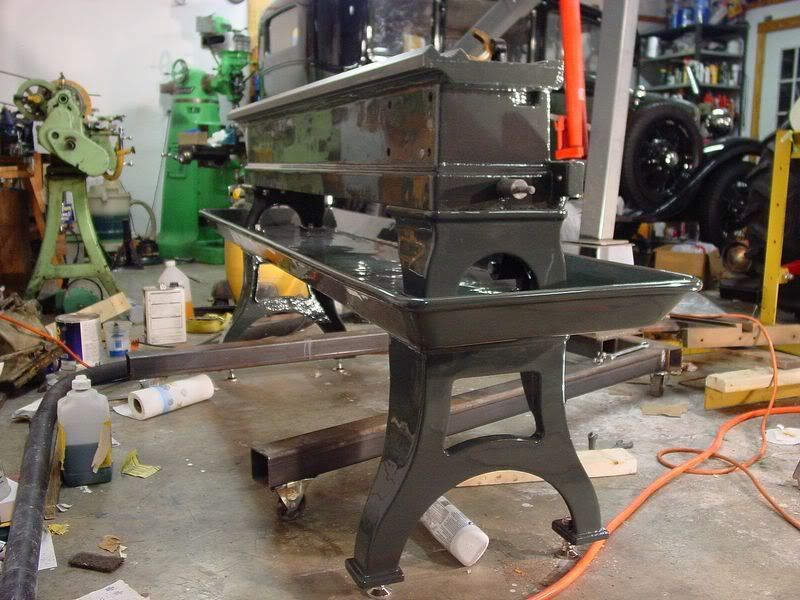
Legs and drip pan done:
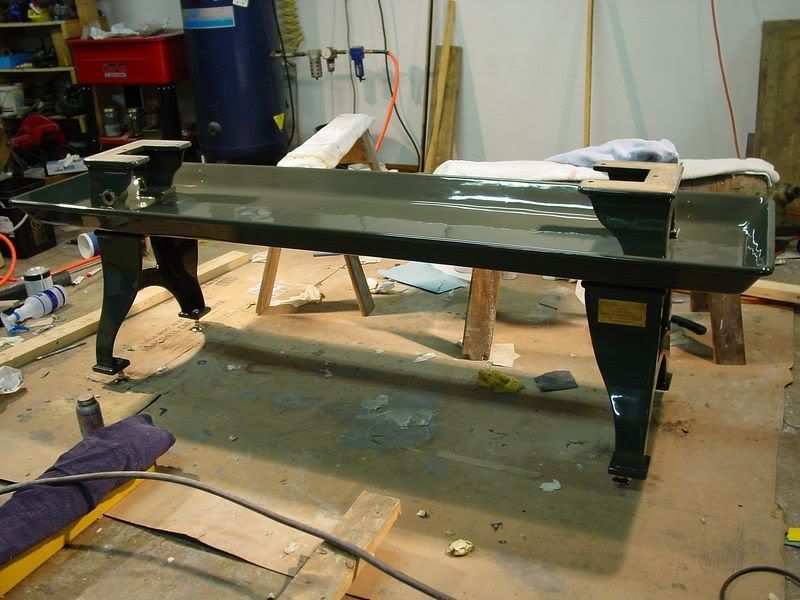
Front view of bed and base painted:
Back side of bed and base:
Below is a picture of the original dealer placard on the front of the lower right leg. I removed the placard before stripping and painting and had to make some new brass escutcheon pins using a form tool since I destroyed the old ones taking it off.

That’s all for now. Next stop; the headstock.
Patrick Black
I’m starting this thread to document my efforts to put some life back into this poor old Hendey.
First a brief history: Thanks to Hendeyman, I found out this old lathe started life in 1915 at Bethlehem Steel, PA. After working at the steel mill, who knows, but somehow it ended up in a home shop in GA. The fellow who owned it decided it was no longer useful to him (he had a cobbled up toolrest for woodturning, go figure) and put it up on the ‘bay which is where my brother (Blackboat) found it cheaper than dirt. This is when the machine was first introduced on PM.
http://www.practicalmachinist.com/vb/showthread.php?t=112764&highlight=hendey
Well, Blackboat decided it was a worthy project and dismantled the beast to begin it’s restoration http://www.practicalmachinist.com/vb/showthread.php?t=114798&highlight=hendey. The restoration was moving along nicely, that is until… Miss Monarch moved in
! What’s a guy to do? Hendey got shoved out the door and became a blue-tarp driveway orphan.That’s how I ended up with the lathe. I posted about its trip from GA to TN back in June http://www.practicalmachinist.com/vb/showthread.php?t=160010&highlight=hendey. I had several time sensitive woodworking projects to finish so the pile of Hendey parts was stuffed in a dark corner to contemplate its fate
. Well, now I’ve decided to start a new post as it’s been a seven months since I retrieved the lathe, and also because I’m at the point of asking a lot of “where does this thing go?” type questions. I hope that's ok with Mr. Oder.So, where does it stand now? So far, I’ve mostly been doing “bodywork”. After sitting outdoors for several months before I could make the trip to pick it up, the moisture began to work on the black filler and started lifting the bondo and paint that Blackboat had applied to the base and bed. I decided to strip everything back off. The original black filler that remained had become punky and I didn’t think it would make a good base for the new paint so I poured on some citris strip and worked over the raw castings of the legs, drip tray, and bed with a needle scaler and cup brushes. I replaced the old filler with polyester glazing compound (kinda like bondo-lite). I also cleaned up the rust that was over all the milled surfaces with phosphoric acid.
Here is the bed, all bondo'd up and ready for primer:
Starting to fill the drip pan:
Pan and Legs ready for primer and paint:
After reading all the Hendey posts in the archives, it appears that like there was no “standard” color for Hendeys back in the day. They were apparently painted to order or with whatever color they happened to have a lot of in stock at the time. I decided to do a 'paint to order' job. I chose Rock Moss Green from an old Ditzler Model A Ford color chip book and mixed up my own version with synthetic enamel paints from Tractor Supply. I also decided to brush it on and not spray since the weather’s cold and it’s a lot of trouble to convert a third my shop into a spray booth. Brushing lends itself to doing a few parts at a time and I need a lot of time since I have to paint a few parts and assemble things 'jigsaw puzzle' fashion from the pile of somewhat random parts littering my shop before I move on to the next assembly Here are the results of my slathering efforts:
Legs and drip pan done:
Front view of bed and base painted:
Back side of bed and base:
Below is a picture of the original dealer placard on the front of the lower right leg. I removed the placard before stripping and painting and had to make some new brass escutcheon pins using a form tool since I destroyed the old ones taking it off.
That’s all for now. Next stop; the headstock.
Patrick Black
 Thanks


 ). I have no reservations about the repair. I'm glad someone took care of it before I got it. I would expect the repair to be durable since the pins are steel and not brittle CI.
  and need some advice. I got the headstock set on top of the bed and decided to level if up before I bolted the headstock down. I couldn't get the bed to level from one end to the other. One foot was always dangling off the ground (I'm using leveling feet here). So I decided to loosen all the bolts between the bed and the four legs and the chip tray. The feet set firmly on the ground and there was a gap between the bed and the top of the upper feet at the right rear corner and the left front corner. For the next hour and a half I kept adding shims to tweek the gap but the results didn't change. I've also tried using different reference points including the flats between the ways and the top of the outer prismatic ways. No Joy
 !!
!! that it never occurred to me to just calm down and wait. I just took the shims out from below the bed (the chip tray isn't stiff enough to pull the bed out anyway), and then jacked the low corner up about 0.010 past level. The other end went up too, but everything seems to be slowly comming in. It's sitting there firmly on all four feet with both ends 0.010 high in the back (so it's straight). When I try to get the bubble in the center the left rear foot is dangling (more or less). I'll let it rest overnight with a little tension on the low corner and see where it is tomorrow.