What's new
What's new

How to disassemble cheap Alltrade micrometer?

spoolin01

Plastic
Joined
Mar 29, 2023
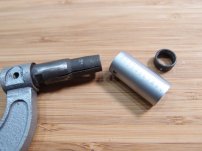
My Alltrade 0-1" micrometer suddenly bound up yesterday - limited barrel rotation with a gritty bind-up turning in either direction. Alltrade says this was some limited deal years back and has no expertise or other info. I'd like to take it apart for inspection, but other than getting the ratchet stop and end cap off, I'm stuck at the next step. I've posted a pic of the end of the thimble - anyone recognize how to get this thing apart?

I realize this is a cheap item, but it's handy around the apartment now and then, and if it can be made to work again I'd like to give it a try.P3292910.JPGP3292908.JPG
 
Last edited:
If I recall correctly, Costco sold a Alltrade-branded, wooden-boxed set of a 1 inch micrometer and a 6 inch dial caliper in the late 1980s or early '90s for $US 35 or thereabouts. The quality of the set was similar to most of the Chinese-made micrometers and dial calipers sold in the U S under multitude of brand names.

My recollection is that the micrometer spindle / thimble interface is a self-holding taper. Removing the thimble from the spindle is pretty straight-forward: Use one had to grip the knurled portion of the thimble without covering the end of the thimble; lightly tension the taper by pushing the thimble away from the micrometer frame. Use your other hand to give the thimble end a moderate smack with a plastic screwdriver or small soft-face hammer. If it doesn't release at the first smack, a couple more will almost certainly free it.

My experience with these micrometers is that the spindle threads were nicely ground and then abused before they made it to the assembly separtment. The spindle nut thread is usually burred at the adjustment slits.

The spindle threads usually clean up nicely with an external hone (easily improvised) and a triangular jeweler's file can get rid of the slots in the nut.

The spindle taper will probably need a bit of smoothing; I use a diamond-grit "knife sharpening stone".

Spray-can carburetor cleaner is handly for cleaning off dried oil, but it will likely mess up the plastic insulator on the frame.

Once cleaned up and properly lubed (I've found 0w-20 full-synthetic engine oil to be entirely satisfactory), my experience is that these micrometers work well for normal use.

For the record, I've sent dozens of these and similar micrometers through an aerospace-hardware maker's calibration lab, and after that lab was shut down, through a commercial calibration lab. None of those micrometers were rejected.
 
Hammer and chisel...then buy a good mic

Etalons and Tesas will do the same thing if you get grit in them. In fact it's easier to seize them because the fit is closer.

The main difference is, replacement costs a lot more :(

The weird thing is, the thimble should just unscrew. I've never had any mics that didn't. All I know of to try is, spray a lot of carburetor cleaner in there, wiggle and hope.

He's kinda lucky they aren't good ones, in fact.
 
I should add a note stating that the slotted screw in the outer end of the totque-limiting ratchet's knob threads into a hole tapped into the outer end of the spindle, to mechanically fasten the thimble to the spindle.

The ratchet-knob and the thimble cap (aka washer) must be loosened for the thimble to be dislodged from the spindle. I generally loosen the screw 2 or 3 turns, but not remove it. Then I tension the thimble away from the spindle before smacking the end of the ratchet-knob screw with a screwdriver handle.

And then, when it's time to reassemble: 1) Adjust the split nut to fit the spindle thread, then screw the spindle all the way into the frame. 2) Clean the measuring faces of the spindle and anvil, and continue to screw in the spindle until the faces contact each other. 3) Clamp the spindle with the so-called spindle lock. 4) Slide the thimble onto the sleeve until the two tapers contact, then rotate the thimble until the zero mark lines up with the sleeve zero line. 5) Lightly tap the end of the THIMBLE [corrected from wrong word "spindle" on 30 MAR 2023] to seat the tapers. 6) Loosen the spinle lock, slightly open the micrometer, and close it again to verify that the thimble and sleeve zero indices are aligned. 7) Install the washer and ratchet-knob assembly.
 
Last edited:
Success, mostly! I grabbed the thimble and pressed it outwards with one hand, and gave a couple of light glancing smacks with a plastic mallet against the swell at the inside edge of the knurling. Nothing came loose, but when I went to twist the thimble again, now it moved more freely, with just a bit of resistance, and it threaded all the way out. There's a blob of orange something on one side of the rough end of the body stem, that flakes and probablycaused the grit. Not sure what legit purpose that might have had. It doesn't look like rust.

I'll polish and clean the body barrel a bit before re-assembly, and run a brass bore brush up the inside threads. I'd like to get the spindle and thimble separated still but have had no luck. I tapped the spindle face with the mallet, with the thimble end sitting on a bamboo board, just to get it to budge out even with the thimble end, but no sign of that yet. I'll use some PB Blaster and maybe a little heat when I can get back to it.

No obvious signs of damage to the spindle threads that I can see, so I'm guessing it's going to work again.

P3292911.JPGP3292913.JPGP3292914.JPGP3292915.JPG
 
It sounds like I didn't explain the thimble removal process clearly enough. The small end of the spindle taper is at the farthest-from-face end of the spindle; the ratchet knob acts as a drawbar to hold hold the thimble on the taper.

You want to "pop" the thimble off of the spindle taper. I do this by threading the ratchet knob into the spindle -- WITHOUT the washer -- until its about two turns from seated. Then I grasp the thimble with my thumb and index finger while wrapping my other three fingers around the spindle. I then push the thimble away from, in the removal direction, the spindle. Finally, I smartly tap the end of the ratchet knob (as if trying to drive it into the spindle end) with a screwdriver handle or hard-plastic hammer.

One or two taps has always done the trick.
 
Last edited:
I was fairly sure that's what you were saying, and did try it that way with a couple of sharp taps with mallet and punch, with the inside thimble edge supported on top of the jaws of a small vise, but also got no result. I had measured the ID at either end of the thimble with a dial caliper and it looked like the taper ran the other way, maybe .005" or so, so I tried the other direction too. Will try it again in today after I can get to some PB Blaster and light heat, starting with the way you indicate.
 
Got it back together and working smoothly again. Never could separate the thimble and spindle - despite heat and PB Blaster. Didn't want to warp the thimble edge any more than I had. Maybe that orange residue was leftover loctite used on the two, who knows.

Thanks for all the help.
 
Last edited:


Back
Top