What's new
What's new

How to: Stop for Lathe Production Parting/Cutting

JZZ30

Aluminum
Joined
Dec 20, 2007
Location
CA
Hi all, can't seem to find the answer I need, so here goes...

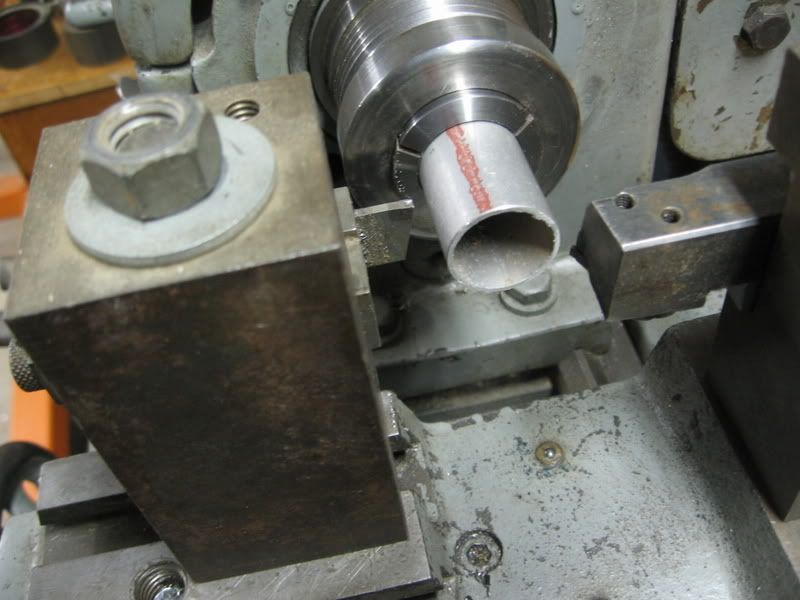
What would be the easiest and fairly accurate way to extend some tube stock out of a 3 jaw chuck to a repeated length? Basically for production cutting.

You know, like:

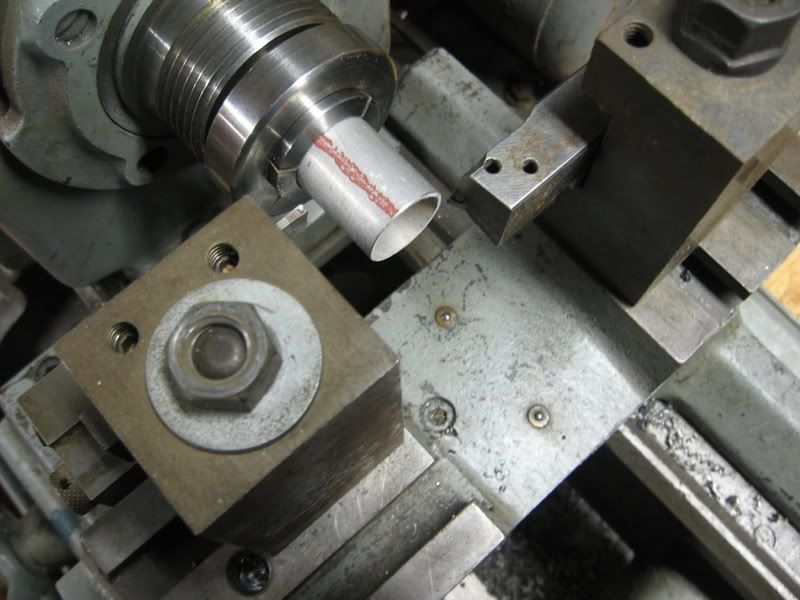
-Feed long tube stock through spindle to protrude from chuck to preset length (~.010 slop is ok on this)
-Tighten chuck
-Cut off piece with parting blade
-Loosen chuck, feed tube again, etc. etc.

I'm assuming any type of fixed stop is dangerous that remains in any (even light) contact (or close proximity for that matter) with the end of the soon-to-be-cut-off piece, since when the piece finally drops, it can catch on who knows what.

Also, it seems like a lever type 5c closer would speed this same process up dramatically?


Someone had showed me a 16 ga piece of scrap 2"x8" with a 1/4" strip removed for around 6" of the length as a good, quick gauge to use as a measurement from the chuck face.

Sort of like this
______________________
|_____________________|
|_____________________|
________________|_____|

Obviously this particular piece would be to space the tube 6" from the chuck face surface.


Any other good ideas?

Pictures of course are welcomed :)

Thanks in advance!
 
Can you give little more specifics? Length, diameter, gauge of pipe?

I have done light aluminum tube by using a boring bar.
 
Well, normally .750" to 1" dia tubing (.200" wall or so) or solid bar stock. Aluminum or carbon steel.

Cutting off anywhere from 1" to 3" lengths normally, so I figure it will be sticking out from the chuck about 5" or 6" or so.
 
Can you give little more specifics? Length, diameter, gauge of pipe?

I have done light aluminum tube by using a boring bar.

Did you keep the boring bar like barely touching the piece to be cut off? When I think about it, it seems like if it is around the 2 o'clock position (as looking at the end of the tubing) it shouldn't cause any problem when the piece drops.

A thicker blade would give more leeway too, at least in theory??
 
Make up a distance piece (length of part + width of parting blade)

Set bed/ carriage stop and insert distancepiece.

Slide stock forward so it's touches side of blade.

Remove distance piece and move carriage to stop.

Part off, repeat.
 
I'd do it like this:

Insert a running centre into the tailstock, slide the tube until it runs nicely on the centre (if larger pipe, pipe centres are available), Adjust the tailstock barrel to get your distance from the parting tool with the 3 jaw a sliding fit on the pipe, nip up, lock up & part off. After the first part don't touch the tailstock, just slide the pipe to hard up on the centre.

Supporting the part in the tail stock when parting usually means less squeal and chatter, as long as your not running at max chat the part should drop with no trouble.

Al
 
This is a very slick device. Mount it in the turret and make a cut. The grippers grab the stock. The turret pulls the stock out to predetermined length. Go back and part.
Repeat.
You can use any industry standard 1" parting blade.
http://www.royalprod.com/product.cfm?catID=4&ID=26

They also make one that uses coolant or air pressure to actuate gripper fingers to grab the stock. But it doesn't part the stock.
http://www.royalprod.com/product.cfm?catID=4&id=27

It's always a joy to see someone get excited when they realize this product is available. It's a real problem solver.
Curt
 
to hold really tight lengths you'll need to re-face the end of the bar after repositioning because the 5c collet may seat more or less deeply effecting the length.

or probe each part after reposition.
 
simple drop stop from hinge

Use a hinge . Cut a slot where I marked it black so it's adjustable.
Lift hinge up as stop, then collet and drop stop. Cut off then lift and repeat.

IMG_0004-13.jpg


IMG_0005-8.jpg


jims
 
Wow!

Use a hinge . Cut a slot where I marked it black so it's adjustable.
Lift hinge up as stop, then collet and drop stop. Cut off then lift and repeat.

jims

Ok, this is the kind of thing I'm talking about!! :D

And this solves the problem of not wanting to disturb the cutting length by moving the carriage left or right (even if by accident).

I do appreciate everyone's responses though, but any of them that involve moving the carriage laterally once everything is set, won't really work. And maybe I forgot to mention this was a manual lathe, so the grabber thing won't work, although it is a pretty trick piece!

I also see that a plus to this tool mount stop is that the left/right carriage position is completely irrelevant. It is also easy to do with one hand while tightening the chuck, and is guaranteed to be solidly mounted without having to be super careful with too much pressure (like when using blades or similar type things to stop against). You actually can press hard against the hinge to hold it there while you tighten the chuck. Even the slop of the hinge is not a point, since you will be measuring with it loaded all the way to the right anyways. Hell, you don't even need it on the machine to set the length for Pete's sake!

jims it's time for a patent for you LOL

Keep the ideas coming though all, all the ideas have been great, and it's always good to keep little tricks stored away for other applications in the future!
 
Endstoplo-res.jpg


This is not as quite as convenient as hinging a stop, but simple to make and fit. You have to wind the cross slide a bit further to bring it into play. I leave the carriage locked and use the compound slide to fine tune the relativity to the tool.

There are two dowels projecting down to keep it square to the T slot. At the end of construction the front gauging face was licked square, with the stop in working position and an endmill in the lathe spindle.

Incidentally, I recently hit on the idea of using it in another role, to connect the tailstock to the carriage.
The idea was to use the much faster-geared, and more ergonomically placed, carriage handwheel for drilling small, deep holes with lots of retraction for chip clearance. Essentially the stop pushes against the back of the chuck on the forward stroke, and the end of the tailstock quill on the return.

Drillfeedpercarriagelo-res.jpg


The cross slide is wound back so the endstop enters the gap between the back of the chuck and the end of the tailstock quill (barrel). The bed clamp is loosened.

The same idea could be used for power feed of bigger drills, provided the tailstock to bed clamp is modified (if necessary) to limit how much free play there is.
 
Hi I use my twin stop on my HLV-H leaver arm tail stock
Drag bar out about 10mm to far with the swiss file that I still have in my hand from de-burring the last component
Set the length with a drill etc with the first stop see picture no2 & close collet
Lift first stop see pic no3
Drill hole to depth, turn & de-burr, etc
I can hold length around 0.004" maybe less with ground bar
I've worked piece work on HLV's for ten years before CNC sliding head came along, we had a row of about 14 with skilled men on each one some of those guy's had been their 15 years before me, we pooled the piece work money so you had to do every thing as fast as possible if you scraped a job you had to cover the time your self.
 

Attachments

  • Ebay new 021.jpg
    Ebay new 021.jpg
    65.6 KB · Views: 474
  • Ebay new 022.jpg
    Ebay new 022.jpg
    62.1 KB · Views: 607
  • Ebay new 023.jpg
    Ebay new 023.jpg
    63.1 KB · Views: 347
You did say +/- 0.010" slop is OK.

Make a stop to fit the tailstock ram. Position the tailstock at about the position you need with the ram handwheel handle STRAIGHT DOWN. Position the stock against it and tighten the chuck. Back the tailstock ram off one turn. Make the cut. It may be necessary to adjust the cutoff tool position for the first one.

Now just crank the tailstock ram in one turn for the next part. This should be fast and easily within your tolerance just by eyeballing the straight down position each time. Back it off and cut again. etc.
 
Just doing the same thing for another run of spacers for work..... (still no turret)

I set a depth scale (scale with clampable piece on it) at the length, lay it against the cutoff tool, and push the rod up to it before setting chuck tight.

I'd use the tailstock as a stop, but I already have a drill and a releasing tap holder swapping in that, so it is never at the right place.

The hinge is cool, I thought of a similar deal, but didn't consider an actual hinge. But most are so darn sloppy, will they hold 0.01" ?
 
Well, normally .750" to 1" dia tubing (.200" wall or so) or solid bar stock. Aluminum or carbon steel.

Cutting off anywhere from 1" to 3" lengths normally, so I figure it will be sticking out from the chuck about 5" or 6" or so.

I used a groving bar. Set the tube a little longer than the part I wanted. Pulled the part out to hit the tool holder. Backed up to get my length. Then parted off and let the part fall onto the bar. It also gave me a few seconds to debur one end of the tube before it fell.

I was doing one inch thin wall aluminum from .5 to 2. long.

For bar stock I have been known to put two tools in. One for a stop and the other for parting off. Kind of a modified version of using a back tool holder for a stop and a front tool holder for part off. :rolleyes:
 
The hinge is a great idea but I like Troup's setup better in the first pic. If you use the corner of the stop-bar to set the tube length, by the time you crank the cross-slide forward to touch the work with the parting blade, it will be out of contact.

You could almost speed this up with a lever-actuated cross-slide (IOW custom-made cross-slide which is clamped to the lathe bed at a specific point for the purposes of production while not wearing out your normal carriage-mounted-leadscrew-cross-slide) although parting that way would definitely make me sweat the first few times :)
 
cut off tube stock

If I was going to cut off tube and I wanted quick and accurate lengths this is how I have done it in the past. I put the facing tool in on the back side and cut off on front. Can be either way. I pull out the stock by hand then using the facing tool I cut from the center out just taking a few thousands off the face then cut off . If you don't have a production cross slide then make a sub plate for your tool posts. I set up so the dial handle is at 6 o'clock of dial and count how many turns to me to be in right place to take facing cut. Then count how many turns back after cut off to be back in place to face next part. After a few pieces the count is allmost automatic. As the tools as locked in place you can hold them allmost dead on. So you really don't need a bump stop, you can use the the facing tool as a stop and the cut off tool is timed to length.
jims

IMG_0004-14.jpg

IMG_0002-18.jpg
 
Last edited:
Yeah, a cross between troups plus jims' last picture is probably what I'll do.

Unfortunately I don't have any mounting slots on the far side of my carriage, so I'll have to build something off the tool holder on the close side.

Maybe something with a bar that can clamp into the tool holder on the right side of the post, so I can adjust it towards and away from me, and another cross bar attached to that, which can go left and right. Maybe some set screw locking thing on the cross bar or something like that. Plus that would be convenient I can just drop it onto the right side of the post when I need to do this stuff.

But definitely like jims' picture where the stop automatically moves out of the way when you crank the carriage to bring in the blade.

Once again, with that setup the left/right position of the carriage is completely irrelevant. Exactly what I need to just chop these things off one after the other!

Very awesome info from EVERYONE!!! :)


Back
Top