What's new
What's new

Hydrovane 6PU compressor problems.

Metal clad was the common seal about 40 or so years ago when your pump was designed, also they can handle some what higher pressures which may be of benefit here? A std sharft seal is going to struggle if its exposed to full air pressure.

Most of the modern rubber only seals do actually have a metal core though, its just fully moulded over these days as thats easier now than it was with developments in the moulding process.
 
Hi,

Thanks adama, yes manufacturing processes change in 40 years although I admit I'm a bit wary about buying non metal clad seals although at the price of modern seals I'm giving them a go because if they do fail little will be lost other than my time; if I intended to use this 6PU as it's designed for then I would have opted for metal clad seals without question. Out of interest and a bit of good news I've now ordered both the "O" rings and three seals. The "O" rings from a store on eBay at £6.01 delivered and the three seals from Bearings 24/7 as kindly suggested by Miller13 these being £7.35 delivered. I'm not saying these parts are exact OEM items but if they work what a tremendous saving in prices; time will tell.

Thanks Miller13; yes I'll keep updating as work progresses. Whilst the compressor is in bits I might as well change all the "O" rings on the various valves etc whilst access is easier; the kit I bought will take care of the unloader valve but the Servo and Safety valves will benefit from a makeover and it won't cost much; I'll need to do some measuring then order the "O" rings but I think patience will pay off long term.

The oil leaks are generally easy to cure but the excessive air pressure is more difficult because the cause is unseen. I'll concentrate on the unloader valve regarding the air pressure; the workshop manual describes the symptom perfectly and I think the work carried out thus far on the unloader valve backs this up. I found play in the unloader valve piston bore which I reduced a great deal by making a new piston and this improved pressure problem whilst not entirely curing it; I also used a non standard Tufnol seat sealing washer but the new kit includes a correct PTFE washer; I have an idea how to improve it further. In two weeks time I'll be visiting Rufforth Auto Jumble and I can buy very cheaply there all sizes of reamers so I'll wait and then then buy a 7mm reamer and turn another new piston to even closer tolerances; also I can then grind in the valve to its seat; steel valve to aluminium seat to ensure this creates a perfect airtight seal. I can use the common fine grinding paste and cup tool as used in grinding engine valves in which I've done many times. All grinding paste will be removed. I'm enjoying this project because I can be a bit creative which adds a lot of interest for me rather than a simple strip and rebuild; it's a challenge?

I'm now busy elsewhere for a short while but I think once all the new spares are to hand the rebuild will progress very quickly because this compressor isn't a big machine or overly complicated.

Kind regards, Col.
 
Hi,

I've tried to add as much detail as possible during the restoration including my initial negative thoughts which I said would most likely swing to positive as work progressed? Well I can say I've finally succeeded in restoring this Hydrovane into full working order and I've now got a wide smile on my face.

The new service kit arrived as did the two large "O" rings and three oil seals. The oil seals were straightforward to install but a lot of care is needed to get them the correct way round; I bought a tube of Silicone Grease which was used both in the oil seal fitting then for packing the seals as suggested in the workshop manual; with two seals installed then comes a split aluminium spacer and the open split must align with an hole in the casting then the final seal can be installed.

I cleaned out the vane housing using clean cloth ensuring there was no gunge or debris left in there. I knew I would have trouble in the two vane shim gaskets one at each end of the vane stator; these measured 0.002" (two thou) each and are described as plastic in the workshop manual. I'm resourceful though and found our kitchen aluminium foil measured 0.001" which was the nearest material I had to hand which could possibly do the job? Firstly though I needed to accurately measure both the vane stator and rotor thicknesses as this is critical; the stator needs to be very slightly larger in thickness than the rotor. I had difficulty obtaining steady readings using my digital vernier calliper so resorted to my trusty micrometer; the stator was 1.456" thick whilst the rotor was 1.455". With the two original shim gaskets installed this would give a working clearance of 0.005".

I found using the foil as gasket material tested my patience and a few false starts were made ending up with balls of foil but with a bit of practice I became better; I was seated at the bench for comfort because this foil is extremely easy to ruin; I found by laying a piece of foil on the stator I could gently hold the foil in position with fingers of one hand whilst my other hand was used to press very gently allowing an outline to be added to the foil; using a sharp craft knife with the foil resting on flat card I then carefully cut around the outlines which in turn provided the gaskets I needed. Realizing how critical it is to obtain as close running clearance as possible I wondered if I could get away with just two of these thinner shim gaskets giving only 0.003" clearance? I assembled the motor and outer vane casting ensuring all mating surfaces were perfectly clean by going around with a safety razor as a scraper. The motor was then positioned upright in the woodworkers vice and two location long threaded rods added; one gasket was placed in position again taking a lot of care not to damage the gasket; the gasket was installed "dry" the vane stator was then gently lowered onto the gasket guided by the rods which went well but then as I tried to add the vane rotor the vanes started to slide out and it's important these vanes be kept in their original slots the correct way around?

I removed the motor from the vice and gently placed it on the clean bench; the motor shaft was rotated bringing the keyway to the top and the key was inserted; with the string still around the rotor I carefully pushed the rotor on to the motor shaft easing the string away as the rotor went home. This is a job were it doesn't pay to rush or be heavy handed; the second shim gasket was added as was the outer cover followed by the securing socket head screws; these screws were tightened evenly and I was very lucky because I found the motor shaft could be turned by hand; it was a bit stiff which I expected due to three new oil seals bearing down on it but I couldn't detect any metal to metal contact. I watched the rotor as I turned the shaft and noticed the vane blades were not dropping into contact with the stator? Was the running clearance too tight which was a worry? Rather than rip it all apart I decided to put some power into the motor to see if centrifugal force would have the desired result; I covered the vane housing with a towel and gave the motor a quick burst of power; this brought the blades into contact with the stator so I was well pleased. I had put plenty of oil on all the moving parts during assembly.

The motor flange/vane unit large diameter "O" rings were easier than expected to install; with the "O" rings in position they and the outer flange together with the vane housing were treated to a good coat of silicone grease; the motor/vane unit was pushed home up to the second "O" ring then it was drawn fully home using the two threaded rods ensuring the "O" rings did not become nipped or damaged; once the second "O" ring disappeared I knew I was then safe.

This was the most difficult part over and the rest of the assembly went very well indeed. New "O" rings were installed as required; two new filters were installed as was the new correct PTFE unloader valve seating washer; I used the new piston I had made and reassembled the unloader valve then installed it.

The oil was added then power applied; the air pressure rapidly rose to 110psi and remained there but is it going to remain there or once again creep into the red zone? An hour later the pressure was still at the 110psi although as I kept watching it I noticed it would creep upwards slightly then come back down much to my relief and pleasure. So at last the wayward air pressure has been tamed and the Hydrovane runs beautifully. After an hours test run I tried the blow gun to find it still puts out lots of water vapour but by your kind replies I now accept this and I think I'll be looking at installing a receiver tank and water trap but I'll give this some thought because now this Hydrovane is fully running as it should it will be worth more should I decide to sell it and invest in a newer up to date Hydrovane with the receiver already installed to save me more work?

I'd like to thank the moderators for allowing me to run this thread even though I'm now writing as a home workshop guy and for all you members for your input and most welcome suggestions. I've written in such a style hopefully which a novice can follow; initially I wanted advice about this Hydrovane 6PU because there was so little about it on the net; I've ended up doing the full rebuild whilst learning a great deal. I'm sure the new shim gaskets and the unloader valve piston will give trouble free service over the years and it shows what can be done with a little imagination in a home workshop at very little cost. I've enjoyed the learning curve and have a nice quiet compressor in my garage so I think it fair to say its been a success. There is now some Hydrovane 6PU information on the net for others to view

Kind regards, Col.

DSCN0700.jpgDSCN0703.jpgDSCN0705.jpgDSCN0706.jpgDSCN0707.jpg
 
Coming this far adding a reciver is not much effort, you just need to plumb it up + have a safety valve, thats really the key easy bit.

Just a heads up on the silicone grease, great on plastics, great on rubber, great for seals. Never use it in metal - metal applications though, will seize solid real quick!
 
Hi,

Thanks adama for the tip regarding not using silicone grease on metal to metal; I'll know in future. I agree that having reached this stage adding a receiver will be very easy and it makes sense because I know my Hydrovane has just received a complete overhaul unlike if I buy another Hydrovane which might have me starting all over again; I could use a remote receiver plumbing in as you say which offers flexibility?

I've just run the Hydrovane again and this time I noticed a distinct click as it reached 110 psi which must be a valve operating; I didn't notice this before the stripdown and whichever valve it is it must now be doing its intended job in maintaining the correct pressure.

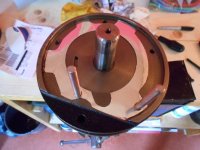
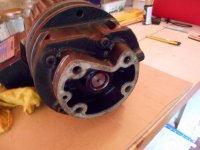
Here is a picture showing the vane unit attached to the motor.

Kind regards, Col.

DSCN0708.jpg
 
Hi,

Thanks adama for the tip regarding not using silicone grease on metal to metal; I'll know in future. I agree that having reached this stage adding a receiver will be very easy and it makes sense because I know my Hydrovane has just received a complete overhaul unlike if I buy another Hydrovane which might have me starting all over again; I could use a remote receiver plumbing in as you say which offers flexibility?

Good writeup, thanks for posting it so others will have a starting clue.

I'd go for the external tank, it's what I'm doing. I have some high pressure braided flex hose to make life easier. My setup - when I finish plumbing it in - goes compressor to fan cooler/radiator to water trap to tank, then take off plumbing as required to end points. For painting, blasting and plasma cutting I have water traps immediately before the final connection. One of these days I'm going to run some steel pipe around the walls which will act as extra cooling.

PDW
 
Hi,

Many thanks PDW. Being a guy I find it hard to multi-task but now the Hydrovane is sorted I can have a look at what's available regarding a tank and water trap etc. If I plumb it in I would always go for steel pipe mostly because of safety; a guy on another forum has just plumbed his compressor in using copper tubing as used in domestic jobs; this would scare me if it was mine? Any suggestions please on decent water traps; at the moment I have only a cheap and cheerful air/water separator which cost £19. I'm sure I can find better.

One point worth stressing and which I didn't know about when I bought my 6PU is that never buy without seeing it run but don't be fooled by the seller as I was in that seeing the compressor run up to 110 psi and the seller immediately opening the air valve to vent to the atmosphere showing it holding pressure at 80psi; insist on testing it with the air valve closed for at least ten minutes and watch the pressure gauge; if the pressure slowly starts to climb and continues to climb it would be a good idea to thank the seller for the demonstration then leave well alone or adjust the price downwards. In spite of the problems I still like my 6PU and will most likely keep it; it occupies little space but puts out plenty of air; certainly enough air for my needs; it's an industrial compressor designed to run day in day out with high reliability and above all I can work near it without needing to wear ear defenders or it rattling the entire bungalow. Having read a bit about this particular model it was made of a time when it cost Hydrovane a lot to manufacture it and it was made well; it's got a top class Brook mtor installed; I know because I worked at Brooks.

Initially I wondered what I was in for as I first started work on this Hydrovane expecting it to be very complicated after all I was totally new to vane compressors. However now I've completed the restoration I can say this compressor is quite easy to work on; because of lack of information the hardest part was sourcing the seals etc but once these were to hand the rebuild proved to be straightforward although I did take considerable care not to damage any gasket or "O" ring. These are nice compressors and I'm now happy with mine.

Kind regards, Col.
 
Hi,

Many thanks dkmc.

I've kept running the Hydrovane for an hour at a time and by this morning it had run perfectly for over three hours; I went into the garage and switched it on only to hear a strange noise then it stopped dead;I think it blew the 13A fuse? Obviously I was not at all happy with this given the work thus far carried out and why would it stop like this after running so well?

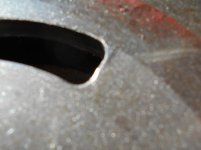
Pointless sticking another fuse in just to blow it so out with the spanners and investigate. With the Hydrovane isolated from the supply the fan cover was removed allowing me to turn the motor shaft by hand; at first nothing seemed amiss but as I turned in the opposite direction there were a number of tight spots; I was very puzzled by this and wondered if it was possible that the unloader valve piston had popped its circlip letting the valve float? Anyway I stripped it all down again to be on the safe side; everything appeared to be perfect until I carefully inspected the vane end cover and noticed a bright contact area at the end of the slot (port). This must be where the vanes are rubbing? The foil gaskets were still perfect but I think I now need to give just a little more vane end clearance and I'll use a file on the port end to ease it.

Fortunately it's not a major problem and this time the strip down was easy; Just another of life's problems and its not the end of the world. I'll add slightly thicker vane gaskets which should resolve the problem? So near and yet so far. Sorry about the picture quality.

Kind regards, Col.

DSCN0713.jpg
 
Hi,

Thanks dkmc; yes I agree; changing the grease is easy; Hydrovane recommend silicone grease be packed into the main oil seals so I'll leave these well alone but I'm having problems in obtaining gasket material so thin; I'll try to obtain genuine Hydrovane gaskets because I'm not in a hurry. The foil shims though were still perfect when I removed them. Its just strange that the Hydrovane ran for a few hours before playing up and ran so well?

I'll report back when I reassemble it again with an update.

Kind regards, Col.
 
Hi,

I think I can now put this hydrovane rebuild to bed having completed it this afternoon.

I had tried to obtain correct "Red" vane stator gaskets but only blue and green gaskets were available. The foil gaskets I made were still in good condition so I thought I would make four new foil gaskets using double at each joint? I got the foil out again and out of interest I measured it using the micrometer; I was amazed to find it was only 0.0005" thick? To double check I put four pieces together and sure enough 0.0002" so I'm not surprised the rotor was rather tight? Looking around for gasket material I have a big roll of quality brown paper which I used in transformer winding and this measured 0.003"; I needed 0.002" but this in use would compress slightly giving the required thickness; this time I placed two pieces together and found 0.006" so now I was in with a chance.

Proper gasket paper is treated and I think cellulose is used; I thought why not try sealing with shellac? I brushed on a coat of shellac which soaked right through the gaskets and allowed them to dry. The rebuild was quick and this time I used vane oil on all the joints and "O" ring seals. At switch on the pressure came straight up to 110 psi and remained there for an hour and a half as I waited for the Hydrovane to get nice and hot.

Having had the Hydrovane run for over three hours with the very thin foil gaskets installed I'm now confident the latest paper gaskets will give the necessary vane clearance; I'm just pleased to have it running again so can relax and get on with something else.

Kind regards, Col.

DSCN0721.jpg
 
Hi,

Well spotted dkmc; yes it is miracle foil? Should of course read 0.002"? :nutter: I was just so excited to get the Hydrovane running again it brought tears of joy to my eyes. Out of interest I've now bought an Apollo Pro-Spray 1500 paint spraying outfit to take care of my paint spraying needs; this cost £160 delivered bought second hand through eBay; it's previously been used for one job and is still very much like new at less than half price of a new one.

Kind regards, Col.
 
Hi,

Thanks dkmc.

I made the initial foil gaskets reasonably easy enough but for the paper gaskets I found an easier way. I placed clean card on the bench; placed the gasket paper on the card then placed the vane stator on the paper trapping the paper between stator and card; the stator was placed with the brass valve and locking wire uppermost this then gave just enough clearance to run a sharp craft knife around the stator perimeter then the knife was run around the bore leaving a nice crisp gasket only taking a few minutes each. The new gasket was released then placed in position on the upper surface of the stator and the holes marked with a dirty finger; I had turned two punches from metal rod and these in turn punched the holes out cleanly.

I was quoted almost £15 for two vane gaskets including delivery. The gaskets I made were virtually free and not in the least difficult to make. Had the "Red" gaskets been available at a reasonable price I would have simply bought a pair but to save lots of wasted time I made my own gaskets.

Although the three new main oil seals are not metal clad they appear to be holding up well so far but obviously time will tell? I've just been running the Hydrovane again and it remains air and oil tight; what a delight it is though to have such a quiet compressor; it's certainly not silent but a vast improvement over the 3hp piston compressor. I doubt I'll ever return to another piston compressor and I now know my Hydrovane inside out; with my new knowledge this 6PU is very easy to strip and rebuild aided by a decent workshop manual which is still readily available quite cheaply.

Kind regards, Col.
 
Hi,

Thanks dk for your kind comments. Your suggestion of contacting Hydrovane by phone is a good one and I would have used it as a last resort but I've now got both good and bad news to share.

I received a reply to the email I sent to Hydrovane and it was most helpful also the guy at Hydrovane has given me permission to pass on the workshop and user manual details which he generously sent me in PDF format completely free of charge so top marks to Hydrovane for this which has cheered me up a great deal. I hope I can suss out how to add both manuals?

Now some detail; yes there are two service kits still available for the Hydrovane 6PU models (there are actually two such models but the kits are identical). KM006 is the smaller service kit containing filters etc whereas the KT006 service kit is the top up kit for use in a major rebuild containing all the seals. Hydrovane have been great in supplying all the detail and I was informed that my nearest Hydrovane agent is Thorite in Bradford where I should order the kits as required? I also enquired out of interest if the unloader valve was still available for the 6PU and not only is it still available the design is so good that it is still used to this day under part number 3653-P.

I've emailed Thorite in Bradford and have received a prompt reply with quotes and this is the bad news because I'm in a state of shock; the smaller service kit KM006 is £81.31 and the comprehensive top up kit KT006 is £252.63 which brought tears to my eyes. This plus carriage of £9.95 and I received an addition to the email requesting I supply details of the quote and if I have followed up on the quote because Thorite are now monitoring emails received through their website? I can understand this because emails take time and will add up to a substantial sum for a big company paying wages? Both kits add up to roughly what I paid for the Hydrovane in the first place and now I have a bit of a dilemma?

The shock is now wearing off and the tears subsiding allowing me to think rationally; if I went ahead and bought both kits and the repair was successful I would have a very nice substantially built quiet Hydrovane compressor which would last my lifetime with care and including the initial cost all for around £700 excluding my labour which of course is a labour of love; compare this £700 to around £2,000 for a new Hydrovane and it brings it into perspective; it's still a lot of money to spend on a compressor which ceased production around 1984 but once the money was forgotten I would have a very nice compact compressor? I could of course just buy the cheaper service kit in the hope the new filters would solve the problem but I don't like doing half a job so I'll give it a bit of thought.

Whilst in Sheffield this morning Bron and I drove over to Direct Plastics Online a company we've visited a number of times previously. I wanted to buy 1" dia Wale Tufnol in a 6" length and I also took along the original PTFE unloader valve seating washer asking if they could supply a bit of material to make a couple of these washers from. Things become more complicated these days and it's becoming increasingly harder to obtain material in small amounts; the Whale Tufnol rod is only available in 300mm lengths it being a cut to size stock item also the PTFE is sold as a sheet in my case 300mm x 300mm x 3mm? The Tufnol works out at £21.77 inc VAT and the PTFE works out at £32.46 inc VAT. I only needed a length of Tufnol at just over 1.5" and the PTFE two diameters at around 1.5". On the bonus side though I was very kindly given a small sample of 3mm PTFE which will yield four sealing washers but I didn't buy any Tufnol. DIY is rapidly being pushed out here in the UK with businesses catering for businesses who have lots of money to spend where minimum quantity isn't a problem; I'm not in any way moaning but I am saddened by the way things are going these days? In a way its a vicious circle with buying small quantities of material the seller has to charge a lot more for cut sizes because of the hassle involved but how much extra is justified? I used to buy BMS in small quantities and it was very expensive indeed then I contacted a local steel supplier who sells the steel in full lengths only with a minimum £25 order; I placed an order for £30 and collected the assorted BMS rounds which had been cut into 48" lengths to allow collection by car and it worked out at less than a quarter of what I would have had to pay from my previous supplier; it pays to shop around. I try to shop around for the two service kits now I have the details?

I've just tried to add the two service manuals in PDF (Adobe) but the files are much too large 6PU Mk2 parts & service is 658KB and 6PU handbook 2,469KB; I've got full permission to show these on the forum so is there a way I can do it please? If not I can send via email?

I've not ruled out buying both servicing kits but I'll have a go at shopping around first because I'm not in a panic and won't be put under pressure by Thorite for a decision in 24 hours?

Does a guy in his own home workshop need to be rich to own and fully service an Hydrovane compressor? I'm not knocking Hydrovane's but this is a steep and expensive learning curve I'm currently going through.

Kind regards, Col.

service manuals in PDF (Adobe) but the files are much too large 6PU Mk2 parts & service is 658KB and 6PU handbook 2,469KB, kan je het naar mij sturen aub?


can you send it to me please?


Back
Top