Sachmanram
Stainless
- Joined
- Jan 17, 2011
- Location
- New Brunswick, Canada
Hello all,
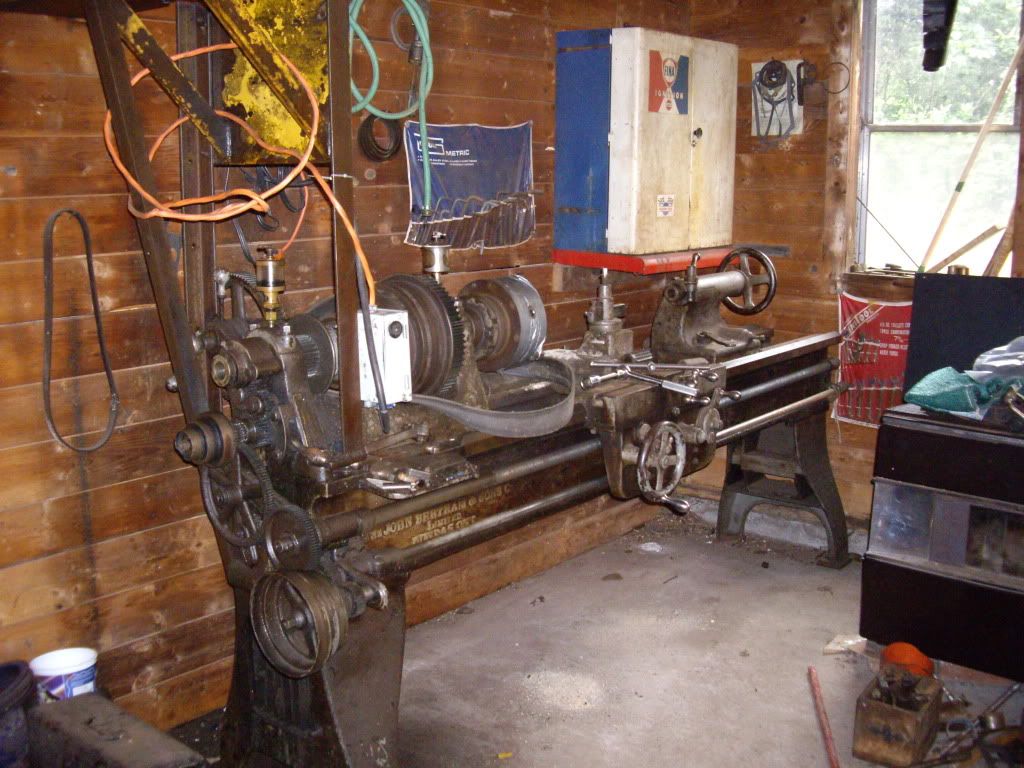
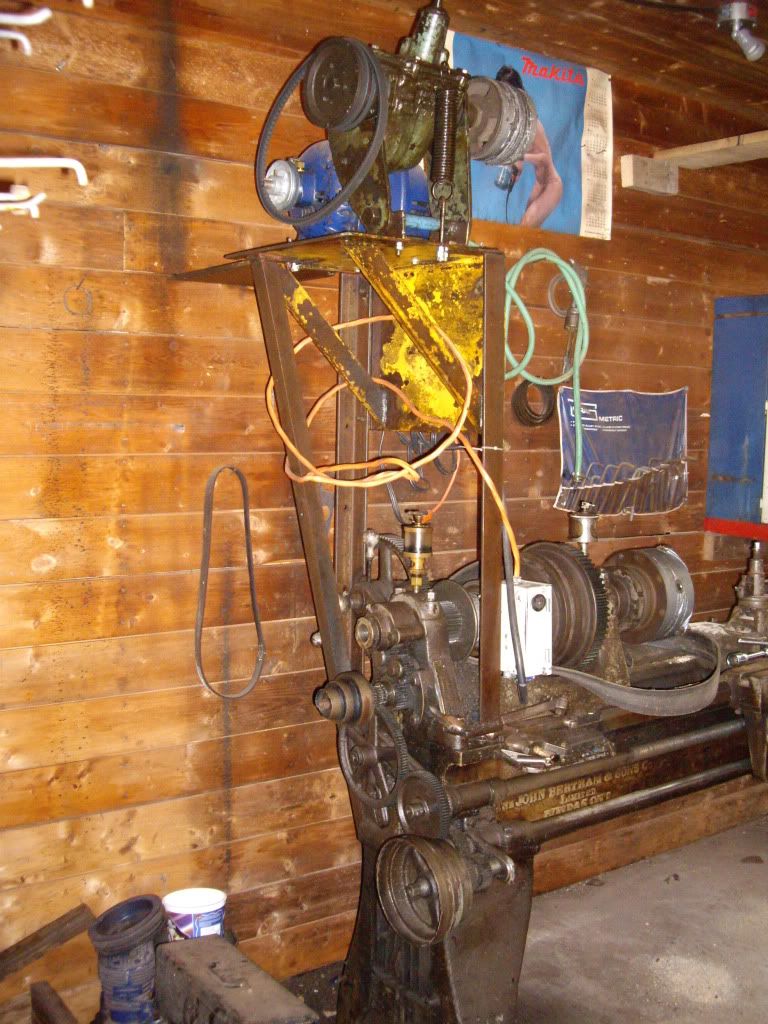
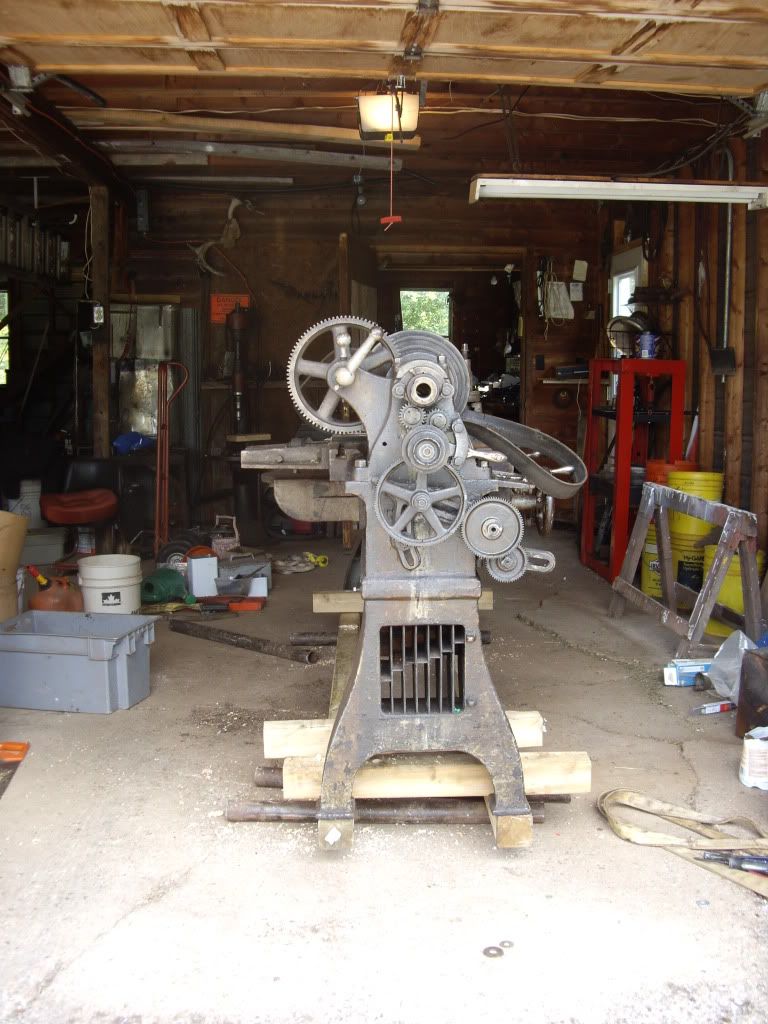
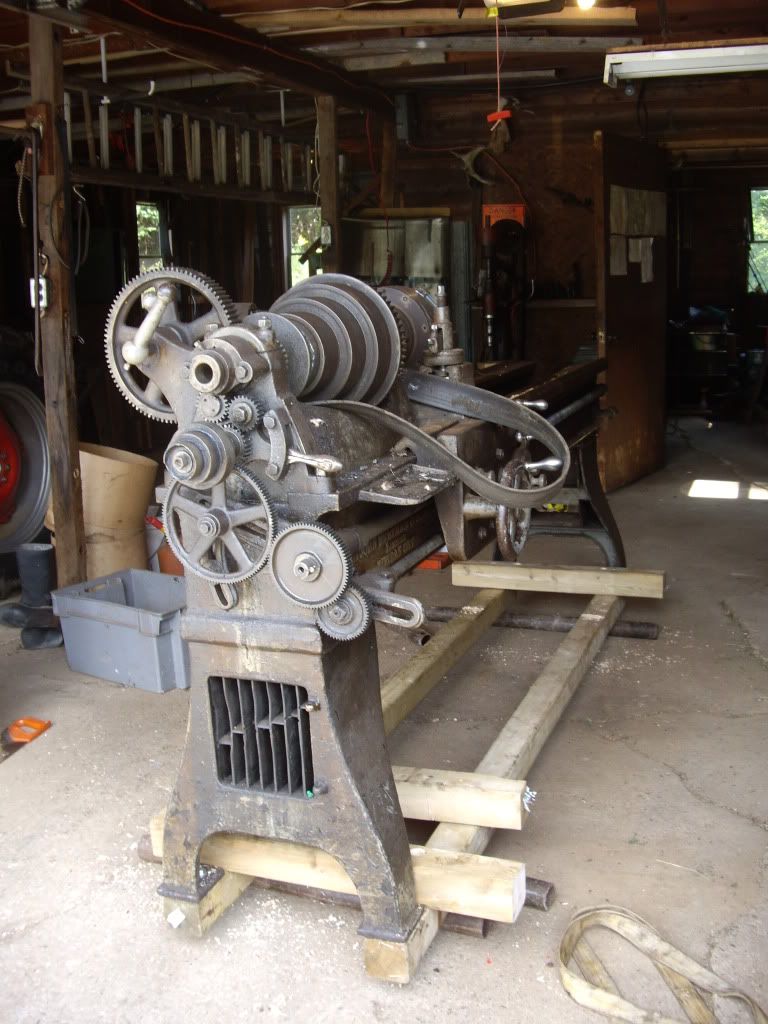
I am the proud "new" owner... hmmmmm... "caretaker" of what I think is a nearly 100 year old Canadian made lathe. It's been a long day starting at 6:30 with a one hour drive to a tiny hamlet called Belleisle Creek in a beautiful farming valley full of market gardens. I met the son of the owner at 8:30 (got kinda lost... don't ask... )this morning at his father's homestead and found him to be one of the most polite, friendly and helpful person that you'd ever want to meet.
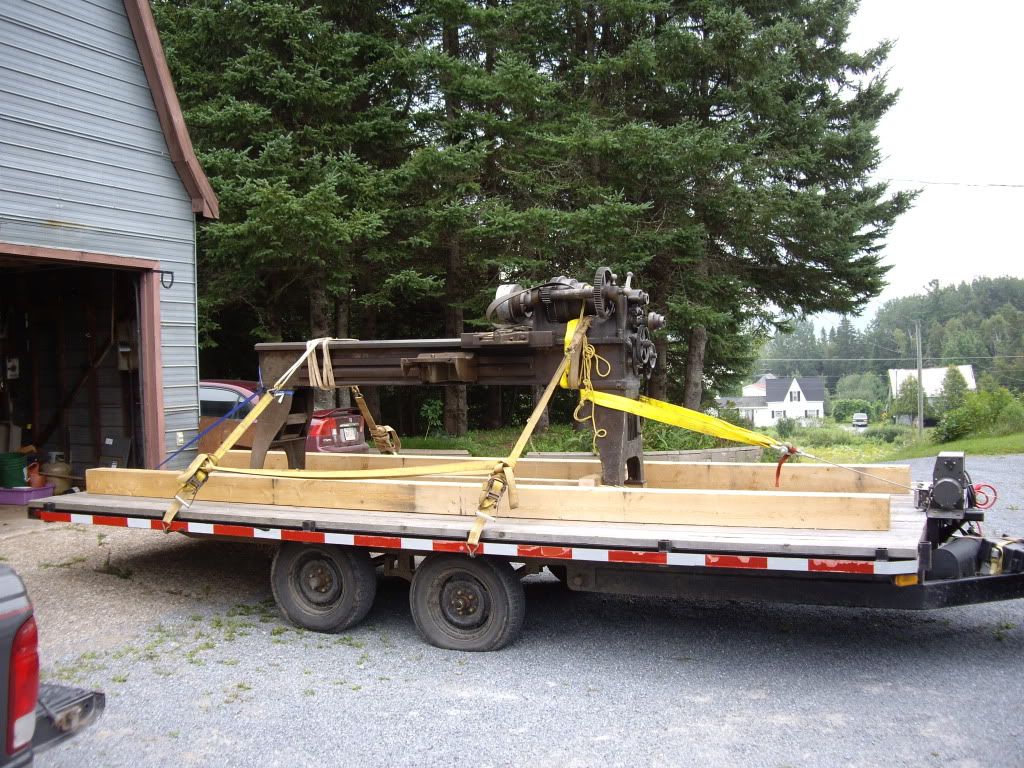
I wasn't sure just what I was up against until I saw the lathe. My little 4x4 Ford Ranger was "not" going to carry this heavy iron home...
Once we made the deal, Layton offered the use of his tip trailer, his help to dismantle as much as we could from the lathe, skidding the lathe onto his trailer and will deliver it to my front door as long as I pay his fuel cost.... of course it will be a "donnybrook" to get him to take the "extra" cash that I will hand him for all of his help... There are real good people in this world... and I met one today...
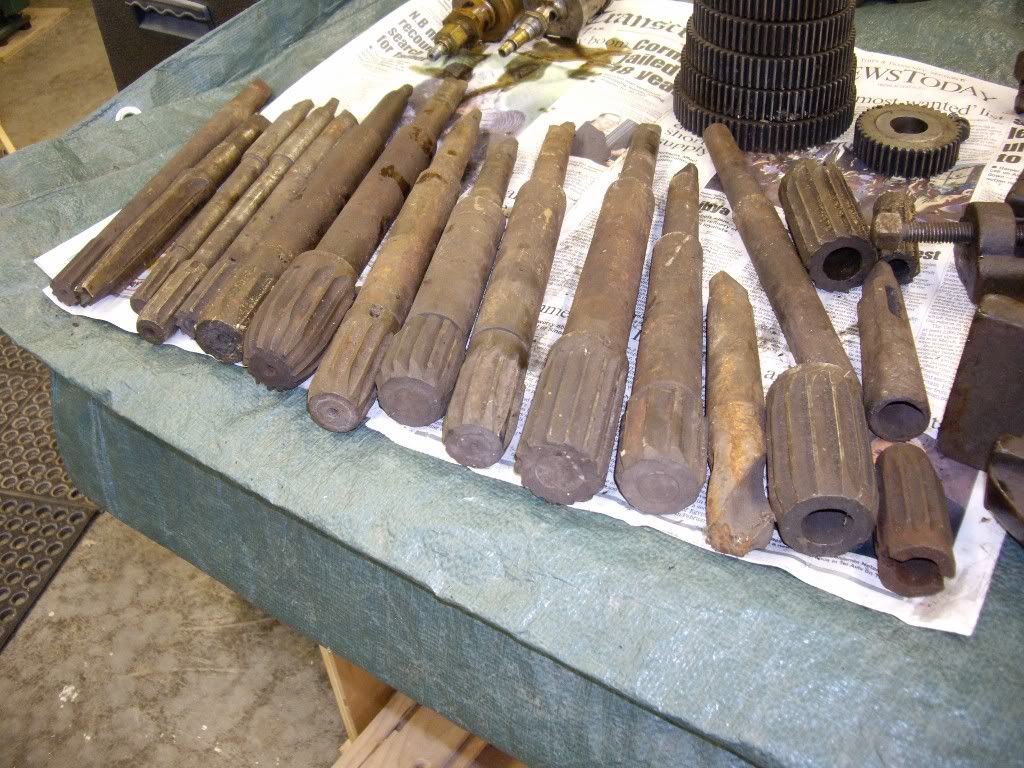
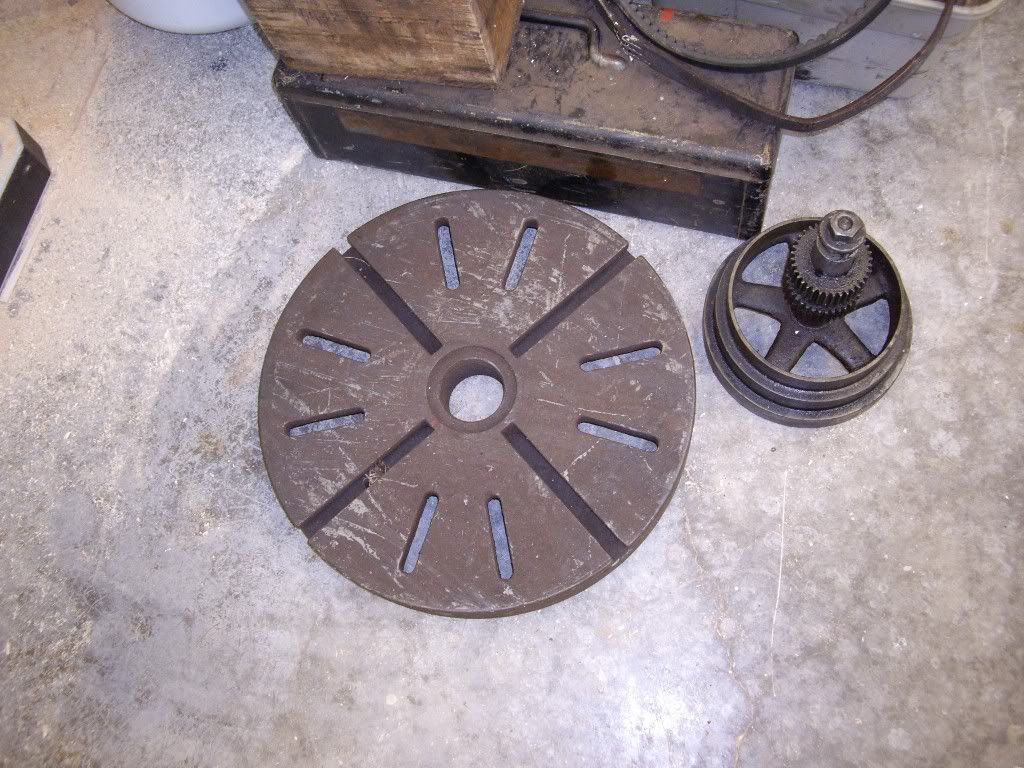
Anywaaaaaayyy.... I brought home a bunch of odds and sods with me and will prepare the way when Layton will deliver the lathe... possibly on Monday evening... I will try to take as many pics as I can....
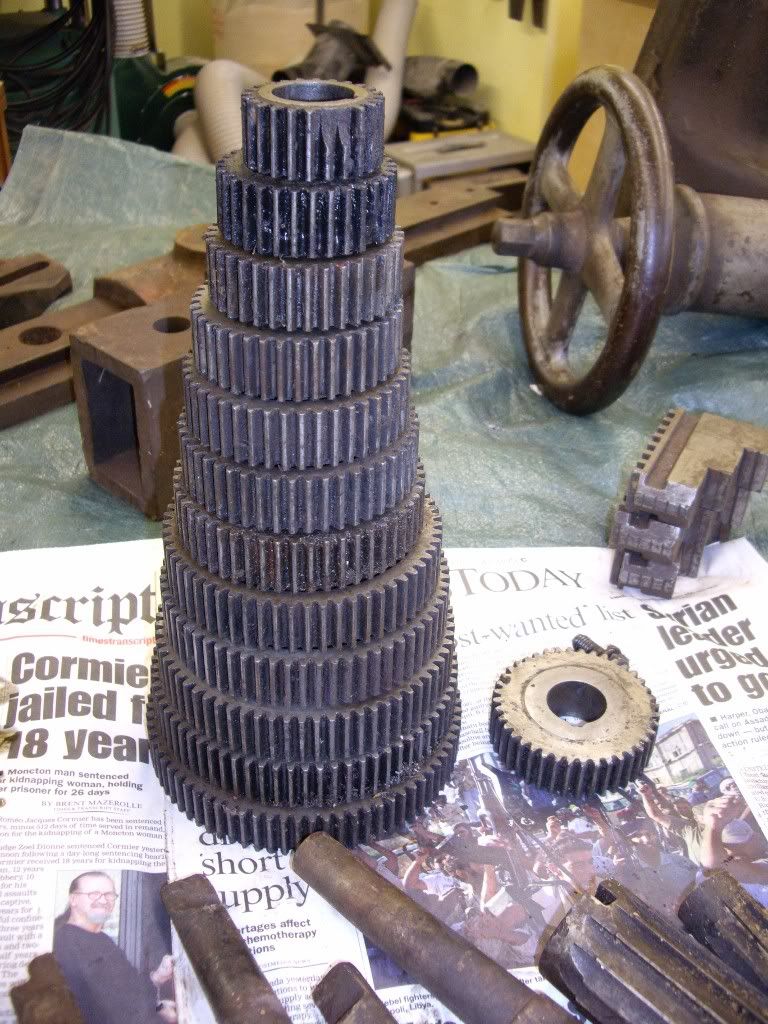
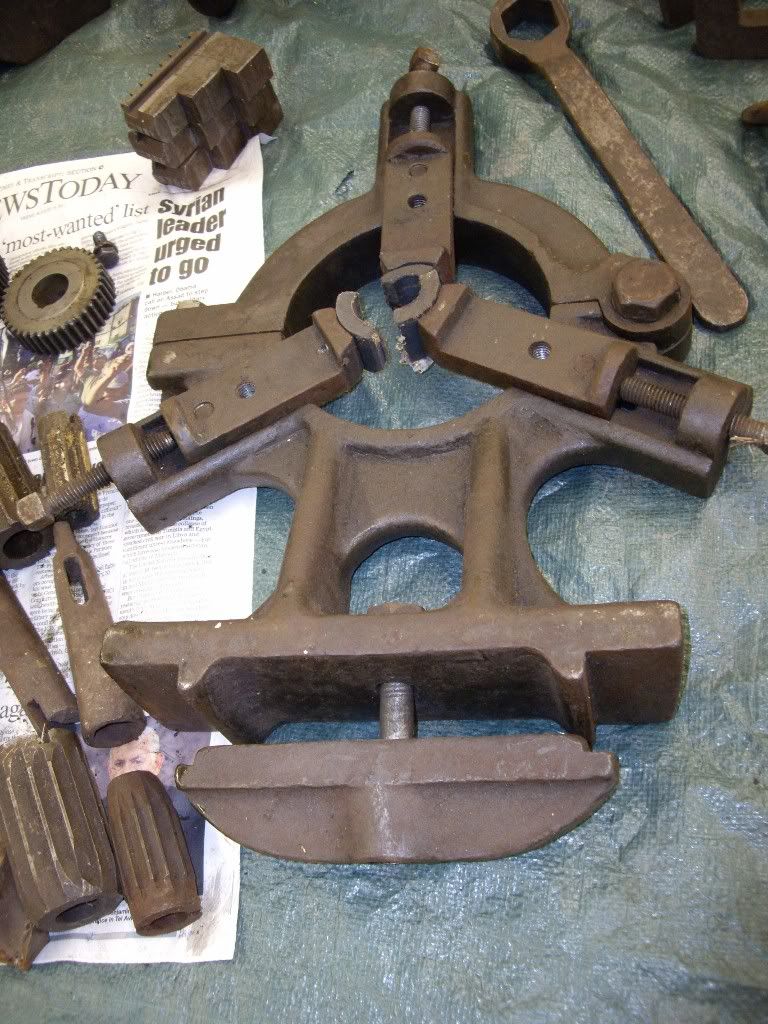
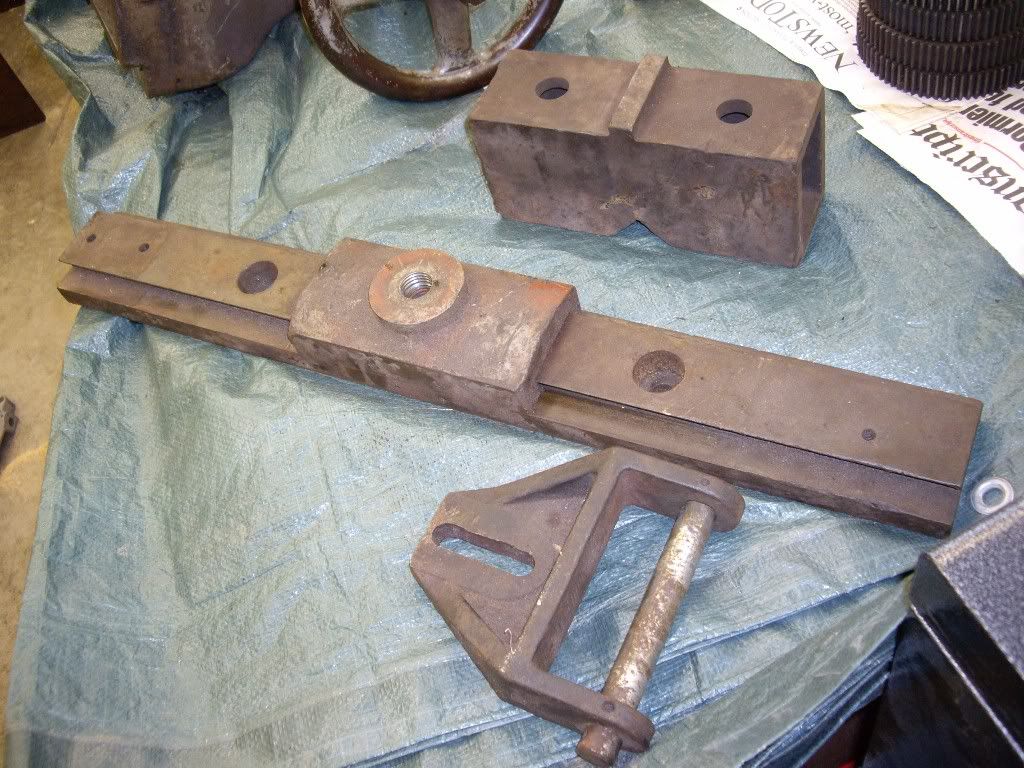
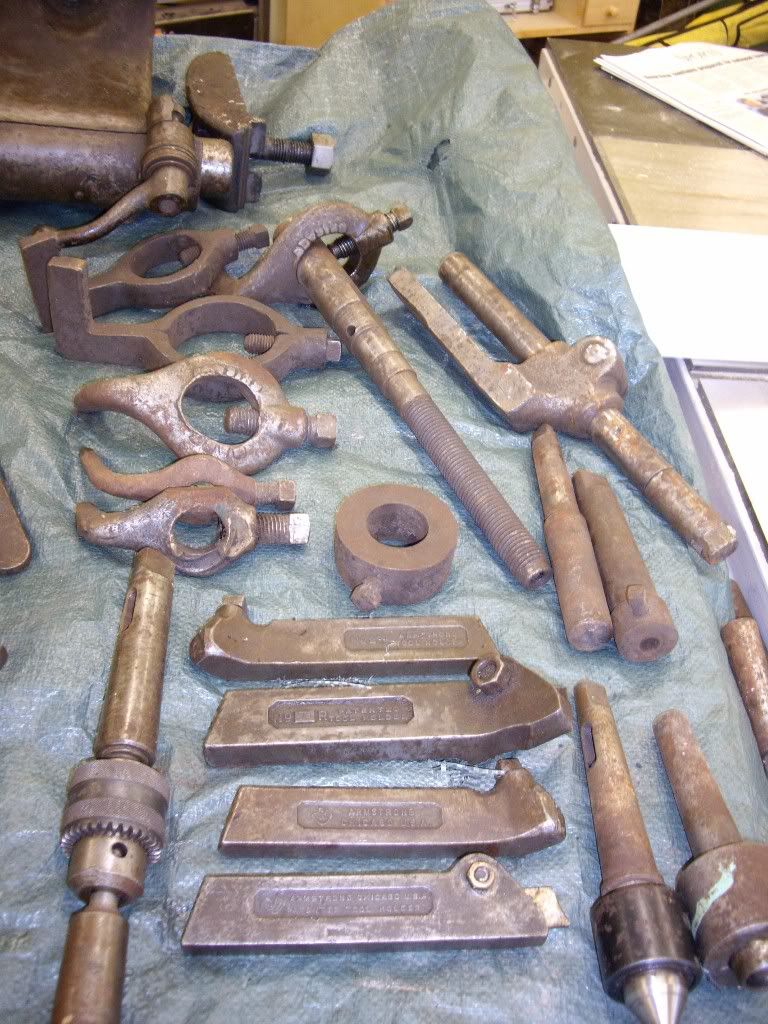
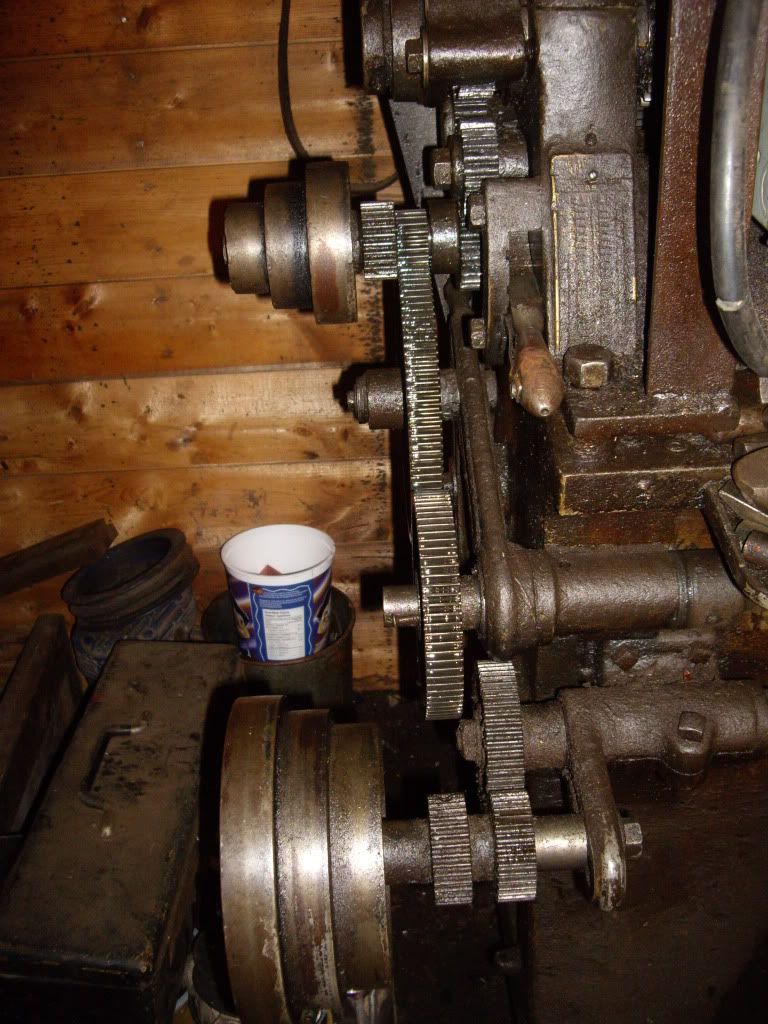
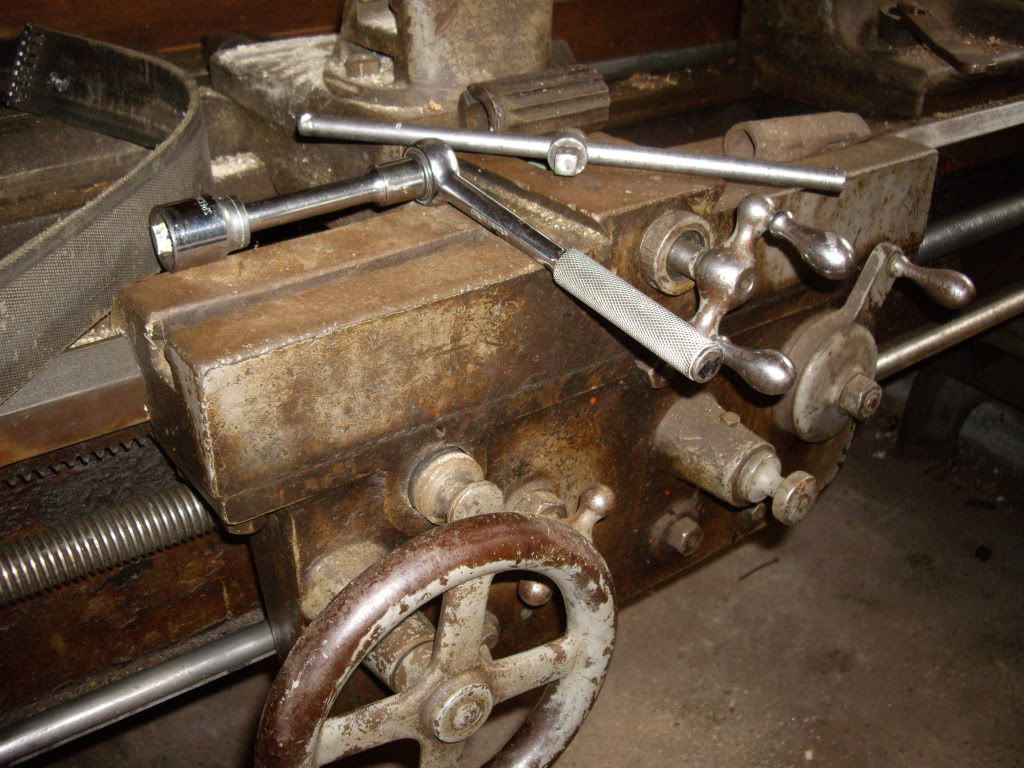
I'm not sure if it was Layton's father who installed the wooden vertical slats in the headstock leg assembly, but i thought that it was a rather clever way of keeping the change gears from separating from the lathe... I don't know if I have a complete set or not at this point... There are two separate doors on each end of the leg assemblies and am not sure if there would have been a back cover of some kind to keep the "innards" from wandering... I will post a few pics to whet your appetite for now... I have too much on the go right now, but will try to post a few pics of the iron that I brought home with me tomorrow... I do believe that this lathe has a taper attachment, but am not sure if I have all of the necessary parts for it...
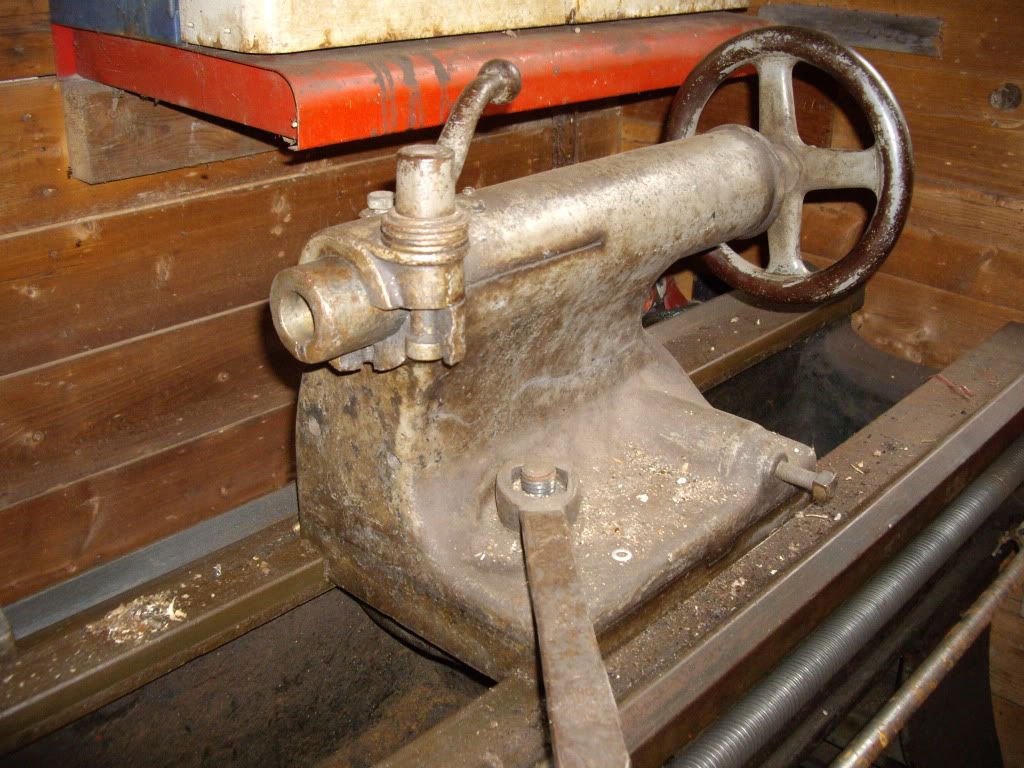
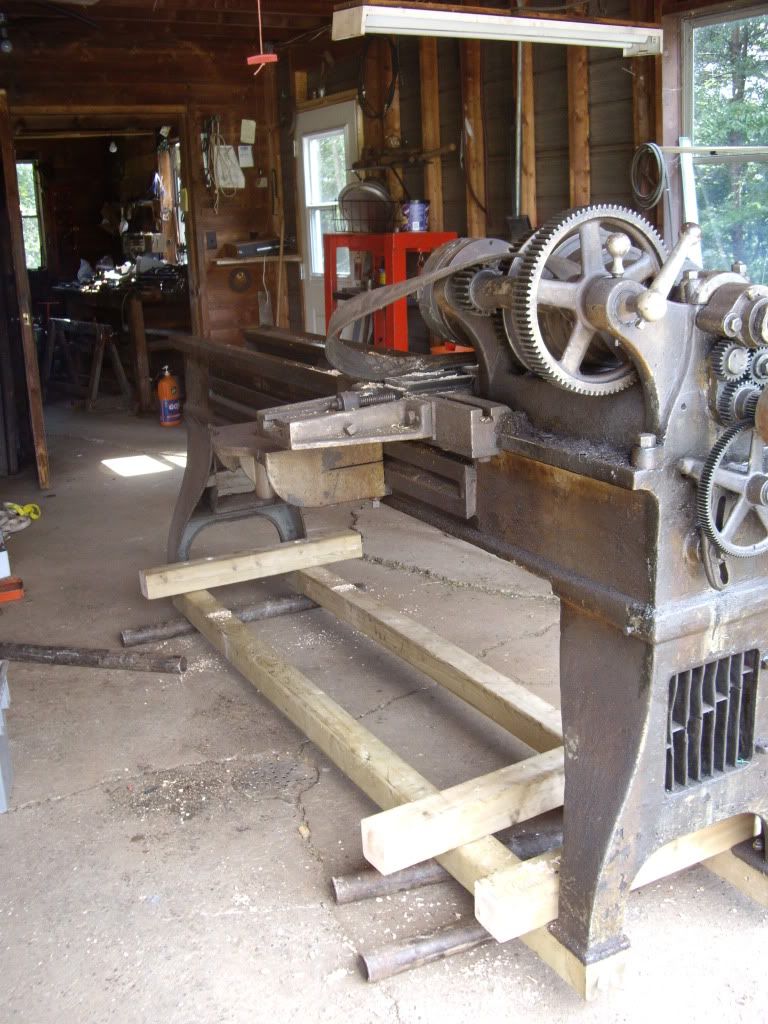
By the way, I am painfully aware of the massive cast iron failure at the nose of the tail stock.... I sincerely hope that it won't detract from my pleasure of exploring this lathe.... It came with a manual transmission, but I may want to restore this lathe to a ceiling mounted lineshaft in the future...
I'm really happy with this lathe...

I am the proud "new" owner... hmmmmm... "caretaker" of what I think is a nearly 100 year old Canadian made lathe. It's been a long day starting at 6:30 with a one hour drive to a tiny hamlet called Belleisle Creek in a beautiful farming valley full of market gardens. I met the son of the owner at 8:30 (got kinda lost... don't ask...
)this morning at his father's homestead and found him to be one of the most polite, friendly and helpful person that you'd ever want to meet.I wasn't sure just what I was up against until I saw the lathe. My little 4x4 Ford Ranger was "not" going to carry this heavy iron home...
Once we made the deal, Layton offered the use of his tip trailer, his help to dismantle as much as we could from the lathe, skidding the lathe onto his trailer and will deliver it to my front door as long as I pay his fuel cost.... of course it will be a "donnybrook" to get him to take the "extra" cash that I will hand him for all of his help... There are real good people in this world... and I met one today...
Anywaaaaaayyy.... I brought home a bunch of odds and sods with me and will prepare the way when Layton will deliver the lathe... possibly on Monday evening... I will try to take as many pics as I can....
I'm not sure if it was Layton's father who installed the wooden vertical slats in the headstock leg assembly, but i thought that it was a rather clever way of keeping the change gears from separating from the lathe... I don't know if I have a complete set or not at this point... There are two separate doors on each end of the leg assemblies and am not sure if there would have been a back cover of some kind to keep the "innards" from wandering... I will post a few pics to whet your appetite for now... I have too much on the go right now, but will try to post a few pics of the iron that I brought home with me tomorrow... I do believe that this lathe has a taper attachment, but am not sure if I have all of the necessary parts for it...
By the way, I am painfully aware of the massive cast iron failure at the nose of the tail stock.... I sincerely hope that it won't detract from my pleasure of exploring this lathe.... It came with a manual transmission, but I may want to restore this lathe to a ceiling mounted lineshaft in the future...
I'm really happy with this lathe...
Last edited:
")