What's new
What's new

My new shed build (Australia)

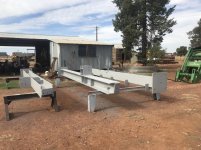
Now its time to start welding the posts. Each post took a lot of welding and I could complete one every day or two. Rolling the posts over too a lot of effort.

IMG_1509.jpg

IMG_1511.jpg

IMG_1515.jpg Welding the knees on was one of the most critical welds. Multiple passes were required

IMG_1517.jpg

Mark
 
Nice work Mark. Thanks for posting it and I'm looking forward to seeing the rest of the build and your shop. Nicely done.
 
That’s my dream Mark, the moment the steelworks closes here in Wollongong and the jobs are gone, I’ll be packing up the machine shop and heading west. Either that or way down south, around Bega.

You must be out near Bathurst/Mudgee area?
 
Love it. I did exactly what you are doing here at the same time. I remember exactly how wet the spring of 2016 was here. wettest spring in Oregon History.

That is some serious steel for what you're doing and that crane bridge looks a lot bigger than 5 tons at 40' span. Looks like a 7.5 ton or more to me.

Did you run ground pressure calcs for your crane footings? 3' by 3' square is a bit small for the weight of your building and the capacity of that crane over one post. I went 5' by 5' and 24" thick for my footings. I also have a 5 ton crane, but my beams are lighter. My uprights are 8x8 3/8" wall tubing with 20 feet to the ceiling and 16' hook height on my crane.

Hi Garwood

No ground surveys prior to the shed build. But it is built on hard ground with a very stony base on top of a hill. The holes were dug 4 ft deep with 12 inches compacted road base in the bottom. This was levelled to provide a flat base to help spread the load. Plus the cement slab was poured over the footings with the reinforcing steel tied into the piers to help spread the weight even more. I'm pretty confident it will take the weight.
The crane was rated at 5 tonne over 60ft span. I'm cutting it to span 37ft so could probably handle 7.5-10 tonne no worries. But only have 5 tonne hoist.

Mark
 
So basically the next few months was slowly making the posts.

IMG_1563 (1).jpg

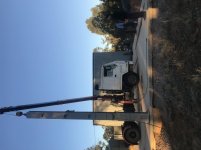
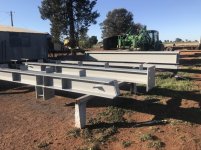
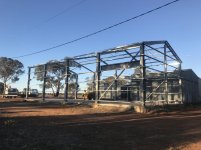
After made first four decided to stand up some posts. Made a lifting jig for the top of the posts that bolts on to make it easier. Lifted then up with Hiab crane on the back of my truck. Posts weighed 1200 kg or 3000lbs each. Crane is rated at 7500lbs so no problems.

IMG_1564 (1).jpg

IMG_1569 (1).jpg

IMG_1568.jpg

IMG_1574.jpg Needed the scissor lift to unbolt the lifting jig. Had decided that needed some sort of scissor lift/boom as working 20 + ft up was not safe just using ladders.

Mark
 
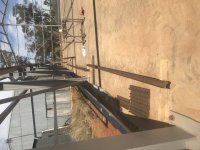
Decided to put up the crane rails as we went. These are 24 inch I beam with a 12 inch PFC welded to the top. This stiffens them to reduce potential for twist. When I brought then they where 8 meters ( 26 ft ) long so I needed to shorten them to 6 meters. They were too big to fit into the power hacksaw so I cut them but hand with a 9 inch angle grinder. Had to be very careful but actually cut quite well. They were pretty rusty so a lot of wire brushing was required. Then holes drilled to fit into the holes drilled into the knees. Used 1 inch bolts to bolt them on and holes needed to be very accurate as only 1/16" difference in the two bolt holes. Then bracing welded in and then painted. All takes a lot of time.

IMG_1664.jpg

IMG_1665.jpg

Mark
 
From the last pictures you can see 4 holes drilled into the end of the crane rail. This is so I can bolt a plate between the crane beams for stability. The crane beams also have lugs at the top so they can be bolted to the post. You can't see these as they are on the post side of the crane beams I think you can see them on later pictures). Also at the end of the beam I welded on a stopper so the crane can't just walk off the end of the beam.

So onward with fabrication and erection over the next few months.

IMG_1705.jpg

IMG_1706.jpg

IMG_1707.jpg

IMG_1708.jpg

Mark
 
Then slowly erected the rest of the crane beams and started putting up the 6 inch purlins for the roof and walls. Also put in the cross bracing in the end bay roof and walls.

IMG_1710.jpg

IMG_1734 (1).jpg

IMG_1735 (1).jpg

Mark
 
Forgot to mention putting in the sag rods for the roof purlins.

So now it is time to start working on the railway line that sits on top of the crane railing beams that the crane wheels run in. The bolts that hold the railway line to the beam all needed to be wire brushed,threads cleaned and coated. All 108 of them!
Then the railway line had to be wire brushed and cut to size. Large joining plates bolt on to join them together.

IMG_1736.jpg

IMG_1740.jpg

IMG_1737.jpg

IMG_1741.jpg

Mark
 
Then it all needs to go up. The bolts fit either side of the railway line in an alternating fashion. This is so you can adjust the railway line one way or the other to keep them the right distance apart and parallel.

IMG_1739.jpg

IMG_1742.jpg

IMG_1749.jpg

IMG_1750.jpg

This shed is going up way faster than I remember

Mark
 
You can see on the last 2 pictures in the last post the cleats welded to the top of the crane railing beam to hold it to the post.

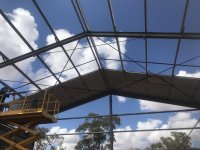
So now it is time to move onto the roof. One of the things I gave a lot of thought to was how best to insulate the shed. In the states this is insulating from the cold but here it is insulating from the heat. In summer it is frequently 40 C + ( 104F +) over the summer. Sislation or Sarking just isn't enough. What I found was 65mm high density polyurethrane sheeting. This came from a large apple storage coolroom that was pulled down. It has flame retardant added so will melt in a fire but doesn't really burn. Obviously each piece had to be cut to size and painted so it looked reasonable. It required a lot of work with preparation and putting it up but hopefully will be worth it.

IMG_1752 (1).jpg Here it is stored in another shed before we started to put it up.
IMG_1755.jpg

IMG_1756.jpg

Mark
 
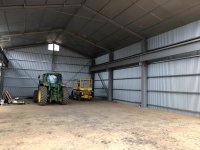
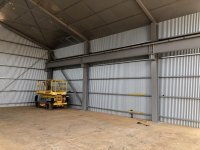
Doing the roof was very slow as we would put up a row of insulation, then some sislation then the corrugated roofing iron. Then repeat. Seemed to take forever. We did the first 3 of 4 bays as the fourth bay has been left open because we will lower the crane down through the roof first then fill it in. Also the big planer will be lifted in while that section of the roof is clear.
Then the wall sheeting went on which was pretty quick.

IMG_2017.jpg

IMG_2016.jpg

IMG_2012.jpg


Mark


Back
Top