What's new
What's new

OldCarGuy’s Retirement Toy Shop

Well what can I say that hasn't already said.In my own toy shop I have 2 lathes 1 mill 1 parkinson power hacksaw,MIG,TIG,ARK,OXY ACETYLENE. many many small tools and a collection of measuring equipment.grinders drill press and all the other basics.But you still put me to shame.I am Impressed,heart broken that its yours and not mine and well good luck to you and I hope you enjoy the retirment you have worked so hard get.
 
I thought if I could get a bigger shop that I would have more room. Seems to me that it doesnt matter how much space you have, we fill to the capacity. Nicest home shop I've seen yet.
 
I like how you positioned your surface grinders perpendicular to the wall instead of parallel or angled. I hope you don't mine if I steal that idea when I move my shop to a bigger place in 2 months time.;)

I'm curious how big is your power service to your shops?
 
I like how you positioned your surface grinders perpendicular to the wall instead of parallel or angled. I hope you don't mine if I steal that idea when I move my shop to a bigger place in 2 months time.;)

I'm curious how big is your power service to your shops?

Not at all!
I positioned all my abrasive equipment together. Along with a single dust collector. I like the grinders setup to throw their dust or mist to a wall. That I have installed white bathroom wall paneling. A damp rag can quickly clean up the mess given off by the grinders.

My Two four-car garages has their own dedicated 100 Amp 240 Volt single phase load centers. My 30' by 50' barn also has its' own 100 Amp 240 Volt single phase load center. Then I have a 240 Volt 200 Amp single phase load center in my 30' by 50' garage machine shop. (panel to the right) That services my lights, outlets, 240 Volt welders, several single phase 240 Volt machines. Plus it feeds a 100 Amp 240 Volt three phase load center (panel to the left) using one 5 HP and one 10 HP Rotary Phase Converters. They are set up to run either one at a time or both in tandem for maximum three-phase output. The center top box encloses the switching relays so that I don‘t get any feedback to one of the RFC that is not running while I'm running the other.
DSCF0592-1.jpg
 
This is my first read as a member of the PM site. I am just getting into machining and am inspired by your thread to spend millions of dollars. Thanks.


P.S. You should check out the Packard museum in Dayton. What a sight:crazy:
 

There is nothing quite like modern technology. But I couldn’t (wouldn’t) justify investing that kind of money into equipment for my garage. I’m sure it has its’ place in a “for profit” shop. But not practical for this old car enthusiast. I can achieve the same results shown on Jay Leno’s video in my shop. And not have to invest a ton of money,, then learn how to run the newfangled equipment.

To duplicate that steam engine’s slider valve. I would simply duplicate it using the old broken one as a model on my Deckel KF3S three dimensional Pantograph Copy Machine... And most likely not take any more time for me to reproduce it than what it took them.

DSCF1477.jpg
 
This is my first read as a member of the PM site. I am just getting into machining and am inspired by your thread to spend millions of dollars. Thanks.


P.S. You should check out the Packard museum in Dayton. What a sight:crazy:


I have been to the American Packard Museum on Ludlow Street in Dayton Ohio a number of times since it opened in the early 1990's. Where Robert Signom preserved an old original Packard dealership building and turned it into a spectacular Packard only car museum. A not to be missed attraction when traveling anywhere through southwestern Ohio.

http://www.americaspackardmuseum.org


.
 
Aren't patterns made deliberately over-size to allow for shrinkage as the material cools? Although my uncles have a pattern making business I don't know anything about it other than they use special rulers that are graduated according to what will be cast as I recall.

If using an existing part as a pattern do you need to build up the part with something to allow for shrinkage/machining? If so I can imagine that 3D gadget must be terrific.

Models needs to be proportionately increased in size so that when the part is removed from the mold and cooled. It shrinks to the desired dimensions. This shrinkage varies depending on material that is being cast.

You need to add .006” per inch when making a mold for casting aluminum. If the finished part is 1” by 5” long, the model needs to be made 1.006” by 5.030” long.

Shrinkage of plastics such as polystyrene, polycarbonate, ABS, and PVC are also .006” per inch. But polyethylene, polypropylene, nylon, and Delrin vary between .010” to .022” per inch. Also part wall thicknesses and flow patterns make a difference. Along with additives such as glass will make a big difference in shrinkage calculations.

My Deckel duplicator can easily be setup to accommodate these shrinkage rates. Additionally CNC programing can easily expand the cutter paths to accommodate shrinkage. And also eliminates models all together. You can go directly from a part configuration to cutter path for both the cavity and core. And make reverse images as well..
 
After two years I dropped out of college. And started in the Tool and Die making trade. Then into tool designing. Then went up the ladder in management. Until I managed a manufacturing plant of 250 people. I started collecting tools when I was 14. At 16 I purchased an acetylene oxygen set. Then things just spiraled from there to what I have now. Though I still find myself in the purchasing mode.
 
Paint booth addition

I thought I'd update pictures of a paint booth that I installed in one of my home garage. Along with reorganizing the garage that it's in. This will be my working garage for restoring my antique cars and repairing my modern ones as well...

Here the paint booth with the filters in place,, taken at night..

DSCF3325.jpg


DSCF3323.jpg


DSCF3368.jpg


Manometer to detect condition of filters. And Variable Frequency Drive (VFD) that converts 240 Volt single phase to three phase...

DSCF3277.jpg


The interior lights and fans switches are mounted outside the walk in door. I used a portion of throttle linkage from an old Stutz to mechanically connect the switch inside the booth. Now I can turn the exhaust fan off before I exit the booth. So that dust won't be sucked onto a freshly paint car...

DSCF3269.jpg


DSCF3273.jpg


The advantage of a VFD is that it can be set up to “soft start and stop” the fan. That is it'll start the motor slowly until the full PRM's are reached. Or run the fan at less than full RPM's.. As shown bt the following video clip. Video taken from inside the plenum box,, looking up at the fan...


24” diameter exhaust fan duct out the back wall. I put a 1/4” mesh screen to keep out small quitters.... And a butterfly valve to close off duct when not in use.

DSCF3306.jpg
 
And a few pictures after I cleaned up this garage... Around my BendPak XPR-10ACX two-post lift and 4,000 pound capacity bridge crane..

DSCF3331.jpg


Placement of a steel workbench with Wilton vise and file cabinet on side of booth..

DSCF3332.jpg


1 1/2 HP Baldor buffer with two storage cabinets mounted to the booth..

DSCF3333.jpg


Stash of buffing wheels and polishing rouge...

DSCF3336.jpg


My roller Snap-On tool cabinet along with Allen Syncrograph Distributor Tester.

DSCF3339.jpg


A maple top workbench with Columbia vise work and Waterloo and Craftsman roller tool cabinets...

DSCF3340.jpg


Ranger RX-950AT tire changer, DTS-1000 wheel balancer, RTJ-1 Two-stage Transmission Jack, and Todd 18 gallon oil lift drain canister

DSCF3342.jpg


DSCF3346.jpg


Now onto the task at hand. Finish restoring my 1910 Buick...

DSCF2017.jpg
 
This is the first Ive seen of your thread, but I have to say you have built an amazing and beautiful machine/work shop!!:crazy: I really love how you have everything laid out nicely, organized, and clean..... a little too clean!! :D I was beginning to wonder if you actually use any of it, but then seen your restoration projects. Nice work. I have a good friend who loves to build hot rods and cars like the Model A Fords.
I really hope that one day down the road a bit, I can build a new house and also a new shop at the same time, then move my machine shop to it and build it up the way I want, much like you have done. You give inspiration to many.
You have such a nice collection of machines and tools, one might not know where to begin when visiting your place. Everywhere you turn theres something cool and interesting to use.
If you havnt already, check out my thread. We got a pretty nice collection of tools also.
Wish you a long and happy retirement, and with a shop that nice, you should be happy. :cheers:
 
24” diameter exhaust fan duct out the back wall. I put a 1/4” mesh screen to keep out small quitters.... And a butterfly valve to close off duct when not in use.

DSCF3306.jpg
[/QUOTE]


Hello Old Car Guy,

I've enjoyed your posts about the amazing shop. Thank you for sharing!

I have a small booth in my shop and have the same exit horizontal exhaust pipe. Can you share some pics or further description of your butterfly valve? When it gets cold here, I have to block off my filterbank with plywood! It would be nice to have something in the pipe to close it off. I'd love to see how you did it.

Thank you!
Saul
 
24” diameter exhaust fan duct out the back wall. I put a 1/4” mesh screen to keep out small quitters.... And a butterfly valve to close off duct when not in use.


Hello Old Car Guy,

I've enjoyed your posts about the amazing shop. Thank you for sharing!

I have a small booth in my shop and have the same exit horizontal exhaust pipe. Can you share some pics or further description of your butterfly valve? When it gets cold here, I have to block off my filterbank with plywood! It would be nice to have something in the pipe to close it off. I'd love to see how you did it.

Thank you!
Saul[/QUOTE]


I added a shut off baffle valve inside the exhaust duct work so the heat in the garage doesn't* escape when not in use. The shaft I made from an old hollow 1” diameter overhead garage door spring shaft. I milled an 1/8” wide slot to accommodate the baffle...

DSCF3263.jpg


Baffle valve made from a 1/8” steel plate...

DSCF3295.jpg


Shaft linkage arm made from a piece of brass bolted to a piece of aluminum that I had laying around. A 1” diameter hole bored through to fit over the shaft. With a 3/8” threaded hole to lock it into place.*

DSCF3298.jpg


DSCF3300.jpg


The butterfly valve is manually is held open or closed by positioning the connecting rod into the proper position... Sometime in the future, I may have this controlled by using an air cylinder that's wired into the exhaust fan control. So it can be done automatically...*

DSCF3306.jpg
 
That is great, thanks!
I thought about replacing my exhaust pipe with a motorized shutter that opened and closed with the fan motor, but I think I like your better. Brilliant!

Thanks for sharing. I'll probably borrow heavily from your design.

cheers,
Saul
 
:drool5: i've lost alot of fluids from orifices i did'nt know i had:ill: reading this thread, getting downright nautical around here from all the drool....gonna need a floaty to survive it:D
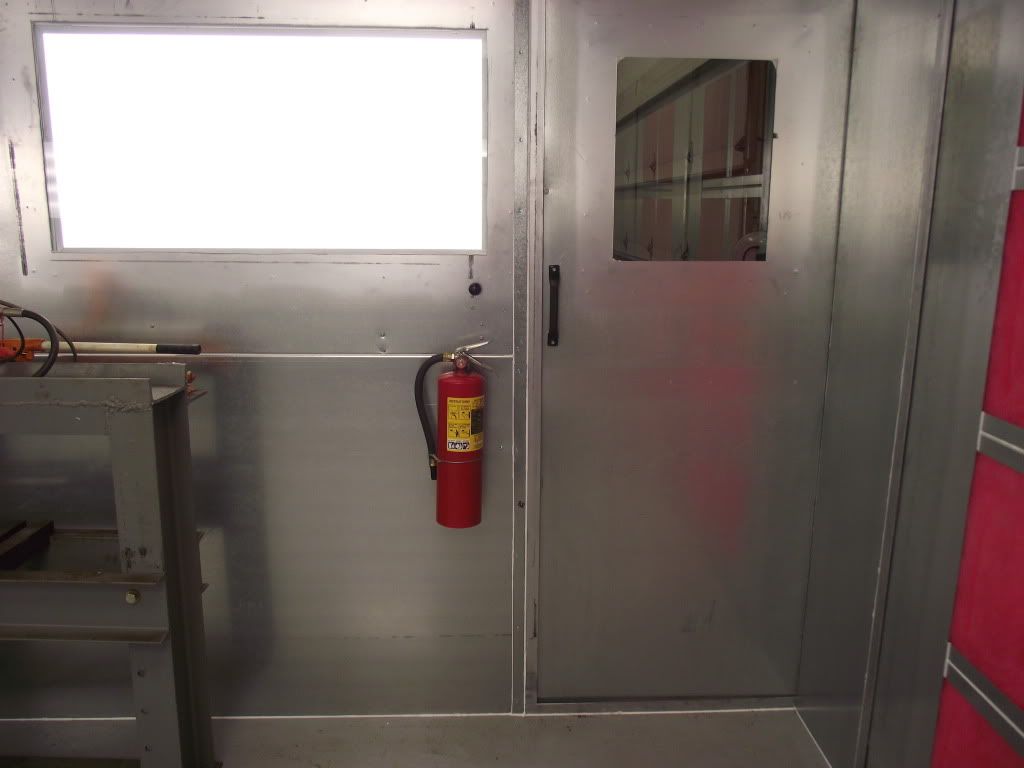
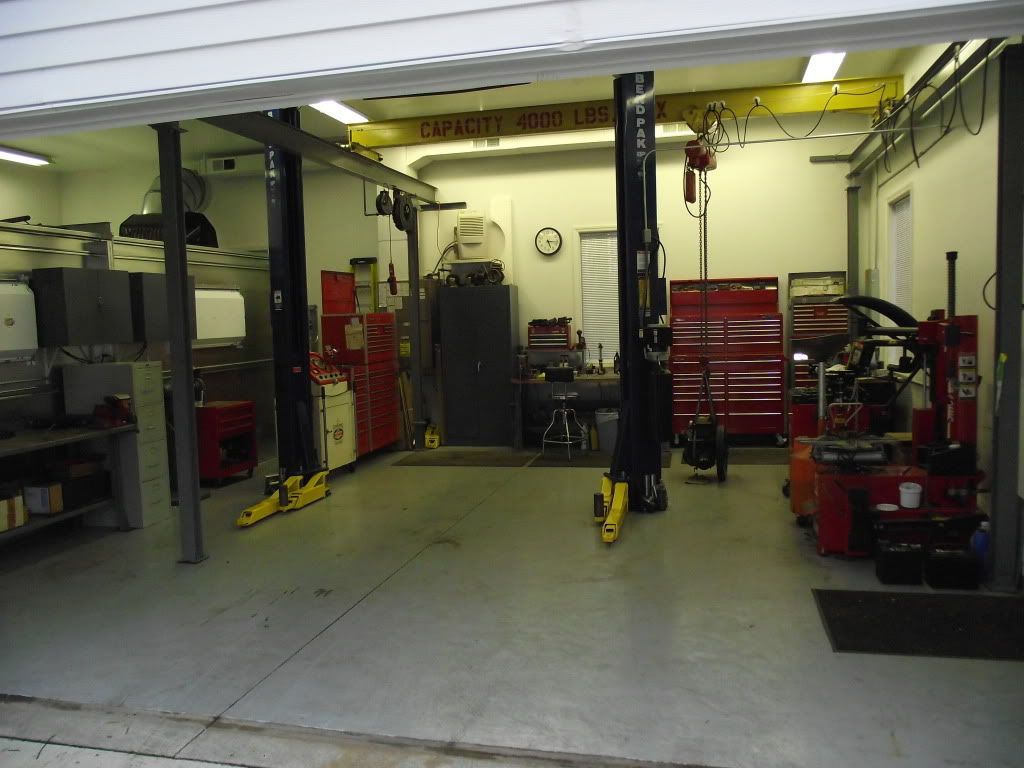
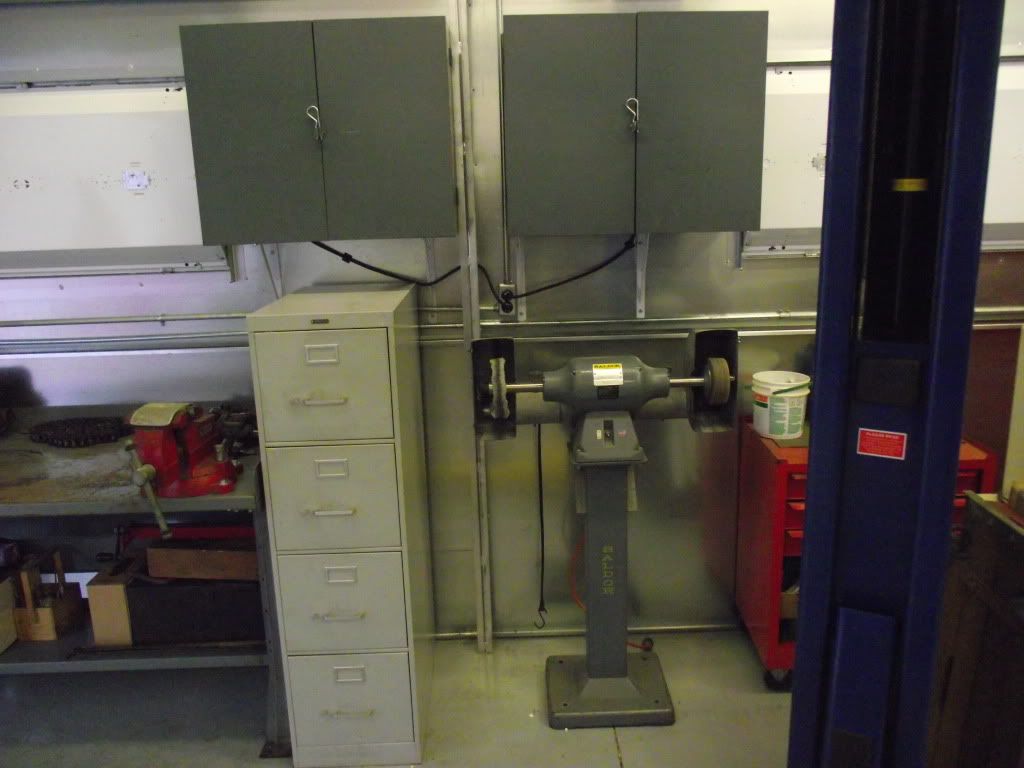
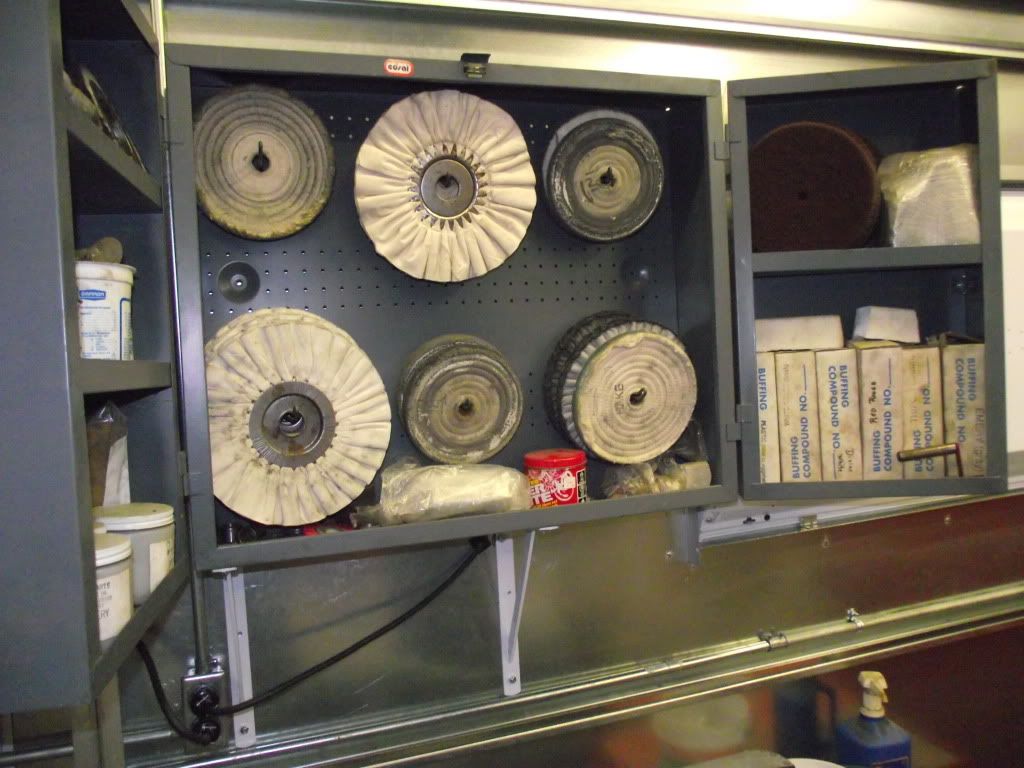
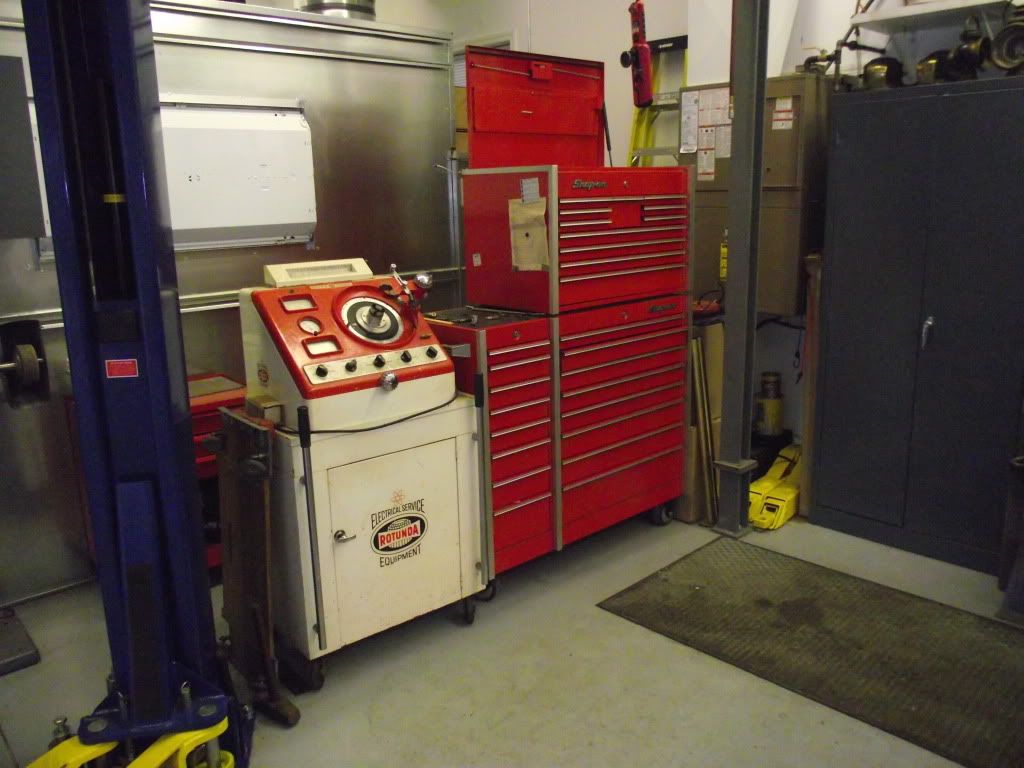
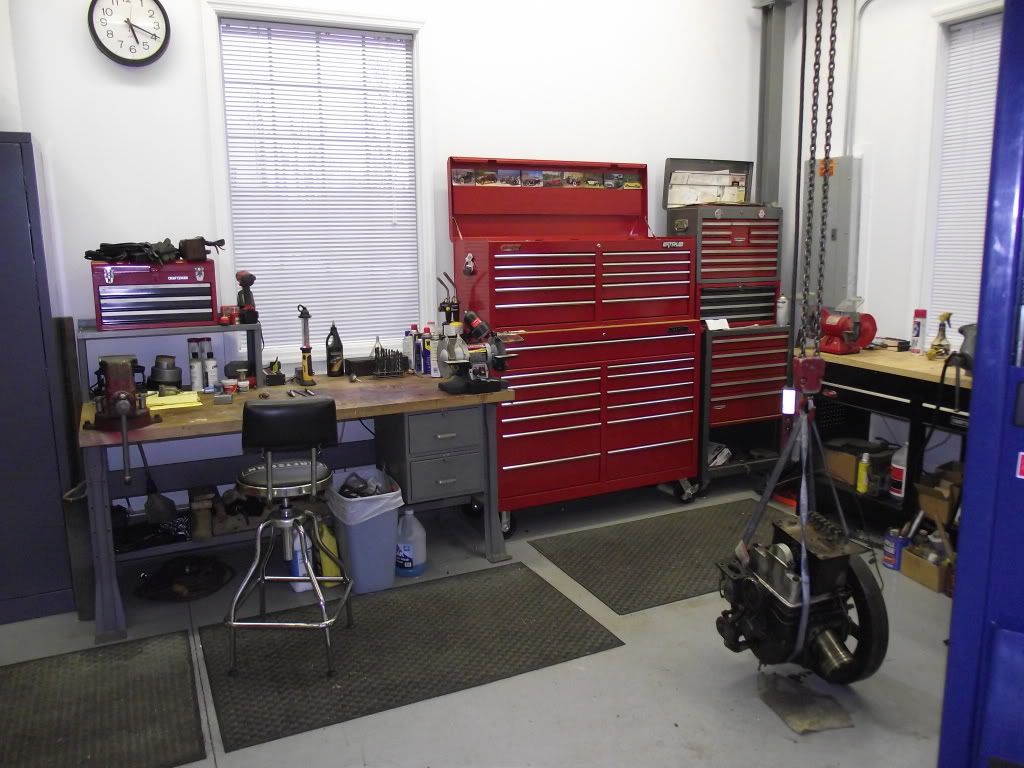
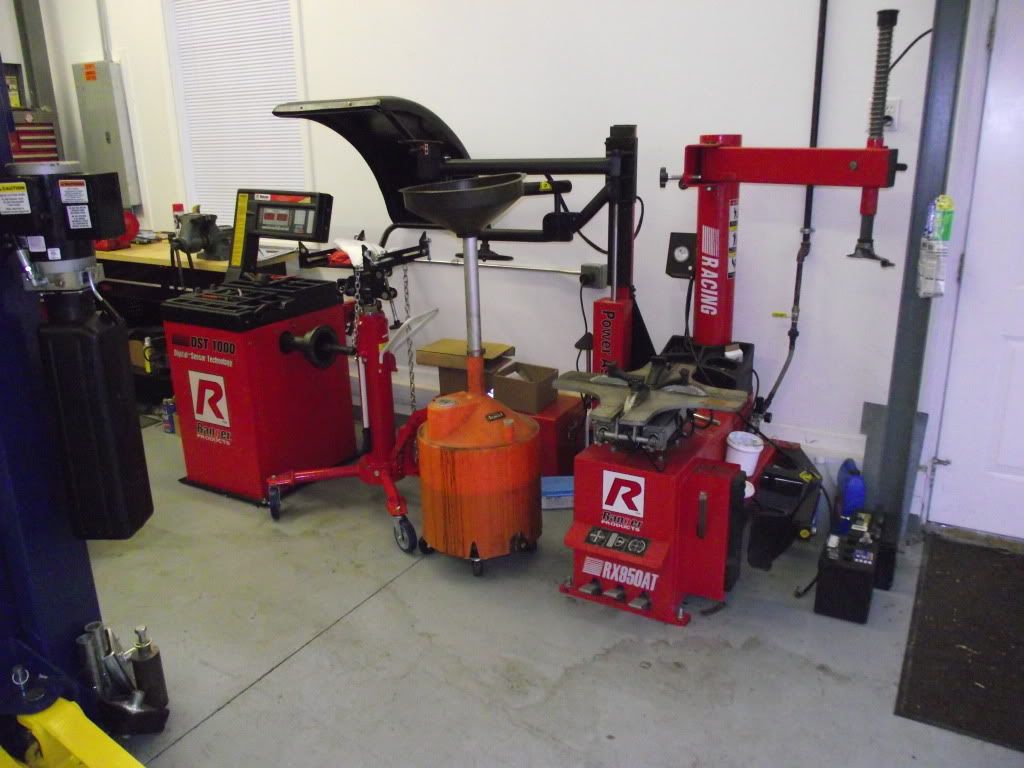
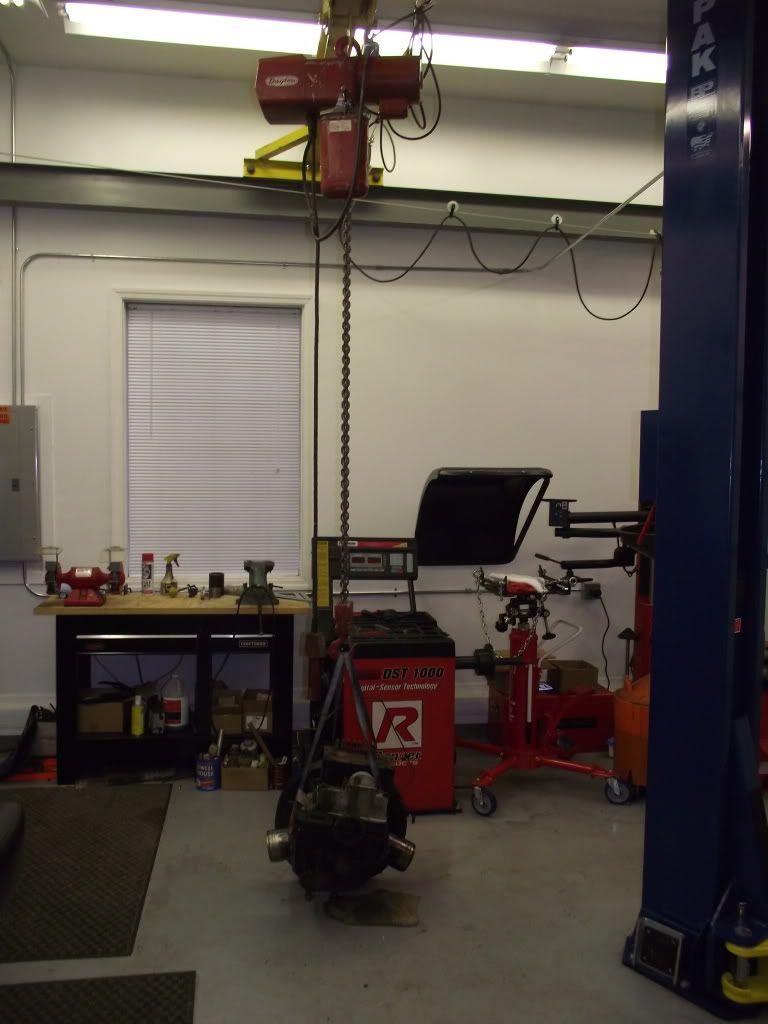
im a retired automotive master tech and i just gotta tell ya i've worked in major dealerships that were'nt anywhere near this well equiped.
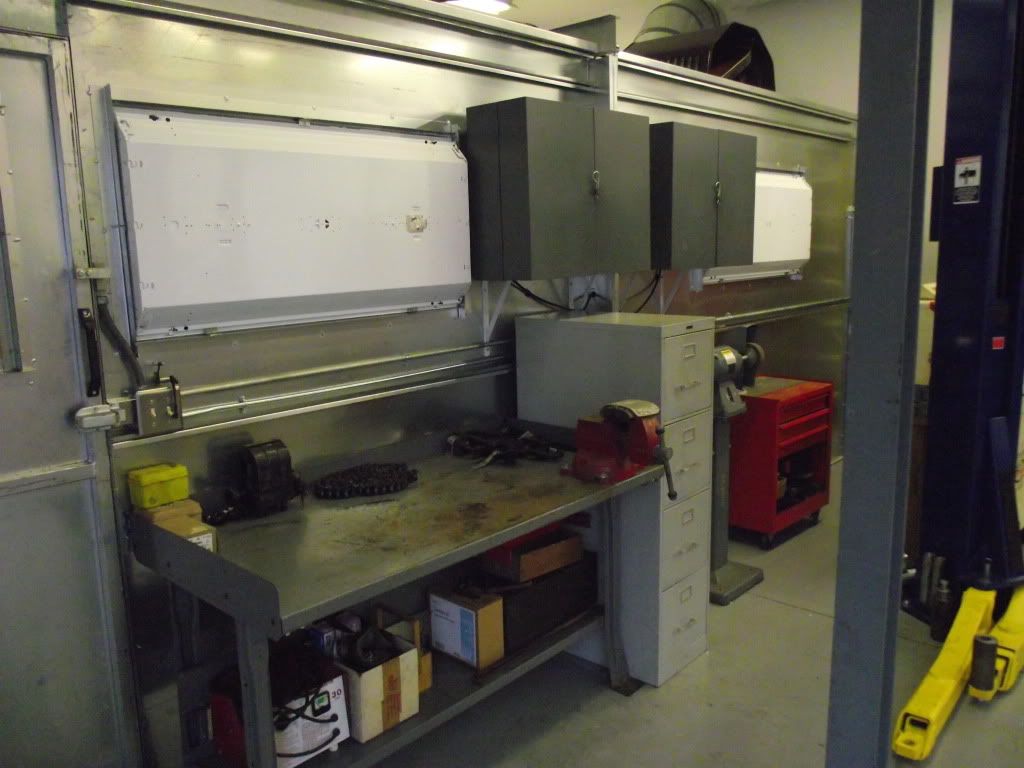
Although you look rather young still, while im "adjusting" the genealogical record,there are some things that i hav'nt seen that would be nice in my...oops..did i say that?...your dream shop.Are there any sheet metal tools lurking around there somewhere?, i think you've got everything else.
english wheel, slip roll,brake, shear,shrinker/stretcher..stuff like that

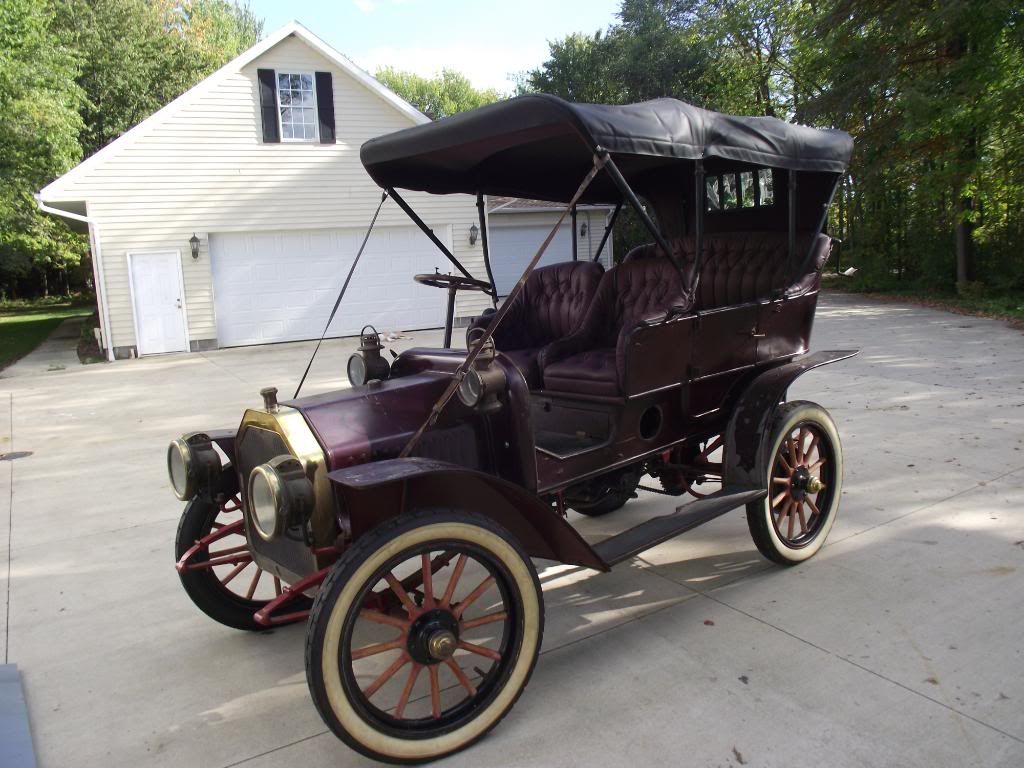
that Packard is pointy sharp...perfect lines,color...just gorgeous

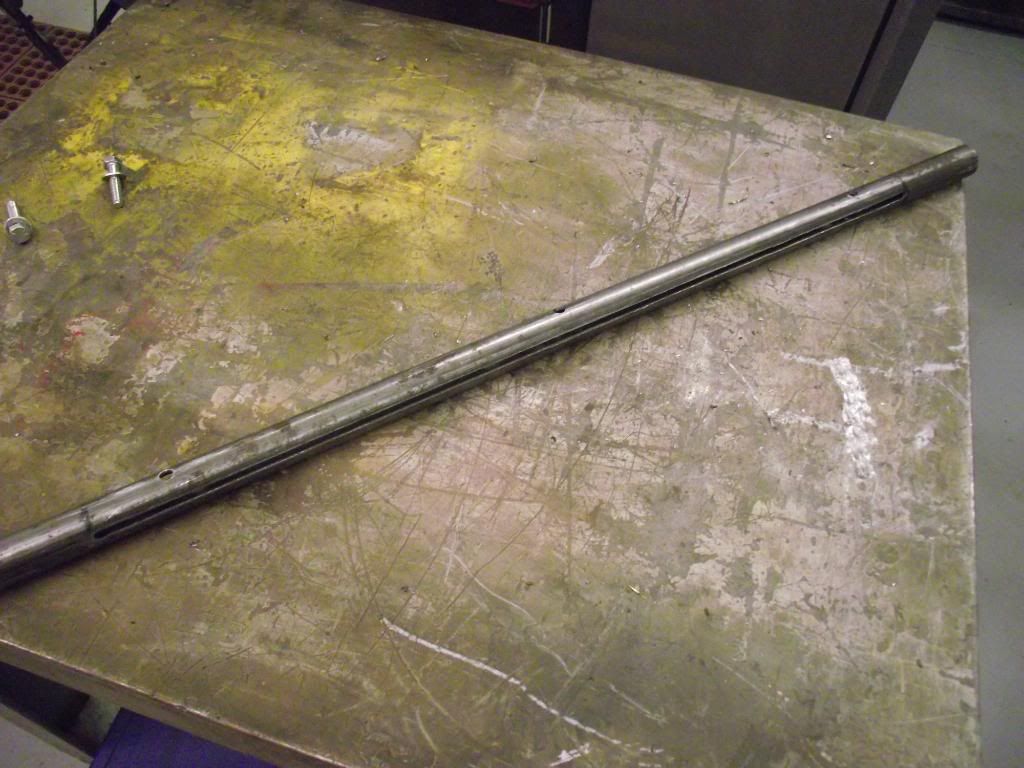
the Rolls third member just blows me away,more studs and nuts than most engine or trans overhauls i've done, would'nt seem fun to sequence torque all that stuff everyday,though they probably did'nt break much.Im guessing saftey wire had'nt come along yet or it would probably have it also :eek:

the mohawks and benpaks probably have saved more than a few lives over the years, the first shop i worked in had 30+ year old inground twin posts that would on occasion jump 1 or 3 feet up or down,sometimes both posts,sometimes just one side!, lost a few cars that way before they spent a year or two jackhammering the old mess out of the ground.. one stall at a time....my ears are still ringing..and that was 25 yrs ago.

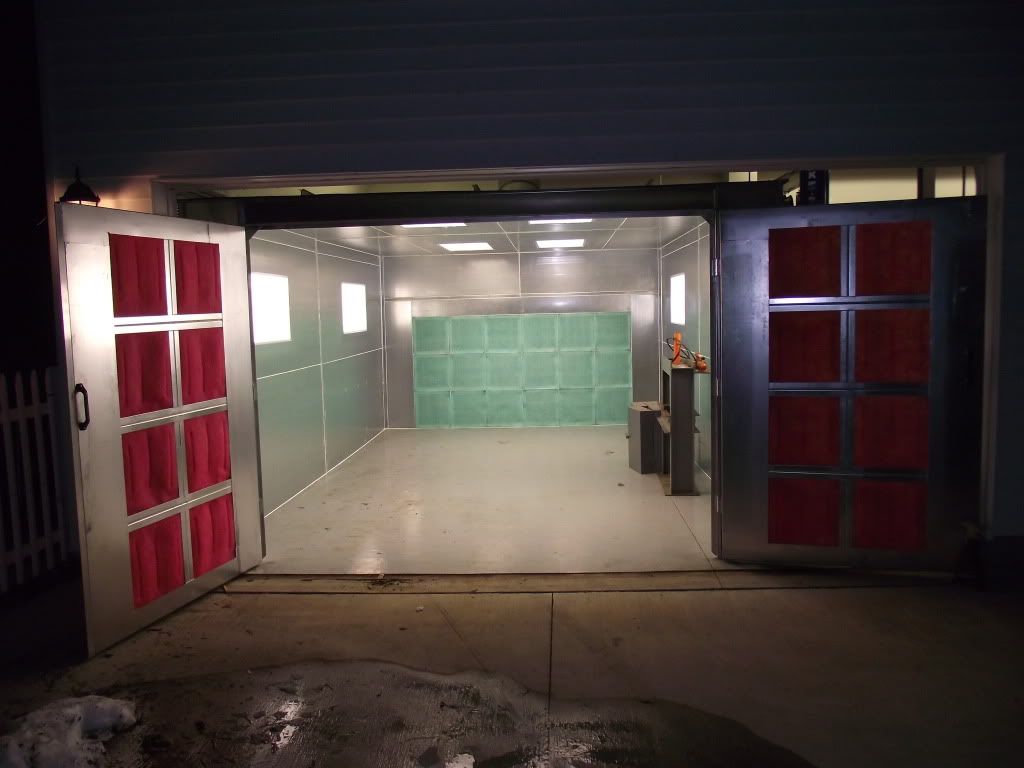
thanks for sharing,the pics are great.....i gotta pull the drain in the floor..
...ah...there it is:hole:


Back
Top