What's new
What's new

Optical instrument for PCD insert's setting

Milling man

Hot Rolled
Joined
Aug 6, 2021
Location
Moscow, Russia
Hello colleagues.
In our work, we use face mills with diamond inserts. These cutters are individually adjustable for each tooth so that they all have the same height. The tolerance of even the most accurate indexable inserts is 10-20 microns, and the maximum error should be 1-2 microns. This process is well described here - https://mapal.com/medias/sys_master...for-PCD-face-milling-cutters-System-Power.pdf
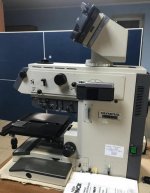
Diamond plates VERY do not like contact methods of measurement. Microchip occurs instantly on them. Therefore, we adjust the cutter using a microscope with a camera - we put it on the machine, insert the face mill into the spindle. Then we orient the spindle to the desired angle and adjust each tooth. The problem is that our microscope has a very small working distance, about 1.5 millimeters. Therefore, we are forced to look at the plate from the side. At the same time, we see an indistinct edge of the plate - this makes work difficult.
Now I'm looking for some kind of "microscope" with which we can look at the front side of the plates when setting up. The cutter has a diameter of 125mm, so we need a "microscope" with a working distance of at least 45mm (1.77 inches).
I specifically put the word microscope in quotation marks, because I'm not sure that we need a microscope.
Our camera has a pixel size on a matrix of 1.35x1.35 microns. With the microscope we are currently using, we have a magnification of about x11. The camera lens has a magnification x0.5. As a result, when the cutter tooth moves 1 micron, it moves 4 pixels on the screen - this is good.
According to my calculations, we need some kind of optical device that will allow us to mount a camera from a microscope, with a magnification of about x6-x10 and a working distance of 45-60mm (1.77-2.36 inches).
I know we can just buy a $200,000 Zoller But now we've almost solved the problem with a $90 camera and an old microscope that costs me about $300. Therefore, I hope to find something that will finally solve all our difficulties.
I almost forgot one of the most important requirements - this optical device must have some kind of precise surface on the outside so that we can accurately align it with respect to the axes of the machine. The cutter teeth have a radial runout of about 10-30 microns, this runout is not adjustable, and if the axis of the microscope is not parallel to the axis of the machine, this will lead to measurement errors.
Now we have a camera like this: 2K 21MP 1080P 60FPS HDMI USB Electronic Industrial Microscope Camera 0.5X Eyepiece Adapter 30mm/30.5m Ring for Phone PCB Repair|Microscopes| - AliExpress
 
You might consider an alignment telescope. Good mechanics for the mechanical axis alignment, not so sure whether you can get the magnification and resolution that you want without some optical add-on.
 
You might consider an alignment telescope. Good mechanics for the mechanical axis alignment, not so sure whether you can get the magnification and resolution that you want without some optical add-on.

I just received my alignment telescope today. While I tried to just focus it. Yes, a working distance of 500mm is excellent. But the magnification is not very large :( Tomorrow I will try to bring the camera from the microscope home, look through the eyepiece of the telescope and try to determine the magnification.
 
According to my calculations, we need some kind of optical device that will allow us to mount a camera from a microscope, with a magnification of about x6-x10 and a working distance of 45-60mm (1.77-2.36 inches).

Have you considered a telecentric objective? Ostensibly the 10x objective here would do: Mitutoyo Telecentric Objectives | Edmund Optics (Mitutoyo 375-039)

It would give you a 0.48 x 0.64 mm field of view.

Illuminate it from the back. I see people recommend collimated illumination.
 
It would give you a 0.48 x 0.64 mm field of view.
.

.020 inch Field of view. That will be fun.
Nice about this lens is the depth it gives you. Be aware that it is only telecentric at the correct stand off and tube or optic train length.
We are sort of in crazy land here and getting below a micron restricting light color with a filter helps. White light not so good.
I'd also be into a monochrome camera.
Bob
 
A green filter helps a lot in sharpening an image from a lens that is cheap and has chromatic aberrations. The gain in addition to that with a monochrome (instead of a color) camera is small.

Mitutoyo has a line of long working distance objectives;

Mitutoyo Infinity Corrected Long Working Distance Objectives

Long Working Distance Objectives

They are infinity corrected, but ignoring this is not a big deal for 10x and lower power. Even 20x is ok.
The longest WD I see is 35mm, a bit shorter than what you want.

A fallback position is to use an old school photographic enlarging lens (very good optical quality, very cheap on ebay. Any of the Nikon ones of proper focal length will do.). You need to make up your own mounting tube and reference surfaces. Note; the mounting thread on an enlarging lens is the same as old Leica screw mount camera lenses; M39 x 1/26 inch (yes, a weird mixture of English and metric).
 
Monochrome cameras have 1 to 3 times the resolution of a color camera.
This due to the way color is made and the filter on top of the chip.
4 pixels per micron of actual resolution puts you way past green and into UV or deep UV like the semiconductor people use and big dollar optics.

More to the task is this alignment needed or beneficial in any way to a PCD milling cutter?
You may be chasing something that will not help. People go so crazy with this tooth alignment stuff.
Bob
 
You need a old speroni toolsetter. They are like a optical comparitor for tools you can measure tool runout and insert height with them you can find them fairly cheap at times this a corner of a boring bar i was setting to diameter
16df8cb21535d024d54319eb0dcf6e20.jpg


When I find it I don’t need it
When I need it I can’t find it!
 
Try Here:Optical Imaging | Laser Optics | Edmund Optics
Lots of products and lots of free technical information

Thank you very much, really many clear articles. And a lot of different optics with prices.

Have you considered a telecentric objective? Ostensibly the 10x objective here would do: Mitutoyo Telecentric Objectives | Edmund Optics (Mitutoyo 375-039)

It would give you a 0.48 x 0.64 mm field of view.

Illuminate it from the back. I see people recommend collimated illumination.

Yes, a collimator is, of course, very desirable. I just got one, I'll try to apply it. But for the task of comparative measurement, when you do not need to know the absolute value of the size, even lighting through a white sheet of paper works well :)
 
.020 inch Field of view. That will be fun.
Nice about this lens is the depth it gives you. Be aware that it is only telecentric at the correct stand off and tube or optic train length.
We are sort of in crazy land here and getting below a micron restricting light color with a filter helps. White light not so good.
I'd also be into a monochrome camera.
Bob

Now my microscope has approximately the same field of view. It's not a problem.
 
Monochrome cameras have 1 to 3 times the resolution of a color camera.
This due to the way color is made and the filter on top of the chip.
4 pixels per micron of actual resolution puts you way past green and into UV or deep UV like the semiconductor people use and big dollar optics.

More to the task is this alignment needed or beneficial in any way to a PCD milling cutter?
You may be chasing something that will not help. People go so crazy with this tooth alignment stuff.
Bob

Could you give an example of a monochrome camera with a pixel size of less than 2 microns? I couldn't find any :( The situation is the same with UV cameras.
Actually, I have a hunch that the cool tool measuring devices like the Zoller use something like a UV camera.
As for the need to align the teeth - this is really necessary. We need to get a roughness of about Ra 0.32 and better, with high performance, on copper.

I meant 4 pixels to a real world micron after optical magnification.
Very small pixel sizes may be good in cell phones but not so much in high magnification measuring due to number of photons gathered.

High precision measuring devices like tool presetters and optical compartors use a semi-telecentric lens system and collimated back lightning.
Alignment of the two is critical and often the light source will have it's own adjustable telecentric stop.
Basic resolution limits here: Resolution | Nikon’s MicroscopyU
Note that a 10x microscope objective is that at only one specific tube length where the lens is designed to work. One can extend the lens to sensor distance and get more magnification but the lens correction go to poop,
On top of the mono/color thing there is the sensor design and what is called "fill factor" or gaps between photosites along with dark current noise.

Can the corner radius be changed or a wiper used so that even if one tooth is set high the required surface finish is achieved?

What is the grain size in the PCD you are using? At the mag you think you have the grains and binder should be clearly visible.
Bob
 
Yeah Bob is dead on; you don't want super small pixels in a sensor if it can be avoided. You get a lot more light with bigger ones, which means a lot less noise. Someday they will probably overcome that limitation, but not there yet.

Bob, what magnification is necessary to see the binder/carbide particles? Any special prep necessary? I've got a 1,000x optical microscope, would be interested to have a look at that.
 
I meant 4 pixels to a real world micron after optical magnification.
Very small pixel sizes may be good in cell phones but not so much in high magnification measuring due to number of photons gathered.

High precision measuring devices like tool presetters and optical compartors use a semi-telecentric lens system and collimated back lightning.
Alignment of the two is critical and often the light source will have it's own adjustable telecentric stop.
Basic resolution limits here: Resolution | Nikon’s MicroscopyU
Note that a 10x microscope objective is that at only one specific tube length where the lens is designed to work. One can extend the lens to sensor distance and get more magnification but the lens correction go to poop,
On top of the mono/color thing there is the sensor design and what is called "fill factor" or gaps between photosites along with dark current noise.

Can the corner radius be changed or a wiper used so that even if one tooth is set high the required surface finish is achieved?

What is the grain size in the PCD you are using? At the mag you think you have the grains and binder should be clearly visible.
Bob

We measured the real resolution of our system directly on the machine. We moved the cutter relative to the microscope by 1 micron and measured how many pixels it moved. The program from the camera measures pixels exactly on the camera matrix, not on the laptop screen :) Therefore, 4 pixels per 1 micron is a fairly real value, I'm sure of it. Of course, it could be 3.5 or 4.5 pixels.
I wouldn't want to do anything to the tool, as we've spent years looking for the right cutter body and insert combination that won't cost thousands of dollars and will have good tool life. The addition of wiper inserts, in my experience, usually results in the tool being no longer versatile. Now we do roughing (depth of cut 1-3mm) and finishing (Ra<0.32 ; our record is 0.05 with 4 teeth on the cutter) with one tool, with the same inserts. This is a cutter body from TaoBao for $80 and inserts from AliExpress for $10. We matched the supplier of the inserts, and now they work almost as well as Sumitomo inserts at 120 euros apiece.
As I said, we have no fundamental problems with the placement of inserts. These are more of a tactical issue. I just want to make it easier for my employees to do it and take less time to do it.
I have now found a lens that seems to (at least that's what the professional optician who tries to help me said) has the same performance as the Mitutoyo 375-039 (10x, 51mm working distance) and costs about $45. I want to buy it and try to combine it with the camera, even if it doesn't work out - $ 45 is not a pity to spend on an experiment.
As for grain size. Since these are Chinese plates, only Uncle Mao knows what the grain size is there :) If you are interested, I can look at the plate under our metallographic microscope with a magnification of 1440 times. But, when setting up the cutter, we definitely do not see the grain.
 
We measured the real resolution of our system directly on the machine.....

This is a cutter body from TaoBao for $80 and inserts from AliExpress for $10. We matched the supplier of the inserts, and now they work almost as well as Sumitomo inserts at 120 euros apiece.
....
I have now found a lens that seems to (at least that's what the professional optician who tries to help me said) has the same performance as the Mitutoyo 375-039 (10x, 51mm working distance) and costs about $45......

Well it seems you have a good handle on it so I am of no help.
Bob
 
Two things I'll throw in to this just for future searches:
1. As others have alluded to, the optics are only made so well. I can put a 20x eyepiece on my stereo microscope, and it'll make things twice as large, but it's empty magnification and won't let me resolve any more than the 800 or so lp/mm that I'm already getting.

I've also seen some literature, specific to telecentric systems, where a slightly defocused image gives better resolution than a crisply focused one. If you are in perfect focus you can't get much better accuracy than your pixel spacing. Once it blurs across a few pixels you can have a bit more data and can calculate the center of the blurred region that spans a few pixels with greater accuracy.
This probably isn't applicable to a human eye aligned task.

In the OP's case I wonder if a softer contact probe would resolve some of the chipping issues and allow a contact based measurement?
 
Bob, what magnification is necessary to see the binder/carbide particles? Any special prep necessary? I've got a 1,000x optical microscope, would be interested to have a look at that.

1000x is min level and will not do submicron grades well.
Depth of field here is not so much so flat polish helps.
I use an etchant of 36g Sodium Hydroxide and 36g of Potassium Ferricyanide in 100 ml water.
Others are possible and some show colors or the tungsten, titanium, tantalum so you can identify the particles.

I am aware of the DOF issues, there definitely isn't much at higher mag. I can go higher than 1,000x with a built-in auxiliary lens, I think my max is going to be around ~2,500x. I can get up to close to 8,000x at the highest settings but it will be a pretty crap image. Thanks for the etchant info, I may give it a shot. If I do I'll post an image or two. I've got a metallurgical scope too, an Olympus Vanox AHMT. Love that thing.

20210724_122617.jpg

As far as the 4 pixels on your camera sensor per micron - there's no way. Pretty sure the smallest pixel record right now is only 640nm and that's on a cell phone camera sensor just introduced last summer by Samsung.
 
As far as the 4 pixels on your camera sensor per micron - there's no way. Pretty sure the smallest pixel record right now is only 640nm
I don't think he was claiming that was the pixel size, but rather the image of a 1 micron move on the sensor, after optical magnification. But maybe I misunderstood?


Back
Top