mcload
Hot Rolled
- Joined
- Nov 5, 2007
- Location
- Houston, Texas
Thought I'd post a few pics of my 9" rebuild, noting an oddity or two.
Finished the horizontal drive last week, which left only the motor to take apart and clean up.
As you know, the horizontal drive assembly pivots in two places on the base. I found it odd that the set-screw is fundamentally squared off on the end, but fits into a conical hole. Why exactly is that? The bearing surface is very close to the edge of the hole. You would think that a set screw with more of a conical end would do just as good at supporting the weight and be much easier for installation. So, I put a conical shoulder on mine....I know, how dare I!!
View attachment 313032 View attachment 313033
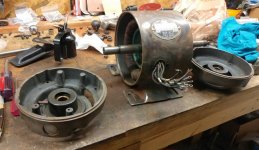
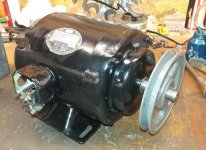
The motor is pert near original (I think) for this lathe made in 1958 as it's a 1/2hp GE. Oddly enough (for me), it has a gits oiler reservoir for the shaft on both ends. Taking one of the end plates further apart, I find a whole bunch of very thick felt pieces. Luckily, these are in great shape and only needed a cleanup with min spirits. The shaft rotates in a specially machined soft bushing. Forget about getting replacement bushings, not that they were worn anyway.
View attachment 313034 View attachment 313035 View attachment 313036
I bead blasted the two cast aluminum end plates and sprayed with clear enamel. After I clean out the frame, I'll prob paint it in the darker machine gray color (Rustoleum) as this is definitely not a good piece to try to paint with a brush. It's original color was a blue-gray, but had a coat of machine gray and gold on top of that.
Of course, the end plates will remain the raw aluminum color just for contrast.
So all of the assemblies are finished and ready. Now to concentrate on building a new bench. By the way, this lathe will be upgraded to include a QCGB.
There is one other oddity, but will save that for later.
(Additional photos follow)
PMc


