What's new
What's new

help: peened surface on tumbled aluminum.

shadpeters

Plastic
Joined
Aug 24, 2021
Hey guys, so quick intro, my name is Shad Peters, I don't have a metal working background. I'm mainly a luthier and woodworker, but my instrument making occasionally leads me into some metal working pursuits. One such pursuit has recently had me machining some of my own hardware from aluminum, and I'm just learning as I go.

I have read through several threads on here that have been very useful both in helping me better understand the tumbling process, and in pointing me towards products and other resources, but I haven't seen this exact issue broached, that is, a peened/pitted surface.

I'm currently using the 2.5 gallon drum from C&M topline and start with plastic pyramids. I get a really nice surface this way, but have yet to nail down a hands off approach to polishing. I'm using the same tl-4 barrel with crushed walnut shells. I've added McGuire's polishing compound to the media which seems to be working, but since the media is so light weight compared to the plastic, the parts are smashing into each other and damaging the surface. After 12 hours of tumbling the parts start to brighten up but the surface also starts to look slightly pitted/peened which has left me doing a lot more hand work on the buffer than I'd like.

Any suggestions on how I might solve this problem? I have wondered if maybe I need to fill the drum with more media? or if maybe a vibratory tumbler would be gentler on the parts? or maybe I need a whole different media. Any advice would be welcome. thanks.


Other possibly useful information: The parts are small, all of them are machined from 3/8" aluminum plate. They range in length from 2-3.25 inches, and in width from 1/2"-3/4". I'm typically running 40-80 parts at once. My barrel is about 50% full with the parts and media in it. Maybe slightly over 50%.

Thanks for your help!

Shad.
 
probably you have waaaay too many of that size parts in the drum at once and they are rubbing on each other, make runs of 10; 20; 30 etc parts per load to find the max amount you can run at one time before the defect starts to occur

edit: I assumed that it is the vibratory type, if it is the rotating barrel sort of tumbler, then I can't say from personal experience, but same may apply - parts are impacting each other, so too many parts and too little media to separate them, increasing fill may also help to reduce the speed/distance they are sliding (thus reduce chance of parts hitting each other), but then it may lead to increased cycle time
 
I could go up to a larger barrel, topline makes one that is 8 gallons, that'd more than triple the capacity. So you think I would still be having the same problem in a vibratory tumbler that I'm having in the rotary?
 
Got any photos of the part surface in question? There was a recommendation from someone (dear departed mitty/Frank maybe?) some years back for a media that had rouge compound embedded that was supposed to be pretty good stuff. If you are sure it's the parts colliding, maybe try more media instead of reducing part load, otherwise you're going to be adding time to the process. I would try something that won't add time first.
 
Got any photos of the part surface in question? There was a recommendation from someone (dear departed mitty/Frank maybe?) some years back for a media that had rouge compound embedded that was supposed to be pretty good stuff. If you are sure it's the parts colliding, maybe try more media instead of reducing part load, otherwise you're going to be adding time to the process. I would try something that won't add time first.

I think I know the thread you talking about, would it be this one by chance?: Tumbling Aluminum

I've got the rouge walnut in my mind as a potential option, but I already had a box of plain walnut hull and some automotive polishing compound so I figured I'd give that a try first.

I've got some photos but I can't get the uploader on here to work for some reason, I just keep getting error messages weather I try to upload them directly or through a url address. Its hard to capture in a photo because the "pits" are are pretty small, like the size of a pin head, and they aren't uniformly dispersed, but once you have a highly polished surface they really stand out and give the appearance of an ever so slightly textured surface. Conversely If I take them straight from plastic media to a buffing wheel they look like they've been chromed.
 
Hi shadpeters:
One of my customers in the distant past made custom scopes for vintage black powder rifles:
He was extraordinarily fussy about cosmetics and had the same problem you do but with steel parts.

His solution was probably way overkill but his parts came out gorgeous...best I've ever seen.

The way he did it was he bought 3 ten foot lengths of 6" diameter PVC pipe and cut a bunch of small openings into the sides of them and made hinged doors for them
He then put partitions into them and made a rotating drive using a bunch of GoKart wheels that overlapped each other to form vees between them and a reduction drive so he could lay the pipes into the vees formed by two tires and rotate them slowly.
Each partition got some media and a single part, so he could process a few dozen parts at a time.
He'd load up each pipe, lay them all in the vees formed between tires and turn the whole works on for a day.

The parts were absolutely perfect when he was done, but it was quite the contraption and took up a lot of space in his shop.
It also took a long time to load and unload, but he thought it was worth it and so did his customers.

So if you want to get totally anal too, there's a solution.

Cheers

Marcus
Implant Mechanix • Design & Innovation > HOME
Vancouver Wire EDM -- Wire EDM Machining
 
Got any photos of the part surface in question? There was a recommendation from someone (dear departed mitty/Frank maybe?) some years back for a media that had rouge compound embedded that was supposed to be pretty good stuff. If you are sure it's the parts colliding, maybe try more media instead of reducing part load, otherwise you're going to be adding time to the process. I would try something that won't add time first.

I just put up an album on facebook so you should be able to see the photos there, let me know if this is helpful. Each photo has a description of what has been done to the particular part. Facebook

Hi shadpeters:
One of my customers in the distant past made custom scopes for vintage black powder rifles:
He was extraordinarily fussy about cosmetics and had the same problem you do but with steel parts.

His solution was probably way overkill but his parts came out gorgeous...best I've ever seen.

The way he did it was he bought 3 ten foot lengths of 6" diameter PVC pipe and cut a bunch of small openings into the sides of them and made hinged doors for them
He then put partitions into them and made a rotating drive using a bunch of GoKart wheels that overlapped each other to form vees between them and a reduction drive so he could lay the pipes into the vees formed by two tires and rotate them slowly.
Each partition got some media and a single part, so he could process a few dozen parts at a time.
He'd load up each pipe, lay them all in the vees formed between tires and turn the whole works on for a day.

The parts were absolutely perfect when he was done, but it was quite the contraption and took up a lot of space in his shop.
It also took a long time to load and unload, but he thought it was worth it and so did his customers.

So if you want to get totally anal too, there's a solution.

Cheers

Marcus
Implant Mechanix • Design & Innovation > HOME
Vancouver Wire EDM -- Wire EDM Machining

Thats interesting. I'm not sure I want to get that carried, but its something to ponder for for sure. At a certain point it may just make more sense to pay a guy to stand there and buff parts straight out of the plastic media for a few hours like I have been. They come out looking really nice doing it that way, but I just hate the investment of man hours into it. I'd like to avoid that if I can, but it may just not be possible.
 
Hi shadpeters:
One of my customers in the distant past made custom scopes for vintage black powder rifles:
He was extraordinarily fussy about cosmetics and had the same problem you do but with steel parts.

His solution was probably way overkill but his parts came out gorgeous...best I've ever seen.

The way he did it was he bought 3 ten foot lengths of 6" diameter PVC pipe and cut a bunch of small openings into the sides of them and made hinged doors for them
He then put partitions into them and made a rotating drive using a bunch of GoKart wheels that overlapped each other to form vees between them and a reduction drive so he could lay the pipes into the vees formed by two tires and rotate them slowly.
Each partition got some media and a single part, so he could process a few dozen parts at a time.
He'd load up each pipe, lay them all in the vees formed between tires and turn the whole works on for a day.

The parts were absolutely perfect when he was done, but it was quite the contraption and took up a lot of space in his shop.
It also took a long time to load and unload, but he thought it was worth it and so did his customers.

So if you want to get totally anal too, there's a solution.

Cheers

Marcus
Implant Mechanix • Design & Innovation > HOME
Vancouver Wire EDM -- Wire EDM Machining


That's worth some thought. I don't know if I want to get that carried away with it, but its something I'll probably ponder on. At a certain point though I'd probably be better off just paying a guy to stand there and buff parts straight out of the plastic media for a few hours like I have been. They come out flawless doing it that way, I just hate the investment of man hours.
 
Here you go.

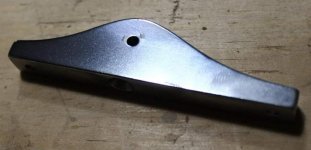
This is the part straight from the walnut hulls after 16 hours or so of tumbling

20210824_102810.jpg

Here is a part after tumbling 16 hours or so and then being buffed on a wheel with tripoli. The little pin sized points of light are the imperfections I am talking about.

20210824_102826.jpg

20210824_103053.jpg

Here is what the parts look like when I take them straight from the plastic media to the buffing wheel

20210824_103303.jpg.


20210824_103353.jpg

I would try a higher media fill and see what happens.
 
Hi again shadpeters:
"Just hiring a guy" is not a viable way forward...you will get boxes of fucked up parts and you'll never be happy.
Polishing and deburring are skills that are totally underappreciated in many shops...in fact they are the critical skills to make a part become an advertisement for the quality of your work, especially in domains where the cosmetics matter.

In such circumstances, you should be paying your polishers top dollar for what they do; but almost nobody does, secure in the illusion that any fucking monkey can be trained to do it.

I can think of few ways to tank your reputation faster, especially on something like a musical instrument that means so much to the talent who plays it.
I'm not a musician myself, but those I know cherish their instruments and treat them with love and respect....they wouldn't bother if their instrument looked and felt like shyte.

So I'm a fan of investing whatever it takes to eliminate the polishing labour as much as possible, and hiring your best people to do the bits you cannot automate away.

Cheers

Marcus
Implant Mechanix • Design & Innovation > HOME
Vancouver Wire EDM -- Wire EDM Machining
 
Here you go.


I would try a higher media fill and see what happens.


I'm giving that a shot, I've got my barrel filled about 80% with media now. I'm also gonna take this run of parts that have already been going for a while and remove about half. I figure that way I'll have something to compare and see weather the surface has gotten any worse as I continue to run, and it'll also cut down on the density of parts in the barrel that much more (not to mention if the parts get completely shot I'll still have some held back I can use). I'll let it run a while and reevaluate.


Back
Top