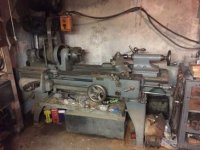
I’ve acquired a Hendey lathe for the irresistible price of free. The caveat is that I need to move it out of a basement through a bulkhead. It’s going to be an interesting journey! First step is stripping a few things off to make it slightly more compact and a few pounds lighter. Then I think I have someone with a backhoe to actually pick it out of the bulkhead and place it on a trailer... Question for the experts though. I would like to remove the apron and I’ve seen a few videos were the lead screw bracket on the right hand side is unbolted and then the bracket is slid off the screw and the apron can then be run right off the end of the lathe bed. I’m looking at the end of the lead screw and there appears to be a cap threaded onto the lead screw that will not allow the bracket to just slid off. In addition to being threaded on it has what I thought was a set screw in the side of it but upon digging the crud out of the hole it looks more like a pressed in pin... Does that sound right? If that’s the case I see no way to remove without drilling the pin... Looking for advice. As this doesn’t seem like very “service friendly” construction. Maybe I’m missing something.
Follow along with the video below to see how to install our site as a web app on your home screen.
Note: This feature may not be available in some browsers.
Largest Manufacturing Technology Community on the Web
Stay Connected:
14x30 Hendey Lathe lead screw bracket and end cap
- Thread starter Matl59
- Start date
- Replies 11
- Views 2,029


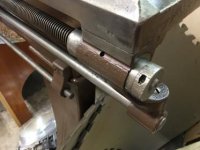

") The thrust washer was sprayed down with penetrating oil before I left. I’ll clean up the shaft as suggested and hopefully I can tap it free on my next visit.
The thrust washer was sprayed down with penetrating oil before I left. I’ll clean up the shaft as suggested and hopefully I can tap it free on my next visit.