What's new
What's new

16" Hendey Tie Bar Lead screw coupling?

tommy1010

Stainless
Joined
Apr 21, 2010
Location
northeastern Pa, USA
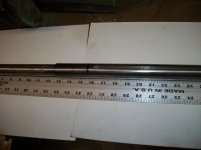
I am currently rebuilding a 16" Hendey Tie Bar. I am currently reassembling the QCGB. As all Hendey owners know the lead screw goes through the entire gear box cone gears sticking out in my case a good 4 feet or more. This is a little cumbersome when installing the gear box or saddle back onto the machine. Has anyone reading this post ever cut the lead screw and then fastened it with a coupling. As seen in the pics attached the first 16" of the lead screw are in the gearbox. The unthreaded portion of the lead screw is about 15" long and already has a 1/4" keyway. This is where I would like to cut then couple. A sleeve with 1/4" keyway and some set screws or tapered pins about 4" long. I don't believe the saddle comes that close to the QCGB. Maybe 4" is too long? Anyone here done this and how? I have had a few machines (not Hendeys) with the lead screw coupled from the factory so I don't think this should be a problem.
 

Attachments

  • 100_0991.jpg
    100_0991.jpg
    88.6 KB · Views: 66
  • 100_0992.jpg
    100_0992.jpg
    88.9 KB · Views: 58
  • 100_0993.jpg
    100_0993.jpg
    89.8 KB · Views: 66
My bed is 6' and while it was a little cumbersome, it really isn't a problem to work with. I would think more of an issue to cut/sleeve than just deal with it.
 
tommy1010:

Your lathe has the old style Leadscrew that was used before the changes in the mid-1930s to the two piece Leadscrew. Since you posted the
size of your lathe, I should be able to give you the dimensions of the coupling sleeve and the size of the taper pins used to join each
half of the Leadscrew. In most applications, a keyway is not required in the sleeve, but you could broach one to help align the two shafts while drilling and reaming the taper pin holes.

Hendeyman
 
I haven't tore into my 8' bed Hendey's QC gearbox yet, but need to. I was planning on pulling it off as an assembly with the lead-screw attached and then dismantling and reassembling it on a bench. I've done so on smaller tool-room lathes like South Bends and Logans and that way I can block up the hanging pieces and use punches to line everything up while the gearbox is laying down. Is that not possible on the older Hendey's?
 
I haven't tore into my 8' bed Hendey's QC gearbox yet, but need to. I was planning on pulling it off as an assembly with the lead-screw attached and then dismantling and reassembling it on a bench. I've done so on smaller tool-room lathes like South Bends and Logans and that way I can block up the hanging pieces and use punches to line everything up while the gearbox is laying down. Is that not possible on the older Hendey's?

I took it off with lead-screw attached, removed leadscrew, did a clean, rehab, paint, put lead-screw back and then put them both back on the lathe.
 
Hendeyman: I would appreciate the dimensions for the coupling/where they cut the lead screw. Since I have the time I will pursue the modification. Thanks very much. Either post it here or PM me. If it helps my serial number is: 11263.
 
tommy1010:

Here is the basic information for cutting the Leadscrew and making the coupling. Assemble the Leadscrew into the Gear Box, just as it
left the factory. With layout dye, mark out a line that is 2-1/4 inch from the edge of the Gear Box, this is where you will cut the
Leadscrew. Square up the two pieces and put a 1/16 inch radius on the edges. For reference, mark out a line that is 1-1/16 inch from
the end of each shaft, this will be the center of the Taper Pin hole. The coupling is made from a piece of steel that is 2-3/8 inches
in diameter and 4 inches long. Mark out 7/8 inches from each end and break the corners with a 1/16 inch radius. Bore the coupling about
1/2 thou smaller than the Leadscrew for a snug slide fit. Drill a 7/16 inch through hole in the two layout lines on the coupling. Do
the same with the Leadscrew pieces. If you are going to broach a keyway, now would be the time. If you decide not too, then assembly
the shafts into the coupling and align the holes with a straight piece of drill rod. While keeping the drill rod in place, start
reaming one of the holes, pushing the drill rod out as you ream. As you ream, keep checking the fit with a Taper Pin. The proper fit
will be when you can tap the pin in and it will not stick out more than 1/16 of an inch. Repeat the process on the other hole and you
should be ready to reassemble the Leadscrew and Gear Box. The Taper Pin is a Number 8 and about 2-1/2 inches long to allow for any
adjustments.

Hendeyman


Back
Top