What's new
What's new

1928 "Ehrlich" Lathe - Spindle teardown (Help request)

Marco Schwan.

Plastic
Joined
Jan 18, 2020
Heyho!

I've recently posted about the restauration of my new(old) Ehrlich Lathe.
The one thing I didn't dissasemble and clean was the spindle itself.

I've done that now and it turns out its enough of a topic in itself for a new Thread.

Since you can only upload 5 pictures here I made an Imgur link with high-res versions of all Photos:

PHOTOS ---> Ehrlich Lathe Spindle Teardown - Album on Imgur <---

I also added some more notes by some of the Pictures.


An interesting feature of this spindle is beeing able to "select" between two speeds.
There is a knob on the big gear on the very right; if you pull that out it disengages the Flatbelt Pulley from the rest of the spindle. By flipping a tumbler on the headstock two more gears are engaged - which in turn results in a (roughly, need to measure it later) 10:1 reduction between pulley and spindle.

I'm assuming this is used for either very large work or thread cutting, since it reduces the speed to roughly 10rpm on the slowest setting.


Help request
Joe Michaels has posted a very nice, detailed instruction for setting the bushings properly, beeing tapered bronze bushings and all that.
I am going to tackle this next weekend, but nevertheless:

If any of you awesome people is living in Germany near Koblenz and would be willing to come over and help me a bit with setting the spindle up properly, - That would be just amazing, and greatly appreciated.


Either way I will post a quick update after everything is finished.
Thanks for reading!

-Marco
 
The "back gears" or "lay shaft" gears were done for over a hundred years. It is a nice surprise to actually see how it works, right there and slightly greasy fingers. Yes the tapered bearings; first clean but don't use brake cleaner or caustic element on them. They are porous and that will disturb the lubrication film that you need. Remember that everything takes a "set" or settles in place after tightening those rings. They can't be perfect until it has run a tad. just right may be too tight and the worse thing to happen.
 
Marco:

Thanks for the kind words. If I lived close to you, I'd be helping you get the lathe assembled and bearings adjusted.

I took a look at your photos. The spindle journals (portions of the spindle which run in the bronze bearings) look quite good with no obvious scoring (cutting of grooves due to uneven wearing). A good test to determine if a spindle journal is OK for re-use is to lightly drag your fingernail along the surface of the journals, axially. If any scoring, ridging or grooving catches your fingernail, it should be put right.

Typically, what we do is called "stoning" the journals. This "breaks the ridges" on any scoring. We use a small oilstone, called an Arkansas Hard Stone, or a "Washita" stone. These are very hard smooth white stones. If you feel them, you would not think they would cut any metal. Using the stone and some light oil (ISO 46 oil or thinner), or some mineral spirits, you take the stone and rub it at about 45 degrees to the centerline of the spindle, working your way around the journals. This takes down any slight ridging and cleans up the journals without taking enough metal to affect runout or roundness of the journals.

When you put the lathe back together, as noted, the journals and bearings have to "Bed in" (a term us old timers use). Kind of like a person getting into a new bed, having to get used to it and not quite settling down to rest until the bedding and their body conform to each other.

Even though the lathe parts will be put back together as they came apart, the fact is the bearings and spindle were taken apart. Reassembly and readjusting the bearing clearances will put things in slightly new positions, hence the "bedding in" process. As I wrote, your first runs of the lathe are "bearing heat runs", done to make sure the bearings- while having correct amounts of clearance by dial indicator testing- do not run hot.

After you have used the lathe for a week or two (depending on how heavily you use it, types of jobs, etc), re-check the bearing clearances. As the bearings bed-in to the headstock and the spindle journal beds-in to the bearings, clearances may open slightly. A very small amount of re-adjustment might be needed at that point.

A lot of this work is done by instinct or feel, since there are usually no manuals for these old machines. Learning how an apparently scored spindle journal can still function in a lathe doing accurate work was something I remember well. Old-timers taught me, and I was fortunate to learn from them. All of what they taught is never found in books. Those oldtimers are all dead and gone now, so I suppose I am now one of the oldtimers. I've worked with bronze and babbitted (white metal) bearings in anything from small machine tools to steam engines and hydroelectric turbines and generators (bearings 0ver 1,5 meters in diameter). Even on the big hydro turbines, we'd get things taken apart during a repair or inspection/maintenance outage and I'd be asked to take a look and determine what work was needed. Usually, we'd just run our fingernails over the shaft journals, do the same with the babbitted bearings and give the babbitting a good visual inspection (and maybe some ultrasonic testing to determine that it was still bonded to the steel bearing shells). After that, we'd get the oil stones and stone the journals lightly (stoning a 1,5 m diameter journal takes a few men some time to do), and we'd give the babbitt a light scraping (we'd call it a "shave", such as you do with a razor on your face) to "break the glazing". Put 'er back together, adjust the clearances and return the turbine and generator to service following a bearing heat run. 18-24 months of running until the next inspection/maintenance, and we always got things put together right.

Plain bearings, such as are in your Ehrlich lathe are a science unto themselves. In engineering terms, we say these sorts of bearings are "simple but elegant", and the principals of how the oil film is formed and maintained has always fascinated me. As I said, were I living anywhere within driving distance of your place, I'd come over with my tools and supplies and we'd get your lathe put to rights. I learned the machinist trade from German immigrant machinists a LONG time ago as a kid. These were men who came to the USA around 1923 to escape the currency inflation and economic collapse and hardships in Germany at that time. Some came from Bavaria and some from the Schwalbenland. I wound up speaking a workingman's German, ungrammatic, and definitely not Hochdeutsch. I can handle a days work in a machine shop without speaking English, but it is hardly the German you'd learn in college. I get kidded by some Germans when I speak "Bauerndeutsch". The oldtimers who taught me were in the USA, but in their shop, they spoke German and I picked up enough of it to get by and learn the trade. Those oldtimers were great teachers in so many ways, and they saw something in me when I was a teenager and took me into their shop and taught me. Other older men taught me in other shops and then on powerplant jobs after I got my engineering degree. I like to say that the best professors were the old machinists and other craftsmen, and the best post-graduate education I got was on the shop floors and on the powerplant jobsites.

So, viele gluck und mach's gut !

Joe Michaels
 
Hi, my name is Kev, I have an old IXL, the adjustment threads on the spindle bearings have been partially stripped at some point in its life, do you know of anyone that supplies them or has a sketch of them to enable manufacture
Any information would be greatly appreciated. Also is there a link to the adjustment of the spindle nuts. Thanks in advance for any help. Kev
 
Kev:

Welcome to our 'board. Unfortunately, with old/antique machinery, replacements parts are 99.9999 % nonexistant unless you find someone parting out a similar machine tool. Many of the smaller machine tool manufacturers went out of business years ago, and if they left any 'legacy' of drawings or parts, that is usually long gone as well. Add world politics with WWII intervening and many of the pre-war German manufacturers wound up in East Germany and were absorbed into state-run enterprises.

OK, enough about the state of the machine tool industry and world politics. As for your lathe, the tapered bronze spindle bearings offer several repair possibilities:

1. Inspect the existing threads, and see if enough remains to let you get some adjustment on the bearings. This is the 'do nothing' and 'hold your breath' approach.


2. What I'd call the "Cadillac repair" is to make a new set of spindle bearings. 'Reverse engineer" the spindle bearings using micrometer readings to determine the
dimensions and work out the taper of each bearing. Make good drawings. You may choose at this point to have the spindle journals reground if they are
badly scored or ridged. The new bearings are then bored to a good fit on the reground journals.

Personally, if I had access to another lathe, I'd turn a couple of dummy male taper plugs to fit in each of the spindle bearing bored fits in the headstock.
I'd turn these out of aluminum and 'blue them in' to check how accurately I was cutting the tapers. When I had the taper established, I'd make new
spindle bearings. These would need to be machined from bronze, and a chunk of bronze big enough to make a spindle bearing from is going to be pricey.

The shape or geometry of the bearings is going to require you to likely bore the bearings first and make close-fitting mandrels to hold them for turning between
centers to machine the taper and the end threads. Machining the bearings on a close-fitting mandrel between centers will insure that the outside taper is
as close to concentric with the bore (where the spindle journal runs) as is practical with basic machine shop methods.

After all machining on the new bearings is completed, the bearings are then slit. Possibly, if you can get a chunk of bronze hollow bar (precast as a rough
heavy-wall tube in different inner/outer diameters) you can save a bit on material for the bearings.

3. If you choose not to make new bearings, consider doing a bit of repair work on the threaded ends. Again, you will need to make a mandrel to hold the bearing
between centers on the lathe, and will need to machine a female tapered ring to drive onto the bearing to close the slit in the bearing. Some set screws in
the female tapered ring should hold it in place. With the bearing closed tight and on the mandrel, re-cut the end threads a bit deeper if there is sufficient
metal remaining. Machine new adjusting nuts and cut the internal threads to match the recut/undersized threads on the ends of the bearings.

4. If you find there is insufficient metal to allow for cutting the threads undersized on the bearings, you could get some low temperature silver solder and
build up the worn threads. Keep the bearing in a container of damp sand with the mandrel inside the bearing and the female tapered ring driven onto
the external taper of the bearing and locked on with setscrews. Keeping the bearing in the damp sand should keep the heat from travelling into the rest of the
bearing. Localized silver solderingvto build up the worn or stripped threads is a kind of 'skin of your teeth' approach. You would then need to setup the
bearing on its mandrel in another lathe to machine down the silver-soldered areas and recut the threads.

There is no 'kink' to the adjustment of the spindle nuts. I detailed a method in a post I wrote for Marco. Using a dial indicator to check the amount of free play or clearance in each bearing is what's needed. The thing to remember is to try to never let the bearings get loose in the headstock when you are into the adjusting.
If you let out on the adjusting nut on one end of a bearing, you need to take up on the nut on the other end. If you are looking to loosen or open up the clearance in a tapered bronze bearing, you will need to drive the bearing in the direction of the 'big end'. A tapered semi-split bearing will not move in the 'opening' direction by itself even if you slack off the adjusting nuts. Tapping on the adjusting nut in an axial direction (parallel to the centerline of the spindle) with a brass drift and hammer is what has to happen to cause the bearing to move in the 'opening' direction. Tightening up or closing the clearance is done by very small adjustments to the end nuts on each bearing. Loosen the adjusting nut on the larger end of the bearing by a very small amount and take up on the nut on the small end to reduce bearing clearance. We are talking of very slight rotations of the adjusting nuts to get clearance adjustments measured in thousandths of an inch or tenths of thousandths.
 
Joe,
Thankyou for your reply, what you are telling me is pretty much what I thought. I have had the lathe for about ten years and I have managed to keep it running for that time although I have not that much turning on it what I have done was acceptable. I knew that the bearings needed work when I got bitbuilt up after purchasing it of ebay. The vendor assured me that everything was OK and in good working order. Anyway I managed to bodge it up with the intention of having some new ones manufactured where I worked in an engineering workshop.
Unfortunately I had quite a serious motorcycle accident so the lathe repairs were put to one side for a time. I intended removing the bushes and taking them into work to make drawings of them and also make new ones. But alas time passed quickly and before I new it I was retired. Every now and again I have searched the Internet just in case someone else had done the hard work for me. But the time has now come to either repair my trusty old lathe or replace it. I will have to strip down the head stock and make my mind up, I'll let you know what I decide. Hopefully I'll be repairing it.
 
Royaloak:

I daresay we have some similarities. Like yourself, I am also "retired". I put 'retired' in quotation marks as I say 'retirement' is a figure of speech. I have been retired about 7 1/2 years from formal employment, and have not stood still. As a licensed professional engineer and certified welding inspector, work finds me. I also take on some machine work and odd fabrication work in my home shop. Like yourself, I also enjoy riding motorcycles. In the USA we have a saying: "there are two kinds of bikers: those who have been down, and those who will go down". I was fortunate in that the one real motorcycle accident I had resulted when two deer ran in front of my Harley one cold November night back in 2006. I slid with the bike on the pavement, then got free of the bike and slid in my leathers. I was able to pick up the Harley and had to be convinced to have it flat-bedded to a shop. My only real injury was a busted knuckle on my left-hand. A busted knuckle is kind of a status symbol in some of the circles I move, and telling people "I got a deer with this hand" always gets a good laugh when I tell them a Harley was included in the equation.

As for your bearings, I tend to think that an approach of building-up the partially stripped threads on the bearings may be the most expedient way. If you or someone you know is a good hand with GTAW (TIG) brazing, they may be able to build up the damaged threads with either silicon bronze or aluminum bronze alloy. This will then give some new 'meat' for recutting the threads. I suspect the adjusting nuts are steel. Chances are previous owners have used drift punches and hammers to turn these adjusting nuts. While their outer appearance may be rough, so long as the internal threads are acceptable, I would re-use them.

Another trick for remachining the threaded portions of the bearings comes to mind. Some purists may holler murder at me for suggesting it. There are two (2) approaches:

1. vee out the slit or cut in the bearing at each of the threaded areas. Pull the bearing tight so the slit closes. Do a localized TIG brazing to build up the damaged threads. Try not to get brazing into the bore of the bearing. If you do, clean it out with files and a scraper.

2. Soft soldering to hold the bearings tightly closed at the slits. I'd do the TIG buildup on the damaged threads first to avoid TIG brazing the bearing solidly togetherIf you clean the bearings really well, particularly at the slit, you may be able to soft solder the bearing temporarily together for remachining of the threads. I use "Milk of Magnesia" a laxative which is a chalky white liquid as a 'stop' or 'mask' to keep soft and hard solders from migrating where I do not want them to go. I paint the Milk of Magnesia on with a small brush, and let it dry on areas of the work where I do not want solder to flow and 'wet' or 'stick'. I'd suggest painting the entire inside of each bearing with Milk of Magnesia, leaving just the sides of the slits uncoated. Apply a soldering flux to the sides of the slits and pull the bearing tightly closed using hose clamps on the threaded portions at each end (these are straight cylinders). Soft solder the bearing together at the slit.

Either way, you will need to make mandrels to hold the bearings for turning between centers in another lathe. This will let you turn the threaded portions to original diameter and recut the threads.

Once the threads are recut, if you have brazed across the original slit in the bearing, re-cut the slit with a hand hacksaw for what the slit needs to be doing. Clean up with thin files.

If you have gone the soft solder route, simply heat the bearing hot enough so the soft solder melts and runs out of it.

Reverse engineering to make new bearings with the tapered fits is a bit of a job. Getting the tapers on the new bearings correct, at least for me, would take some measurement and then turning what I call a 'dummy', or male plug gauge out of aluminum. I make this sort of gauge a touch larger than the final size to allow for 'bluing in' and tweaking the taper attachment on the lathe for final cuts. If you can salvage the original bearings by localized buildup/recutting of the threads, I think you will be way ahead of the game.
 
Joe,
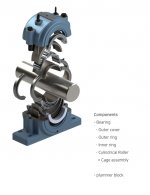
Many thanks for your input it is much appreciated. There is actually no thread left on the pull side. Another method of repair which I have been thinking over is to skim the area where the thread was leaving a shoulder on the outer edge. Then make a ring complete with a thread, then solder the ring to the Bush if you understand what I mean. On plain split bushes we used to mill the mating faces of the Bush and the solder them together to enable all over machining, I don't ever remember the bushes coming apart until we wanted them to so I am wondering if this may work. Had they been more substantial bushes I believe it would work without the solder. Some plummer blocks with split roller bearings have a similar locking mechanism but without the thread the rings have Allen screws which clamp them together onto the shaft. http://hktbearings.com/en/portfolio/sub01_2/?ckattempt=1.
I don't know if the link will work for you, but it might help you understand what I mean. But saying all that I think I may be forced into the reverse engineering them route especially if the shaft has any damage.
Regards
Kev
 
Joe,
Many thanks for your input it is much appreciated. There is actually no thread left on the pull side. Another method of repair which I have been thinking over is to skim the area where the thread was leaving a shoulder on the outer edge. Then make a ring complete with a thread, then solder the ring to the Bush if you understand what I mean. On plain split bushes we used to mill the mating faces of the Bush and the solder them together to enable all over machining, I don't ever remember the bushes coming apart until we wanted them to so I am wondering if this may work. Had they been more substantial bushes I believe it would work without the solder. Some plummer blocks with split roller bearings have a similar locking mechanism but without the thread the rings have Allen screws which clamp them together onto the shaft.
But saying all that I think I may be forced into the reverse engineering them route especially if the shaft has any damage.
Regards
Kev


Back
Top