What's new
What's new

Bristol #0 Horizontal Mill restoration

RCPDesigns

Hot Rolled
Joined
Sep 3, 2014
Location
Atlanta GA.
I recently came across a Craigslist ad for a horizontal mill that was priced right and had a small footprint. I posted about it here in the forum and was able to get some good information on it. The original thought was that it was a US Machine Tool #1 Horizontal Mill. The rational for that guess was a good one... the picture I provide was darn near identical. Once I went to buy the mill it turned out to be a Bristol No 0 Miller made by C.G. Garrigus Machine Co. of Bristol Connecticut. I haven't been able to find another instance of this mill though I did find a post here in the forum about a #2 horizontal mill.

http://www.practicalmachinist.com/v...story/intro-looking-bristol-mill-info-276179/

It seems this company was around from about 1907 up to 1917 when it was bought by the Wallace Barnes Company to make machine gun springs. It also appears that the machine tool division was spawned off and created a new company, The Bristol Machine Tool Company. As such it appears my mill was made between 1907 and 1917.

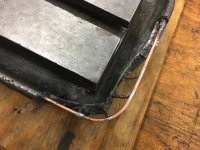
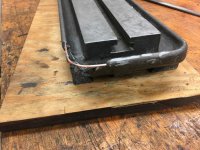
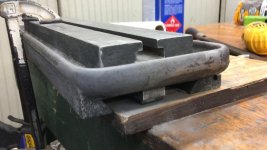
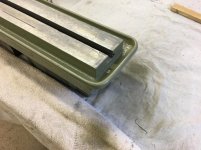
Here are a few pictures when I picked it up and two from when I got it back to the shop.
 

Attachments

  • IMG_2083.jpg
    IMG_2083.jpg
    97.2 KB · Views: 320
  • IMG_2084.jpg
    IMG_2084.jpg
    95.9 KB · Views: 275
  • IMG_2085.jpg
    IMG_2085.jpg
    95.2 KB · Views: 282
  • IMG_2090.jpg
    IMG_2090.jpg
    96.7 KB · Views: 249
  • IMG_2091.jpg
    IMG_2091.jpg
    94.1 KB · Views: 277
One end of the table was chipped off so I repaired it similar to how I did the Hendey tool tray. I squared up the edges, drilled some 1" deep holes, filled with JB Weld and inserted heavy gauge copper wire. I repeated that (vertically) along the bottom and then soldered those to the main wire across the top. The results was a skeleton of sorts strong enough to move the table around with. I filled that in with JB Weld Steel Stick, filed it to shape and painted.
 

Attachments

  • IMG_2532.jpg
    IMG_2532.jpg
    95.4 KB · Views: 196
  • IMG_2534.jpg
    IMG_2534.jpg
    95.5 KB · Views: 179
  • IMG_2542.jpg
    IMG_2542.jpg
    96.4 KB · Views: 193
  • Frame-12-02-2018-04-23-56.jpg
    Frame-12-02-2018-04-23-56.jpg
    90.4 KB · Views: 210
  • IMG_2555.jpg
    IMG_2555.jpg
    94.9 KB · Views: 185
As I cleaned the grime and light surface rust off I was pleased to find not much wear. None of the gears, leadscrews, racks, pinions, etc looked exceedingly worn. As I cleaned off the sliding surfaces I was very surprised to finds scraping marks. The dovetail for the knee on the main casting appears to have marks to aid in lubrication whereas the top of the knee (that would support the table X/Y) appears to be scraped as one would expect but certainly not 100+ years later. I do know that the mill has not been together in the last 30 years but I don't know much about the history before. I will try to find out more. I'm missing a few bolts, handles and various items but the whole of the mill is there and appears to be in great condition. As I get the spindle assembled and on the main casting I'll update this thread. I haven't decided how I will power it but I'm leaning toward a 3 phase motor with VFD.

Major items that I'm missing are the overarm and support. The diameter is 2.25" and it is 4.25" center to center.

I'd also love to add a Rusnok or similar vertical head at some point in the future.
 

Attachments

  • IMG_2569.jpg
    IMG_2569.jpg
    92.3 KB · Views: 200
  • IMG_2553.jpg
    IMG_2553.jpg
    91.7 KB · Views: 151
  • IMG_2551.jpg
    IMG_2551.jpg
    85.8 KB · Views: 176
Telll Us About the Spindle

RCPDesigns,

This is a very good restoration !

Please tell us about the spindle. Does it have an internal taper and a drawbar, or is this one of the early mills which has the arbor in a single piece with the body of the spindle?

I'd suggest electrolysis to de-rust the arbor. "Minimally invasive," as they say.

To make a decent-looking arbor support, get a length of TGP (Turned, Ground, and Polished) shafting for the overarm. The support itself can be waterjet-cut, or even plasma or flame-cut, from a piece of heavy plate, say about 1.5" thick. (J.P. Salvage, Rossville, Staten Island NY has this sort of material at decent prices.) Looking at what you've done already, I have no doubt you can round off the edges to make this look nice!

(A shop could have a regular sideline business making replacement arbor supports for the many old mills which are missing same.)

You chose a nice color. May we have the formula for the paint you used?

John Ruth
 
Thanks John!

I'm a little embarrassed to say that the paint formula is... well, Rust-Oleum Painter's Touch 2X Oregano Satin. Yeah, I know, it isn't real paint but my shop is a very sheltered environment so I can get away with the rattle-can products. Here's a link that has the HSL and RGB values for the color, good paint shop should be able to match that. Rust-Oleum Painter's Touch 2X 12 oz. Satin Oregano General Purpose Spray Paint-24969 - The Home Depot

I did use electrolysis on the arbor as well as the table. I left the table in for 3 days at an average current draw of 6amp at 12V. All I had to do was brush off the black dust and it was as you see it in the picture above. Arbor only took a few hours.

The spindle has a B&S #9 taper and both arbors are setup for a drawbar. The drawbar was lost at some point and is now an allthread rod. I'll get around to changing that at some point.
It has plain bearings (apparently steel??). There is the 2.25" OD bearing that presses into the casting. The inside is tapered on both ends while the middle is a felt lined reservoir with an ID that matches the OD of the middle of the spindle. The business end of spindle is tapered on the outside to match the taper in the bearing. A short bearing piece that is like a tapered on the outside (like a traffic cone) slides on the other end of the spindle. It has a small nub on the inside that slides into the keyway such that this piece is locked to the spindle. The nut on the end adjusts for any wear and is locked into place with another nut. Assembly is pretty much as laid out in the picture though I have the spindle facing the wrong direction... fortunately I didn't install it that way. :) Oh.. and the pinion goes in the middle and rotates about the OD of the main bearing. The far end of the spindle has the rest of the keyway for a pulley and is threaded as well.

The X lever feed on the table is really fast. That almost ended in disaster. Once things were assembled I grab a wrench, put it on the lever and gave it a good turn... the table almost shot right off the knee and landed on the shop floor. Fortunately it came towards me and not away otherwise I'd be fixing the end of the table again... maybe that's how it broke before.

I was thinking along the same lines you suggested for the overarm and support... and thanks to your comment, I now know what TGP stands for. I happen to have some heavy plate so I'll just need to find someone to cut it for me.
 

Attachments

  • IMG_2570.jpg
    IMG_2570.jpg
    94.7 KB · Views: 147
Still making progress. I ordered some drive parts and should be able to get the mill running next week. I'm looking for a 3 phase motor and a VFD to control it. I'll probably use the 1/2HP single phase that came with it for the time being.
 

Attachments

  • IMG_2576.jpg
    IMG_2576.jpg
    89.6 KB · Views: 169
Still making progress. I ordered some drive parts and should be able to get the mill running next week. I'm looking for a 3 phase motor and a VFD to control it. I'll probably use the 1/2HP single phase that came with it for the time being.

As to selecting that motor...

Not to forget.. when going from fixed-speed + mechanical ratios to EITHER a variable-speed 3-P AC motor + VFD OR a DC motor + DC Drive, it is prudent to bump the rated HP up by as much as double.

That isn't so you can rip the knee off or bust tools faster. It is because the "best shot" for a motor run at variable speed is dead-on nameplate RPM.

Either side of it, they make one kind of sacrifice or another, and can give-up a great deal of the nameplate maximum.

AC retains "goodness" better than DC at RPM's significantly above base RPM. Load regulates better. "Frequency-brain animal".

DC retains "goodness" better than AC at RPM's significantly below base RPM. Has "reserve" torque ++ short-term overload at a serious multiple, even of that. "Torque-brain animal".

Note that a DC motor often has a larger diameter shaft and two to five times the mass of an equivalent 3-P AC motor, same HP. Torque animals, much akin to heavy low-speed Diesels, they can be.

Middle +/- mebbe 15%, RPM, it makes no nevermind which.
 
Thermite:

Thanks for the information and simplification. I really hadn't thought about DC but that looks like it would have some real advantages.
 
Thermite:

Thanks for the information and simplification. I really hadn't thought about DC but that looks like it would have some real advantages.

It can have, but "only maybe". There are "gotchas".

DC drives are waay simpler and longer-lived than VFD. No significant capacitors for one thing.

Conversely, AC motors are simpler. No brushes nor commutator wanting replaced/refinished every 2,000 power-on-hours = near-zero maintenance for the 3-phase AC motor.

Bearings last the same in either, of course.

The challenges come with finding a suitable DC motor.

"Treadmill" ones are a joke, and a rather BAD joke for use on any sort of machine-tool heftier than a hand-held Dremel!

Two things one needs are..

- 90 / 180 VDC winding VOLTAGE. Because 90 VDC off 115 VAC, or 180 VDC off 230 VAC is all an SCR-class DC Drive can deliver. PWM DC Drives go higher, but are seldom even affordable at anything over 2 HP, and ALSO are reliant on those pesky capacitors as AGE badly.

- The appropriate winding type. Not just shunt wound. "Special Machine Tool Duty" a fiddle, but usable, "Type T" (built for SMOOTH variable speed, but at the price of an efficiency drop to only 70-odd percent), better yet.

These are insanely costly, brand-new, scarce (on the basis of the 180 VDC, mostly) and still costly, even used.

Weight AKA shipping?

- The inverter-duty 10 HP Weg 3-P for my RPC idler is around 100 lbs Avoir, was $390 or so, free shipping included. 91+% efficient, BTW.

- A FIVE HP Reliance RPM III Type TR at around 387 lbs Avoir. is one of five I did a 1,000 mile R/T to fetch home from Cleveland area. Approx 73% efficient. Part of the price one pays for uber-smooth, wide RPM-band operation.

Your mil should be "golden" with a 2 HP 3-Phase + VFD.

And you can still eat.

That 5 HP RPM III bought used at around $400?? It had an MSRP, new, of just under $12,000 at the end of the 1970's - early 1980's.

Present-day?

Not-even "Type T" 5 HP from ABB Baldor/Reliance? MSRP still over $ 11,000.

Do they actually SELL at "Manufactuer's Sugegsted Retail Price"?

Pass. I spent ten years manufacturing gold, platinum, diamond jewelry, got to know many fine folks, Diamond Trade.

Old New Yawk joke was:

Q: "If we Jews are God's chosen people, how come he made so many Gentiles?"

A: "Well SOMEBODY had to pay retail!"

At "quantity ONE", that would be you or I, for sure, General Motors, maybe not so much!

:)
 
Currently waiting on a keyed shaft for part of the drive system. Unfortunately the one I ordered didn't show up... only the cardboard tube did. Here's a video I put together of the initial stages of the restoration. I'll put up a part two once I get the drive system completed. I haven't found a motor yet but I should be fine using the original that came with it for awhile. I took it apart and cleaned it up and it is in great condition. Vintage bronze bearings, no capacitors and no moving brushes. Little signs of wear so I am quite curious as to what the life of this mill must have been. Very old mill with not much wear and a fairly old motor without much wear.

Video: Bristol No 0 Mill Part 1 - YouTube

May have already been conveyed, that "no idea" pulley was for the chain to a balance counterweight to make operating it easier.
 
Yeah, I mention that in the assembly video. I think it might have made more sense to me had I noticed it before I took the rack out. As it ended up... it appeared the pulley was behind the rack not to the side of it.
I have a rope on it now but no weight yet. Should I match the weight of the head? Is it supposed to be 1:1 counterbalance?

There were specialty metal chain for that - ones that track well over the bend of the pulley are not bumpy & jumpy, last a long time. Still out there AFAIK.

Rope? Meaah.. if not chain then a stainless cable would be my pref.

As to balance? I'd say whatever YOU are most comfortable with.

I'd probably try to implement the counterweight with a "main" mass to keep from losing the chain, then stack-on weights - perhaps from body-builder equipment so I could adjust it. Even if.. I only ever adjusted it the one time.
 
Quick update on the project:

I was able to acquire a vertical head that swaps out with the overarm. I've yet to do get it hooked up as I haven't decided on the drive system yet.

I did get a B&S adapter to hold 1/2" shank tools along with a 1/2" shank end mill. I was able to take some test cuts on some cold rolled I had laying around and it did a great job. I managed to get all the gibs adjusted just so and the machine had pretty reasonable stability. I still not sure how much the mill was used because it seems way too tight... there are still two shims for the table. I don't know how many the machine was shipped with but to still have two seems pretty darn good. I tried taking one out but I couldn't even get the table back on without the shim.

I now understand how the table edge was broken. When you take the table off it takes a pretty good yank to get it off the knee. If you don't have an arm under it then it is going to the floor. I had both hands on it and I had a good grip and I was "ready" but while I'm strong enough to hold it, it slips right out of your hands because the edges of the table are rounded. I also found that my copper skeleton and JB Weld Stick holds up to a serious impact. It is broken again but not that bad and I'll probably leave it as it is.

I leaning toward replacing the rack and pinion with a leadscrew for the X. While doing so I'll probably go ahead and put a simple drive system on it. I will be putting a power drive on the knee. The spindle (the horizontal one) also moves via a screw and I'll probably leave it alone. I still need to work out the overarm system and make up the support.
All said there's still a lot to do, but I did want to drop by and give a little update saying that the little guy is making chips again and doing so with ease!


Back
Top