rivett608
Diamond
- Joined
- Oct 25, 2002
- Location
- Kansas City, Mo.
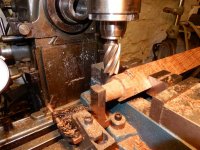
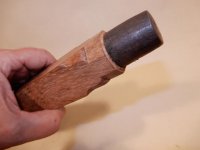
I while back I asked if anyone had any old English Brown Oak that I could make a reproduction treadle for my 1770s English gentleman's lathe. Richard Newman had the perfect wood for this and gave it to me. Thank You Richard! I also posted about making the jam nuts for this. Today I went out to my shop and thought, I'm going to play with this today, the wood parts. Truth be told, I'm not really a good woodworker when it comes to doing full scale work. Also my woodworking bench is in the fair weather shop out back and it totally covered in other stuff. So I just machined the parts. This is the back shaft of the treadle, it mounts between those pointed bolts and I still have the original rolled iron ferrules. The Brown Oak is 1 1/2" square, that is huge for me. I first turned the ends, then milled the corners off forming an octagon. A little more milling down the side and after some work with knife and file they have a delightful "lambs tongue" in the corners. I just love the color of the wood, it seems to age just by handling it. I'll have to decide how much wear I'm going to add to the treadle when done.