What's new
What's new

The return of the Nichols Mill

DocsMachine

Titanium
Joined
Jan 8, 2005
Location
Southcentral, AK
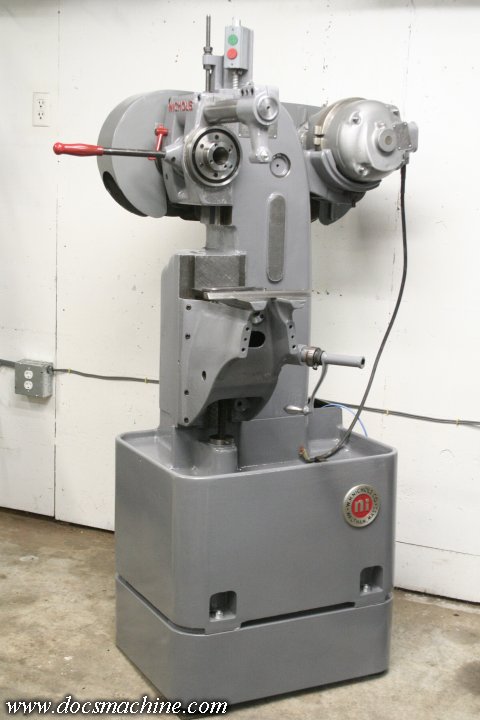
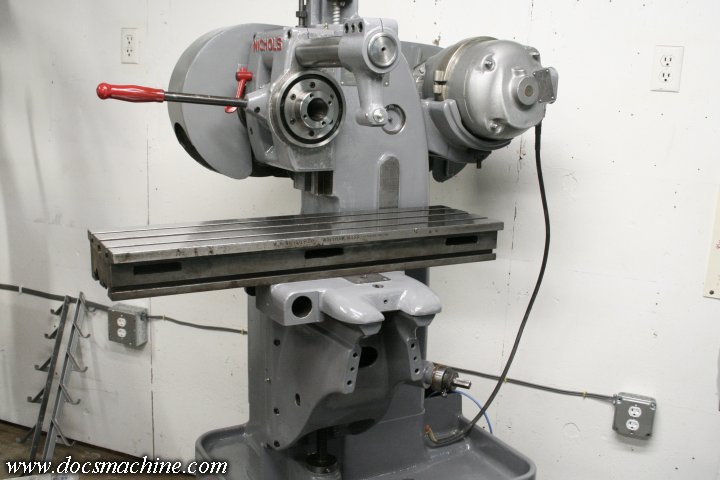
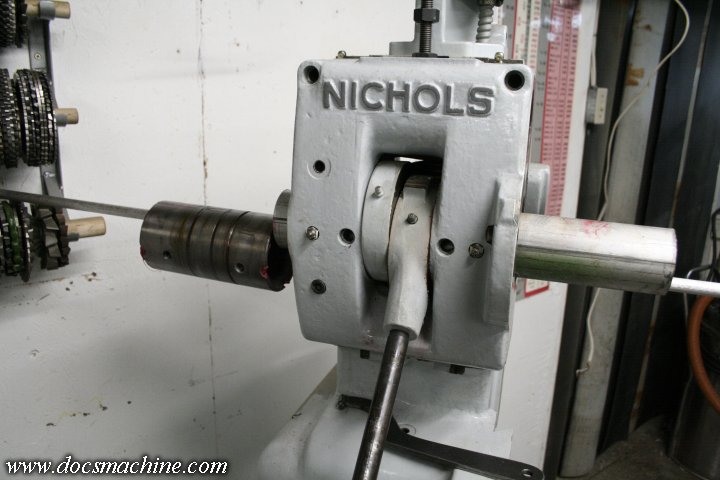
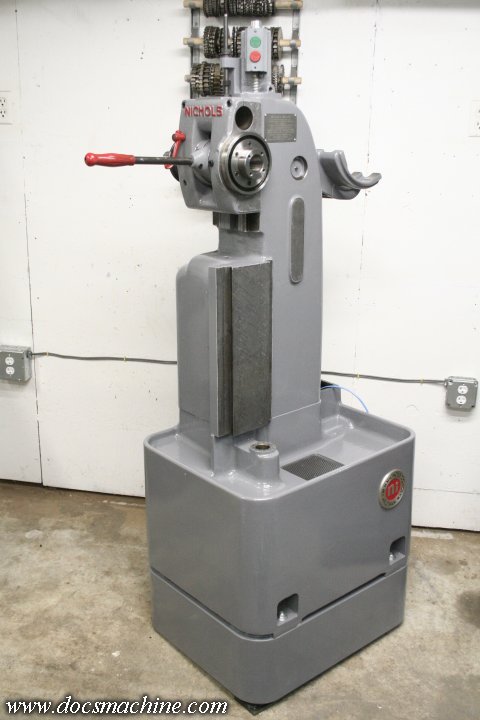
Some of you may remember my rebuilding a Nichols horizontal mill, with more than a little help from several long-time regulars here.

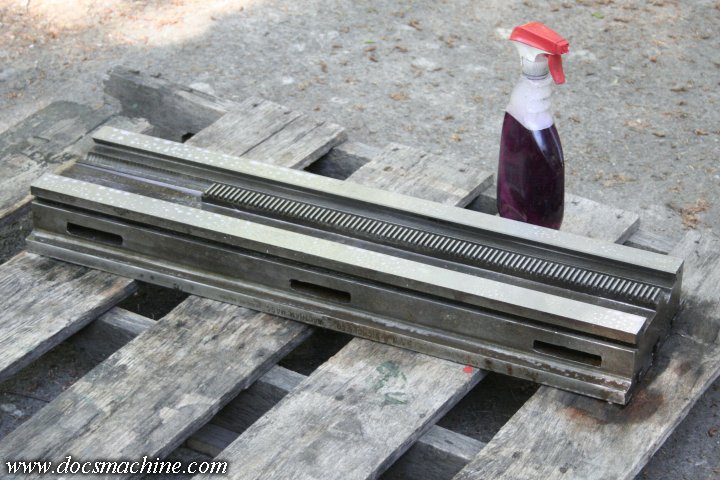
Well, while I got quite a bit of use out of that machine, it never really lived up to it's full potential, because having been a repetitive-use factory machine, the middle third of the table travel was severely worn. Like rock the table a quarter-inch at the ends, worn. (When centered.)

So I wound up only using it for roughing and chop-saw-like duty, or other things that didn't need table movement.

In early 2018, I dismantled it and two other of my various manual machines, and sent them all on what turned out to be a rather convoluted path to a grinding shop to have them all finished back to straight and true.

I finally got them back in April of this year, and in this case, theoretically I could just throw it back together and put 'er back into use.

But nooOOooo! I gotta make more work for myself! :D

The story here is that when I put the Nichols together back in 2009, I hadn't settled on the shade of grey I liked. I'd flipped through the book at the paint store, found one that I thought looked right (I was looking for a grey with a slight hint of blue, sort of a battleship grey) but of course it only looked right under the store lighting.

In actual application, it looked damn near white. With a hint of blue.

By itself, the machine looked fine, but as I got others in, that were the... I guess 'correct' shade of grey, the brighter and whiter the mill looked. And the less happy I was about it.

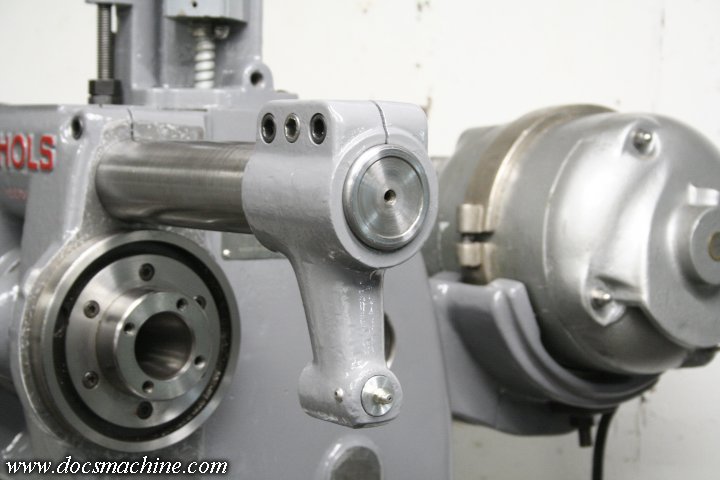
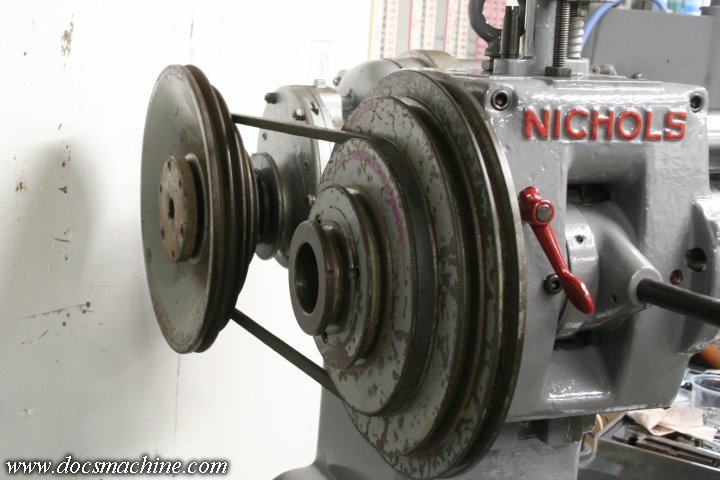
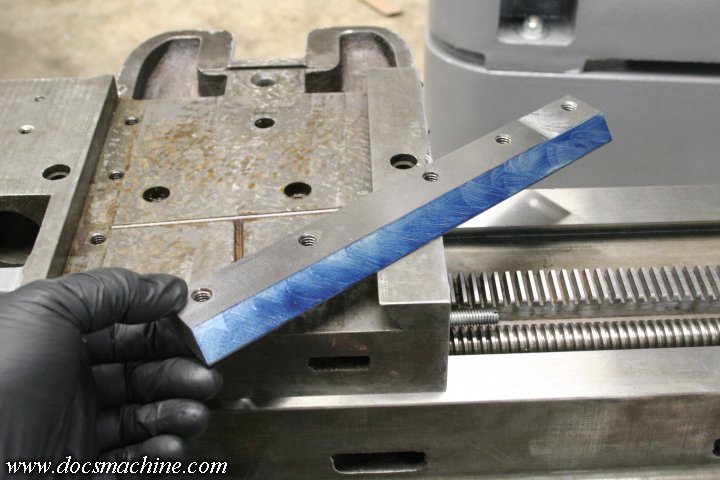
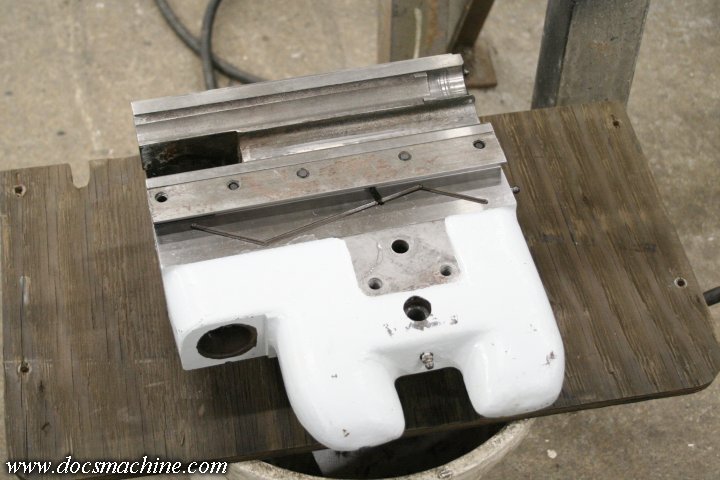
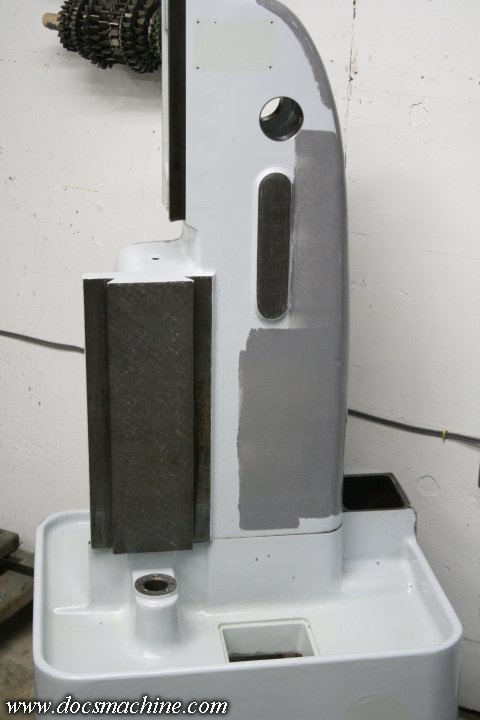
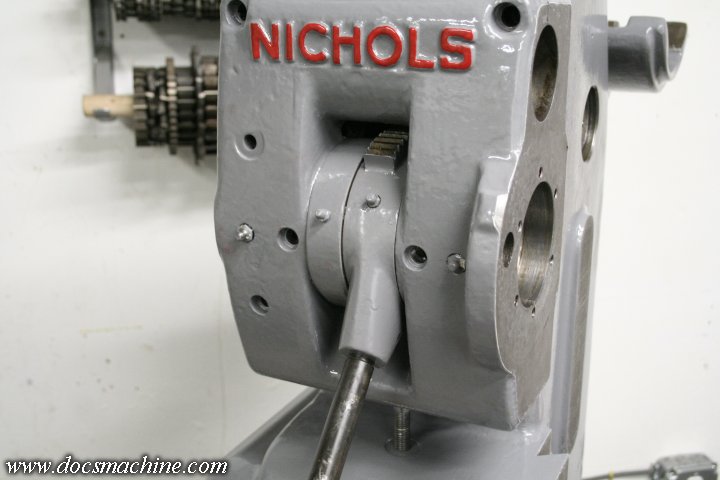
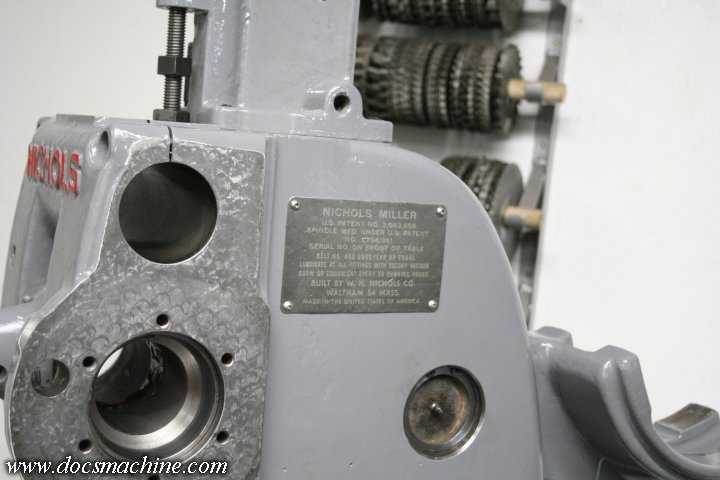
So, I suppose, no time like the present. Original put'near white, now with some handling damage from the excursion:

nichols20-001.jpg


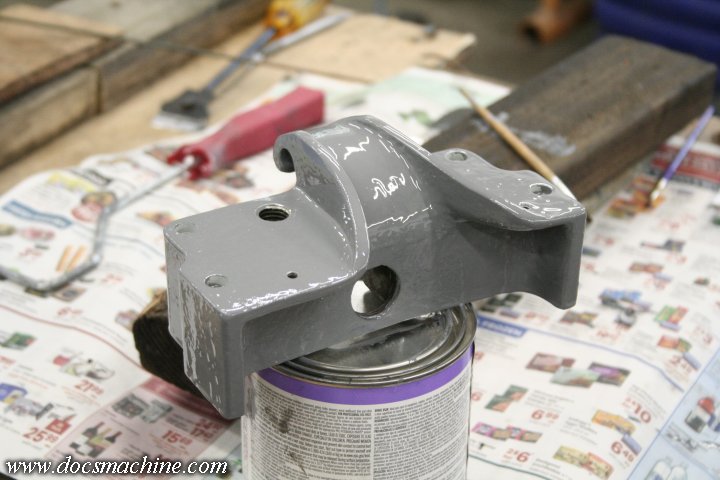
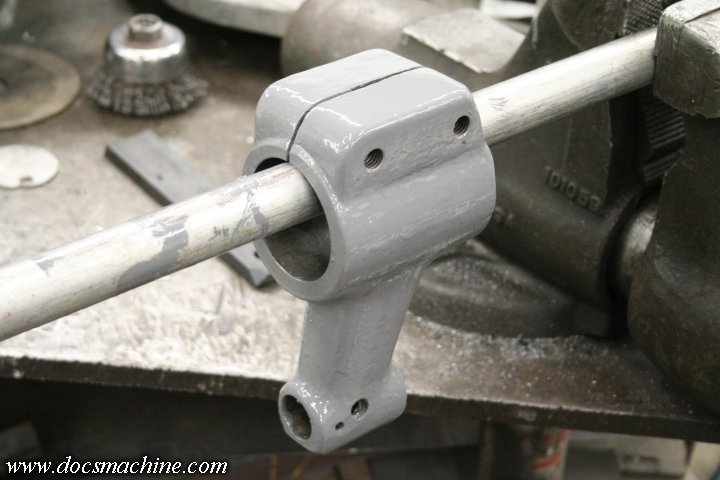
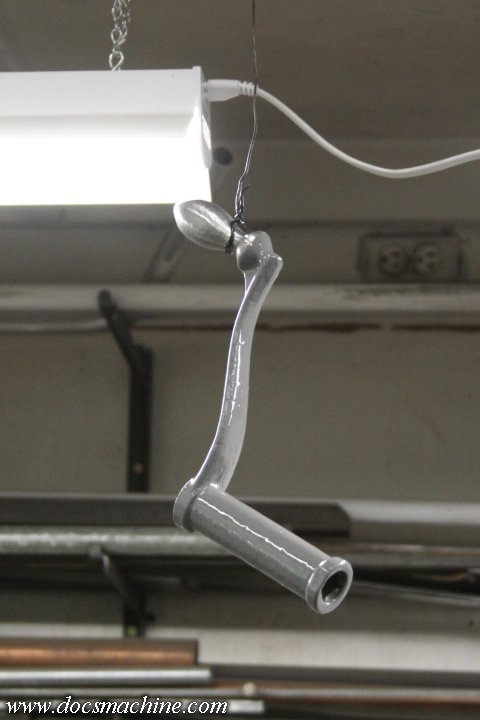
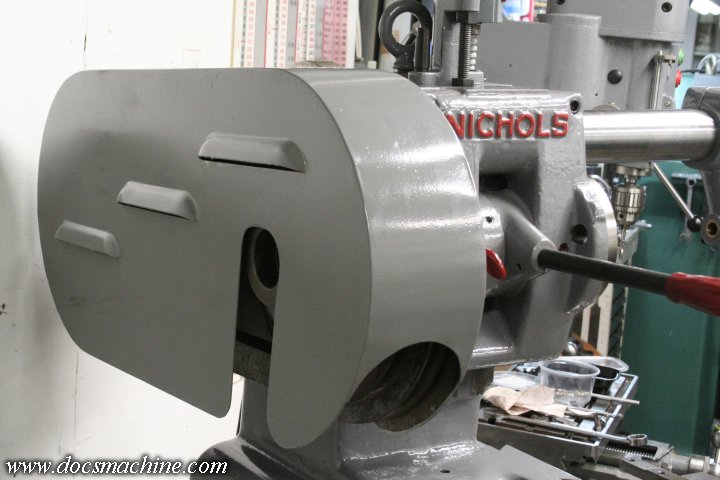
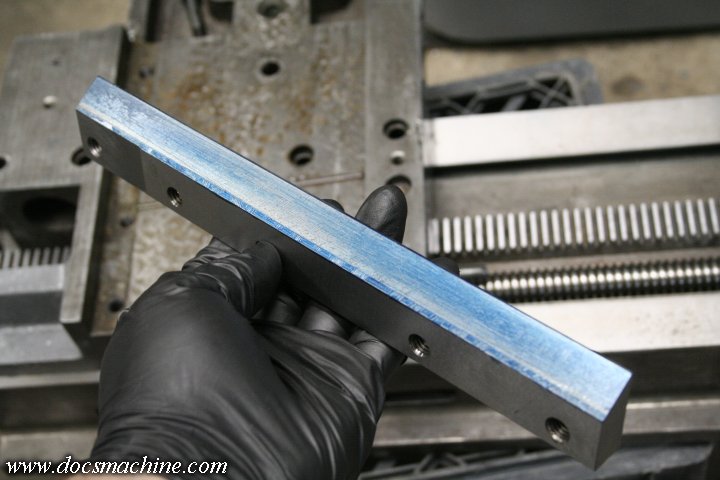
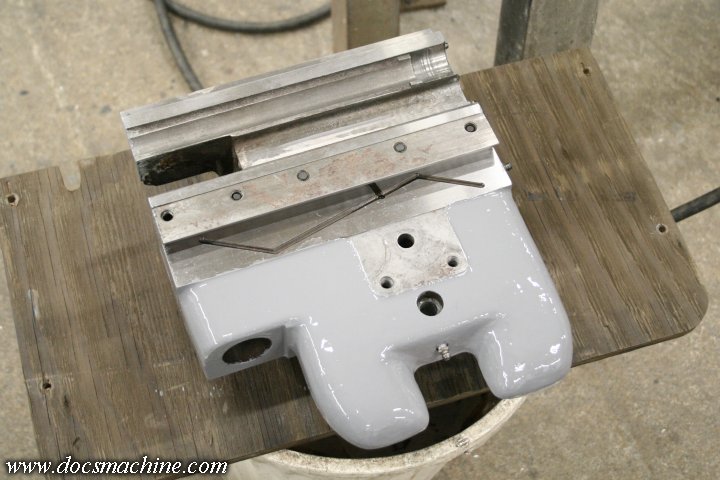
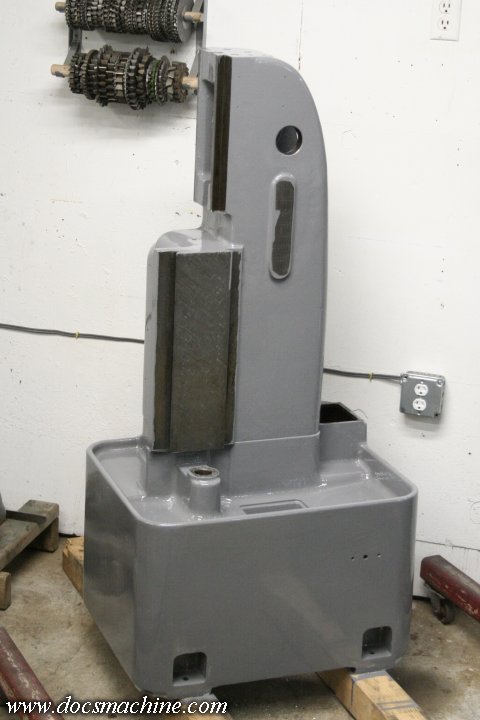
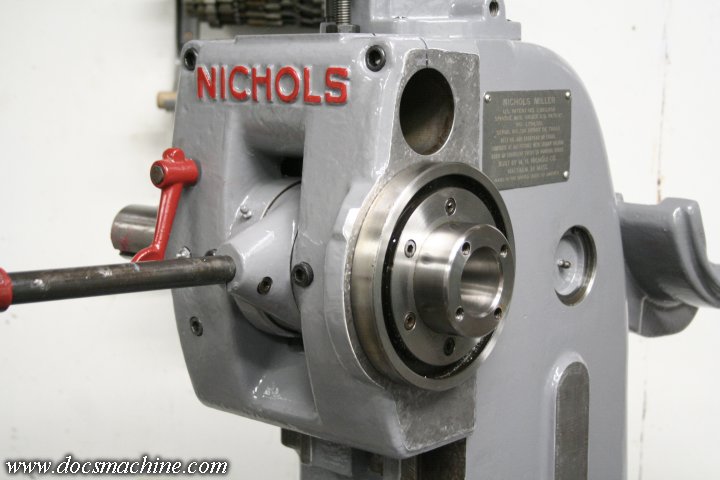
And then with a first coat of the more proper grey.

nichols20-002.jpg


Now, this isn't a spur-of-the-moment change. I'd painted the belt cover for the mill, a year or more ago, expecting to also do other parts so it would all be ready to go once the bed came back.

Well, we all know how those kinds of plans go. :D

Once I had the parts back, I was in part forced by lack of space, to start reassembling what I could of all three, getting the Stockbridge Shaper mostly together, as well as the infamous Springfield Lathe.

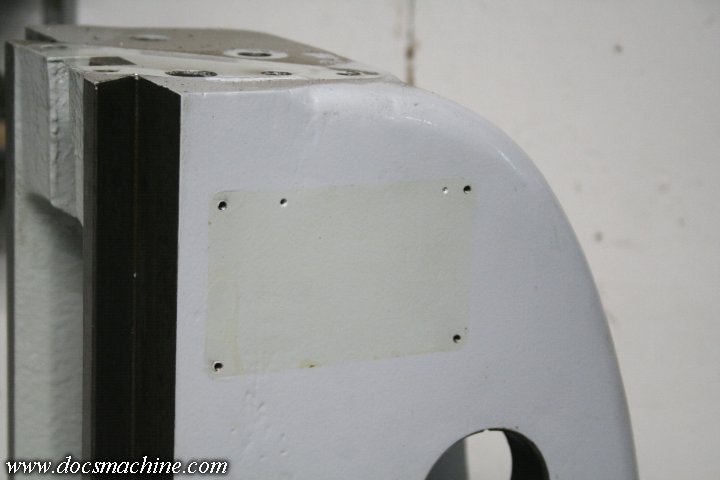
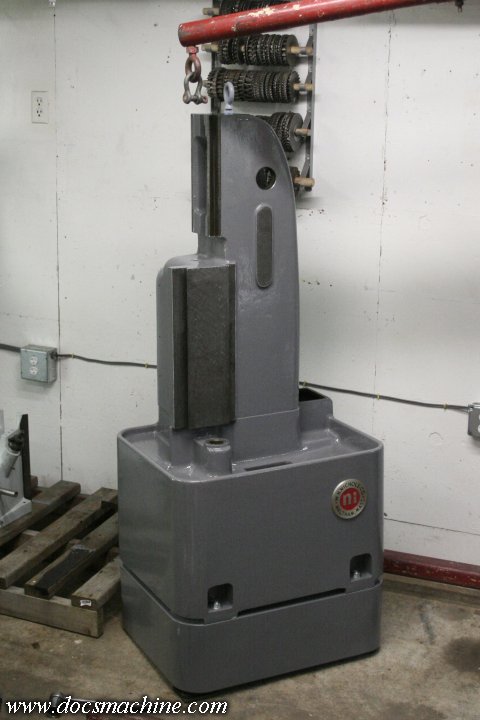
After clearing some floor space, I turned my attention to the Nichols, and decided to do a full repaint, as well as attend a few other minor issues.

nichols20-008.jpg


The three machines' grinding work and shipping, after all, cost me a bloody fortune, so I might as well take the time to do it up right. If I'm gonna have that much cash sunk into the thing, it might as well be as good and as accurate as I can make it.

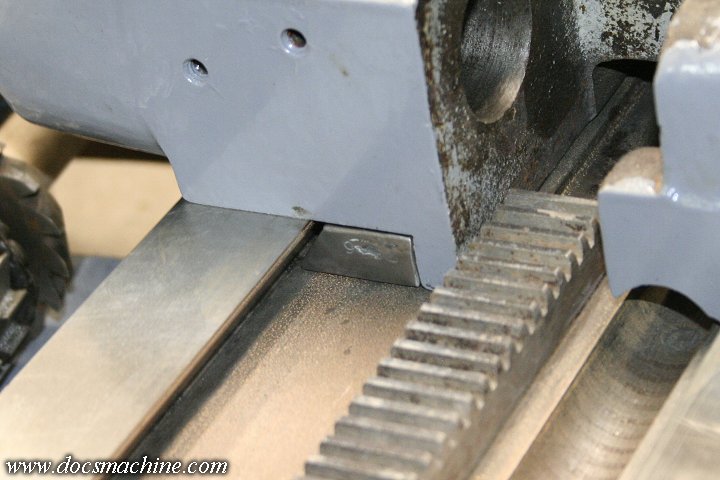
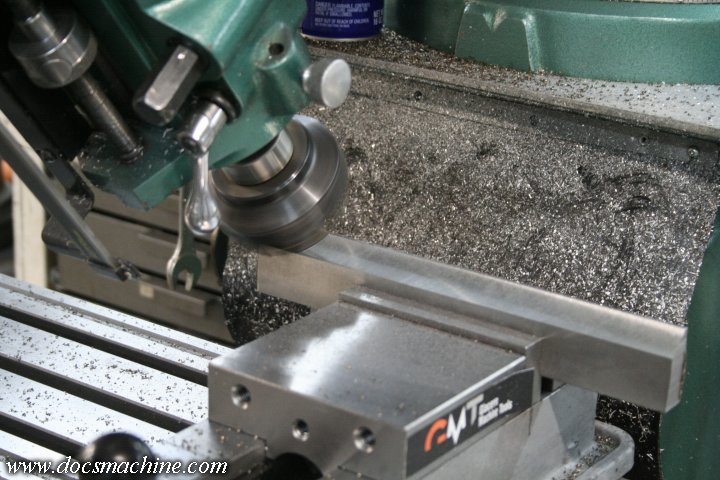
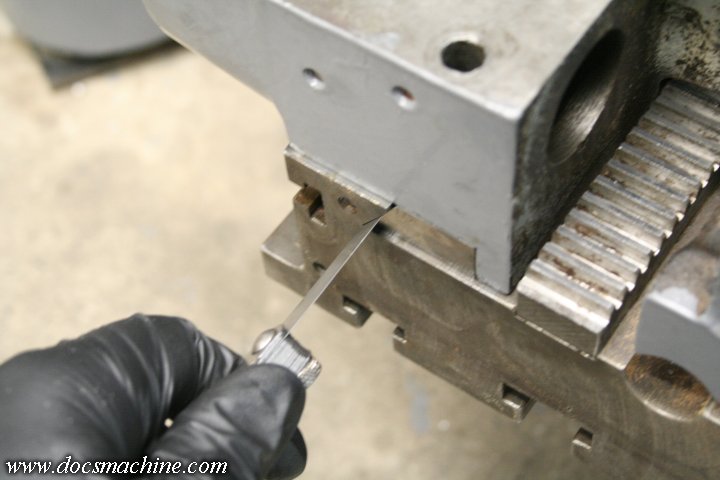
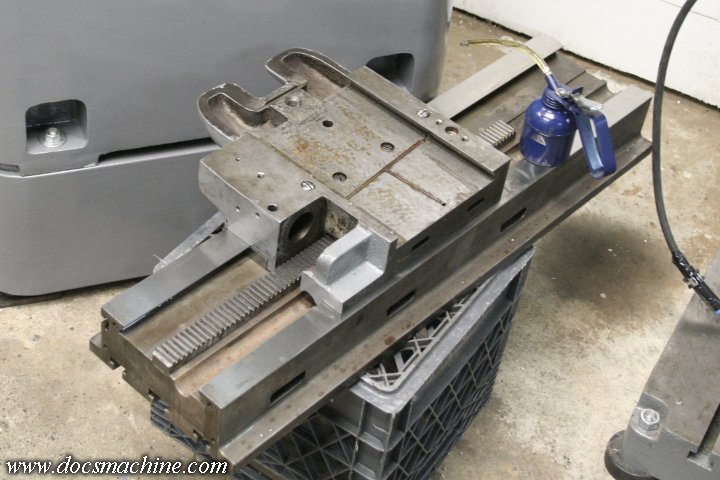
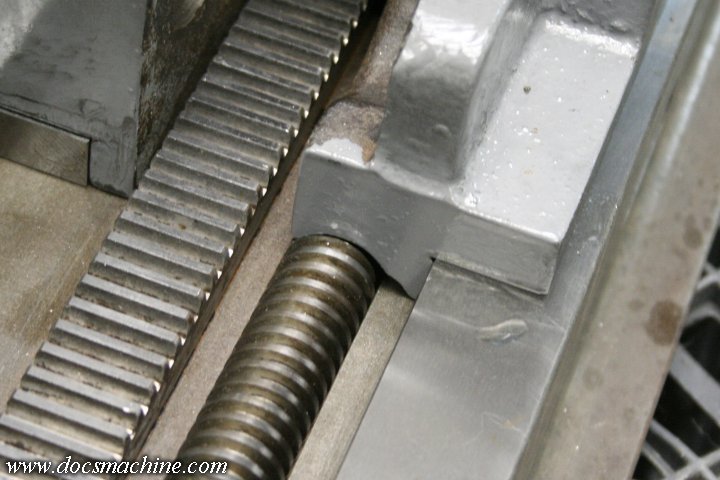
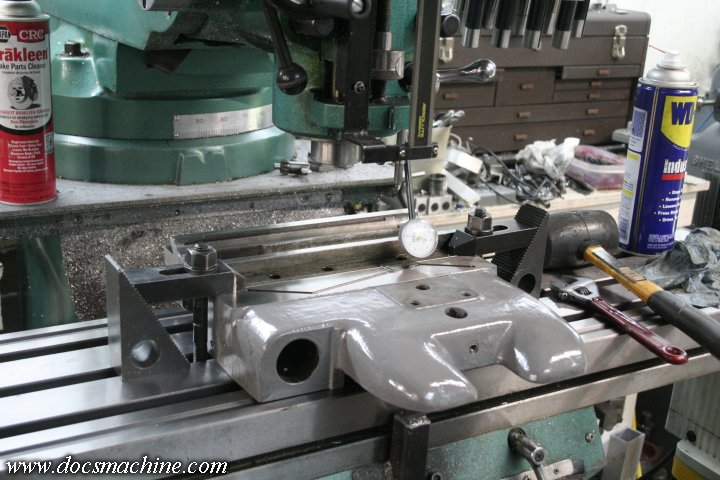
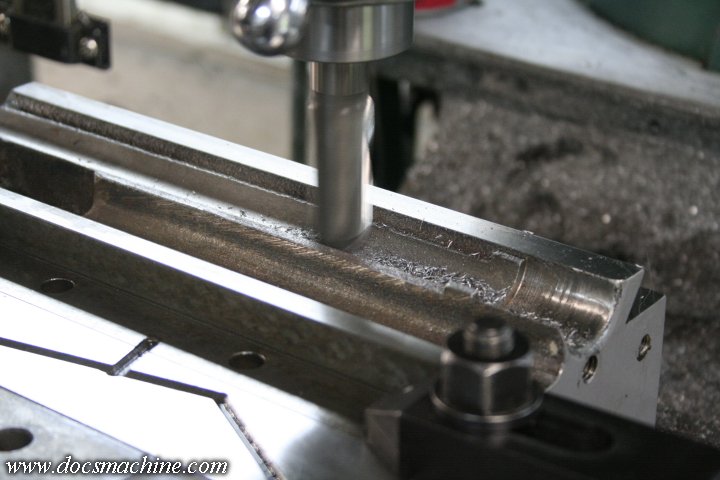
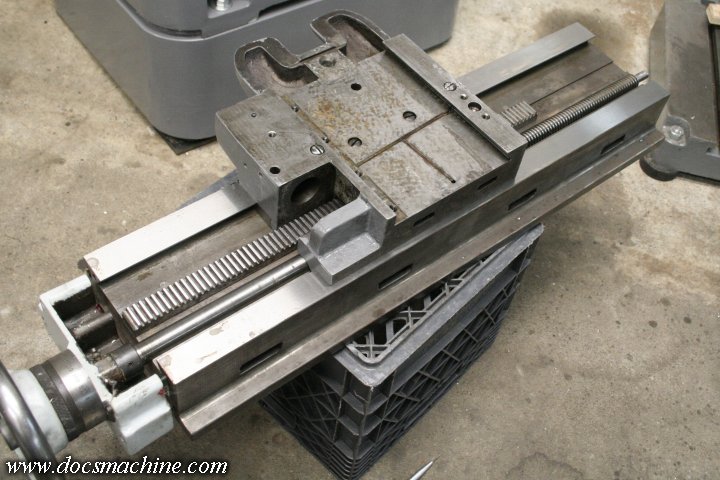
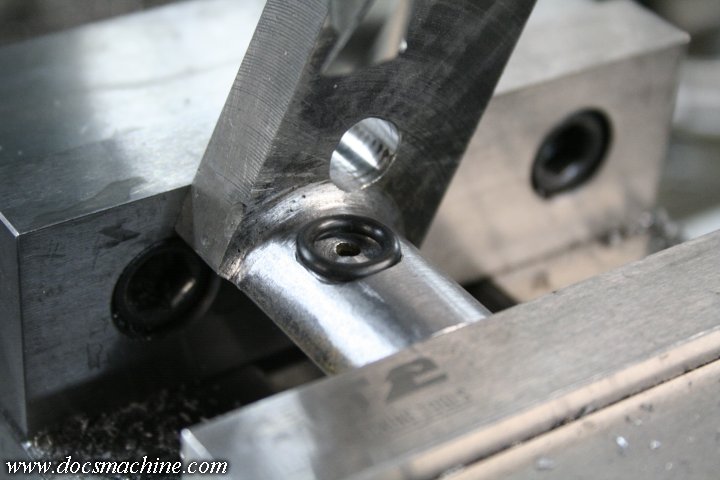
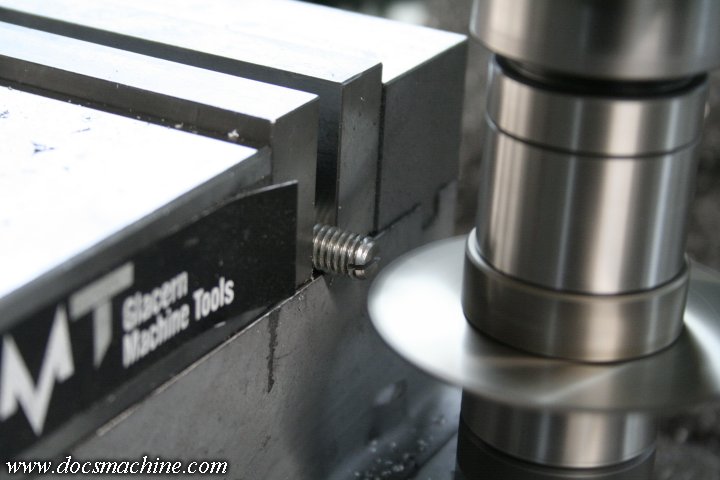
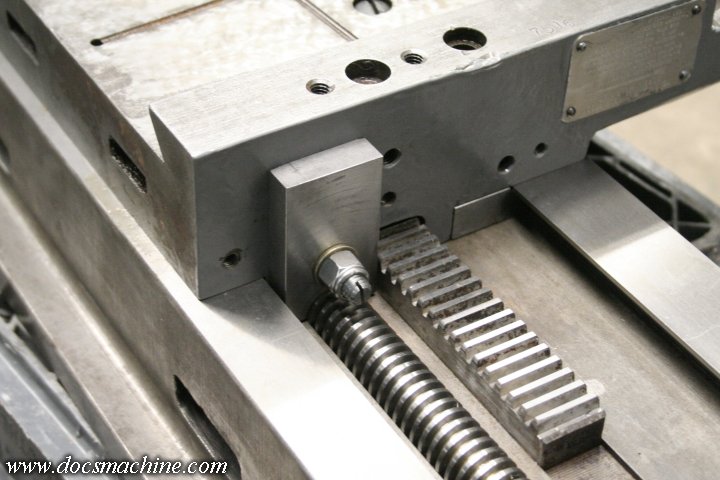
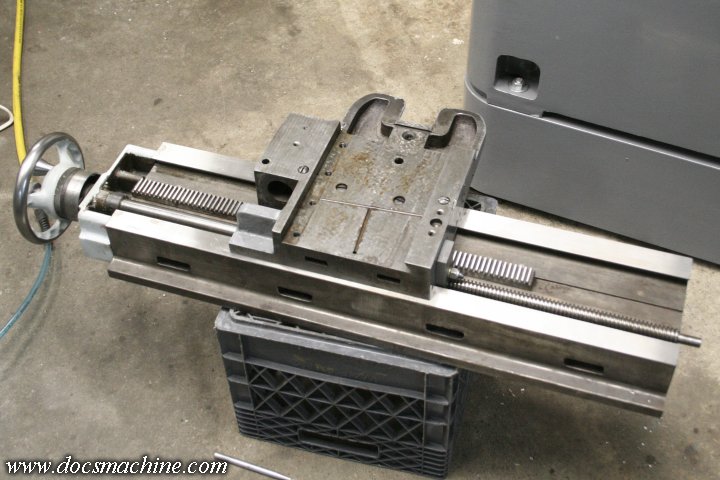
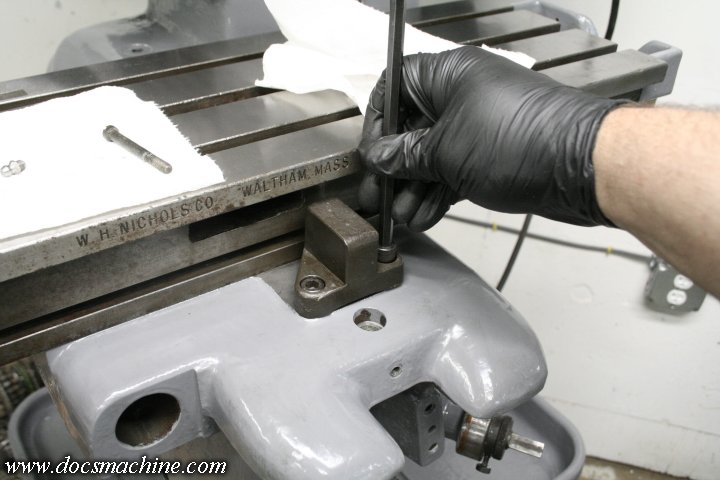
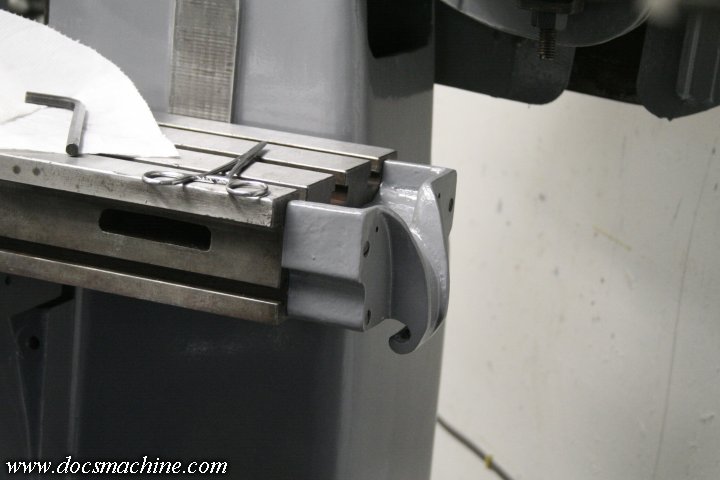
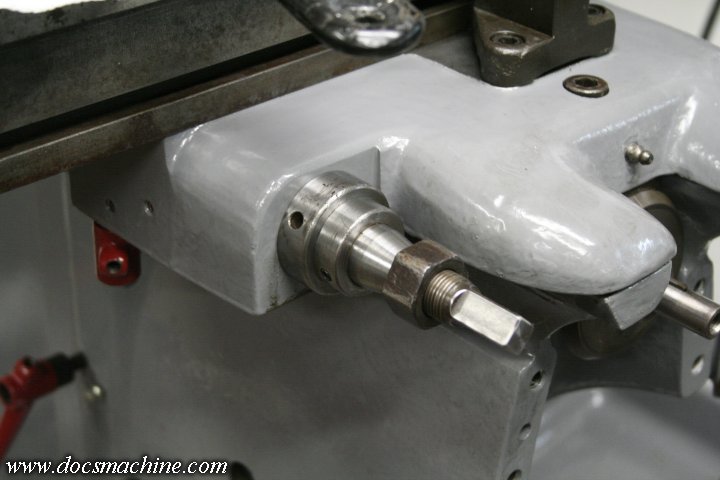
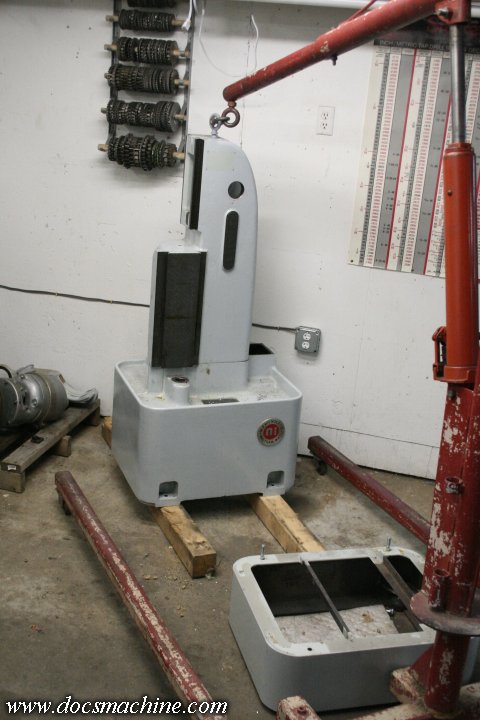
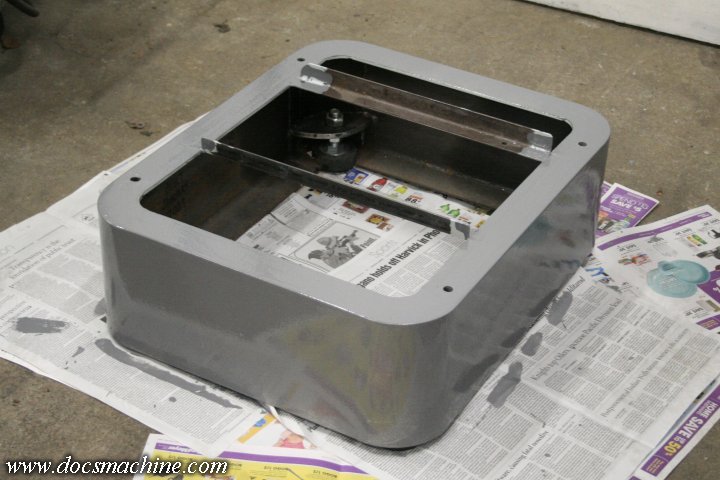
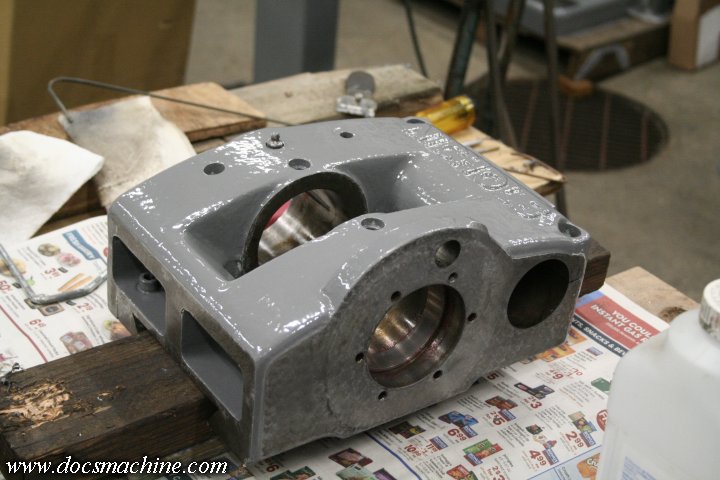
The table and saddle were, of course, already off the machine, so it wasn't much work to get the knee and motor off as well.

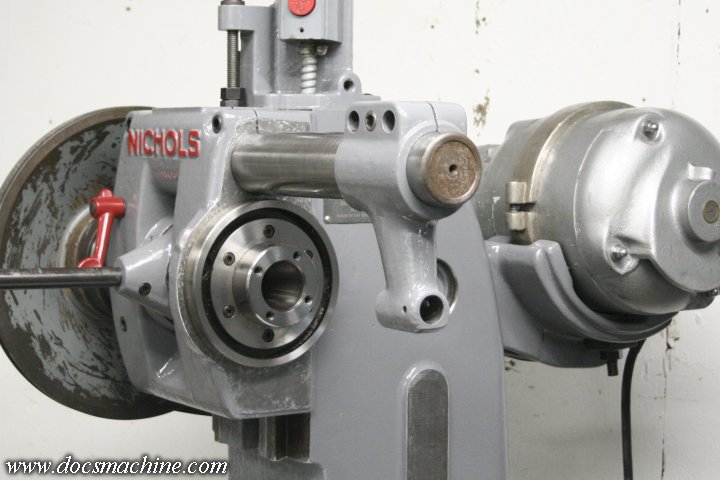
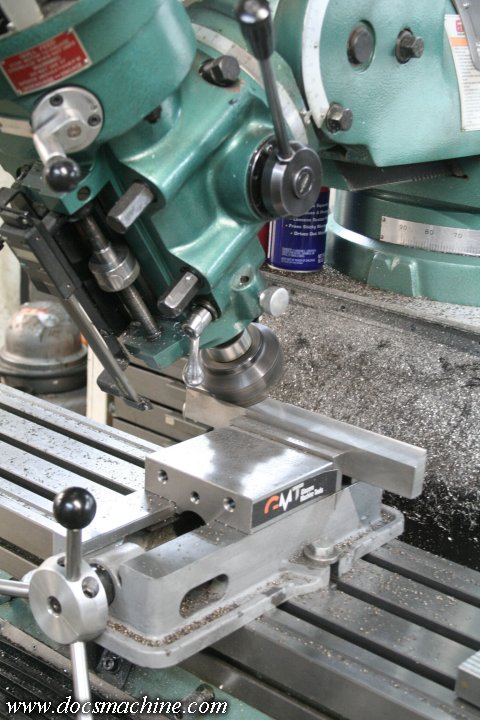
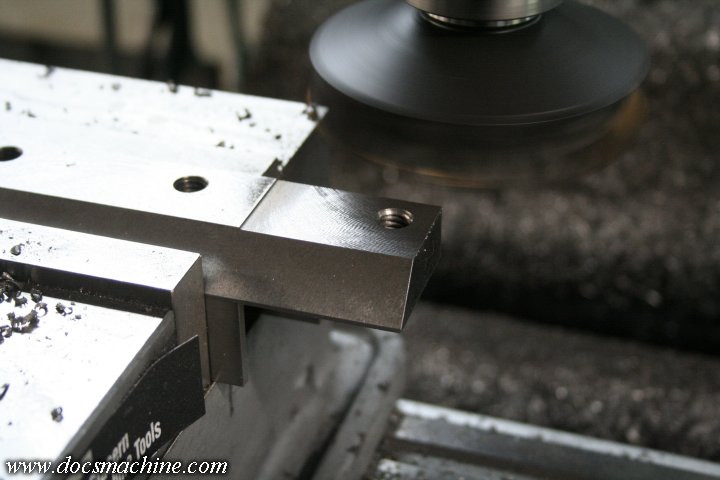
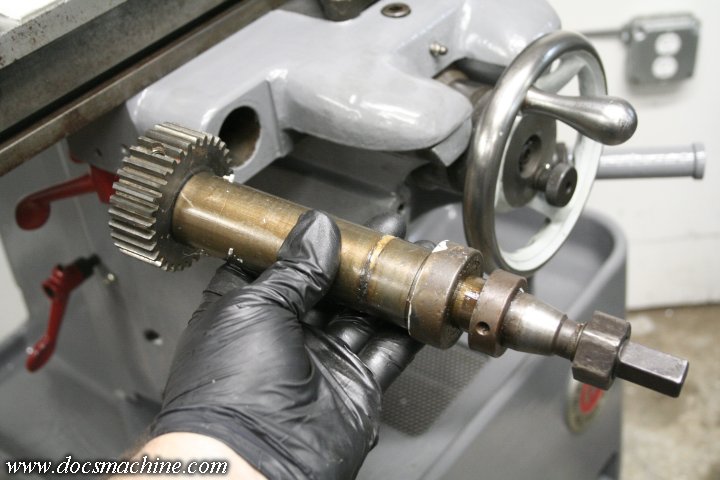
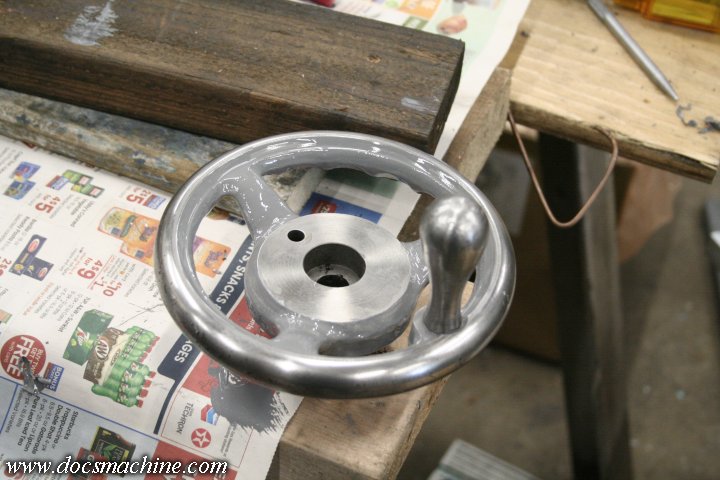
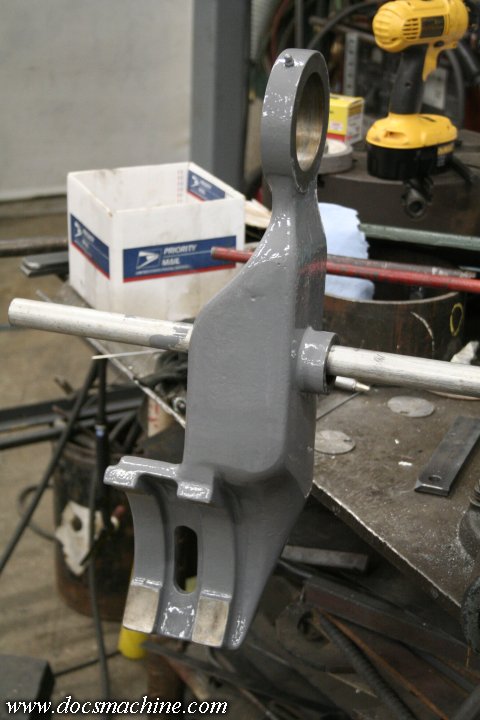
After that was the head, which of course required disassembling the spindle...

nichols20-009.jpg


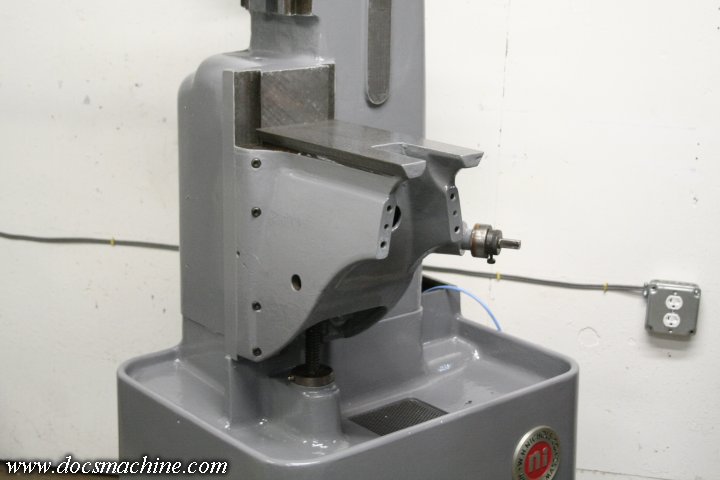
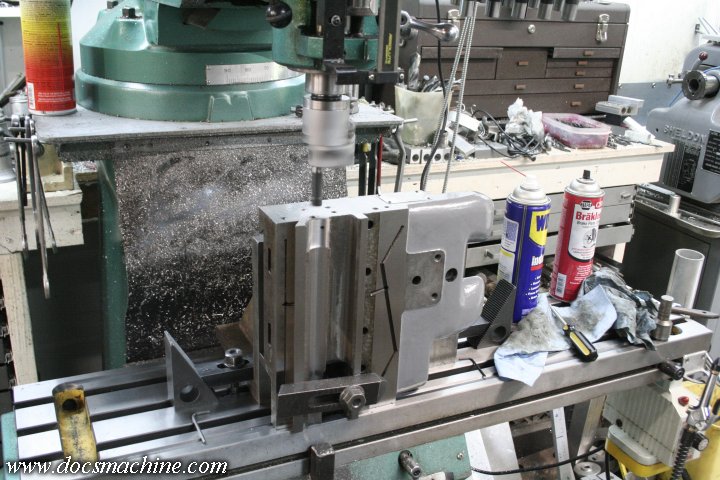
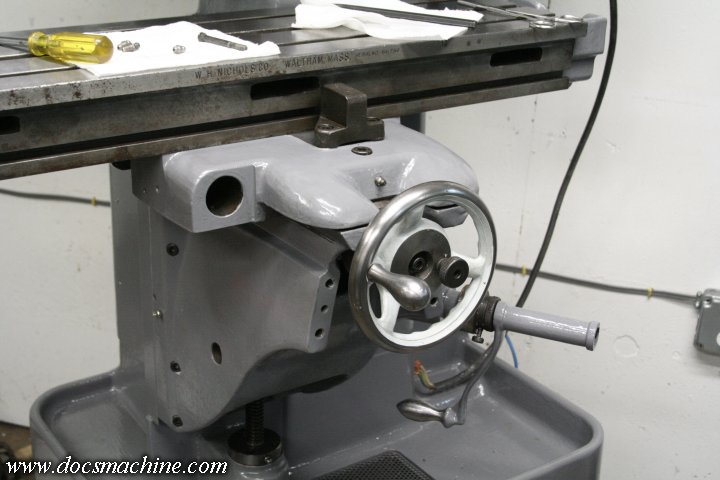
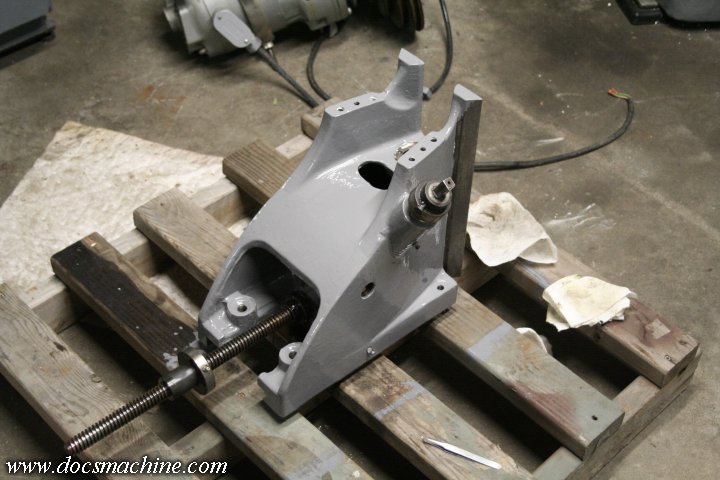
Which got me down to a mostly-bare column casting on my handmade riser base...

nichols20-010.jpg


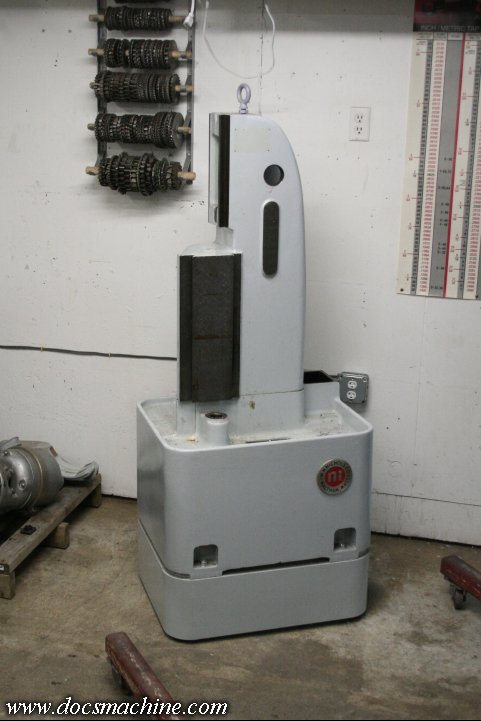
Which of course came off too, so I could paint everything properly.

nichols20-011.jpg


To be continued...

Doc.
 
One interesting point, was how the paint had discolored under the ID tag and the name badge on the base.

nichols20-012.jpg


It's not like the rest of the paint "faded" around the tag- the paint's only about ten years old, and has been indoors, in a windowless room, the entire time. Only thing I can think of is that maybe some cutting lube, mainly WD-40, oozed behind the tag and sat there long enough to discolor it. The tag itself was clean stainless steel, with no paint or coating of it's own.

In a small stroke of luck, it turned out I had a still-new, unopened can of the correct paint, from 2018. I'd probably picked it up in the anticipation of the parts coming back from the grinder in midsummer or so, and apparently forgot about it.

'Course, I have so many things on my mind these days, sometimes I'm lucky to remember pants. :D

Anyway, I'd seen this can recently, when shifting stuff around for the newly-returned parts, but I think for some reason I thought it was the darker grey, as used on the big lathe and the old drill press. I thought of it, double-checked, and sho 'nuff, it was the lighter of the two greys.

So I got out half a roll of paper towels, some rubber gloves and a nearly-empty jug of mineral spirits, and went to town.

I cleaned off the first five major pieces, the base and column, the head, the motor mount, the riser base and the head raise-and-lower handle, and got 'em painted.

nichols20-013.jpg


In case how light the supposed original grey really was, never really came through in the photos, here's the column with an initial partial coat of the 'correct' grey.

Yeah, the old color was, in fact, damn near white. And I remember distinctly- it looked battleship grey in the chip-book. And I painted it over bright-white primer-filler, so it did, in fact, look a darker grey. But once I had it together it became obvious it wasn't anything close to what I wanted.

And here's the first sloppy coat:

nichols20-014.jpg


I usually don't mask most of the parts, since it's so easy to just trim off drips with a razor blade, which gives a smooth, sharp, clean edge.

And here's a pic of the riser base:

nichols20-015.jpg


After two coats had been applied n' dried, I scooched the crane around and got the riser bolted back underneath, and then with the thing dangling from the arm, I slid it a little further down the wall, by maybe 18 inches or so, and maybe a tad further out from the wall than before.

nichols20-016.jpg


nichols20-017.jpg


I may still do some tweaking, but that's it's new home. The floor in the shop isn't terribly level, and the feet on the riser block are no longer correctly adjusted for the new location. Once I have the table in place, I'll put a level on it and adjust the feet accordingly.

I then got a good couple coats on the head...

nichols20-018.jpg


The motor arm...

nichols20-019.jpg


And the knee.

nichols20-020.jpg


Still to be continued. :D

Doc.
 
After the paint was good and dry (this all happened over the course of about a month) and since there was no real service, maintenance nor repairs to be done at this stage, reassembly was nearly as easy as disassembly.

First the sliding head unit...

nichols20-021.jpg


I'd been a little sloppy with the paint on the zerks, but most of those will be getting replaced anyway- some were clogged and others leaked.

Note I also took a few moments to paint the raised nameplate lettering. Hey, why not? :D

And speaking of the nametag, that was an easy bit- just clean out the now-threaded holes and screw it back on.

nichols20-022.jpg


(During the original build, I'd removed the little rivets, and retapped the holes to 6-32, in order to use some tiny stainless buttonhead screws.)

If you look right at the bottom edge of the photo, there's two other holes barely visible. When I first got the machine, it had a little brass tag there marked American Drill Bushing Co., which was presumably one of the companies that had this mill in it's factory.

Always meant to drill and tap those, too, in order to reinstall the tag, but I can, of course, no longer find it.

Now, as I was reassembling the spindle, I ran across one other issue:

nichols20-023.jpg


They're not as bad as the photo makes them look, you can't actually feel any grooving, but regardless, they're pretty bad. The rollers conversely look pretty good, but of course they need to be replaced in pairs.

Oddly enough, I can't honestly recall what kind of shape the bearings were in when I rebuilt the head the first time. I suspect they weren't this bad, else I probably wouldn't have left them in. Or maybe I was just in so much of a hurry to get it back together, I may have thought "they'll last me a while" and put it out of my mind. I dunno. It's been a decade, and I've slept since then. :D

Anyway, I looked around and found out replacements are going to be something like $200-$250 each. I have since found a big stash of bearings that includes those sizes, all for $250, so I'll pull the ones I need and hopefully resell the others at fire-sale prices.

If I'm lucky, I'll get away with maybe $100 in bearings all told, rather than $500. Even if I junk the rest though, I'd still be saving 50%.

Anyway, I didn't have those at the time, so I went ahead and reassembled the spindle with the old bearings:

nichols20-024.jpg


The lash adjustment was on the back, so I snugged that up to something close to "that's about right" and set the dust cover back in place.

nichols20-025.jpg


And that gets the bulk of the structure back together, cleaned, painted and finally the proper color. :D

nichols20-026.jpg


TBC, 'natch. :)

Doc.
 
I had, during all this, of course gotten some of the other parts painted as well. The right-hand table endcap...

nichols20-027.jpg


The never-before-painted overarm support...

nichols20-028.jpg


And the also never-before-painted knee elevating crank.

nichols20-029.jpg


I never got around to painting either of those, largely because by the time I was winding up the original rebuild, I'd already determined that wasn't the color I wanted. And so didn't bother painting anything else, since I figured I'd eventually be repainting it anyway.

Only took a decade, but hey. :D

Again, once the paint had had a chance to dry, I accosted a passerby and persuaded him to help me lift the knee into place.

nichols20-030.jpg


At which point it was the moment of truth; to finally reinstall the table I'd shipped off some two bloody years ago, and which cost me, all told, in excess of $3,000. That's not a typo- all three machines, combined, including shipping and customs (long story) took two years and cost me well over nine thousand by the time it was all said and done.

Entry #952 on the list of reasons why Doc is not a rich man. :D

Anyway, when I'd received the parts back, they were all still covered in coolant residue and grinding schmutz. So the first thing I did was take the table outside, hose it down with Purple Power, scrub it good, and pressure-wash it clean.

nichols20-031.jpg


Now, here's the tricky bit. Schaffer had to grind quite a bit off of all four contact faces, thanks to the wear. And the problem with that is that the Nichols does not have anything like an adjustable gib: They have fixed, solid "dovetail bars", that have to be carefully hand-fitted into place.

nichols20-032.jpg


I knew this going in, and figured I'd have to fab a new bar. mI was not wrong, with the resulting gap to the removable way at nearly an eighth of an inch.

nichols20-033.jpg


So I called up McMaster, and ordered a chunk of ductile Dura-Bar.

In the meantime, I scraped the drips out of the bore of the overarm support, and slid both it and the overarm itself into place.

nichols20-034.jpg


Then I pulled the bar back out, buffed off the crusty end, and slid it back into place. :D

nichols20-035.jpg


After that, I installed the pulleys and got them pretty well lined up, a surprisingly fiddly job I don't recall doing the first time.

nichols20-036.jpg


Why didn't I paint those too? Well, I might, when it comes time to re-rebuild the spindle, but for the moment, they're hidden under the belt cover.

nichols20-037.jpg


Note one little "just for coolness" thing I did, in that last time, I added rounded corners to the belt cover openings, which I thought made it look more finished and professional.

Which it does, but also actually interfere a little with tilting the cover over the pulleys. A 1" shorter belt would likely solve that, but it was one of those things I thought of years ago, and did without thinking of how it'd actually work in practice. :)

And finally, a quick "beauty shot".

nichols20-038.jpg


Still a ways to go, but I like the color a lot more than the way-too-light grey. Yeah, I know some of you would have painted it forest green or bright blue or something, but I'm the one that's gotta look at these things all day. Call me a traditionalist, but machines, to me, are supposed to be grey.

If someone ever sends me a free 10EE, maybe then I'll paint it candy-apple red with flames. 'Til then, I prefer the industrial battleship grey. :D

TBC, 'course!

Doc.
 
I have seen those "dovetail bars" before, and they always had "pusher screws" to adjust them.

If the range is no longer correct and you can't tighten the gib, you may have to mill some off the bottom (contact) surface to bring the adjustment back in range of the pusher screws. At least I had to when I worked on a machine that was like that.

The pusher screws would be on that back-up part of the casting. In the pics I see no such pushers, so I assume they were not present? I have no idea how they would be adjusted on that setup

You would have to mill off a LOT to bring that back into contact.
 
Nice machine, all over again :) Wish mine had the big Nichols placard down on the base. Sounds like your ways are a lot higher mileage than mine... That grey is much better than the white. The knee elevation lever is lots different than mine, which is a big handwheel.. square hole in the center- it works on both the knee and y axis. It also fits on the x axis pinion shaft but affords insufficient leverage to be useful there.

The parts machine we did a while back had shims on the back side of the table dovetail to make the fit better- are you making whole new dovetail pieces with the durabar?
 
I have seen those "dovetail bars" before, and they always had "pusher screws" to adjust them.

-Not on the Nichols. All four dovetails (head, knee, saddle and table) are solidly fixed. They bolt on, butting up against a flat (IE, 90-degree) face on the inactive side. No shims, no adjusters, no screws. They just bolt on solidly.

The manual recommends surface-grinding, half a thou at a time, the narrow face as you suggest, but that's the only method available. There are no other adjustments.

Yeah, I could have milled an eighth inch or so off the factory bar to make it work, but I'd have list a significant percentage of the angled contact face, and I didn't really like that idea.

The knee elevation lever is lots different than mine, which is a big handwheel.

-I'm pretty sure that wheel is some aftermarket replacement part. I've seen people also fit capstan wheels to the X-axis in place of the lever, or handwheels just like the table axis, to the knee, etc.

But none of those appear in any of the factory documentation I've ever seen (not that I have any kind of a comprehensive library or anything. :D ) Typical factory offerings for the knee were a crank handle like mine (which I suspect was supplied by an outside vendor, but is the factory piece) or a more swoopy curved one which is a later model unit.

The parts machine we did a while back had shims on the back side of the table dovetail to make the fit better- are you making whole new dovetail pieces with the durabar?

-Yep, already made. I'm reposting this from my own board, and as I type this, the machine is basically done, save for the spindle bearings. (Which will be in late next week.) I milled a new way out of a chunk of Dura-bar, and had a few issues with fitting- angles of course are notoriously fiddly.

I wound up finally getting good contact, but was forced to put a thin shim on the flat face directly opposite the angled face, in order to get the clearance just right.

We'll see that in the next few pages. :D

Doc.
 
Concur wrt the big handwheel- pretty generic but generally a really good fit to the machine. I have a shop-made capstan wheel that fits the table drive pinion, used it a couple times when the production lever throw wasn't long enough.

new dovetail sides out of durabar is a great idea- I wouldn't have dared try back when I first got the nichols but wouldn't think much about it nowadays. Assuming the threaded holes was the annoying op?
 
OK.... That goes along with the nasty location for the dovertail bars, inside. There probably is a little slack in the screwholes for shimming the last bit, if you chose to.

I definitely agree that if you got that one in contact, you'd have a LOT less area involved. Making a new one is a good move for that.

I find it questionable if all that looseness was from grinding, seems like a huge amount of slack. What was it like before you sent it off?
 
Now the fun begins. :D

As I'd mentioned, I'd already rebuilt this machine, and it'd been in semi-regular use ever since, so there was not really much by way of repairs and upgrades it needed. The paint was just an aesthetic thing to soothe my OCD, so really, it was just the worn table that needed to be addressed.

Schaffer in LA took care of the grinding, and did an excellent job, but as noted, they had no real control over the removable way bar. Theoretically I shouldn't have even bothered including it, but no matter.

So the main thing to be done here is to fab up a new way bar, slightly bigger to take up the extra clearances. I'd ordered up a chunk of Dura-Bar from McMaster...

nichols20-039.jpg


And set about milling it to shape. The first part is of course a classic "squaring up" exercise familiar to any first-year machinist...


nichols20-040.jpg


And then, after a good long while, finally milled down to an approximate thickness.

nichols20-041.jpg


Now, the angled face was obviously not any common fixed angle, like 30, 45 or 60, so I got out a protractor and a MkI, Mod0 eyeball (admittedly somewhat out of calibration) and determined it was at least somewhere in the ballpark of 38 degrees.

nichols20-042.jpg


So I cranked the head of the mill over to that indicated number, and milled a tapered flat on one edge of the bar.

nichols20-043.jpg


Compared with the original, it appeared that neither the eyeball nor the degree markings on the mill knuckle were particularly close...

nichols20-044.jpg


So I cranked the head out to 35 degrees and gave it another skim cut.

nichols20-045.jpg


That got us a lot closer, but still not quite right. You can see there's a space at the top of the seam here- it's easier to see by eye than get a photo of.

nichols20-046.jpg


A bit more adjustment and another skim cut...

nichols20-047.jpg


And now we're close enough to try some blue.

nichols20-048.jpg


TBC fer'shur. :D

Doc.
 
After closer inspection, I'd determined the sharp edge of the bar was contacting the inner point of the angle, probably a little too much, so first thing was I milled just a smidge (that's a technical term) off the tip:

nichols20-052.jpg


I couldn't actually find my Prussian Blue- I'd put it somewhere safe, I guess :D - so I tried a red Marks-A-Lot instead:

nichols20-050.jpg


Not much contact yet...

nichols20-053.jpg


So another very slight adjustment and another skim cut.

nichols20-051.jpg


After a few more tries, I got what I thought was pretty darn close to spot on...

nichols20-054.jpg


And then milled the back face so it could be fitted into the saddle gap.

nichols20-055.jpg


I got the width what I thought was right on, but I'd also left the thickness a tad big. I shaved that down lightly in the mill, then finished it off with a few passes over both sides in the surface grinder.

nichols20-056.jpg


Note how even careful mill work still doesn't necessarily produce a true and flat finish. (That spot's only about a thou low, and likely because the bar was a lot wider than the vise jaws.)

nichols20-057.jpg


A nearly perfect fit. Or so I thought.

nichols20-058.jpg


Slide it in place, mark the bolt holes with a centering punch...

nichols20-059.jpg


Then drill and tap all the appropriate holes.

nichols20-060.jpg


And finally bolt 'er in place proper for final fitting. I'd hoped it was a little closer, but turns out I still had an 0.008" gap:

nichols20-061.jpg


TBC, natcher'ly :)

Doc.
 
I find it questionable if all that looseness was from grinding, seems like a huge amount of slack. What was it like before you sent it off?

-Very sloppy. You could still see factory scraping on the end thirds of the ways, but the middle third was worn at least 20 thou hollow per side on the middle third.

I'm sure they had to grind both angled and flat faces, quite a bit, and stacking a considerable amount of removal on four faces, all added up to a pretty big gap.

Doc.
 
You have enough room in that gap to use a two-piece adjustable gib system.

The front gib is similar to what you have now, only about half as wide, with a slight taper along the back side. The “push” gib fits behind it, has a matching taper that runs against the front gib.

Depending on how far the push gib is pushed into the gap determines the pressure of the front gib to the dovetail.

Then it’s just a matter of figuring out how to lock the two in place.

Often you will see locking screws tapped into the ends of the gibs....or you could use the top bolts to put pressure down on both, holding in place?

Adjustability is nice....will save you a few hairs!

TooCat
 
Not shown, but I surface ground another 0.003" off the narrow face, and that seemed to get things pretty close, but I wanted it to be assembled, upright and in place before I took it any further.

So the next thing I did was milled a shallow relief in one end of the new bar, as Nichols' "way lock" is simply clamping one end of the bar against the matching dovetail.

nichols20-062.jpg


I then simply scribed the other end and milled that face lightly to length.

nichols20-063.jpg


Then with a little lube and everything snugged, it felt good and I was getting ready to put it up on the knee, but remembered I'd forgotten something:

nichols20-064.jpg


For those not familiar with the Nichols, these things are generally factory machines, doing repetitive cuts all day. As such, they're usually set up with a lever to move the table, rather than a handwheel and screw.

This one's a "toolroom" model, and so had both the screw and the option for lever operation.

Now, in order to swap back and forth, the leadscrew nut is only half a nut, and can be unbolted and simply lowered away from the leadscrew, for when you want to use the lever. And because of that, the leadscrew runs in a closely-fitted channel on the underside of the table, so that when you're turning the screw, it doesn't try to "climb out" of the nut.

This position didn't change- the end caps that locate the screw of course haven't changed, but thanks to the rather radical change in the dovetail dimensions, the matching channel in the saddle is now roughly .100" outboard. The screw doesn't fit.

nichols20-065.jpg


So, pop that puppy back off of there, set it up on one of the other mills and indicate it square.

nichols20-066.jpg


Then locate and mill additional clearance with a 7/8" ball-end, about 0.100" outboard of the original channel- this part is simply clearance, and doesn't affect the location or support of the screw at all.

nichols20-067.jpg


Try it all again, and it fits perfectly.

nichols20-068.jpg


However, the "half nut" does sit in a small semi-precise socket, and this was very tricky to measure accurately. I gave it my best, set the saddle back up in the mill, and used a boring head to mill out a new semicircular recess, again, slightly outboard of the original.

nichols20-069.jpg


Success! A touch sloppier than I was hoping for, but it fits and works.

nichols20-070.jpg


Last bit is to realign the mounting bolt hole:

nichols20-071.jpg


Which, since it was already slightly oversize, I just needed to slot it slightly.

nichols20-072.jpg


TBC, sho'nuff. :D

Doc.
 
Now, one other quirk of the Nichols, is that there's a grease zerk for the half nut, but it's mounted on the saddle casting. The grease passes through a passage in the casting and through a hole in the nut to get the grease to the threads.

Well, as I said, things were now a little sloppier than I'd hoped for, thanks to imperfect measuring of a tricky setup, and I didn't want the grease just filling empty cavities on the underside of the saddle.

So in a funky setup you'll never see in any textbook, I milled a recess over the oil hole in the back of the halfnut, rocking it slightly and taking small skim cuts, to form a curved pocket.

nichols20-074.jpg


That holds a thick-ish O-ring which also compensates for the misalignment to the original grease port.

nichols20-075.jpg


It's by no means the best setup, but it really just needs to guide unpressurized grease. Not the kind of thing I'd brag about in a resume`, but it gets the job done. :D

Now, one other aspect to this halfnut, which has bugged me since I made it, is I can't actually fully bolt it down.

If I get very close to fully snugged, everything's fine. But the last sixth turn or so to "tight", basically locks the screw solid. And I have no idea why. Everything is as square and true as I can measure, the nut was made square, I've tried using thin shims at different places to get the nut to cock one way or the other (or rather, in an attempt to compensate for such misalignment, if it exists) and so on.

More baffling, is thanks to my mismeasurment, I can now raise and lower the nut into alignment with the screw, probably by about 20 thou. And even retracted all the way- which should presumably add some 20 thou of clearance to the nut- it still locks up in that last smidge of a turn on the bolt.

I've stared that that thing and tried different fixes literally for years- when I first made the nut ten years ago, and for several hours just recently when reassembling it. It has me baffled, and I honestly have no idea how or why it's doing it.

So, we apply a Band-Aid. :D

Instead of the bolt, I cut a section of 3/8" all-thread to an appropriate length, and threw a screwdriver slot at one end.

nichols20-076.jpg


Now, with a small washer and a Nylock nut, I can adjust the tension to "just short of locked up" and not have to worry about the bolt coming loose.

nichols20-077.jpg


I'm sure at some point the nut will wear-in slightly and the issue will go away, and I can go back to a standard bolt. But in the meantime, I think this'll work just fine.

So now we're ready to plunk it on the knee and see how it handles. :D

nichols20-078.jpg


TBC, don'cha know. :D

Doc.
 
Doc, I believe you are writing the textbook on Nichols repair along with the repair /renovation tomes on the other machines you have... great work and write up as usual, Jim
 
Well, it'd be "textbook" if I'd been a little smarter about fitting the way bar, or knew how to properly scrape. (Or had the equipment thereof.)

But even though it was kind of sloppy work, I got the job done.

Doc.
 
Doc, I believe you are writing the textbook on Nichols repair along with the repair /renovation tomes on the other machines you have... great work and write up as usual, Jim


Agreed! IIRC Doc also found the modern version of the gear-motor shaft oil seal. The drip on mine keeps not being bad enough to get me to tearing the thing apart, but someday I guess :)

I have the OEM half-nut on my unit which is also the toolroom version, its a bit weird too; not that it jams the screw but the way they did the casting could lead an inattentive operator to break off one end of it while stowing the halfnut in preparation for production feed. There are 2 holes in the halfnut base, a big one for securing it in place for use, and a small one (10-32 maybe?) which lets you hang the halfnut upside down from a nearby hole in the saddle. But the halfnut casting is not full thickness around that hole so if you stow the halfnut but crank down on the screw (being a knuckledragging operator), you risk breaking off the tab which makes the halfnut impossible to secure right there on the apron- and so likely to be instantly lost. A mystery why they bothered changing the thickness around that hole, and put it on the wrong side of the part...

Made some progress this spring on a vertical mill attachment that mounts to the overarm hole- an old taiwan mill-drill head (sort-of a Clausing clone); got the motor mount and pulley assembly built- just have to fab the frame. It will be awkwardly heavy- nmtb30 spindle, still don't know how useful it will be but it does have a quill... so maybe.
 
After pondering it for a bit (remember, this all took place over several weeks) I decided I still wasn't truly happy with the dovetail fit. So I finally located my tube of Prussian Blue, and gave it a nice thick coat.

nichols20-079.jpg


And for you scrapery types, yes, I know a thinner coat would give me a more accurate "print", but in this case, I first had to figure out if I was even in the ballpark, let alone try to start splitting hairs. :D

And, as I turns out, I was in fact only in the parking lot of the ballpark.

nichols20-080.jpg


Re-reset the mill, and another skim cut.

nichols20-081.jpg


Two or three more very fiddly-close tries like that, and I finally got reasonably good contact.

nichols20-082.jpg


The problem with that was that the already-slightly-too thin bar was now about ten thou thinner still. There was, however, just a touch of slop in the bolts, so I was able to find and fit a thin shim to go on the flat face, to take up the clearance.

The 'correct' method, as noted earlier, was of course to surface-grind the mounting face, which I can still do if needed. For the time being, I liked the "adjustability" of the shims- and in this case, I had a well-used long set of feeler gauges that were already missing blades (and had some duplicates) that were ideal for the application. I could just loosen the bolts, slide the shim in, and retighten. Since they came in 0.001" increments, it was easy to find the correct one- which for the moment turned out to be an 0.017", which actually miced out at 0.0165".

So, with some shanghaie'd help, we lifted the table and saddle up and slid it into place on the knee.

nichols20-084.jpg


After that, a lot of it was simple bolt on. The beefy table stop...

nichols20-085.jpg


The right-hand table end cap, with a swoopy lip to get the coolant to drain inward toward the base...

nichols20-086.jpg


The as-yet-unrepainted Y-axis table feed screw and handwheel...

nichols20-087.jpg


And finally the never-really-properly-serviced-before table gear drive thingy.

nichols20-088.jpg


That got properly cleaned off in solvent, scrubbed and dried, buffed and brightened a bit, and then properly installed.

nichols20-089.jpg


The hole in the large round boss is for a pin spanner. The outer sleeve is turned eccentric, and you turn that with a pin spanner to set the gear-tooth engagement with the table rack.

And finally, I disassembled both axes screws, cleaned everything with solvent, and repainted both handwheels and the left-end table endcap.

nichols20-090.jpg


TBC, you betcha! :D

Doc.
 
While those parts were drying, one of the last major tasks was to reinstall the VFD. I cleaned off the Square-D housing that I'd modded and installed all those years ago, and screwed it back down in place over the no-longer-used coolant well.

nichols20-091.jpg


I've got a little foam weatherstripping on the back to keep chips from piling up in the slight gap behind it. And the control cable is a section of solid-wire CAT-5 run down from the factory buttons up at the top of the column, down the inside, and back up through the coolant well into the enclosure.

It was a simple matter of screwing the VFD back into place, and reinstalling the 220V in and 3-Ph out cables.

nichols20-092.jpg


And, with the usual rereading of the manual, head-scratching, and poking it with a stick while grunting, I got the control wires back into their proper connections, then powered up and tested!

nichols20-093.jpg


After that, it was a simple matter of screwing the outer cover back into place, and... that's about it, really.

nichols20-094.jpg


I've kind of been toying with the idea of running the power-in cable (the right-hand one) down through the chassis and in, maybe through the back of the riser base, but for the time being, this works just fine.

TBC, o'course, o'course. :D

Doc.


Back
Top