What's new
What's new

Saving a Stockbridge Shaper

DocsMachine

Titanium
Joined
Jan 8, 2005
Location
Southcentral, AK
Those of you that have been following the recent resurrection of my Saving a Springfield thread may know that I'd sent the bed of that machine off- in a roundabout way- to get it ground back to spec.

Well, the original deal on that grinding involved what was supposed to be very low cost shipping- basically a friend was towing an empty trailer to the States, to return with some other gear.

Because the shipping part was so cheap, along with the bed of the lathe, I opted to include the table and saddle of my Nichols mill (due to repetitive factory use, it was badly worn in the middle third of the table travel) and the ram and column casting of the shaper (which had considerable wear.)

Unfortunately, the original deal fell through, which forced me to either abandon everything (thus junking all three machines) or to throw money at them to get the job done and the parts returned.

The entire deal cost me a great deal of money- roughly twice what the worst-cost estimate of the original deal was supposed to.

The upshot of all this? I wound up sinking several thousand dollars into an obsolete, antique machine that I don't need, don't have the room for, and won't be able to sell. :D

I have never once been accused of being a brilliant businessman. :D

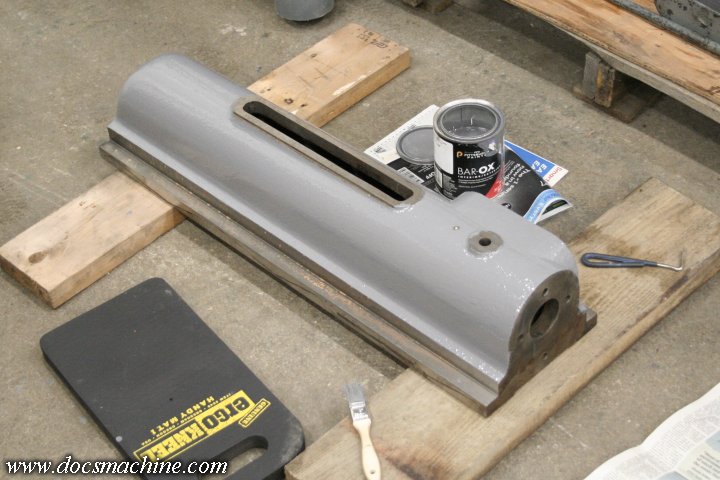
But, I'm now slowly putting the machine back together, and figured if nothing else, it'd be a fun read. :)

[cracks knuckles]

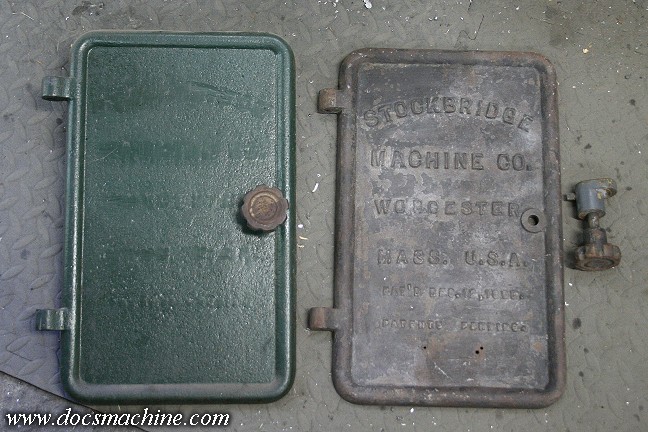
Back in early 2008 (!) I heard through the grapevine of a guy that had a full-size shaper for sale, for cheap. I posted it here, and some of you PM'ers identified it as an old Stockbridge 16" shaper, probably made around 1905. (And I found out from other sources that the company was probably closed by 1912.)

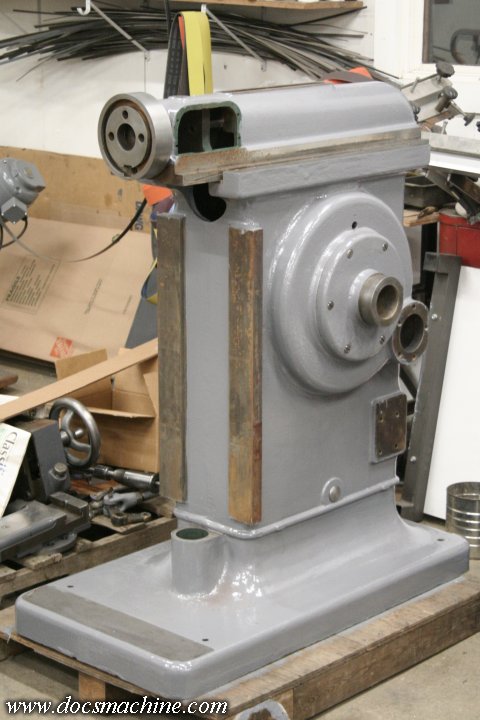
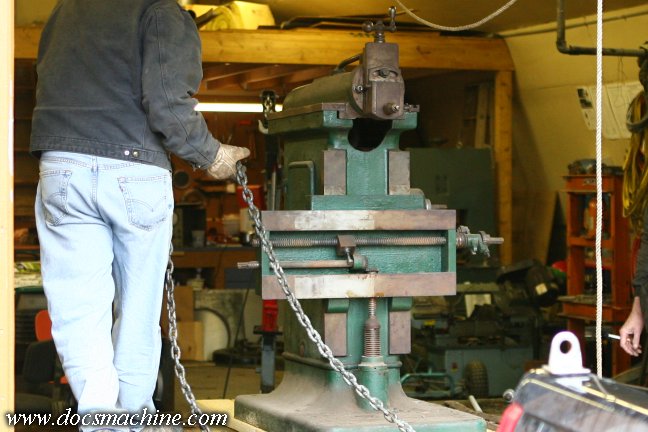
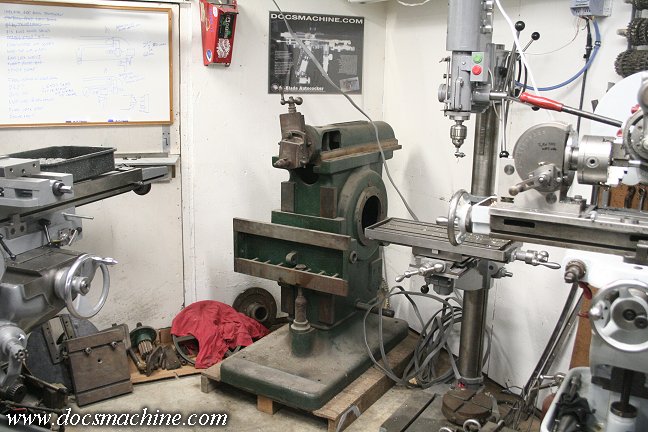
I eventually decided to buy it, as I had the time and the room back then, and, of course, a nearly-fatal case of Old Iron Disease. In June, I sorted out some transportation and hauled it home.

stockbridge001.jpg


The story I was told was that the machine had been on a Navy air station on Kodiak Island, and had been junked, probably around the time the station was handed over to the Coast Guard. Oddly enough rumor has it my Springfield lathe carried a similar tale. No proof of either, of course, but still interesting.

stockbridge002.jpg


stockbridge003.jpg


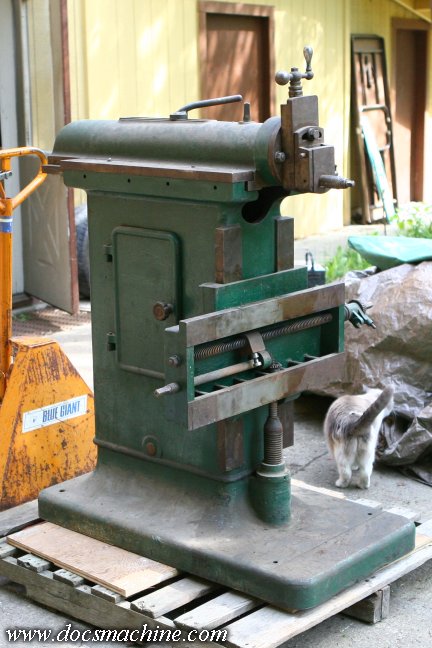
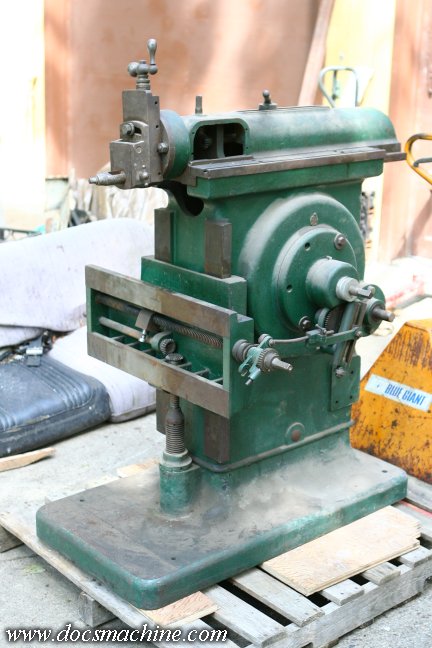
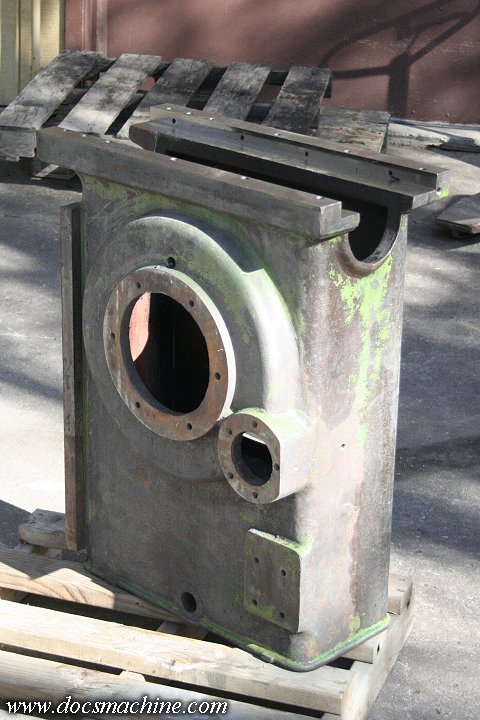
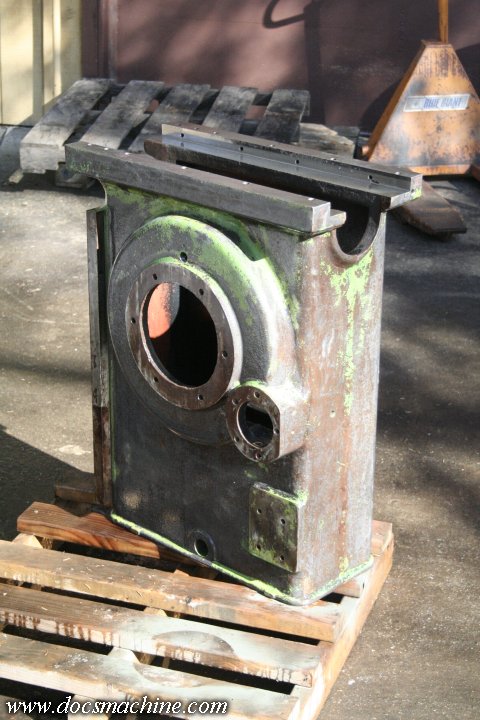
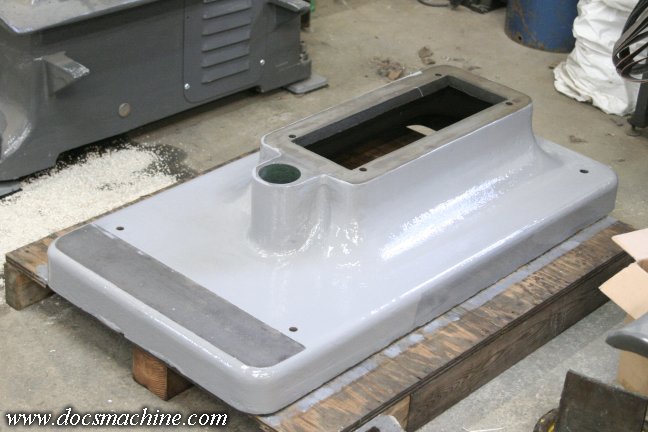
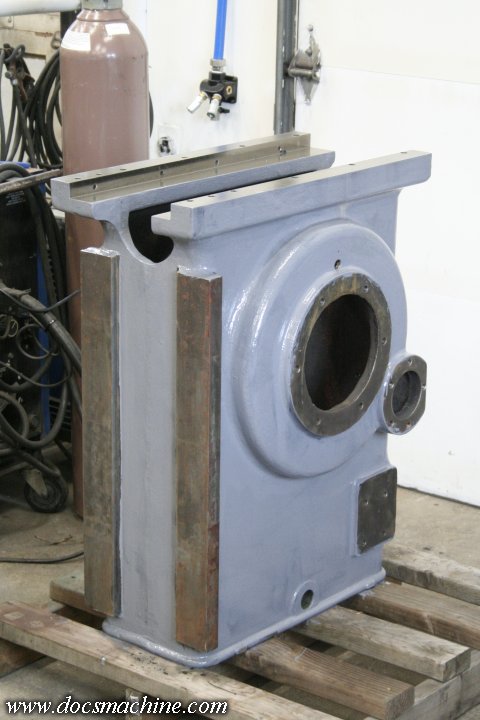
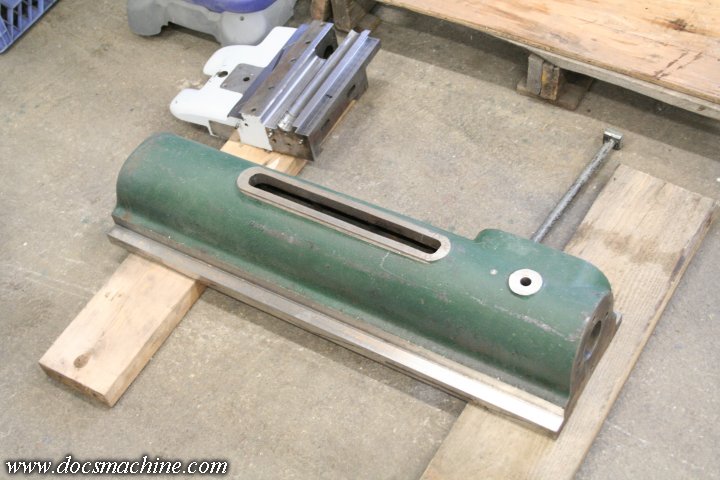
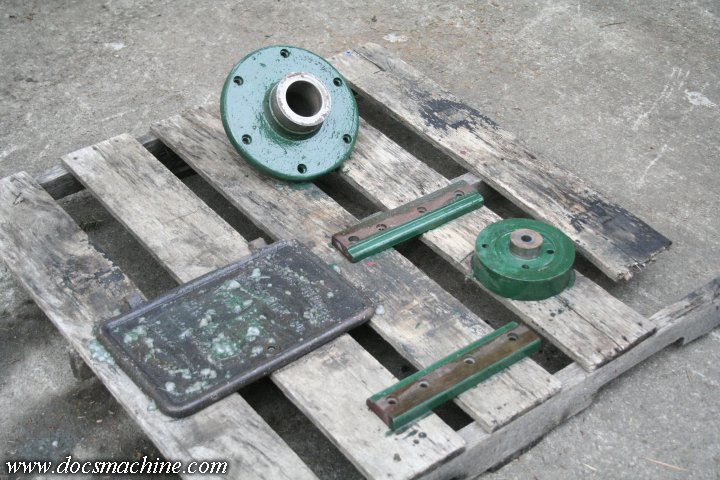
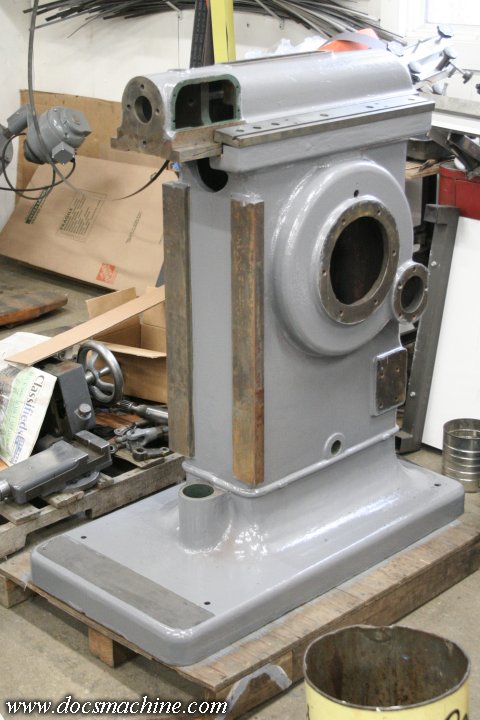
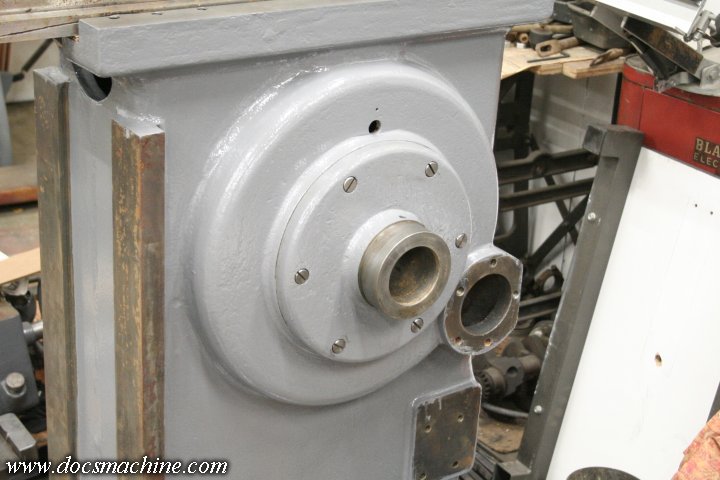
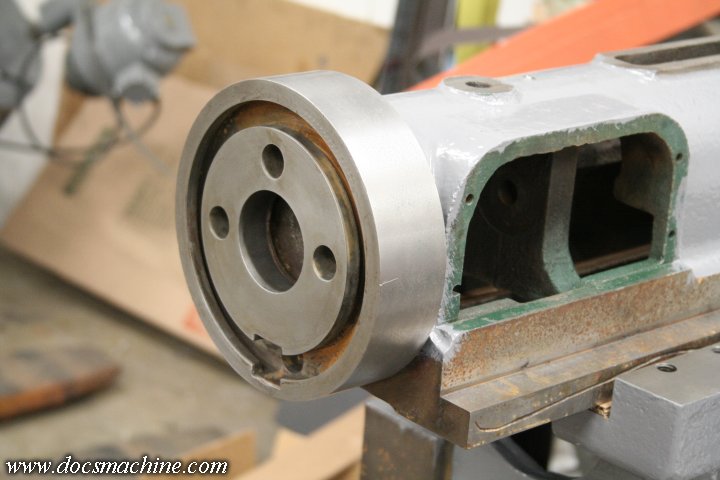
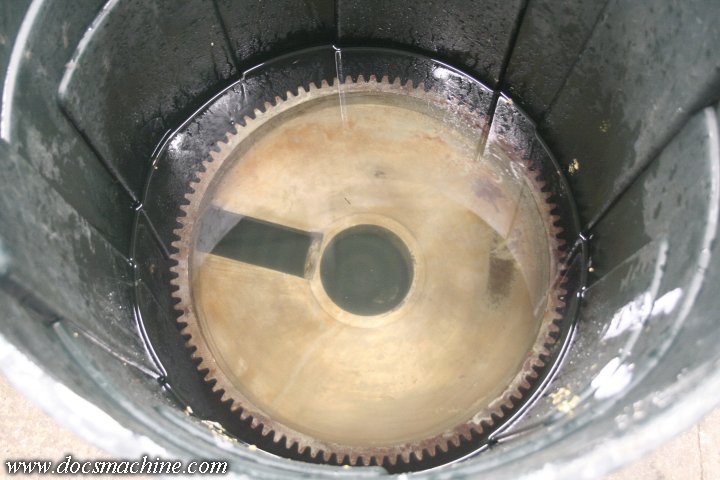
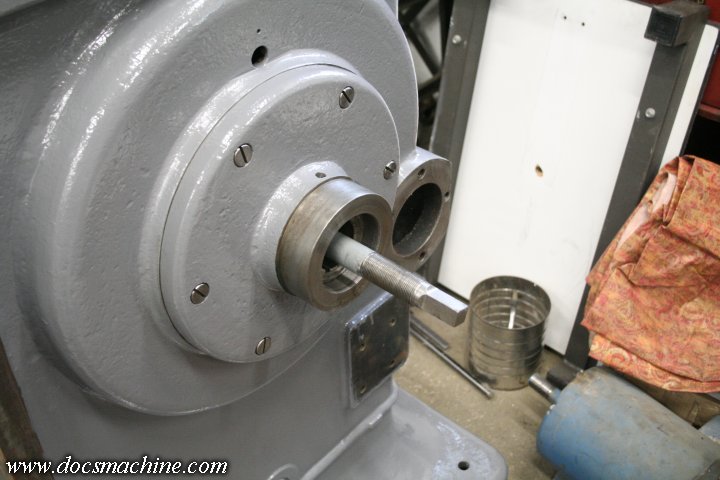
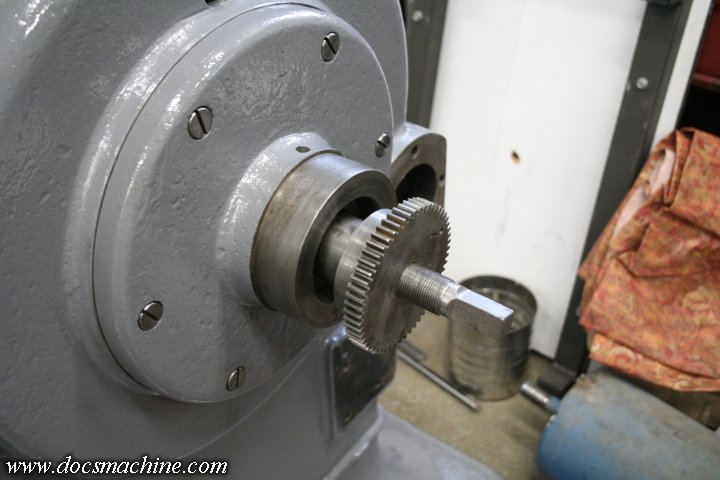
The machine was complete (the table had been removed, but was included) save for any sort of a drive, having originally been lineshaft-powered.

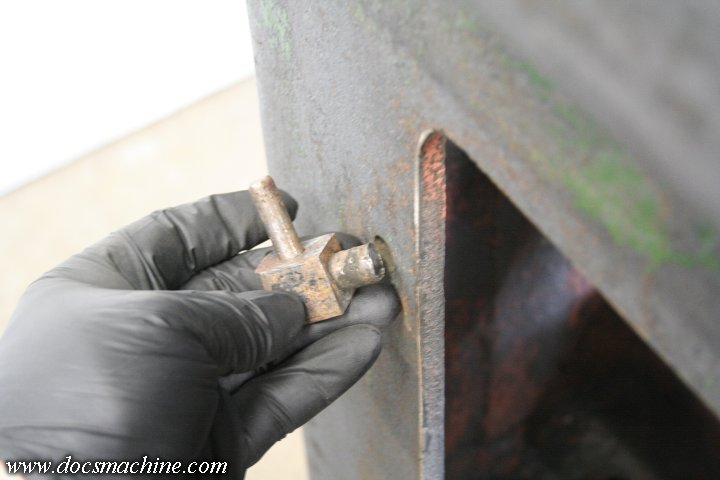
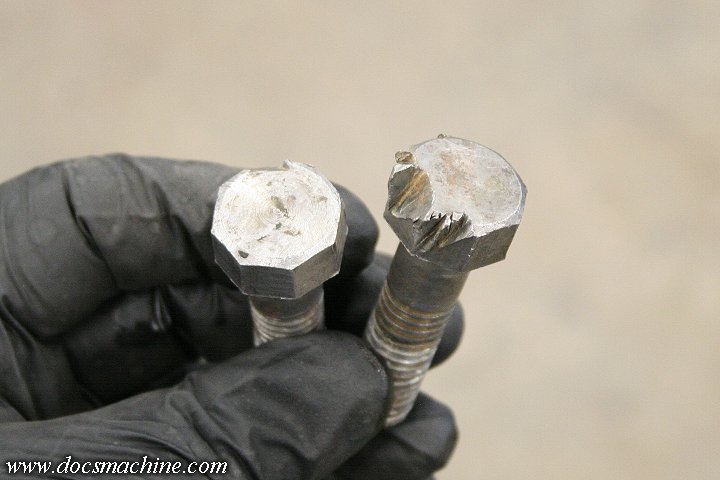
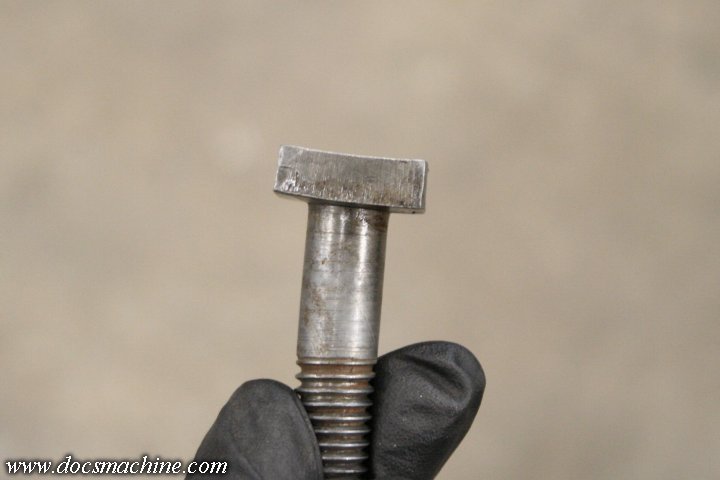
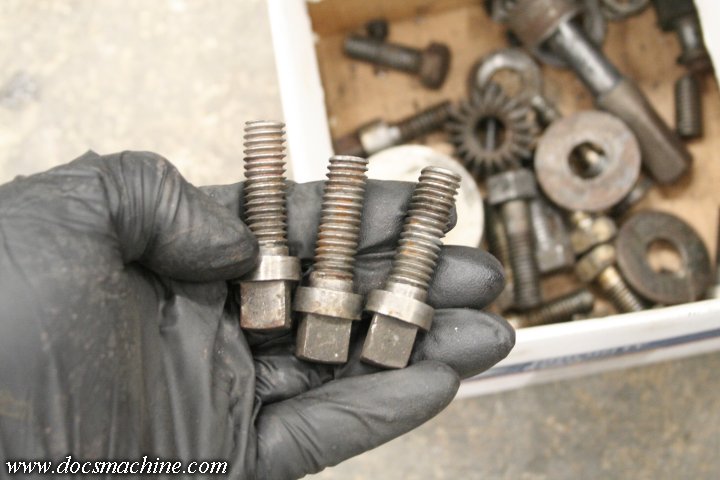
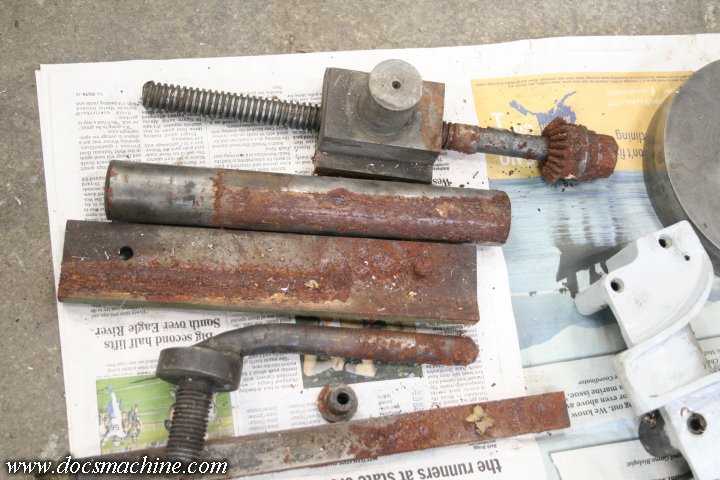
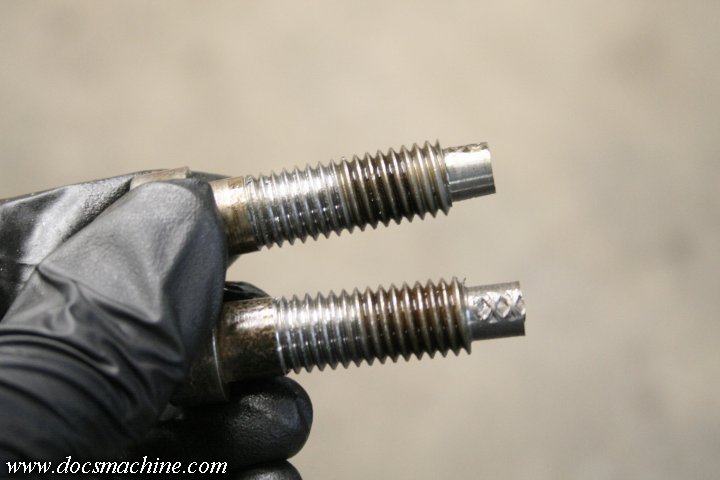
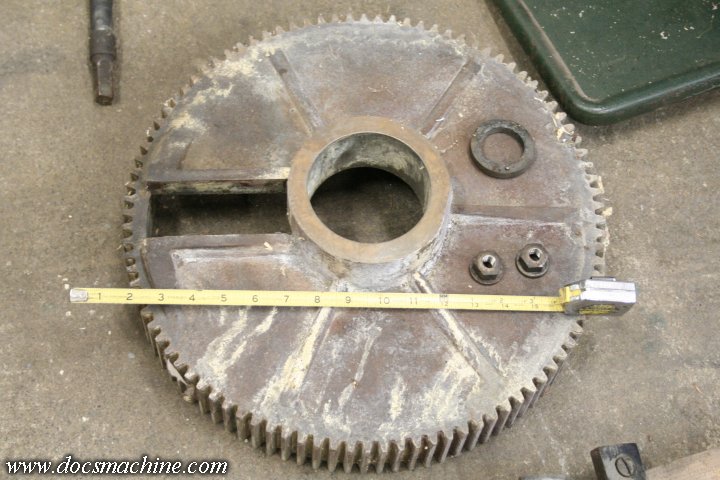
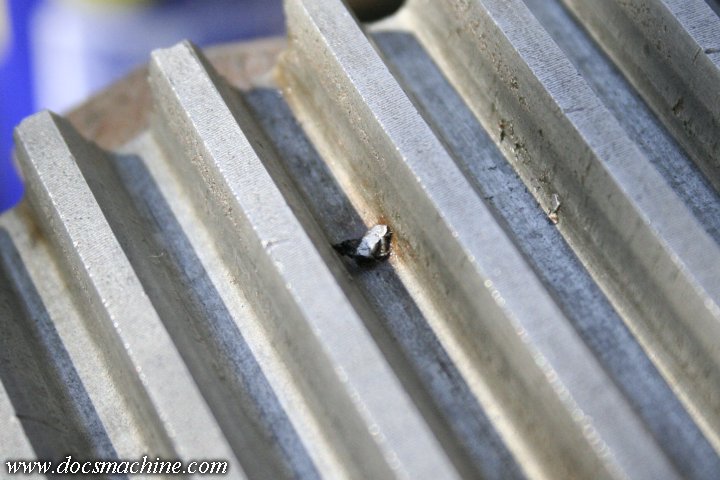
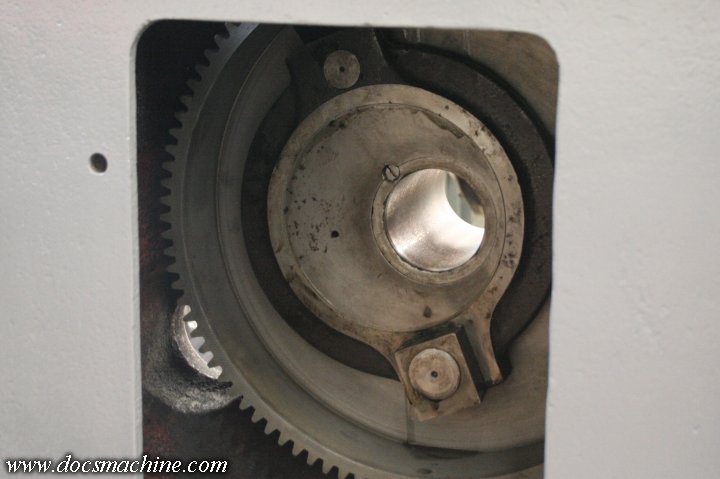
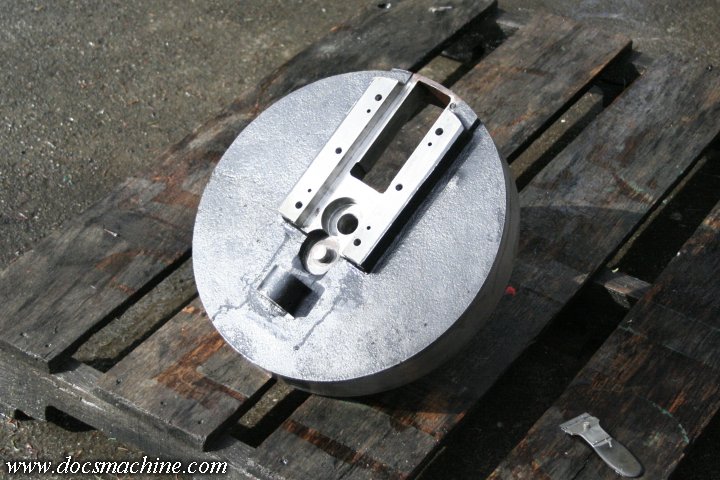
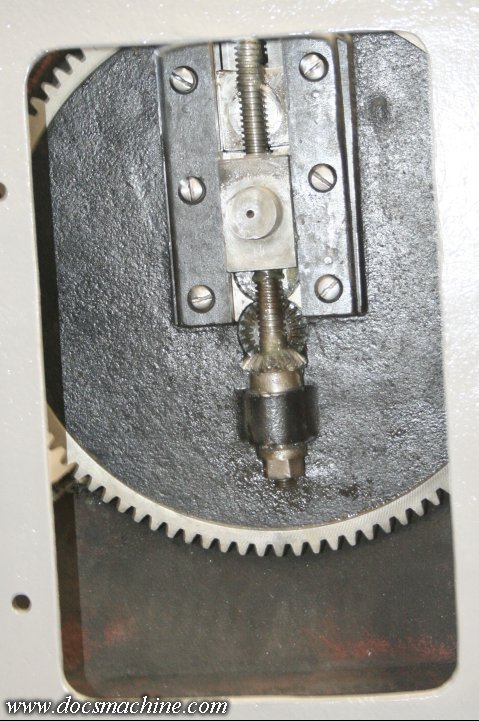
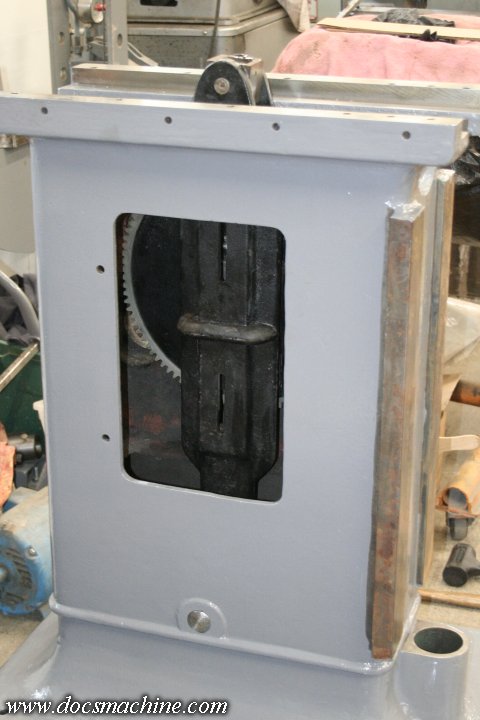
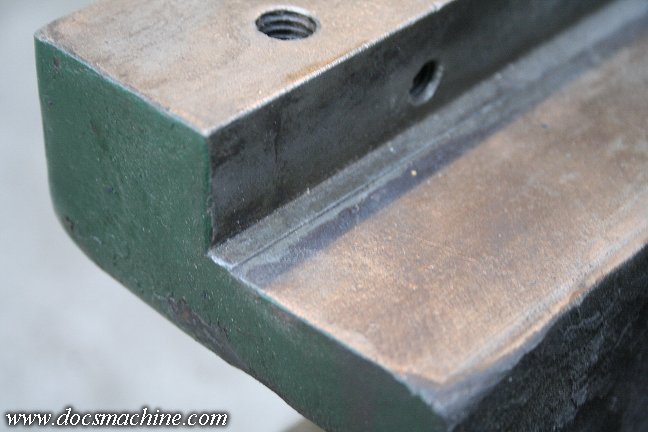
It had been "rebuilt" by some ham-handed previous owner, but never run since said rebuilding- fortunately, as the only "lubrication" I found was some copper never-seize.

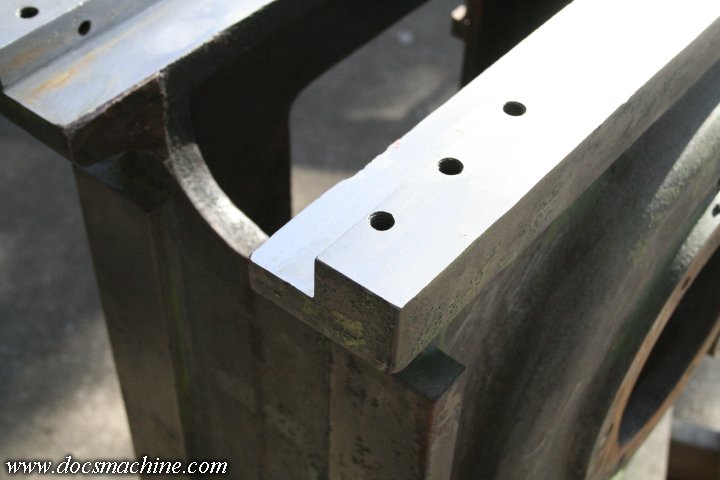
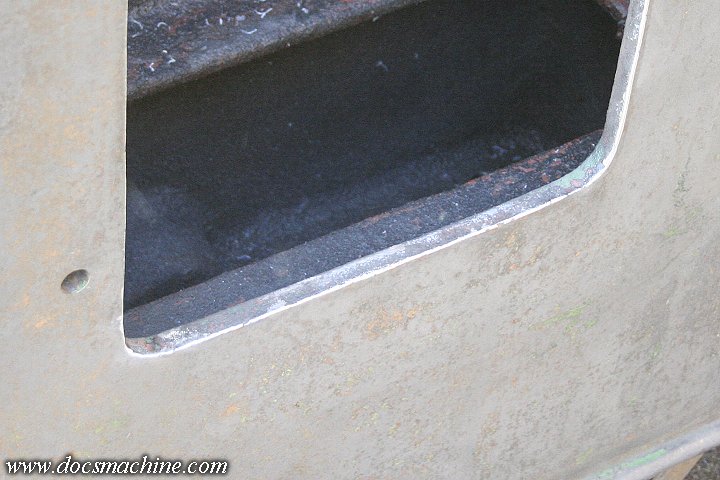
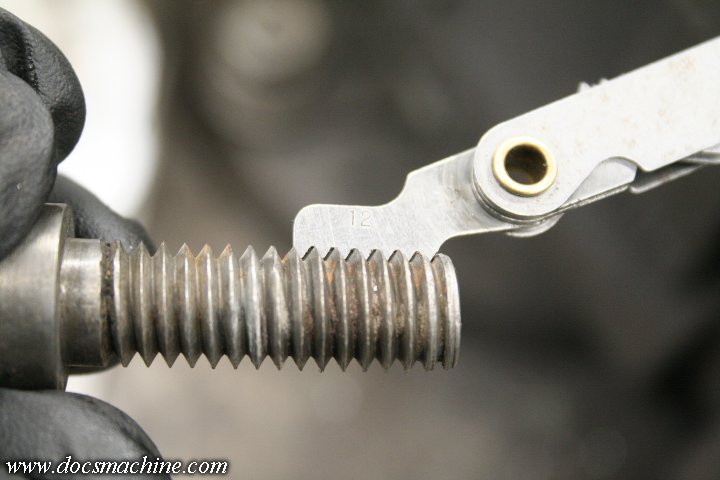
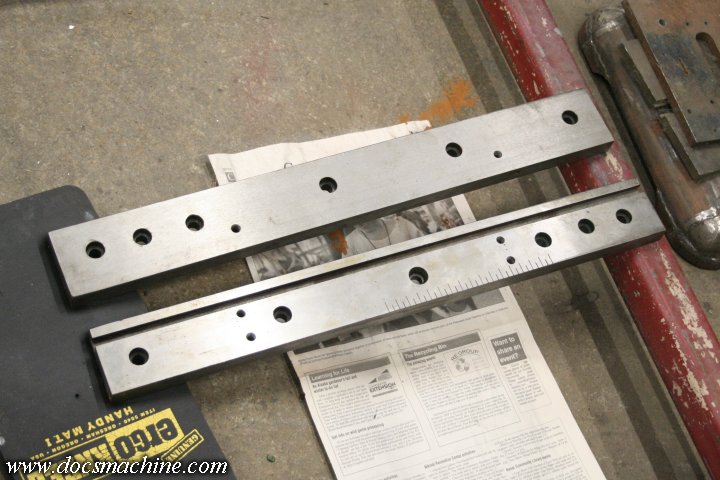
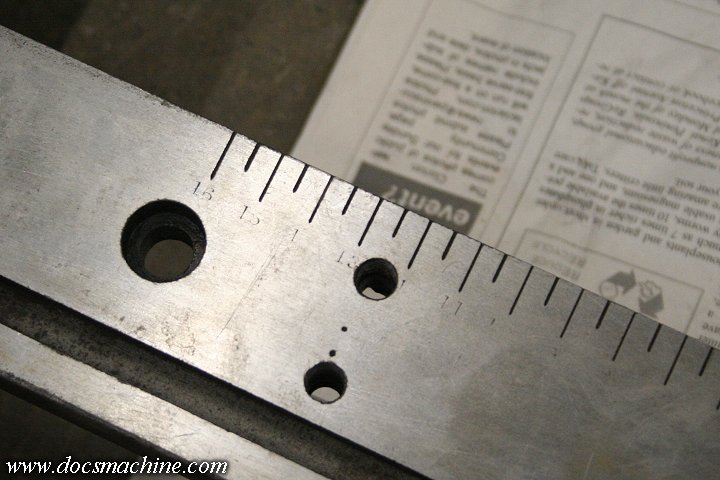
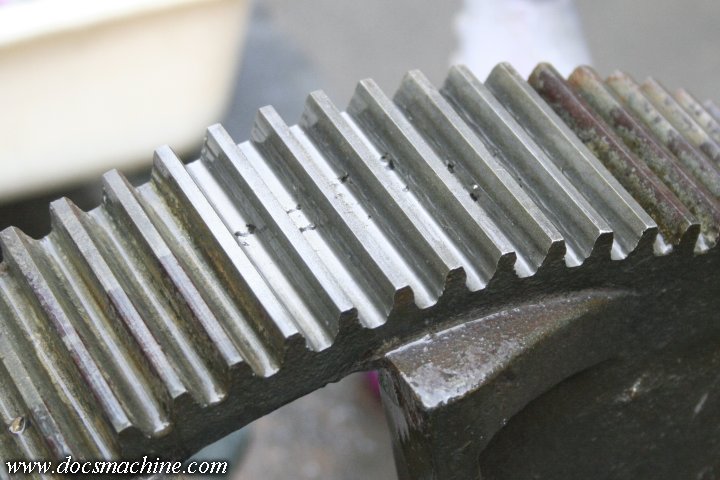
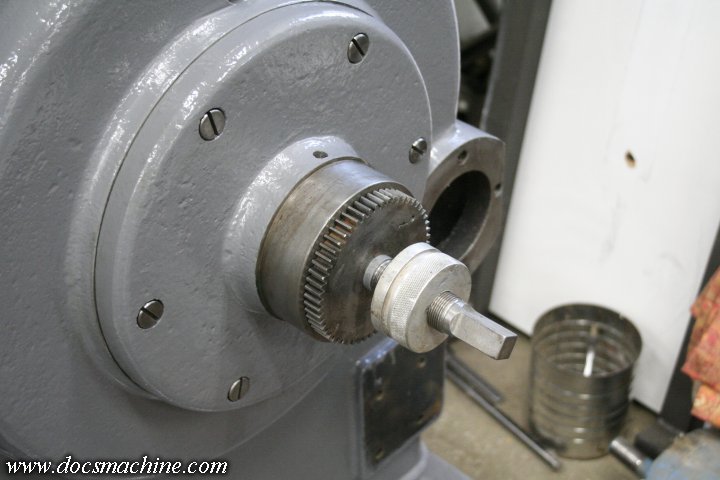
It did, however, have some fairly considerable wear:

stockbridge010.jpg


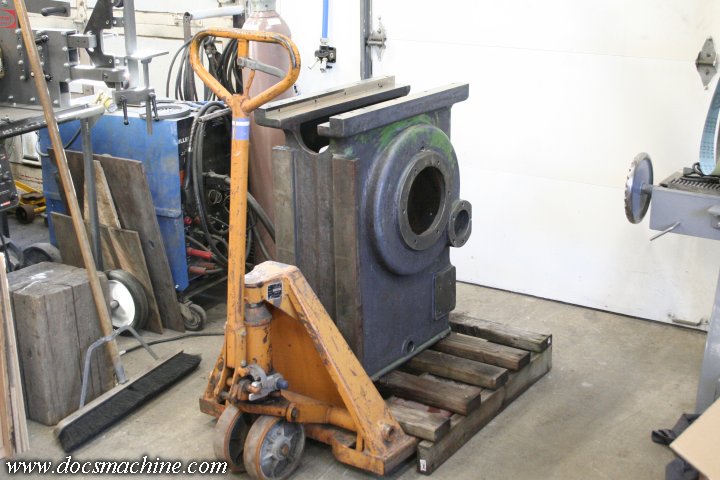
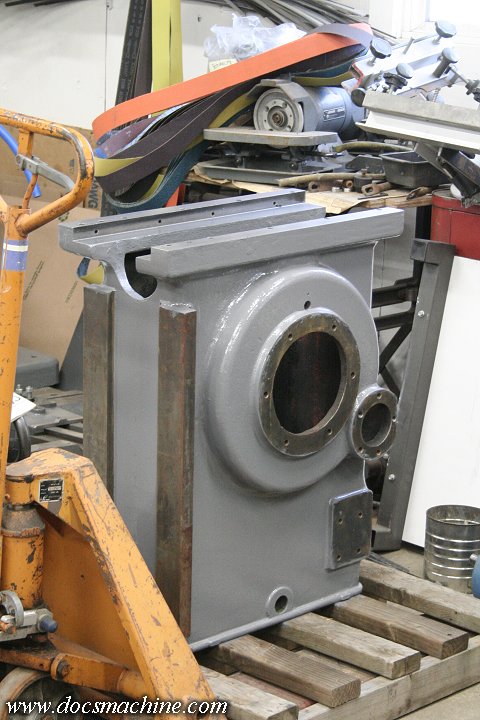
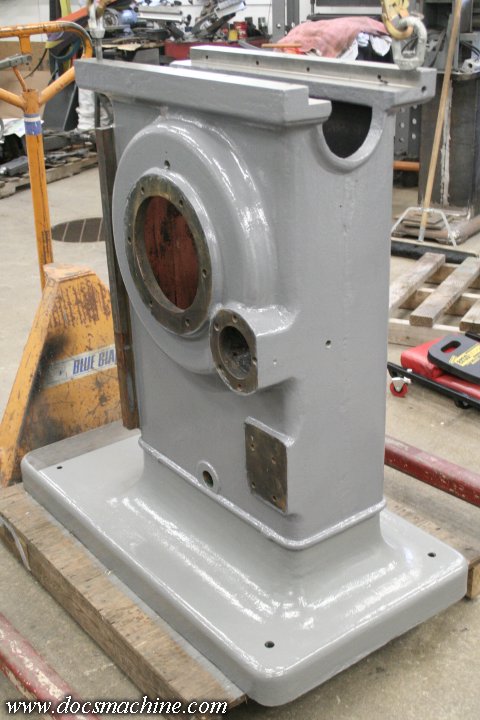
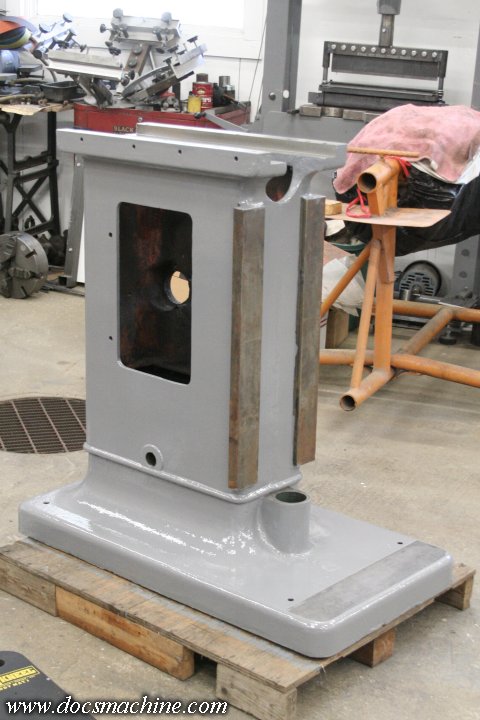
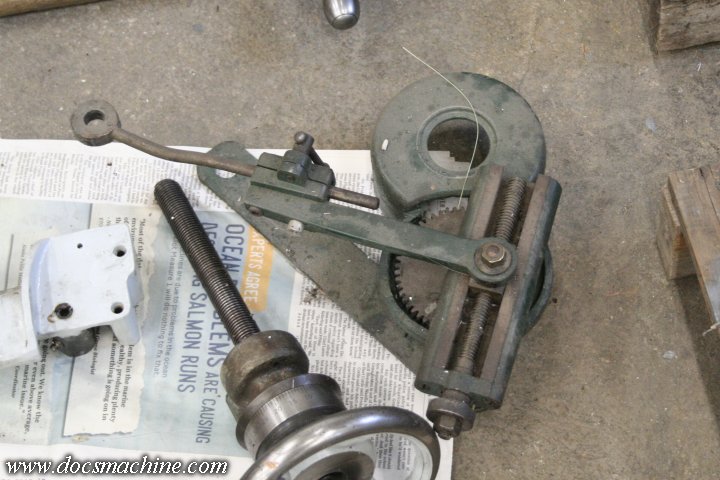
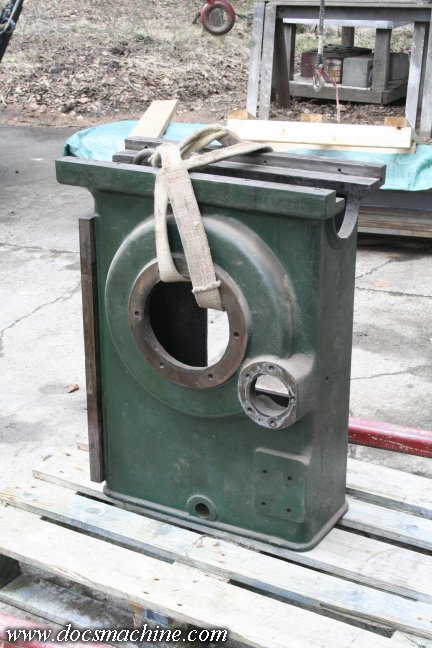
I hosed some of the grime off, partially dismantled it and surveyed what I'd need to do to restore it... and then shoved it in the corner in leiu of more... shall we say, 'profitable' ventures. :D

stockbridge013.jpg


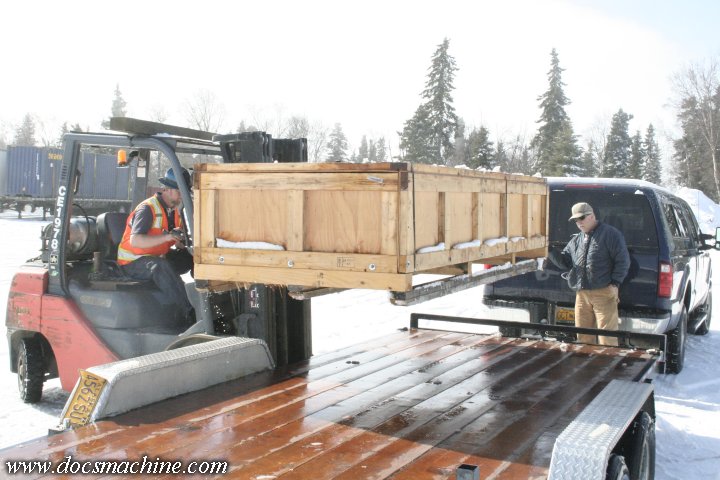
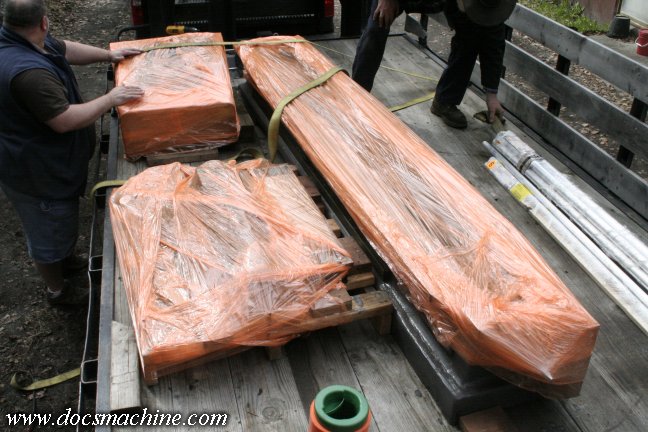
Fast-forward a decade (!) and in early 2018, the aforementioned trip to the States was brewing, so I dismantled the three machines, including the shaper...

stockbridge015.jpg


And sent it all off on it's merry way.

stockbridge016.jpg


More to come... :)

Doc.
 
Last edited:
That was basically my motivation. Having a soft spot in my head for old machines, I figured this thing had by that point survived over a century. And simply put, I didn't want to be the one to finally scrap it.

No, it wasn't the smartest decision I ever made, and even once fully rebuilt, there's virtually zero local interest in these, meaning I likely won't even be able to give it away.

But my estate sale is going to be epic. :D

Anyway, as hinted at in the first post, the original deal went south almost immediately, and the parts wound up gone for nearly two years. After some... unpleasantness, I had 'em shipped to Schaffer in LA, who completed the work quickly and very well.

All the pieces finally made it back to me at the beginning of the month, one month short of two years later.

stockbridge017.jpg


It's worth noting that this shaper alone contributed to a pretty fair percentage of the total cost of the fiasco. Since it took the most grinding on the most faces (six on the ram, six on the column, and two each on the top way bars) it probably contributed to roughly half the total grinding costs, and due to the bulk of it, it more than doubled the size of the crate, which also jacked up the shipping costs considerably.

Again, NOT a brilliant businessman. :D

Anyway, the crate arrived relatively safe and sound. It'd had a hard ride, and the crate had broken, and the shaper column had knocked a slight ding in the freshly-ground rear way of the lathe bed (which I was able to stone out) but I finally had my parts back!

stockbridge018.jpg


They'd had to take considerable metal off to get everything back to square and true- I think the worst face was about 0.035"- but everything's still nice and thick.

stockbridge019.jpg


One thing I didn't realize was that Schaffer apparently does very little post-operation cleanup. I'd run the lathe bed in and gotten it up on the bases before I realized it wasn't just a thin layer of preservative oil, it was covered in grinding schmutz.

That forced me to clean up the bed basically by hand, in place, with rags and solvent, but lesson learned, I decided to clean up the shaper column before bringing it in.

First I ran a flap wheel lightly around the door opening, which was still kind of rough and had some slight flash...

stockbridge020.jpg


Then hosed it down with Purple Power, scrubbed and pressure-washed it.

stockbridge021.jpg


Then I blew it off as best I could with compressed air, and brought 'er inside to dry.

stockbridge022.jpg


More to come.

Doc.
 
Now, while the main parts were off on walkabout, I'd planned to do a lot of the preliminary cleanup to some of the other parts, so that once the ground bits were back, reassembly would be relatively quick.

Naturally, all I got done was the base. :D

Grungy original...

stockbridge023.jpg


Paint that didn't "strip" like normal paint, and with an underlying layer of some filler that resembled cold tar (possible japanning?)

stockbridge024.jpg


Cleaned and washed...

stockbridge025.jpg


And painted.

stockbridge026.jpg


Typical boring Machine Grey, using an Alkyd Enamel that experience has shown holds up very well in a machine shop environment.

Doc.
 
I think it was money well spent as it wasn't my money, of course. Anyway, investing in a shaper is always a good idea as shapers have such a high return on investment. Or maybe no return, I can't remember. Joking aside, I've been a big fan of your lathe thread and I'm happy to see the shaper progress as well.
 
Now, one of the odd things about this shaper, when I got it, was that some previous owner had, for some unfathomable reason, ground the name off the door.

stockbridge027.jpg


I have no idea why, and cannot even guess, apart from the possibility he thought he was "filing the serial numbers off", or something. :D

Anyway, several years later, as I was carefully aging it in the corner, by blind luck I ran across another PM'er who was scrapping a 24" Stockbridge. He still had the door, and by further luck, said door was exactly the same size and shape as mine.

stockbridge028.jpg


The only difference being the hinge holes had been drilled to a smaller size.

stockbridge029.jpg


And speaking of hinges, when I got this one, the lower hinge-pin thing was bolted on, and easily removed, while the upper one had been staked in place. As I was about to paint the casting, I licked it with an angle grinder and tapped it out with a punch.

stockbridge030.jpg


I'll do the same thing as the lower one- drill and tap it for a bolt from the inside, to reattach it.

After that, it was time for the first coat of enamel.

stockbridge031.jpg


Still more to come. :D

Doc.
 
Got a second coat on the column...

stockbridge032.jpg


And once it was dry, it was time to get 'er mounted to the base, which had been painted roughly a year before. So I dug out my now-dusty box of hardware and started rooting through. I found some of the bolts that held the base that held the column to the base, and was reminded of something odd about them.

Two of them were octagonal.

stockbridge033.jpg


Now, I honestly have no idea if those are original or not. The machine had been "rebuilt" at least once, supposedly after being rescued from a trash dump. I don't know how far apart that person took it, or what condition it was in when he found it, etc. Suffice to say I pulled these two bolts out of the base of this shaper.

They're machined, not upset, and both show damage from a chisel, but in the direction of trying to tighten them, not loosen. Don't know what the story is there.

Either way, I only had the two, and the one is badly damaged, so I replaced them with some fresh standard bolts. I'll keep these for curios.

As I was rooting through the box, I also noticed something about the T-bolts that held the cutter head on:

stockbridge034.jpg


I don't recall seeing any damage to the ram or clapper assembly, but clearly there was some stress on it at some point. Both look that way.

And then, I sorted out these, which I determined later hold the flat way bars to the "knee" assembly. I need eight and only have five. Each one also has a center drilled in the threaded end, indicating they were likely hand-turned, not machine made (not that there was probably much automatic screw turning in 1905. :D )

stockbridge035.jpg


But a closer look...

stockbridge036.jpg


Yep. They're 1/2"-12, not 1/2"-13. They screw into the knee assembly, so those threaded holes are factory. Which is odd, because the holes drilled into the bottom of the column casting- again factory holes- are in fact 1/2"-13. I bought brand-new hardware-store bolts for those.

Again, not sure the story here. Given that Stockbridge wasn't a huge manufacturer, it may very well have been a case of "use whatever's available".

Anyway, I got the two parts bolted together, and noticed yet another little issue. The colors don't match.

stockbridge037.jpg


Now, over the years I've been using the same brand of alkyd enamel for these, that a local shop custom-mixes for me (that is, they stock base tints, and mix it on a computerized scale to a precise formula.) They've been very good about color matching- a new mix matches very well with a batch from a few years ago.

But in this case, the base ended up a shade or so lighter- and since I know from experience that this stuff darkens a touch when it fully cures, the freshly-painted column is only going to get slightly darker still over the year-plus-old base.

Well, the solution to that is simple: Give everything a third coat. :D

stockbridge038.jpg


And while I had the paint out, I scrubbed and pressure-washed the ram...

stockbridge039.jpg


And gave it two coats as well.

stockbridge040.jpg


And that catches us up to today. (Or last weekend, anyway. :D ) Further progress will be catch as catch can, as I have client work to do as well, and of course the next week or two is going to be on the Springfield.

Stand by. :)

Doc.
 
First up, a bit about the bolts. Getting back to those 1/2"-12 bolts? Pretty sure those were shopmade at some point, and were made sloppy and loose, because the threaded holes are, in fact, 1/2"-13.

So what that leaves is eight points on the "knee" ways, and six on the bullgear support flange, which are all counterbored, as if to take an Allen-head bolt rather than a standard hex bolt.

Well, the two top way bars were held on by slotted "cheesehead" bolts...

cheese1.jpg


Which also fit perfectly into both the bullgear support and knee way bars, so I'm presuming those were in use all over the machine. I did not have bolts for all of those spots, and after looking around at places like McMaster, Fastenal and even eBay, cheeseheads that big are actually pretty hard to find.

I lucked out on a fistful of original-style bolts on eBay, at less than a buck a bolt. The photos show heads pretty much identical to the ones I have, they're just longer and not fully threaded- both of which I should be able to take care of.

Anyway, while waiting on those, the next part to go on will be the bullgear support- a big round flange on the righthand side. Pretty much all the internals ride on this, so it's gotta go on next.

First up, I pop off the incorrect "grease zerk" fitting on the spindle bore.

stockbridge041.jpg


As I've mentioned, someone at some point in the past "rebuilt" this machine, but never ran it, and in doing so, he made a lot of rather ham-handed changes. This shaper, like most machines of it's vintage, does not- or rather, did not originally- contain a single rolling-element bearing. The entire works is iron-on-iron, I'm not sure there's even any babbit anywhere.

Now, luckily, unlike the upper ram ways, the inner "spindle" assembly is actually in very, very good shape. And to keep it that way, I'll be replacing the "zerk" with either a big Gits cup, or possibly a 'sight glass' type oiler. The ram ways will likely get two per side or so, as well.

Now, run that part and a couple others outside, and slather 'em with now-verboten methylene chloride paint stripper...

stockbridge042.jpg


Let 'em sit for a bit, and give 'em a good pressure-wash.

stockbridge043.jpg


And, with some of the gunk gone, an interesting little artifact appears: On the inside of the door, there was at some point a plate or placard of some sort, riveted on.

stockbridge044.jpg


All four rivets are still there, and the ghost of the plate can be seen in the presumably original paint, but no other trace remains of the plate itself. Any guesses as to what it was? A lubrication schedule? Speeds and feed chart?

Anyway, after that, it was time to do a little more cleanup to some of the parts...

stockbridge045.jpg


And finally give everything a quick coat of paint.

stockbridge046.jpg


As usual, everything will get a second coat tomorrow, and once fully cured, a little more cleanup and installed.

Doc.
 
Didn't get much done today to either machine project. Rounded up some help to get the saddle onto the Springfield, and while we were at it, got the ram up off the floor and temporarily stored on the column.

stockbridge047.jpg


That's the most assembled that thing's been in two years. :D

Also took a moment to wipe the grinding schmutz off the top ways, and scuffed off the tarnished, unground sides to brighten things up a bit.

stockbridge048.jpg


While I'm glad they gave the tops a light grind to smooth and brighten 'em up (and to square things up to grind the other, more important side) but it's kind of a pity we lost some of the ram markings:

stockbridge049.jpg


Those marks correspond with a pointer- absent on my machine- that helps you set that ram stroke length. Half inch increments up to 16".

Anybody know where I might be able to find a set of number stamps that matches the old style? I've been looking on eBay for a while (off and on) as I'll be needing to restamp the dials on the big lathe too. I need pretty close to 5/32" to match the Stockbridge, but the lathe (since I don't have to overstamp an existing number) can be 3/16". (1/4" would probably be too big, and 1/8" too small.)

Does anyone make modern stamps in the old "font"?

And finally, a bit of bad news. As I was digging out some of the parts that had been laying in a corner of the machine room, I discovered that, for some reason, dear departed previous kitty had decided to pee on some of them.

stockbridge050.jpg


That rusted several parts very badly, so I went to get some fresh vinegar and they're all soaking now. (I wish somebody local would start carrying Evap-O-Rust...)

Hopefully that'll clean 'em up reasonably well.

Doc.
 
Evaporust is on Amazon...:)

I can appreciate the old american iron "syndrome"- with SB and Sheldon lathes, and an old Steptoe horizontal that had been converted to vertical.

I've been looking longingly at this Stockbridge that's local- but...
I don't really need a shaper, especially a beast like this...
I don't have room for it.
I don't have time for it.
I don't have the $$ to put into it.

It's only the "I don't have room for it" that's kept me from going to look at it, lol...

14" METAL Stockbridge shaper (1916 ?) | eBay
 
As much as I like shapers- I'm a nut for any old iron- if I'm honest I can't recommend them to anyone, unless you have the room and the time for a "just for fun" toy.

Yes, there's some good uses for them out there, but for this one, for me? Once it's done, I'll have several thousand dollars and quite a bit of time in it, but if I work at it, I'll likely use it less than once a year.

As for that eBay shaper, it's interesting that there's some definite stylistic Stockbridge points (the bottom base casting, the "knee" way plates, the square ways, the table shape and size, the feed mechanism, etc.) the side door is clearly different (mine's rectangular) and says "Niles Bement Pond" on it.

Anybody know the order of succession, if there is one? Did NBP buy out Stockbridge? I seem to recall from one of the other posts (or an article, etc.) that Stockbridge was out of business by 1912. If that one IS in fact a 1916, did Pond buy SB out, redesign the machine a little and start selling it again?

Doc.
 
The rusty parts cleaned up reasonably well, though I didn't really get any pictures of the process. No significant damage.

But, the paint was dry on the bullgear support, so it was time to bolt that puppy on. Problem there was I still needed more "cheesehead" bolts.

I'd found a batch of 17 on eBay that were the right thread and an identical head, but not threaded all the way, and about 3/8" too long. I figured it was either a case of turning the whole dang thing from scratch, or a few minutes lathe work to mod these. And hey, for $16 and free shipping, it sure couldn't hurt to try.

[Jeremy Clarkson] Or could it?

Well, I finally got a method worked out, but it cost me most of a day, three junked bolts and a LOT of frustration to get there.

First pull the top jaws off the chuck in order to hold the bolts, and centerdrill the threaded end. Then, using a collet and a live center support, turn a flat on the end just below the thread root.

stockbridge051.jpg


Now, very carefully pick up the thread, and run about another 1/2" of partial threads up the shank.

stockbridge052.jpg


I say partial, as these bolts are surprisingly tough, and the collet couldn't hold them securely. If I tried to cut too deep- and in this case I was shoving the tool straight in, rather than at 30 degrees- it'd dig in and move the bolt in the collet. Which of course forced me to re-set and pick up the threads again.

But anyway, after trashing a couple, I came up with a solution. screw the bolt into a threading die, and clamp the turned end hard in a vise.

stockbridge053.jpg


Then use a die handle to turn the die up, to clean up the partial threads. Heavy sulfurized cutting oil helps a load, here.

stockbridge054.jpg


And yes, I tried running the die straight in, without threading, first. Kinda worked, but took "I'm about to break this die handle" amounts of force, and holding on to it in the vise started becoming a major problem.

But, that gave us a nice, clean thread.

stockbridge055.jpg


Note the distortion on the turned end, from the vise. That's why I turned the end- if I hadn't, there wouldn't have been any way to unscrew the bolt, without clamping (and thus marring) the head.

Then it's simply back in the lathe to face and chamfer the ends to finish the job.

stockbridge056.jpg


And viola`, it's just that simple.

stockbridge057.jpg


I'm just glad I only had to do six for now. I'll have to do a couple more later, but this let me put the bullgear support on. That just needed a little cleanup of paint drips and surface rust from the wash cycle...

stockbridge058.jpg


And with the freshly-modded and buffed screws, bolts right into place.

stockbridge059.jpg


I also cleaned up the clapper support ring and slipped it temporarily in place (mostly just to keep it off the floor. )

stockbridge060.jpg


And there she is so far:

stockbridge061.jpg


Also note the lower crank bar pivot. That was one of the rusty bits that got cleaned up, and after I'd buffed it a bit, I slipped it in place, again, basically just for storage.

More to come!

Doc.
 
Okay, today was very productive. With the bullgear support in place, the next item in was of course the bullgear itself. While some previous owner had cleaned up several rusty parts, he'd never run it after reassembly, and thus never lubed anything.

As such, several parts had acquired new rust, and that included the bullgear. When I pulled this thing apart years ago, I'd intended to electrolytically strip it, but what happened was I put my time and attention into other machines. So what I did was hit this thing with maybe Ospho, to at least stabilize it, 'til I could get back around to it.

stockbridge062.jpg


So now, I had to strip the rust AND get rid of the Ospho goop. I was thinking of going with the electrolytic, but decided to try vinegar first. But, I needed a big tub, 'cause it was a big gear, and most of the tubs I had that were big enough to fit the thing, were also long and rectangular, which would have required more vinegar than I wanted to throw at it.

After a little pondering, I emptied out my shop trash can, scrubbed it out with soap and water, and it was perfect to hold the gear and five gallons of white vinegar.

stockbridge063.jpg


I had plenty of extra, so I threw some parts from the lathe chuck in there, and let the whole mess sit overnight. Today, I hauled it out, set up some sawhorses outside, and scrubbed and rinsed the gear clean.

stockbridge064.jpg


I destroyed a brand-new wire toothbrush getting the gear teeth clean, but it was worth it.

stockbridge065.jpg


As I was cleaning, I did notice a few anomalies- there's several places on this machine where it's clear the cast parts weren't quite perfect. Minor porosity and the like, and the bullgear was no exception:

stockbridge066.jpg


Nothing structurally bad, of course, but definitely shows that Stockbridge wasn't one of the top-of-the-line makers, or used a somewhat more slipshod foundry. (Or couldn't afford high quality control, etc.)

I even found a small piece of metal embedded in one of the pores. I had to pry it out with a pick.

stockbridge067.jpg


After it was cleaned, rinsed and oiled, I oiled the support stub inside the chassis, and slid 'er into place.

stockbridge068.jpg


Now, this particular machine has what's known as a Whitworth Quick Return mechanism in the overall ram drive. It basically "speeds up" the faster return stroke, while keeping the full "power" stroke.

So the next piece was this eccentric...

stockbridge069.jpg


Which is retained to the non-rotating gear support shaft, by a heavy setscrew.

stockbridge070.jpg


Then this follower unit with two matching drive blocks slips over that. It's worth noting there's not a single roller bearing or even babbit in the entire mechanism. It's all iron-on-iron.

stockbridge071.jpg


Then this "cover plate" assembly gets cleaned up, scrubbed, rinsed and oiled...

stockbridge072.jpg


And that slips into the bullgear, with the stub going inside the non-rotating gear support boss.

stockbridge073.jpg


If you're interested to know exactly how that setup works, check out this YouTube video. Basically the shaper mechanism already has a slow-forward-fast-return trait kind of built in- adding a Whitworth mechanism basically adds a "second gear" or second stage to it, in order to speed up the return even more.

To be continued...

Doc.
 
With that inner plate in place, I could grease and slip in the stroke adjusting shaft, and it's idler gear...

stockbridge074.jpg


stockbridge075.jpg


And over that shaft, the feed drive gear:

stockbridge076.jpg


And then this cast aluminum knob, which I suspect is not original, goes on, basically just to hold everything in place.

stockbridge077.jpg


Before I do anything more there, basically this mechanism needs to be cleaned and repainted:

stockbridge078.jpg


So, back to the internal assembly, I'd previously cleaned the adjusting mechanism also with vinegar, after finding out it'd briefly been a kitty latrine, but once cleaned, I was able to reassemble it with some good grease...

stockbridge079.jpg


And slip it into place.

stockbridge080.jpg


The two way bars that hold that slider in place were then cleaned, but before I could install them, the bolts needed some attending. The heads and slots had been kind of buggered by some previous owner, so a bit of file work and spin polishing was in order.

stockbridge081.jpg


Not at all sure these are original screws, as they'd clearly been cut down and ground smooth, from a longer bolt.

stockbridge082.jpg


It is, of course, easily possible that the requirements for this setup necessitated a specific length screw, and some poor apprentice back in 1905 spent several days at a lineshaft-driven grinding wheel shortening and smoothing these bolts. Or it's possible some previous owner had to replace them... who knows?

Regardless, they were all there, just needed some smoothing up and tightening into place.

stockbridge083.jpg


And, surprisingly enough, that only leaves the crank arm to go into place. Again, scrubbed clean, rinsed, a bit of rust Scotchbrited off, rinsed again, and oiled.

stockbridge084.jpg


This block is the follower, riding on the bullgear pin to move the arm. I thought it interesting that it had been sleeved for some reason. Can't be damage, the pin on the gear is smooth and clean, and doesn't appear to be a replacement. (For one thing, its cast iron, and was cast to shape.)

stockbridge085.jpg


Kind of wondering if that wasn't a factory repair- trying to save an otherwise bad or mis-machined casting in an effort to save money. Again, no idea. Anyway, that block goes on the gear pin...

stockbridge086.jpg


And, for the first time in 12 years, the crank arm is back in place!

stockbridge087.jpg


Surpisingly enough, that actually completes the internal mechanism! The one last "internal" part to add on is the pinion drive (which actually bolts on from the outside.)

There's still plenty to go- the ram, the cutter head, the entire table assembly and the feed mechanism- but holy crap, the internals are done!

Doc.
 
Doc
Love this thread!!
How was the fit of the sliding block in the crank arm?
When I built my Pootatuck that was a “fiddly bit”
They make a whole lot less noise if it is scraped to fit the crank ram closely.
Keep up the great work and the pictures😎

Peter


Back
Top